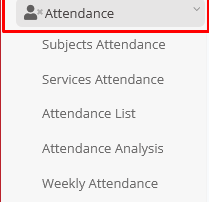
Quick Navigation
In this section, you can manage students’ absences or late arrivals (Figure 41).

Figure 41
Subjects Attendance
- Use filters to show students (Figure 42).
Note: There are 4 available methods of recording absences (or late arrivals). The default method is set by the admin. (See in the subsections below the four different ways).

Figure 42
- Use the bus icon to check student’s bus route (available only if the student uses the school’s transportation services (Figure 311).

Figure 42
- Use the ‘Add Remarks & Actions’ button to add remarks or actions (Figure 43).

Figure 43
- Use the ‘Remarks & Actions’ button to check remarks or actions added (Figure 312).

Figure 44
- Activate/Deactivate ‘Absence’ or ‘Late’ to record the student’s presence
Note: Column status i.e. A (absent), L (late), P (present).
- Select ‘Absence Category’
Note: The list is available only if set by the admin.
Click on the word ‘Empty’ to add comments.
Check the total number of absence/late per student in the column ‘Total’.
It is subject to settings made by the administrator[3], whether the student’s account will be instantly updated with the activated absences or not.
The days’ limit, for employees being able to edit the submitted absences, is set by the administrator[4] (Figure 44).

Figure 44
- In case a student is set as “unavailable” by the admin (is set at the back-office application – Classter Manager) because for example he is attending a school project, his entry line will be colored, and you will not be able to add an absence.
- When the absence recording system is based on Timetable Hours and a student gets an absence for the 1st period, then the system dynamically fills in an absence in the rest of the teaching periods. Click on ‘Save’ to add the suggested absence.
Fast Absences Entry
- Click on the ‘Quick Actions’ menu to select the ‘Fast Absences Entry’ (Figure 45).

Figure 45
- Select the absence type and category
- Select date
- Write the student’s name to select it from the list
- Select the timetable category
- Select the hours you want to record an absence for, from the hours list.
Note: Click on the ‘Registration for the rest of the day’ button if you are recording absences on real time and you want all hours onward to be selected.
- Click on ‘Save’
Daily
You can add a number of absences (1 or more) per specific date (Day).
Use the Date, Teacher and Group/Class filters to show students (Figure 46).

Figure 46
Per Timetable Period
You can add absences per Student of a specific Group/Class, at a specific Date and Timetable period (you don’t need to create a Timetable).
Use the Date, Teacher, Group/Class, Timetable Categories and Periods filters to show students (Figure 47).

Figure 47
Per Subject
You can add a number of absences (1 or more) for a specific subject at a specific Date.
- Use the Date, Teacher, Group/Class and Subject filters to show students (Figure 48).

Figure 48
Based on timetable
You can add absences per Student of a specific Group, at a specific Date, Time period, for a specific Subject based on the Timetable entries (Timetable creation is mandatory with this option).
- Use the Date, Teacher, Group/Class, Timetable Categories and Periods filters to show students (Figure 49).

Figure 49
Service Attendance
In this section, you can record the student’s absences at extracurricular activities (Figure 50).
- Click on the ‘?’ button to view information about this page.
- Select date, teacher, service, and timetable period filters to show students.
- Activate/Deactivate student’s attendance.
- Click on ‘Save’.

Figure 50
Attendance List
Here, you can get statistics and manage students’ absences.
- Use the attendance type, date from/to, Verification Status and Student filters to show results (Figure 52).
- You can view results per student, per date, per teacher or per subject (Figure 52).
- Collapse / Expand results to manage easier (Figure 52).
- You can Manage Columns by clicking on the Manage Columns button (Figure 52).
- You are able to expand the grid so you can view your list in a larger view by clicking on the button (Figure 52).
- Use the Search text box to find any student you want (Figure 52).
- You can view the list shown per student, per date, per teacher, per subject (Figure 52).
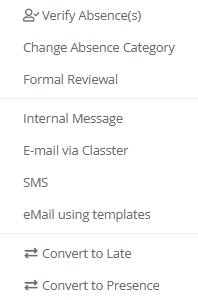
- Use the ‘Actions’ menu to delete, review, verify, change the absence category or convert the attendance type of entry. You may also communicate with students via Internal Message, Email or SMS (Figure 51). Note: Depending on if you have SMS credits available and if SMS is configured, Emails are sent via Classter or any mail service that is configured for your Institution.
- Use the ‘Bulk Actions’ button to delete or review the selected rows (Figure 53).

Figure 51

Figure 52
Figure 53
Note: At the Review window you can verify the absence and activate formal reviewal (Figure 54).

Figure 54
Attendance Analysis
In this section, you can have a variety of attendance statistics.
- Use the date, type, grade/year and group/class filters to show results.
- Select a query type and use the operator filter according to the statistics you want to see (Figure 55) e.g. query type: Student’s Absence, operator: Absences above 5.

Figure 55
Query Types
![]()
You can see the number of absences per student (Figure 56).

Figure 56
![]()
You can see the Presence to Absence Percentage per student for the selected group/class, in the specified date period (Figure 57).

Figure 57
![]()
You can see students’ absences per subject (Figure 58).

Figure 58
![]()
You can see the absences before, after, or at a specific time frame (Figure 59).

Figure 59
![]()
You can see the recorded late arrivals per student of the selected group/class, in the specified date period (Figure 60).

Figure 60
![]()
You can see the recorded presences per student of the selected group/class, in the specified date period (Figure 61).

Figure 61
![]()
You can see students’ absences in the selected subject (Figure 62).

Figure 62
![]()
You can see the students’ presence at the selected subject (Figure 63).

Figure 63
![]()
You can see students’ attendance percentage per session (Figure 64).

Figure 64
General Note for Section: Terms may appear differently in each institution according to their academic terminology. For printing, you must have an operational printer set up (fully loaded with ink cartridges). For exporting you must have installed PDF readers and the MS Office suite.


