The Classter – Canvas integration provides institutions with three core functionalities:
- Automated creation of students and teachers in Canvas based on Classter data.
- Automated creation of courses in Canvas based on Classter data.
This integration enables institutions to manage key entities within Classter and synchronize them with Canvas automatically. However, the integration is currently one-way only, meaning that changes made in Classter will be applied to Canvas, but not vice versa.
Before proceeding with the integration setup, ensure that your Classter Portal is fully configured with all necessary entities and that you have administrative access to your institution’s Canvas account.
Step 1: Accessing Canvas in Classter
- Log in to Classter as an Admin user.
- Navigate to Configuration > Advanced Configuration > Third-Party Integrations > Canvas.
- Click the Canvas button to access the Canvas Settings page and review the existing configuration settings.
Step 2: Gathering Canvas Information
- Enter your Canvas Admin Account.
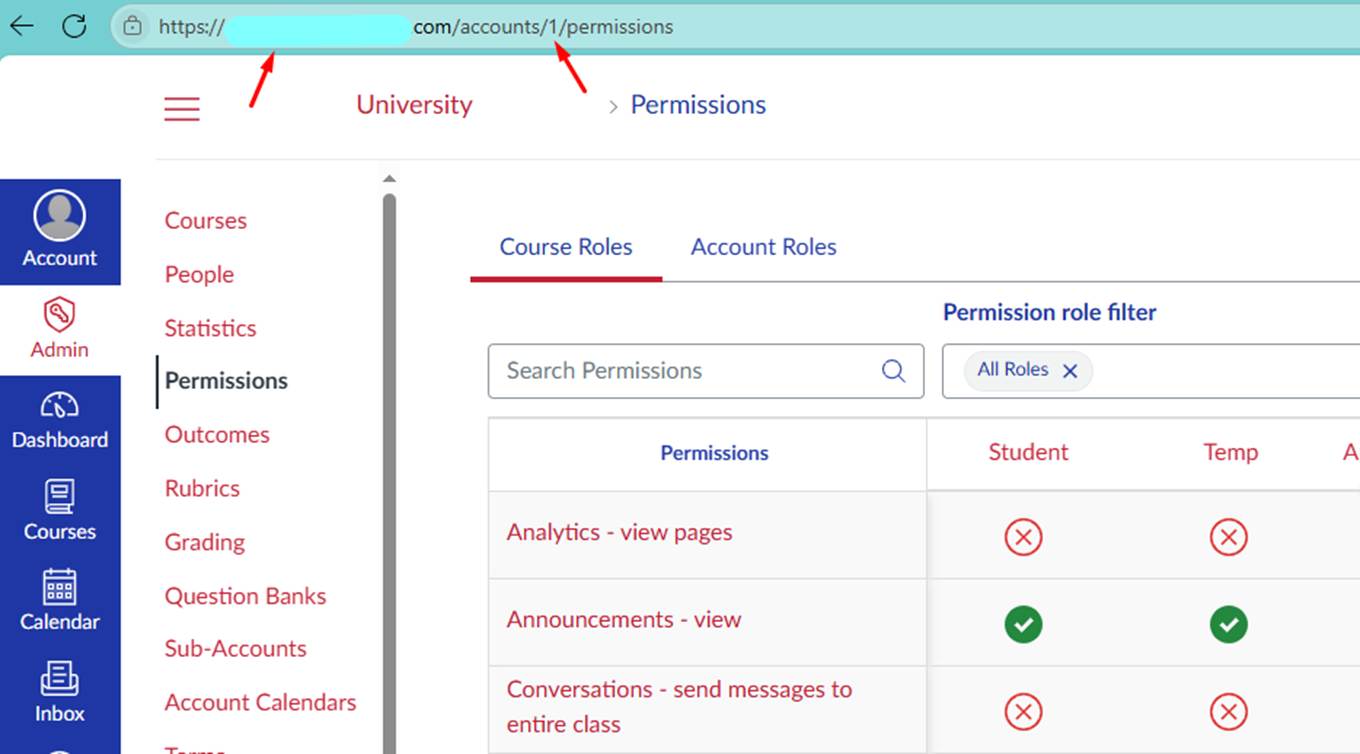
- Navigate to the Admin section in Canvas.
- Get your Domain and Root Account ID from the URL. Example: http://school.test.canvasintegr.com/accounts/1 (Root Account ID is the numeric value at the end).
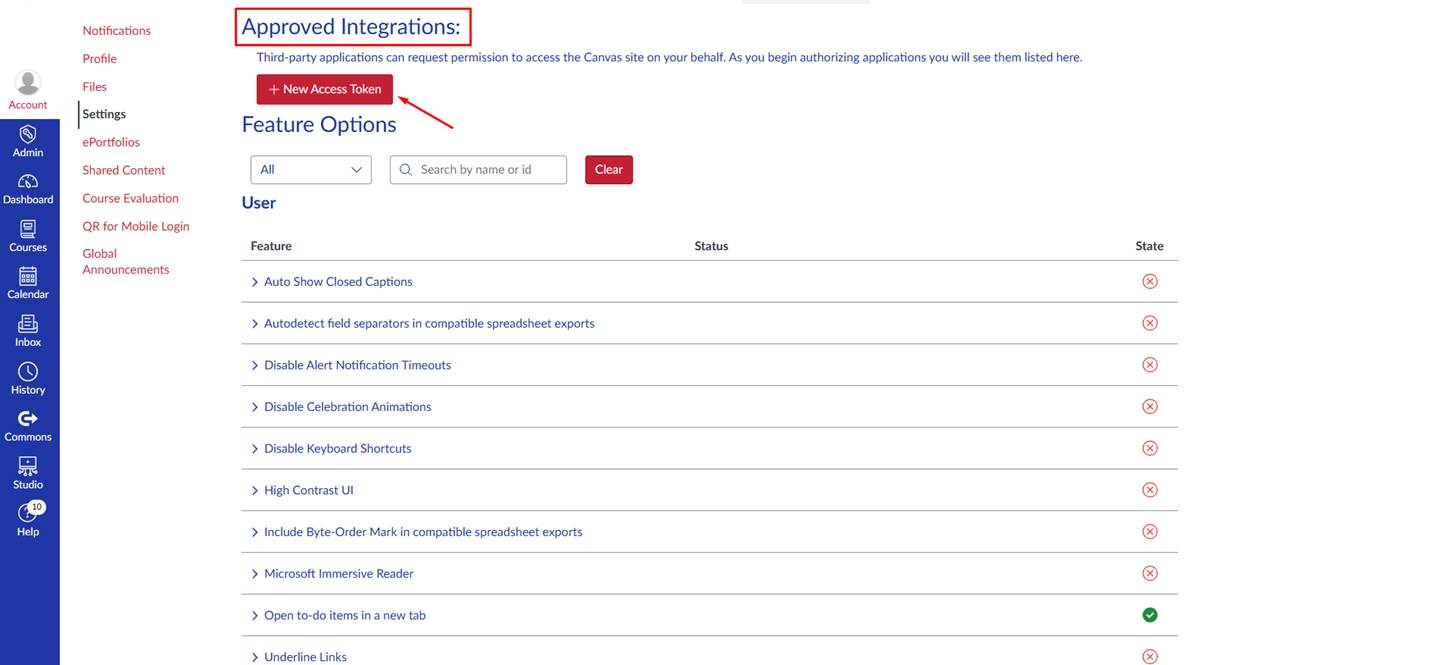
4. Go to Account > Settings, scroll down to Advanced Integrations, and press the + New Access Token button.
5. Fill in the fields in the pop-up window and generate a New Access Token.
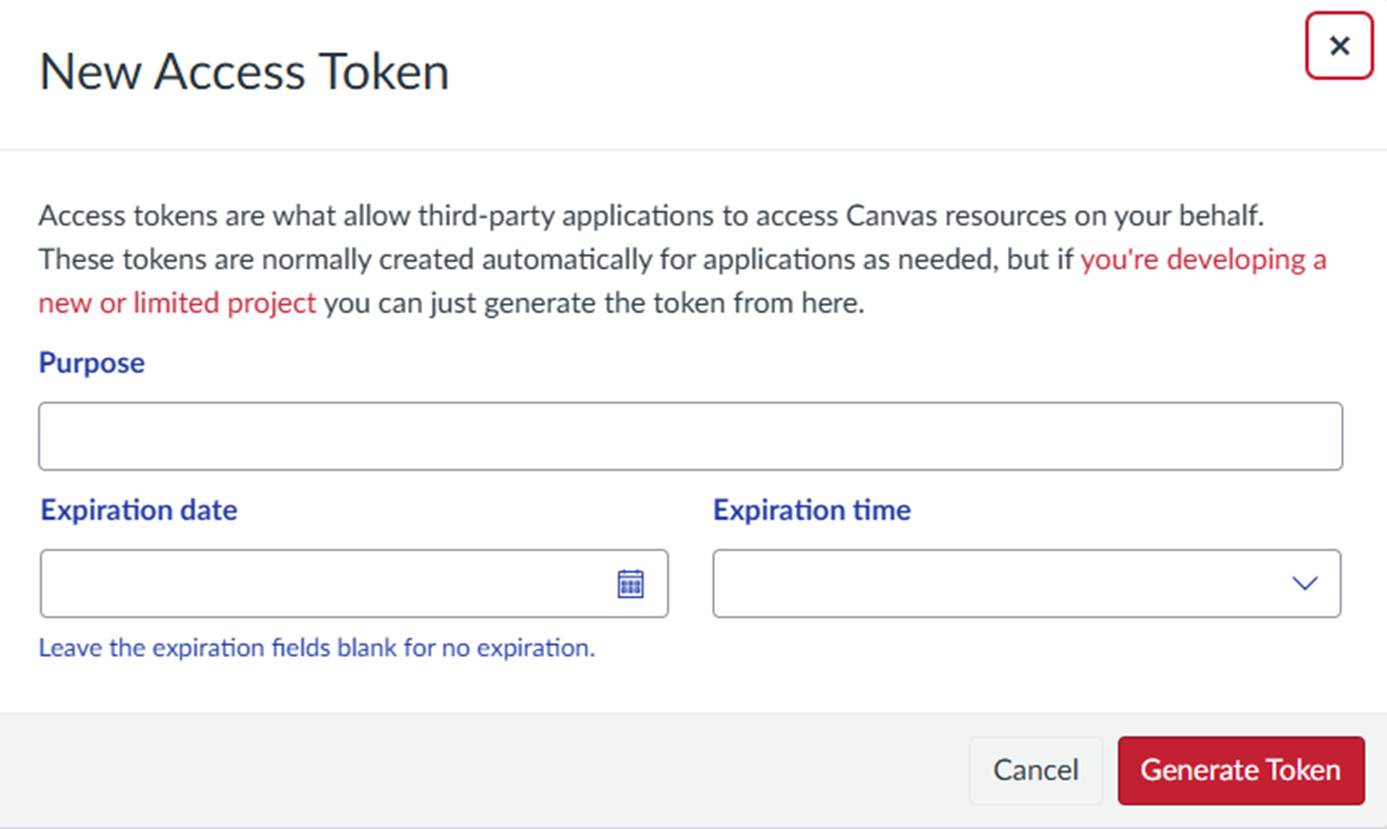
6. Copy the following information and return to Classter:
- Domain: Canvas URL (e.g., http://school.test.canvasintegr.com).
- Token: The generated API token.
- Root Account ID: Primary Canvas account ID.
Step 3: Entering Information from Canvas
- Fill in the following fields:
- Domain – Enter the Canvas URL.
- Token – Paste the API token generated in Canvas.
- Root Account ID – Enter the Root Account ID.
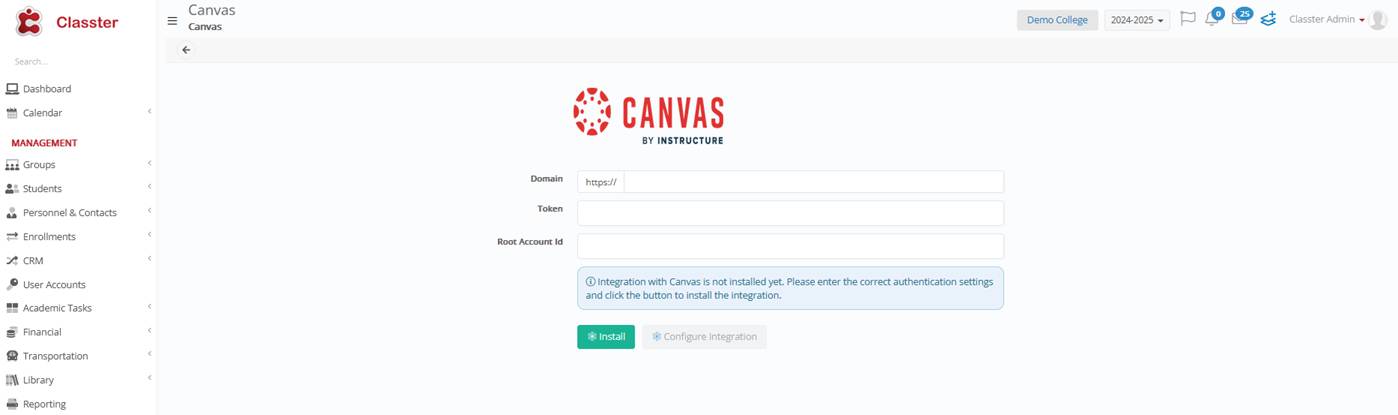
2. Click Install order to complete the setup.
After completing the setup, configure the following options:
- Activate Marks Syncing: On/Off.
- Disable Sync for New Sections: On/Off.
- Fetch Marks Type: Choose between calculating numeric marks against literals or fetching actual numeric marks.
- Mappings: Manage academic year and subject mappings.
Configuration Settings
In this section, you will set up the synchronization period and define the academic settings for your LMS.
Academic Period and Sync Duration
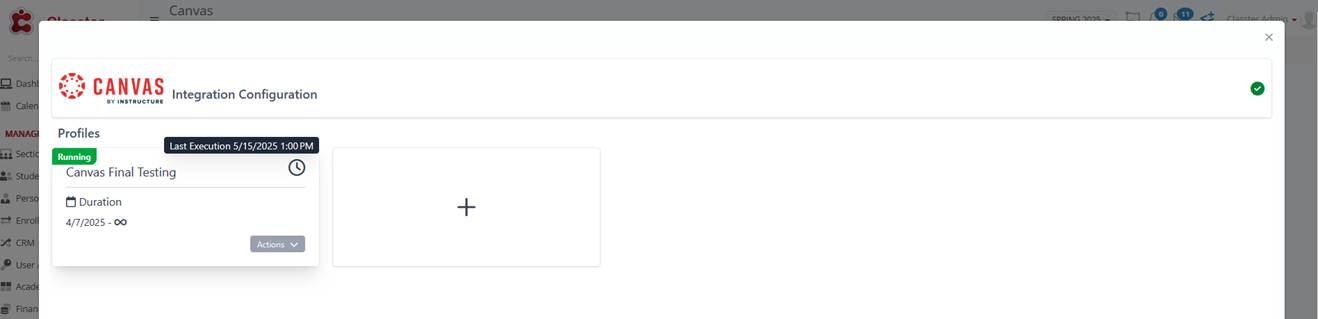
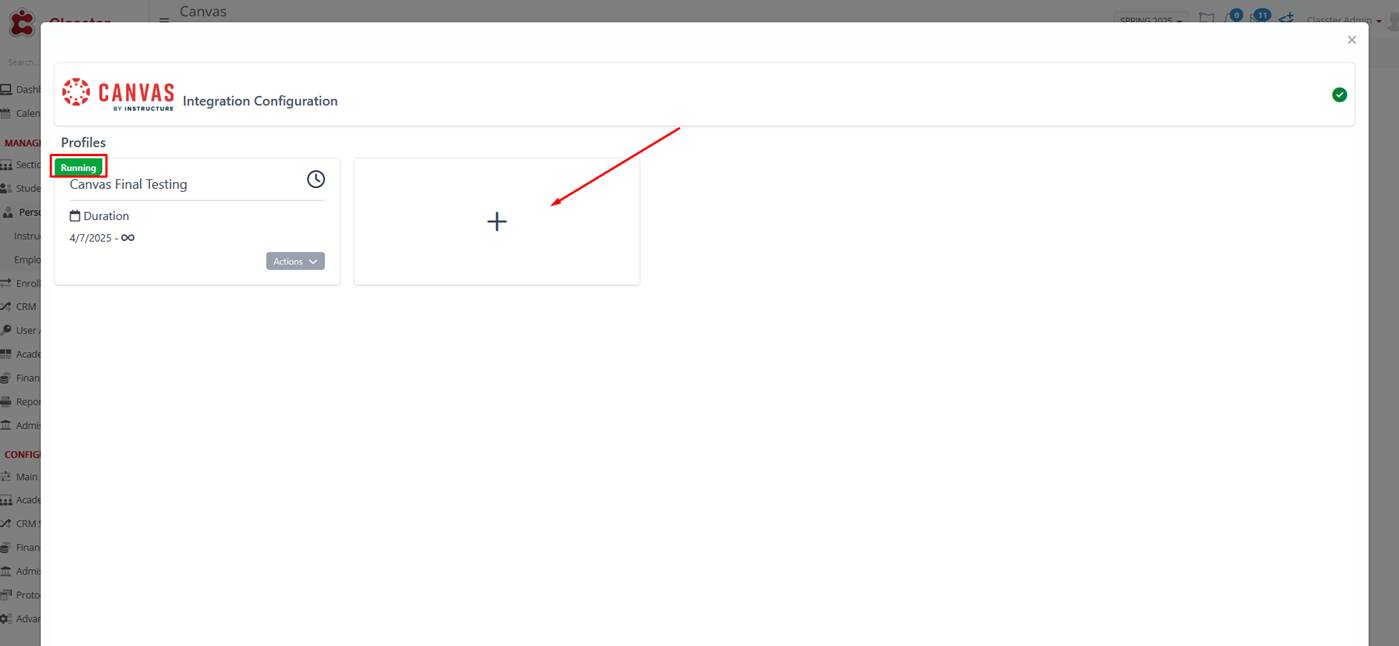
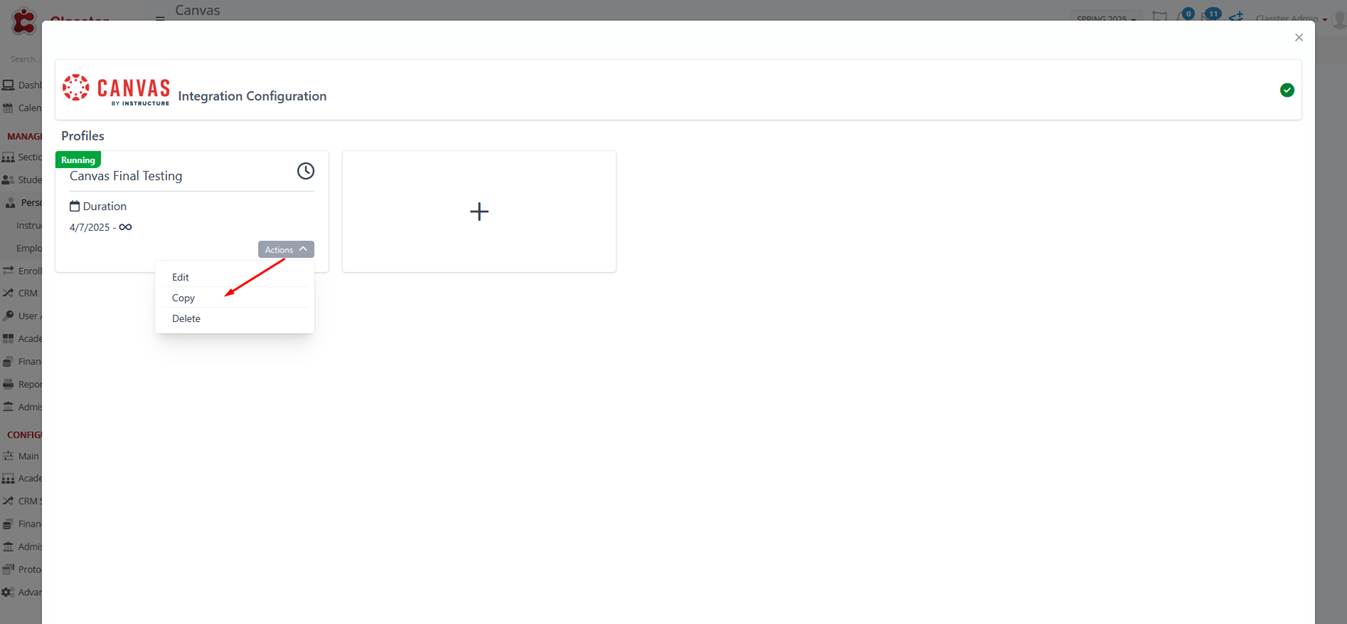
To get started you must set a new Synchronization Period pressing the add (+) icon, as seen on the Figure below to create a new Execution Profile for your LMS.
On the example below, as you observe, there is one already created and Running.
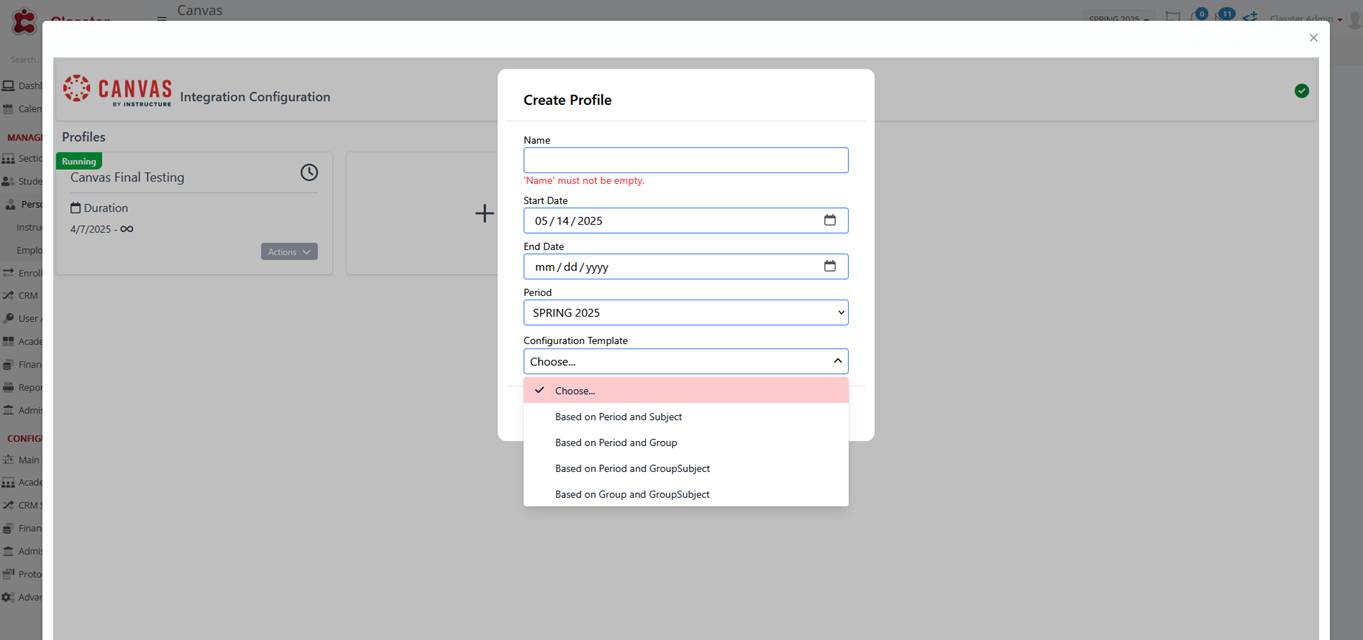
In the popup window, you can define the Name, Start and End Dates, Academic Period and the Configuration Template (Classter) for your new execution profile. Select the appropriate configuration template based on the combination of Period and Subject, Period and Group, Period and GroupSubject, or Group and GroupSubject to ensure proper mapping of data during synchronization.
Note! If there are two profiles with overlapping dates, only one of them will run and synchronize data. Therefore, ensure you set up dates that do not overlap.
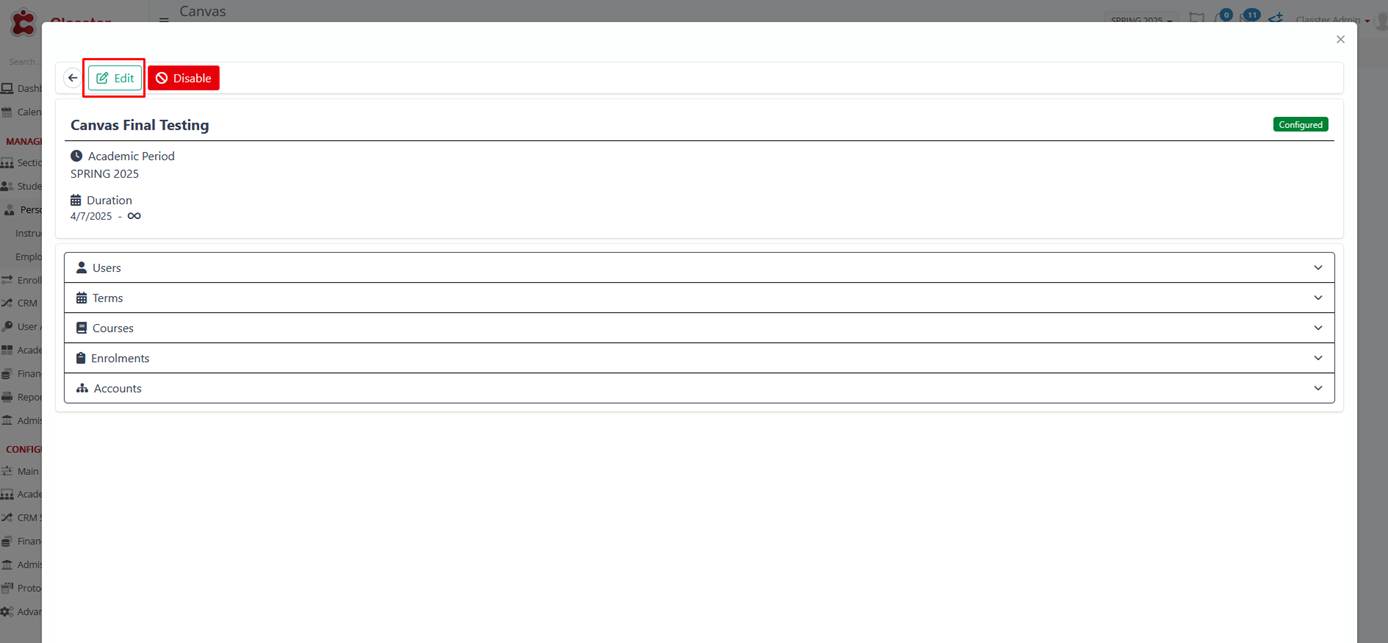
To edit a Sync Period, click the Actions icon and select Edit.
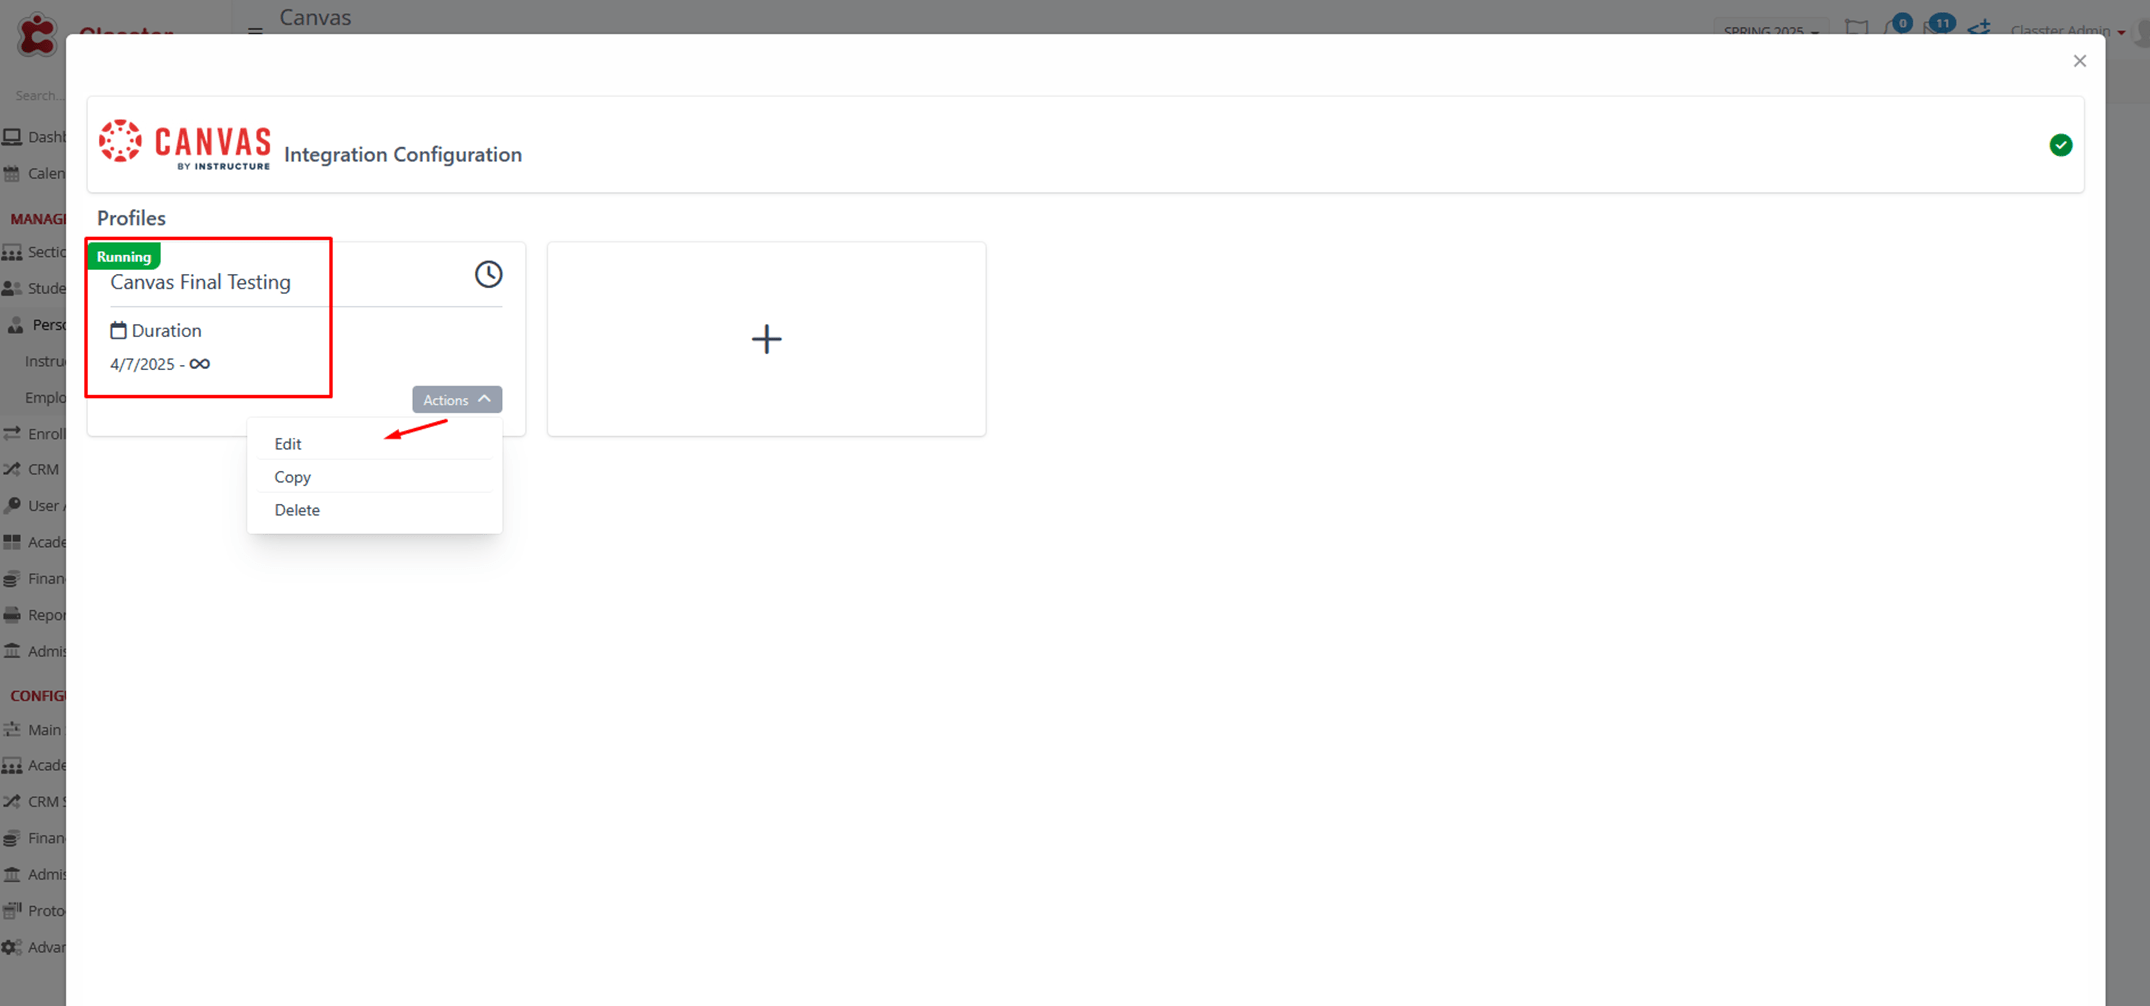
Alternatively, you can click open the profile and then select the Pencil icon to make changes.
You can also Copy a profile, with all existing settings, to use again on the same or another Academic period, with a different Sync Period and a New Name.
The configuration should be divided into 5 parts (depending on your LMS), as many as the main entities we need to match our system. These, for Canvas, are the Users, the Terms the Courses, the Enrollments, and the Accounts.
Mappings
Mappings define how Classter data translates to your system. You will encounter them in each section of your configuration. They are based on various properties such as:
- For Users: Properties such as Contact Email, First and Last Name, Id, etc.
- For Terms: Properties such as Start/End Date, External Id, Name, etc.
- For Courses: Properties like _Group_ Id, _Grade Type_, _Subject_ Id, etc.
- For Enrolments: Properties like Roles for Enrolments, etc.
- For Accounts: Properties like Study Areas/Departments Name, Id, Supervisor, etc.
Note! If any of them is Grey (locked), it is either already chosen to be configured or it is Required.

For all mappings, rules include:
Type: Property or Static
Value: e.g., Email, Entity ID, First Name, End date, External ID, Grade, _Group_ ID, Institute Name, etc.
Casing: None, Lower Case, Upper Case.
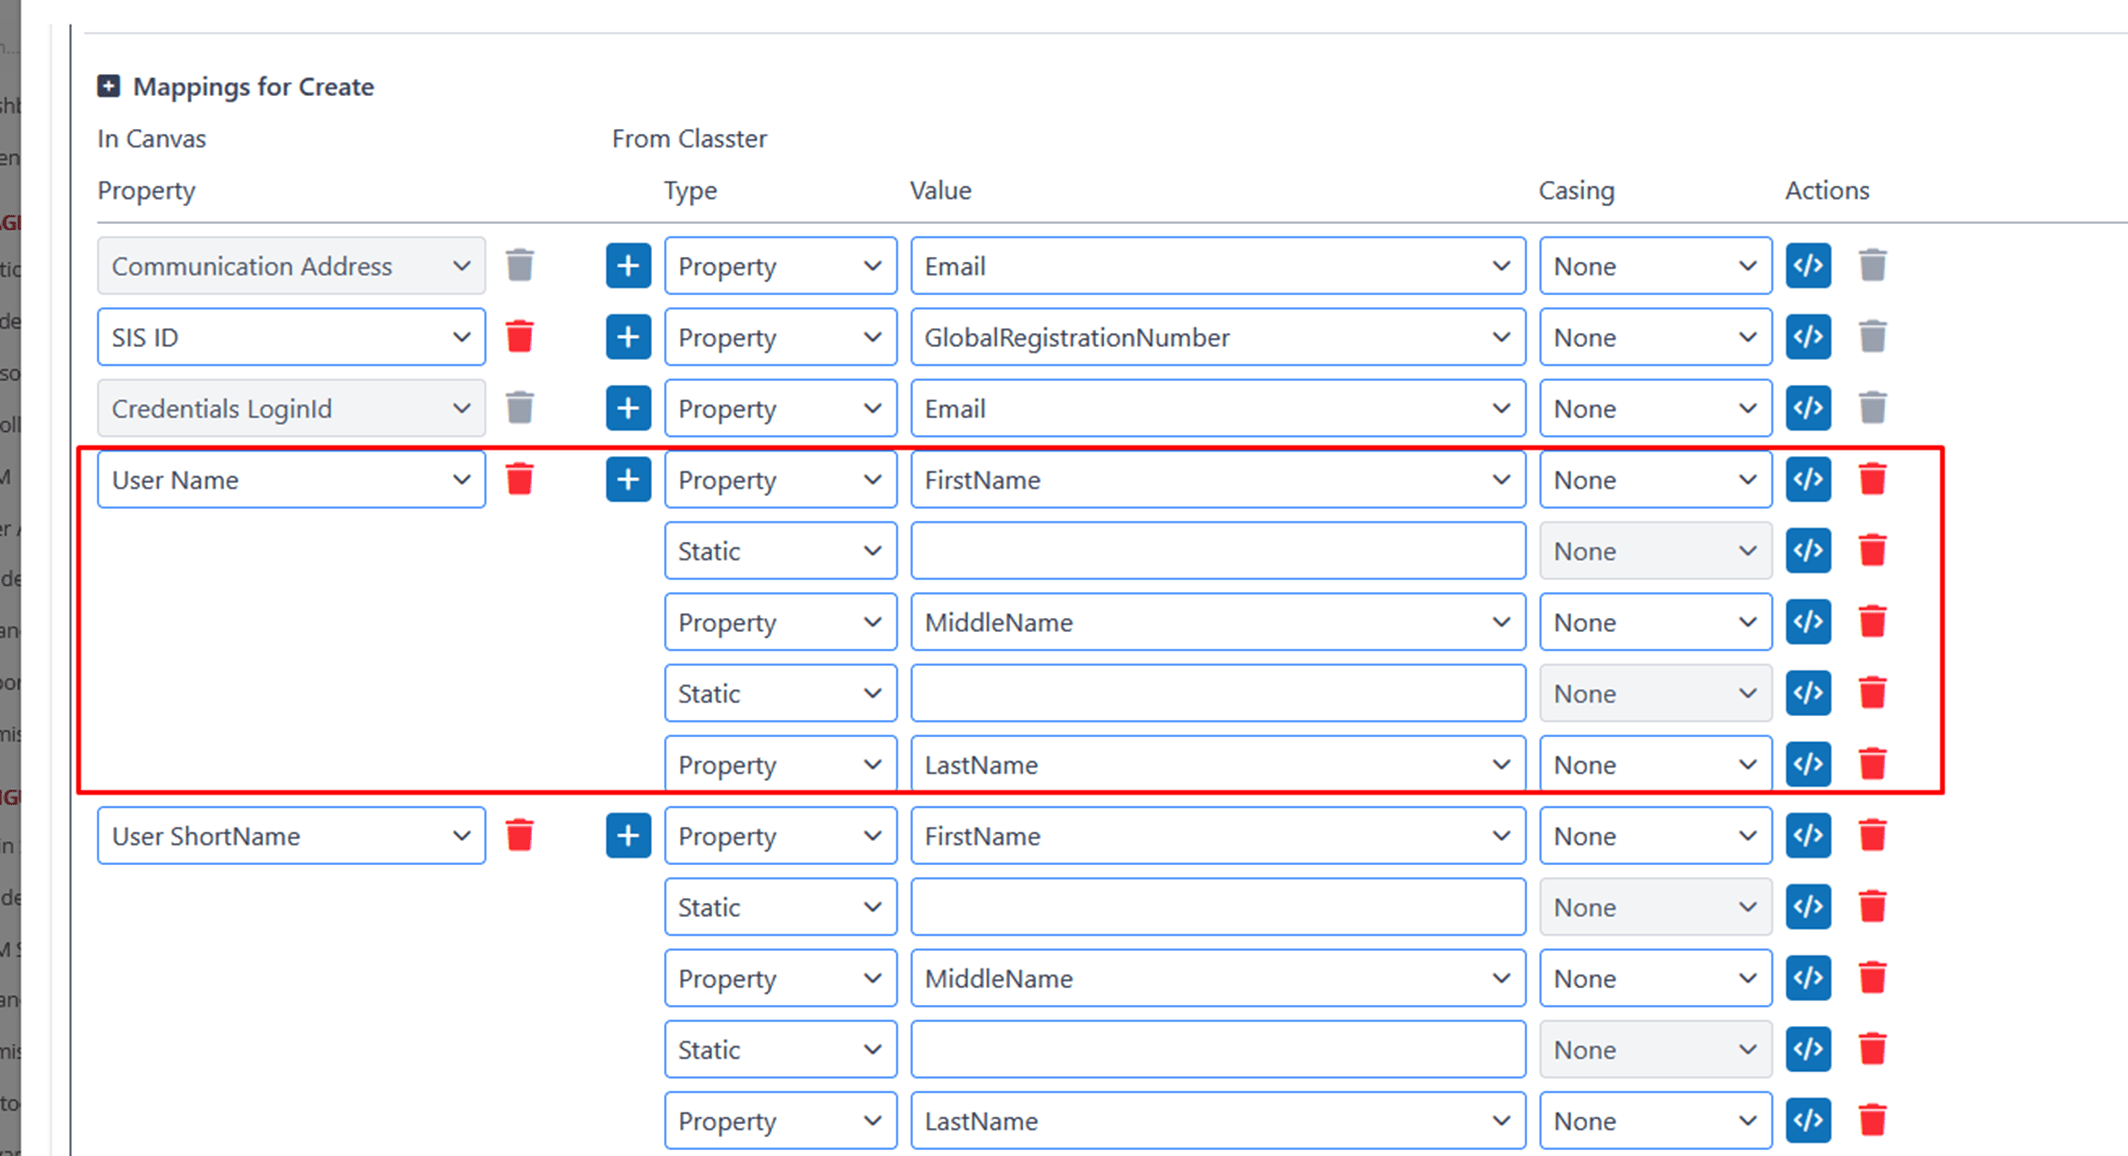
In the Figure below, you can see an example of an Advanced Property Mapping for User Name.
User Name (in Canvas): takes the following form: FirstName MiddleName LastName(from Classter)
Actions
For the User entity type, the following actions can be performed during synchronization: Create, Update, and Deactivate.
In the following Figure, we can see that:
- All Suggested Actions for the _Student_ user type are selected for the synchronization.
- For the _Teacher_, only the Update and Deactivate Actions are selected for synchronization.
- No Actions for the Parent type.
- And just update for the Employee type.
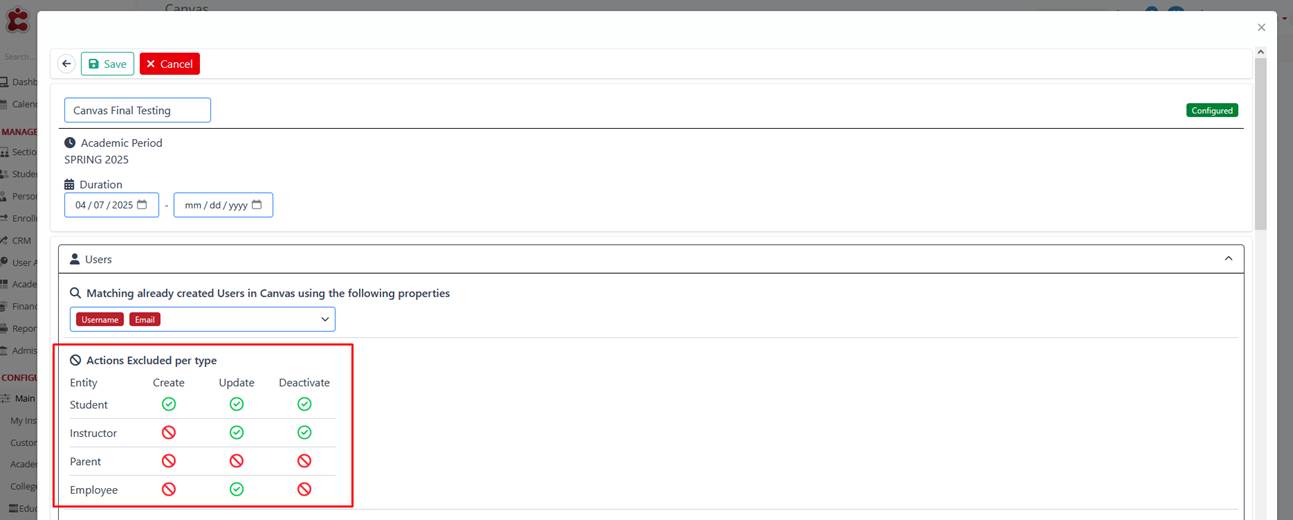
The selected actions ensure a precise configuration.
Configuration per Entity
Users
When setting up the configuration for the first time between the two systems, we must match our entities to a property based on the initial configuration on the LMS (e.g., email, username, etc.).

After this initial matching per execution profile, synchronization will proceed based on the LMS entity ID.
Actions: Choose the actions to be performed during synchronization:
- Create: Create new user accounts in Canvas.
- Update: Update existing user accounts with new data.
- Deactivate: Deactivate user accounts in Canvas.
Mappings: Like in the example above about advanced property mappings, one mapping would be User Name (in Canvas): FirstName MiddleName LastName (from Classter). This indicates that the User Name in Canvas is constructed by concatenating the First Name, Middle Name, and Last Name fields from Classter.
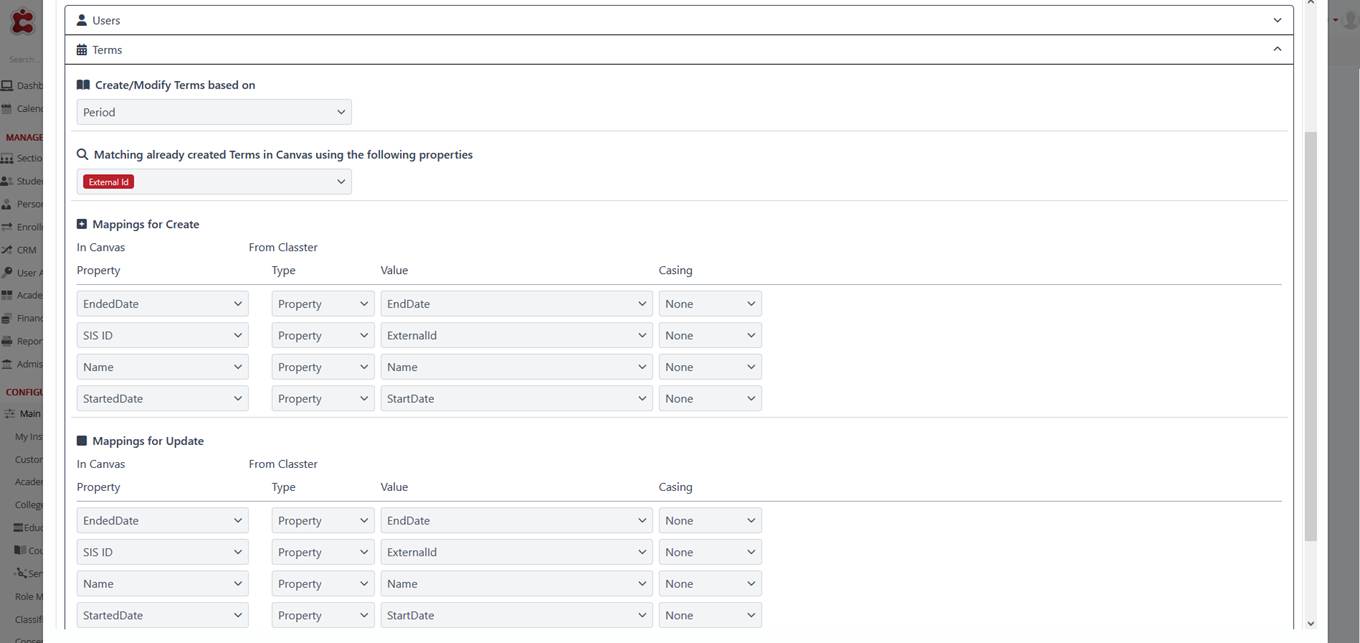
Terms
- Create/Modify Terms based on: Based on Period or Period Semester.
- Matching already created Terms in Canvas using the following properties: External ID or Name.
- Mappings: Create, Update, Deactivate:
- In Canvas, based on Property (e.g., Duration end date, Description, Name, etc.)
- From Classter based on Type (Property or Static), Value (e.g.: End date, External Id, Name, etc.), and Casing (None, Lower Case, Upper Case)
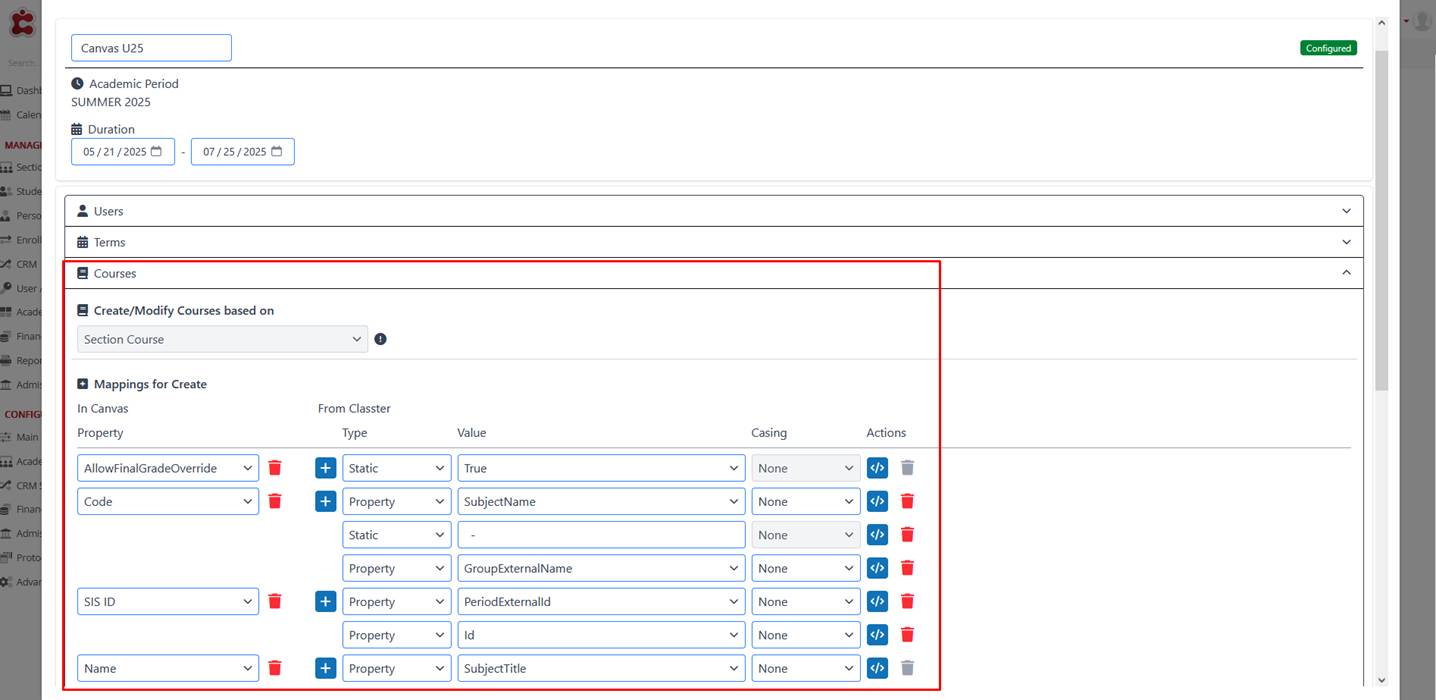
Courses
Create/Modify Courses based on: Subject, Group, or Group–Subject.
Matching already created Courses in Canvas using the following properties: External ID, Name, Code.
When selecting this option:
-
Enter the External ID, Name, or Code of the existing course in Canvas.
-
Classter will search for matching courses in Canvas.
-
Select the course from the search results to complete the mapping.
Note: Matching existing courses ensures that Classter links to Canvas courses already created, preventing duplication during synchronization.
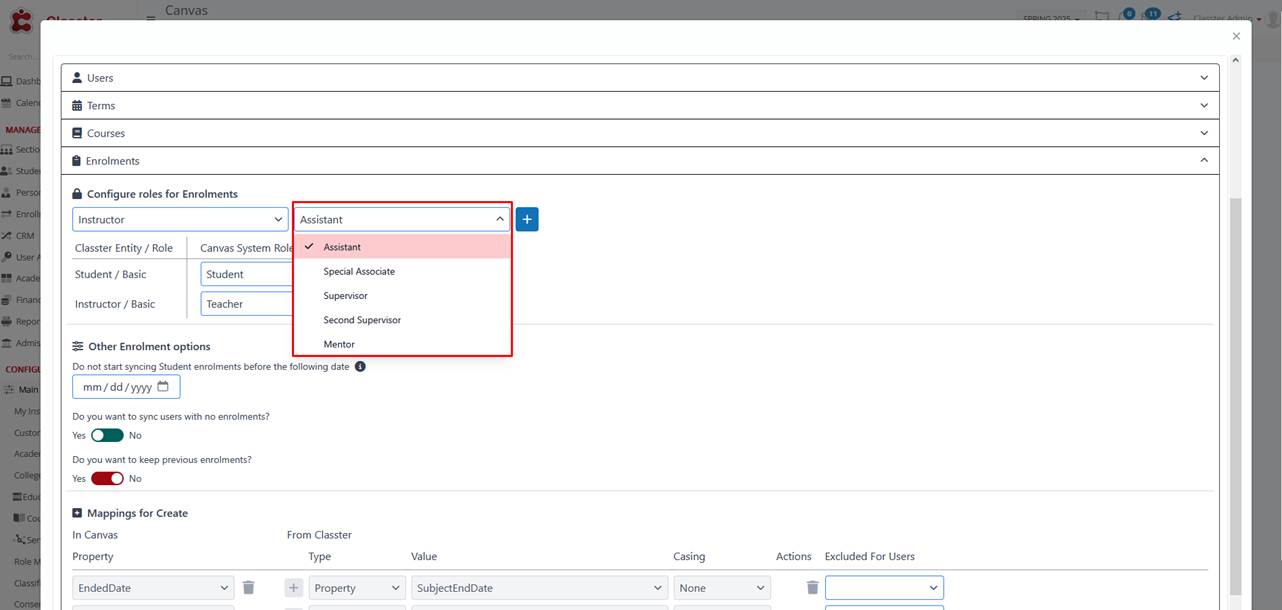
Enrolments
Configure Roles for Enrolments:
Setting up the enrollments, we could also configure the roles of Students or Teachers, and supporting other Teacher Types, such as an assistant, a special associate, a supervisor, a second supervisor, or a mentor.
Other Enrolment options:
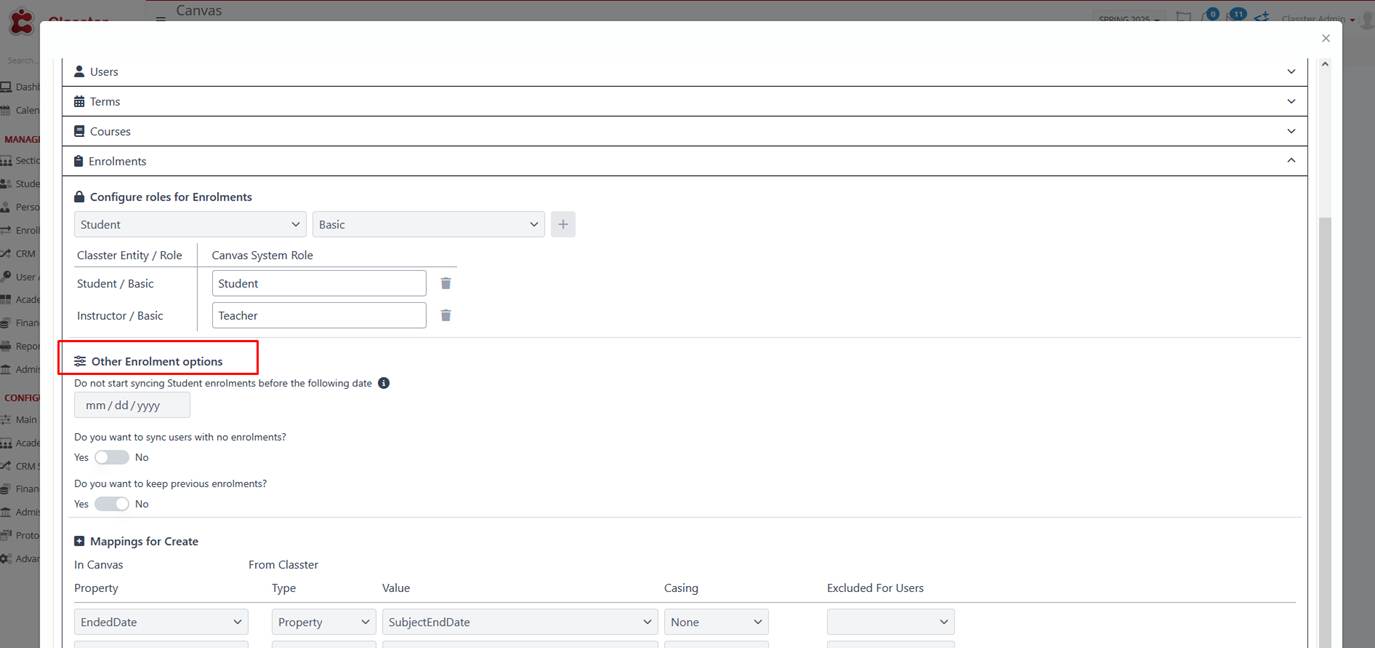
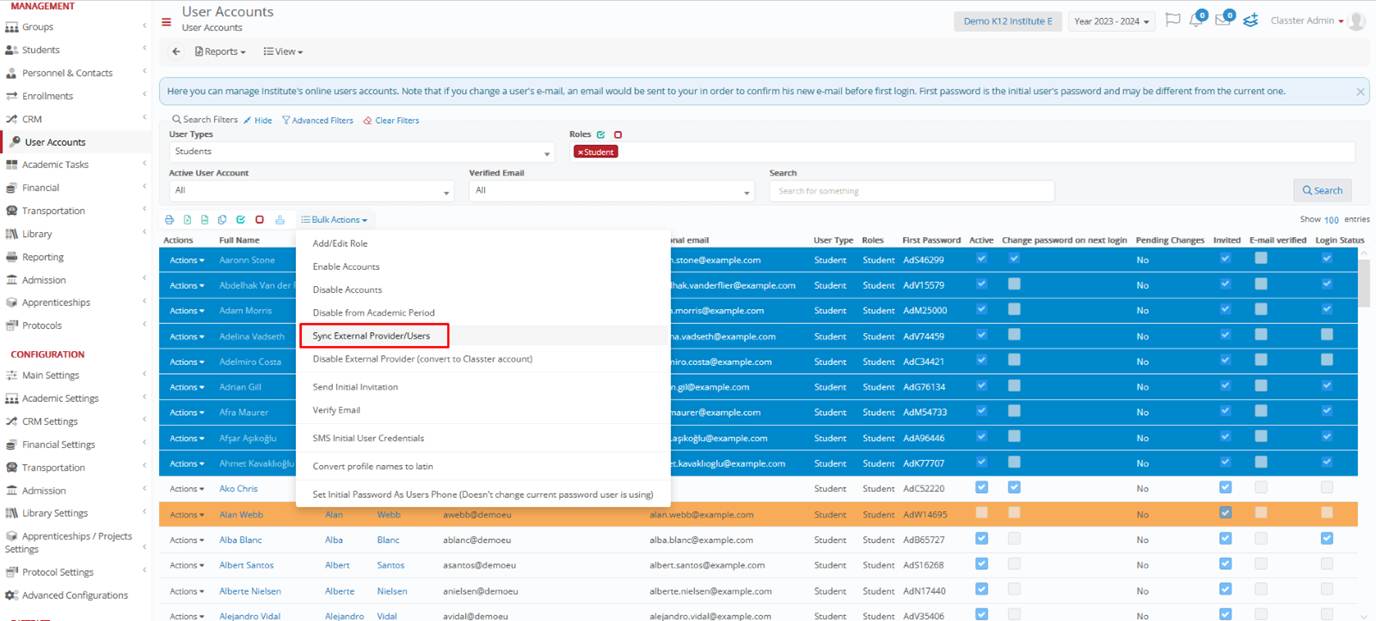
- Sync Start Date: Specify a date before which _Student_ enrollments are not synchronized automatically. Manual synchronization is required for enrollments before this date via User Accounts > Choose _Students_ > Bulk Actions > Sync External Provider/Users.
- Sync Users with No Enrollments: Choose whether to synchronize users who have no current enrollments (Yes/No).
- Keep Previous Enrollments: Choose whether to keep previous enrollments in the system (Yes/No). IF YOU WANT CLASSTER TO ENROL _Subjects_ TO USERS AND NOT UNENROL (Yes/No).
Mappings for Create: When configuring the Enrollments mappings, you need to map data between Classter and Canvas to ensure that enrollment-related information is properly synchronized. For example, the EndedDate field in Canvas can be mapped to the SubjectEndDate property from Classter. Additionally, you can specify which actions should be applied to the users during synchronization, such as excluding certain roles like Student or Teacher.
Accounts
Add SubAccount as hierarchy? Yes/No: Displays an option to add a new SubAccount, as in the initial configuration, and creates all other SubAccounts under this Static SubAccount.
The account’s configuration maps out an educational institution’s structure across five levels: Institute, Location, _Grade_, _Stream_, Marking Period_. If one of these levels has already been configured elsewhere (on any of the entities above), it will not be displayed here.
You can configure your mappings only for the selected entities in your accounts.
If you have selected Location (e.g., below shown as College), when setting up the configuration for the first time between the two systems, we must match the entity to a property based on the initial matching per execution profile, on the LMS (e.g., Name, External Id).
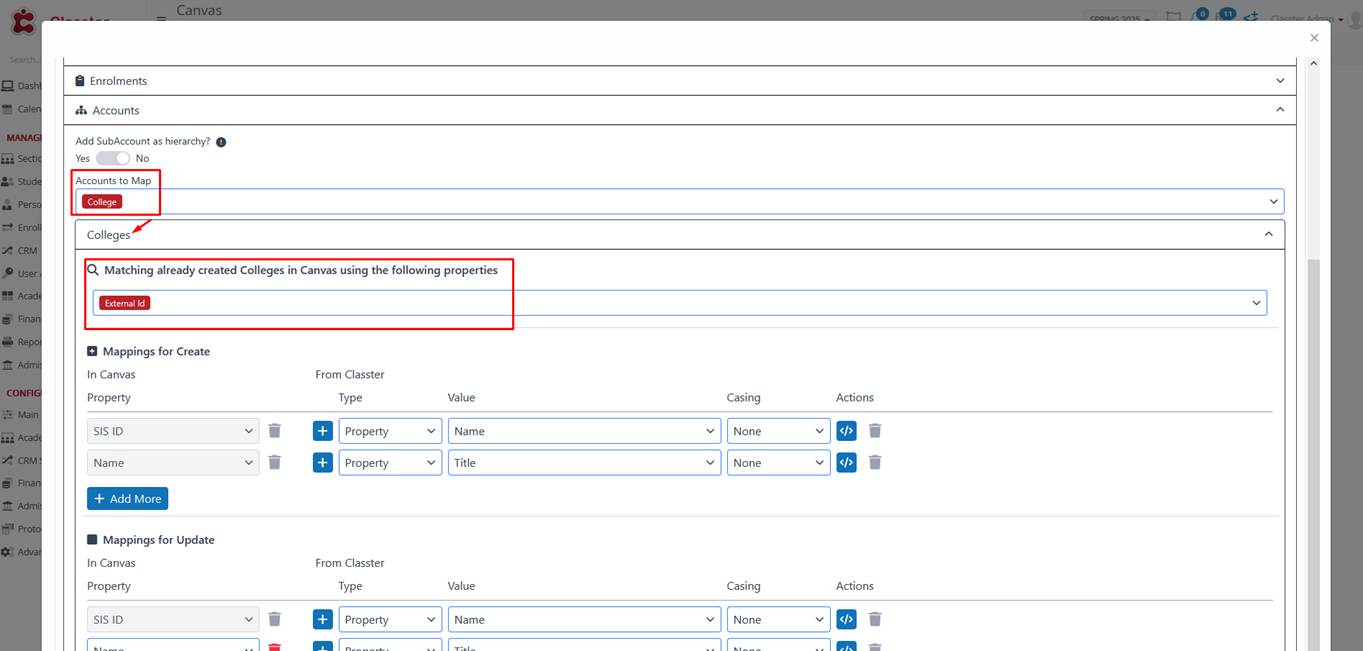
After this, synchronization will proceed based on the LMS entity ID.
Concluding the configuration
At the end of configuring Canvas, you are presented with three options to finalize your changes:
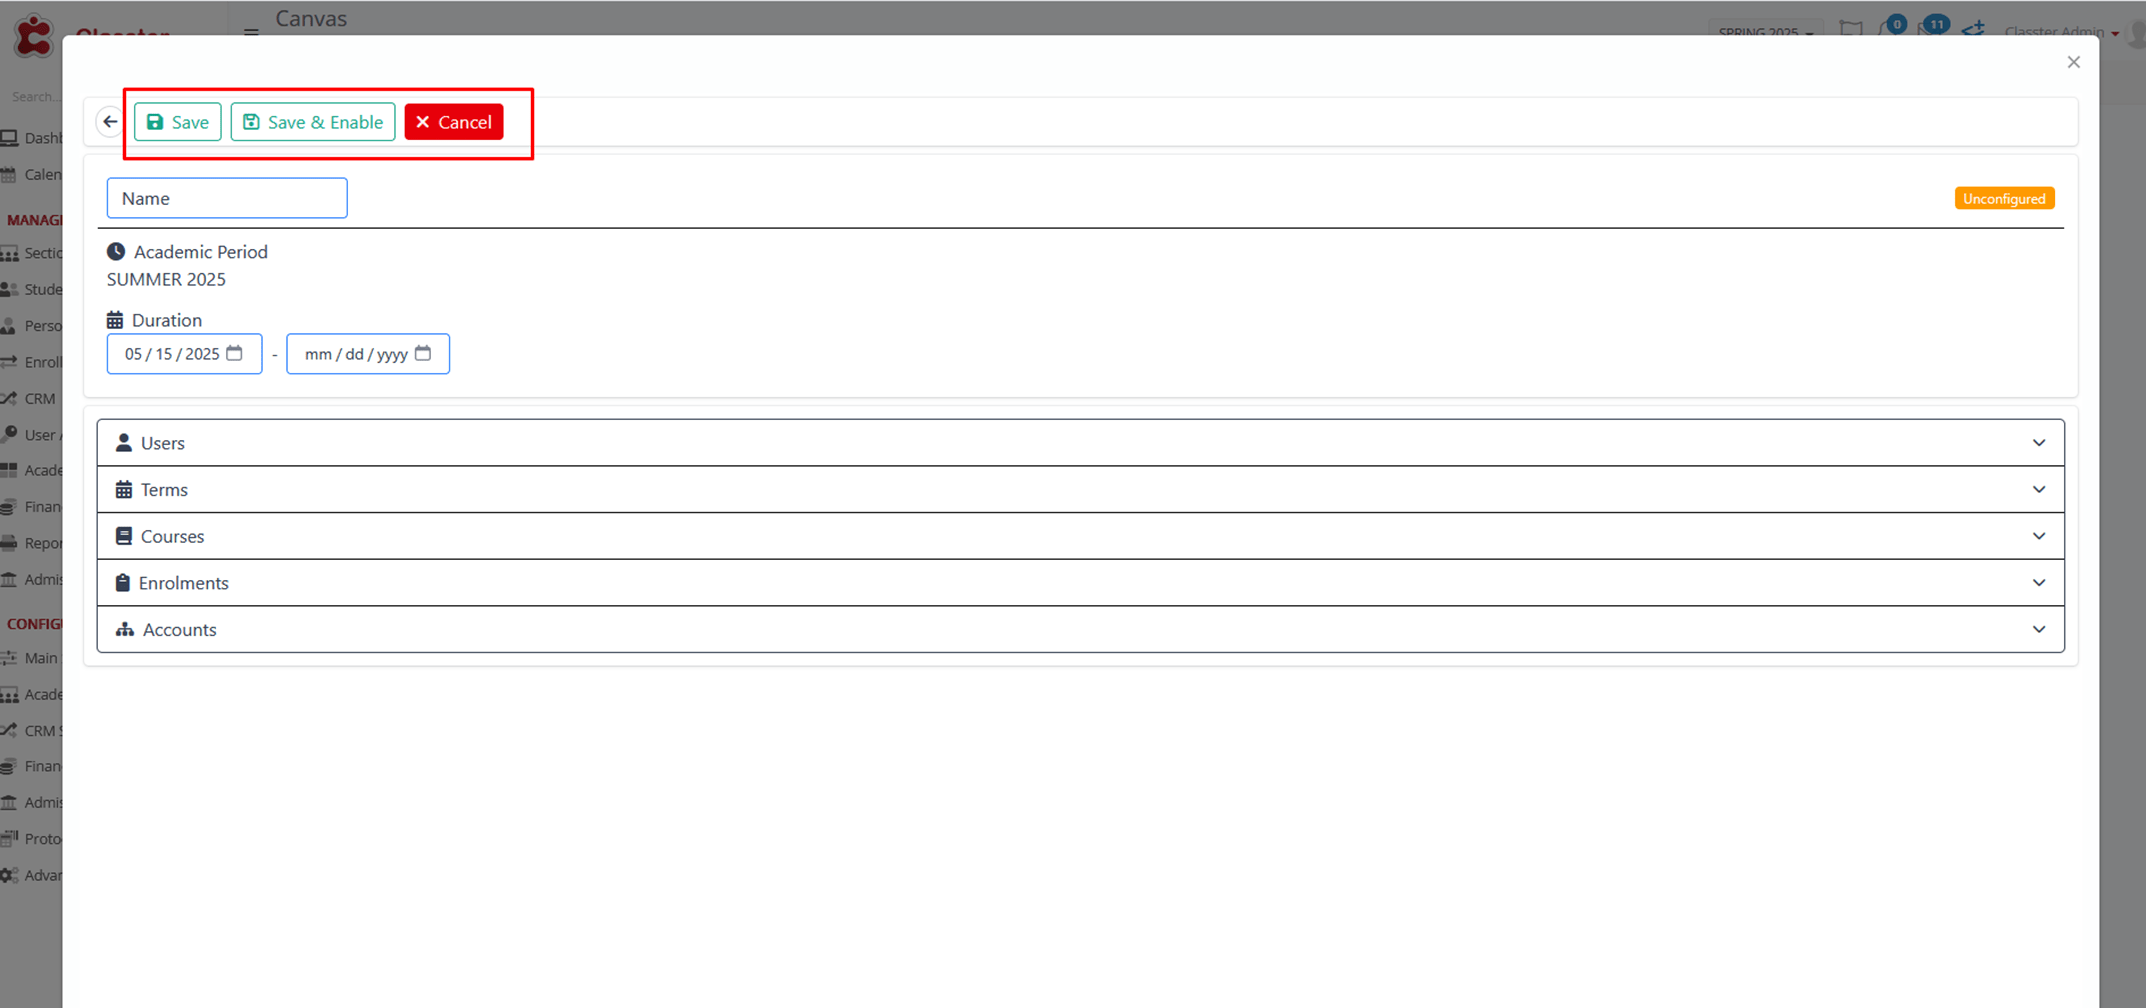
- Save: This option allows users to save their current settings and configurations.
Note: If the Configuration Profile is not yet enabled, you will need to enable it manually when you finish with your configuration.
- Save & Enable (Configuration Profile): Users can choose this option to save their settings and immediately enable the configuration profile.
- Cancel: If users decide not to proceed with the changes, this option discards the modifications and exits the configuration process without saving.
Closing off the Canvas configuration process, a small clock icon appears on the configuration profile after the first synchronization. This icon provides essential information about the last synchronization of the profile, displaying the exact date and time when this profile was executed.