

The Import Arrangement with Details function in Mass Imports allows Institutions to bulk import financial arrangements for _Students_ using an Excel file. This feature helps automate and manage financial arrangements while ensuring accuracy in Student billing and invoicing.
Supported Cases:
In Classter, you can import financial arrangements for the following types of entities:
- _Grade_/Program: Import financial arrangements based on/connected to the Student’s enrolled Grade/Program.
- Service: Import financial arrangements based on/connected to the Student’s enrolled Services (such as transportation, library, registration fees).
- _Subject_: Import financial arrangements based on/connected to the Student’s enrolled _Subjects_.
Pre-Requisites
Before proceeding with the import process, ensure the following:
- The Students are enrolled in the entity of the type of Arrangement you wish to import (registered in the Grade/Program, in the Service, etc.).
- The Students do not have an arrangement already in the entity you wish to import.
- The Excel file is properly structured with the correct format (aligned columns with the mapping fields).
How to Import Arrangement with Details
Check out the listed steps for importing Arrangements with details in Classter.
Navigate to Import Arrangements with Details
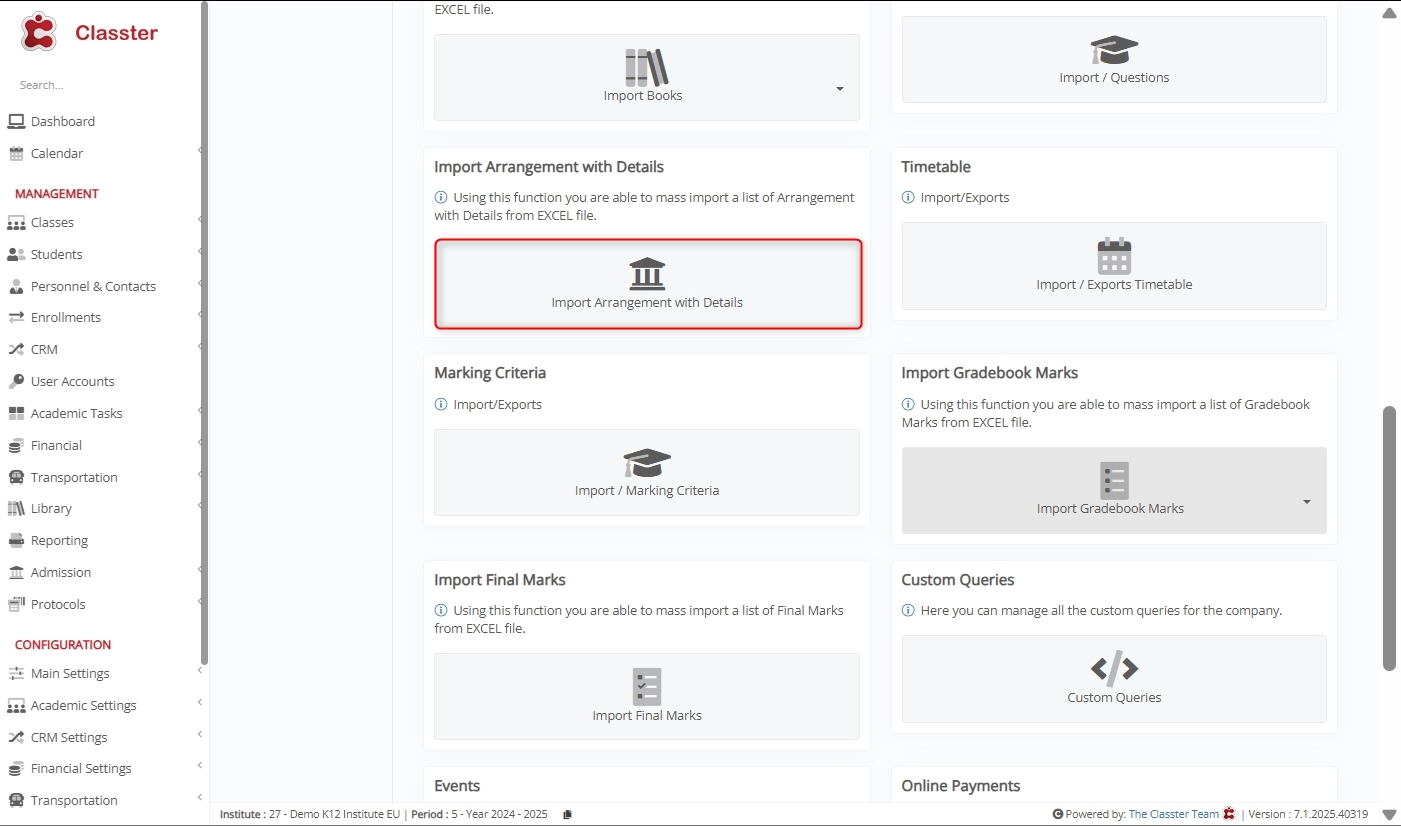
Log in to your Institute and navigate to: CONFIGURATION > Advanced Configurations > Mass Imports / Actions > Import Arrangement with Details.
Select an Excel File to Import
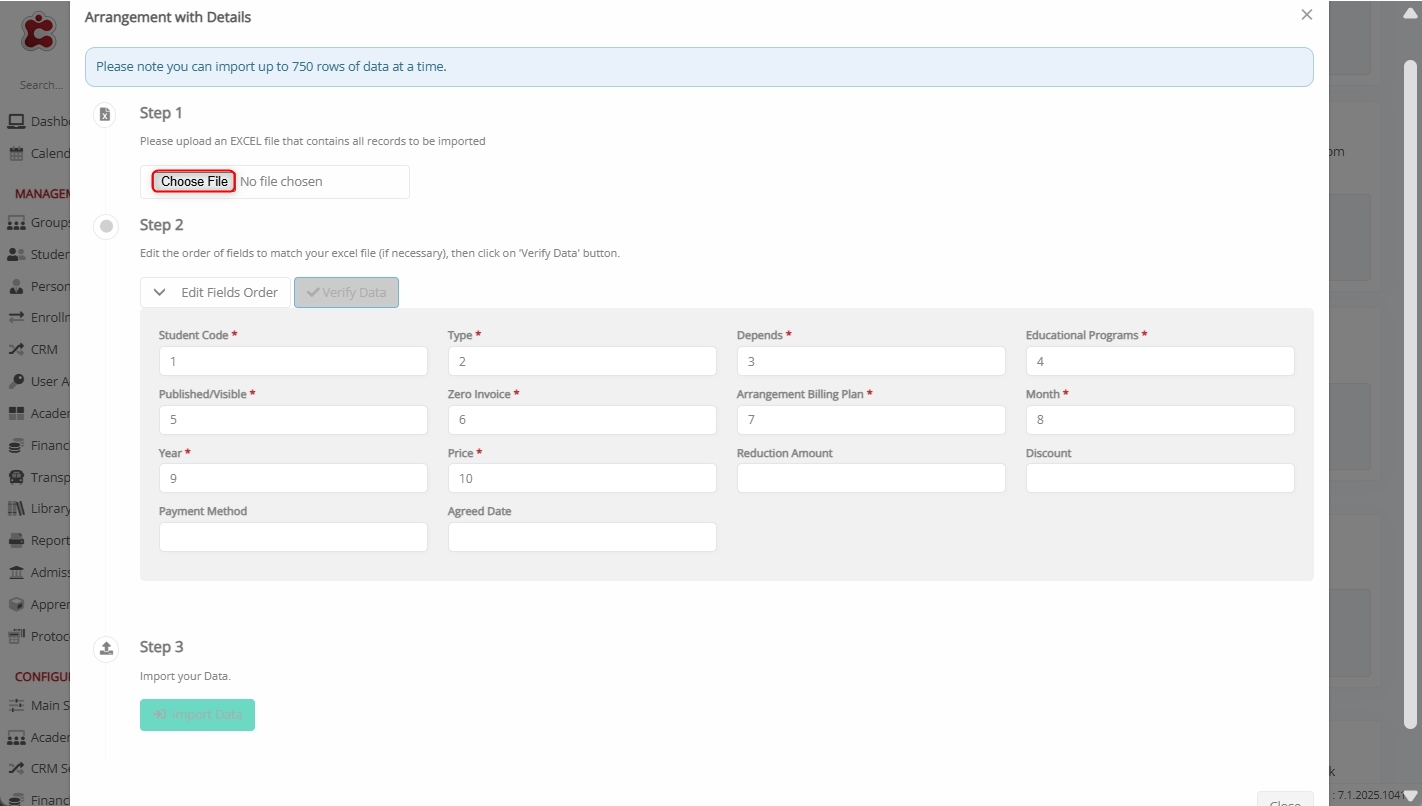
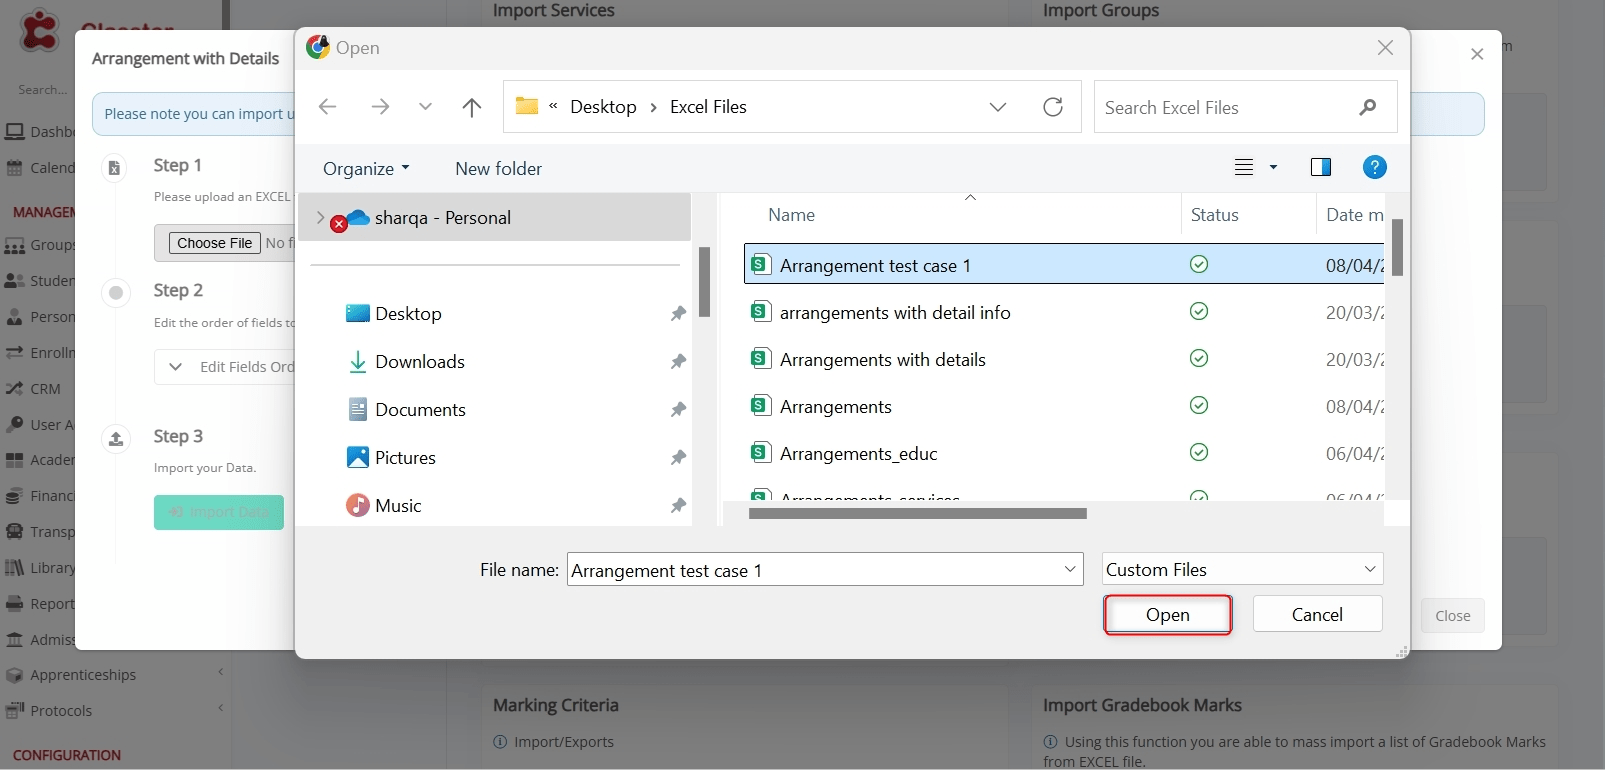
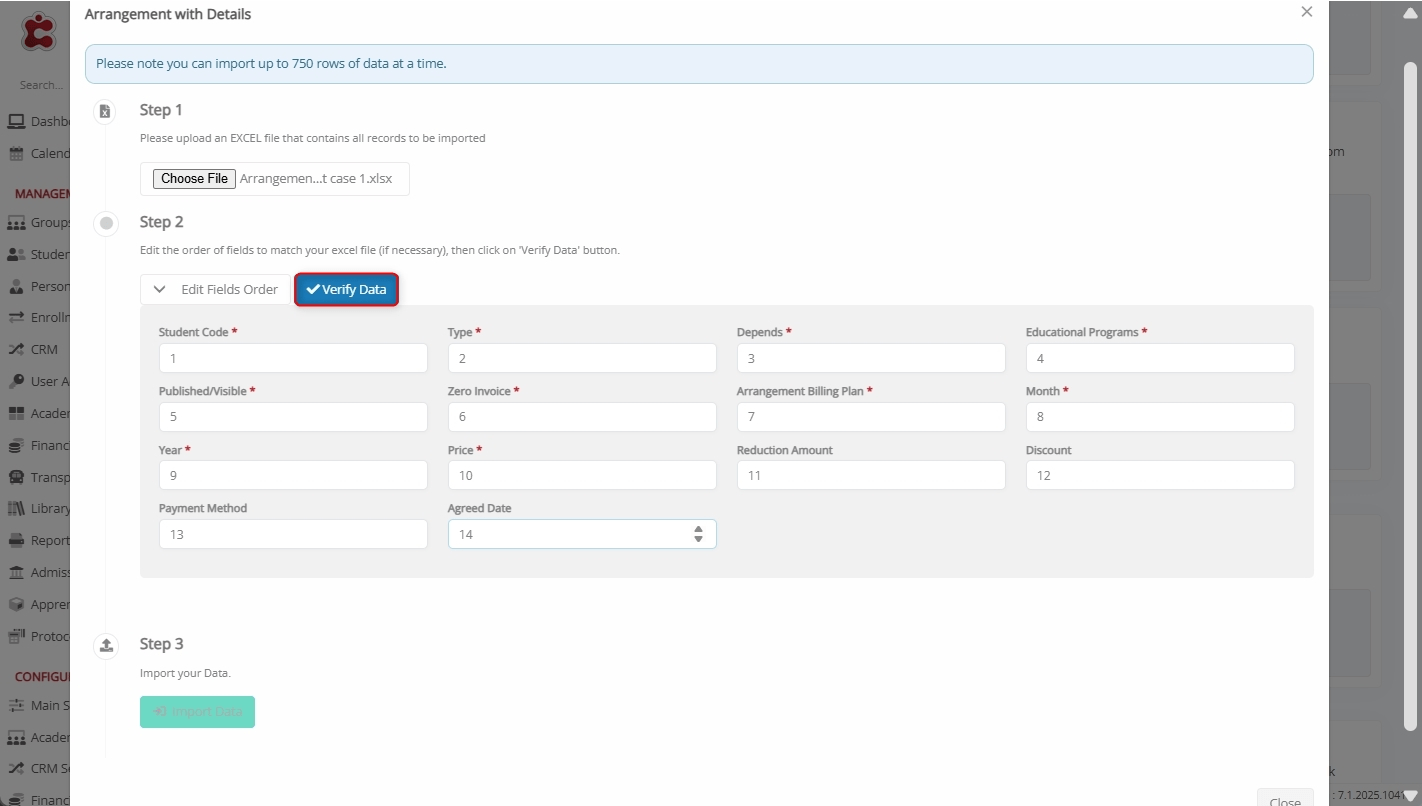
Click Choose File to upload an Excel file containing all Financial Arrangement records.
Select the file and click Open.
Map Classter Fields to Excel Columns or Set Predefined Values
Before proceeding, click Edit Fields Order to edit the order of the fields to match the Excel file.
Important Information
In order to ensure that imports remain flexible and support the arrangement in detail, the import structure is in installments.
Please note that:
- Each row is one installment of the arrangement.
- If you have only one installment in the arrangement, then you simply import one row per arrangement with all the details.
- In case of multiple installments, then, you need to repeat the common data in each row (Student Code, Type, Depends, Educational Program/Specialty, Published/Visible, Zero Invoice, Billing plan, Payment Method, Reduction, Discount) and add the data of all installments in the different rows (Month, Year, Price, Agreed Date).
- Please note that you need to add the final amounts after any discount/reduction.
- The system will finally sum up all the installments in order to present the total arrangement amount.
- Reductions and Discounts are applied on the entire arrangement in the system, so in case of multiple discounts, we repeat the total discount in all installment rows (and not split into the installments).
Mandatory Fields
These fields are essential for successfully importing the financial arrangements and must be mapped correctly according to the column numbers in the uploaded Excel file.
- Student Code: Unique identifier for the Student. The Classter Student Code.
- Type: Defines the type of arrangement, such as _Grade_/Program, _Stream_, Service, _Subject_, etc. Be careful, your custom terminology must be used here.
- Depends: Based on the type, here we specify the exact entity on which the Arrangement depends. For example, the Grade/Program full description, the Service title, the Subject Title, etc.
- Educational Programs: There is a special format here. The associated full Educational Program of the Student.
– This applies to all types.
– All arrangements must be connected to an Educational Program/Specialty.
– There is a special format in this column as: Student Code$Grade$Stream or Student Code$Grade$Stream$Educational Program Category if the field is enabled in your Institution.
- Published/Visible: Indicates if the arrangement is publicly visible to end users, like Students, parents (options: Yes/No).
- Zero Invoice: Defines whether the system allows the issuing of zero invoices in these arrangements (options: Yes/No).
- Arrangement Billing Plan: The billing plan linked to the arrangement. Usually, the option here is “Identical with the arrangement”, unless you have a custom billing plan, then you add the title of your custom plan.
- Month: Specifies the month of the installment.
- Year: Specifies the year of the installment.
- Price: The final amount of the installment (after any discount/reduction applied).
Optional Fields
These fields are not required, but provide additional details for financial arrangements:
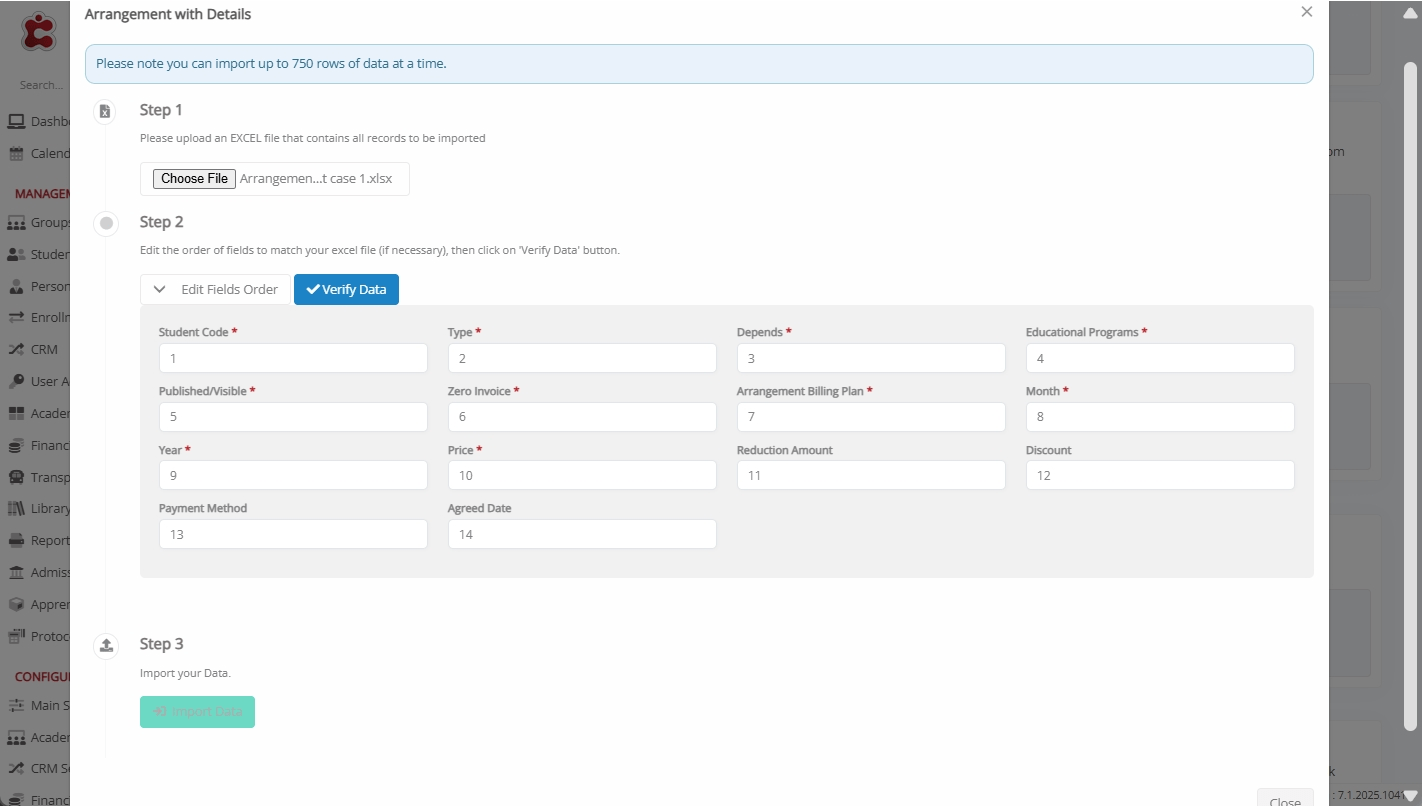
- Reduction Amount: Reduction amount applied to the total arrangement.
- Discount: Discount amount applied to the total arrangement.
- Payment Method: The default payment method for the arrangement.
- Agreed Date: The agreed due date for the installment.
Templates
Check out the listed templates for importing different types of arrangements. Notably, for all of these, you have to add values in the following sequence:
- Student Code
- Type
- Depends
- Educational Programs
- Published/Visible
- Zero Invoice
- Arrangement Billing Plan
- Month
- Year
- Price
- Reduction Amount
- Discount
- Payment Method
- Agreed Date
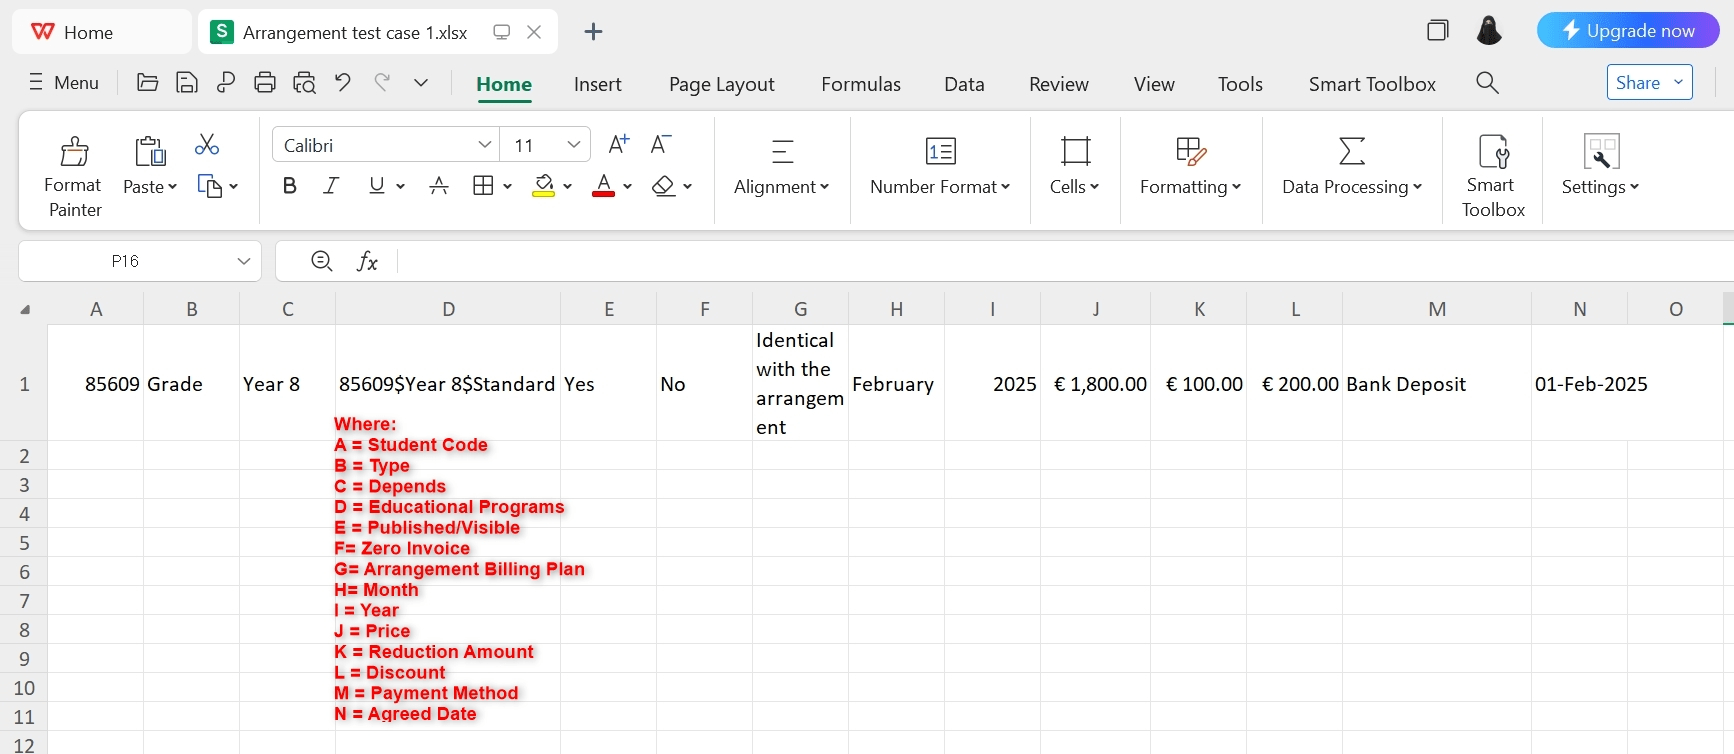
Grade/Program Type Arrangement
- In the first column, add the Student code.
- In the second column, define Type as Grade/Program (as per your custom terminology).
- In the third column, add the Grade/Program full description.
- In the fourth column, define Educational Program/Specialty format as StudentCode$Grade$Stream, and vice versa.
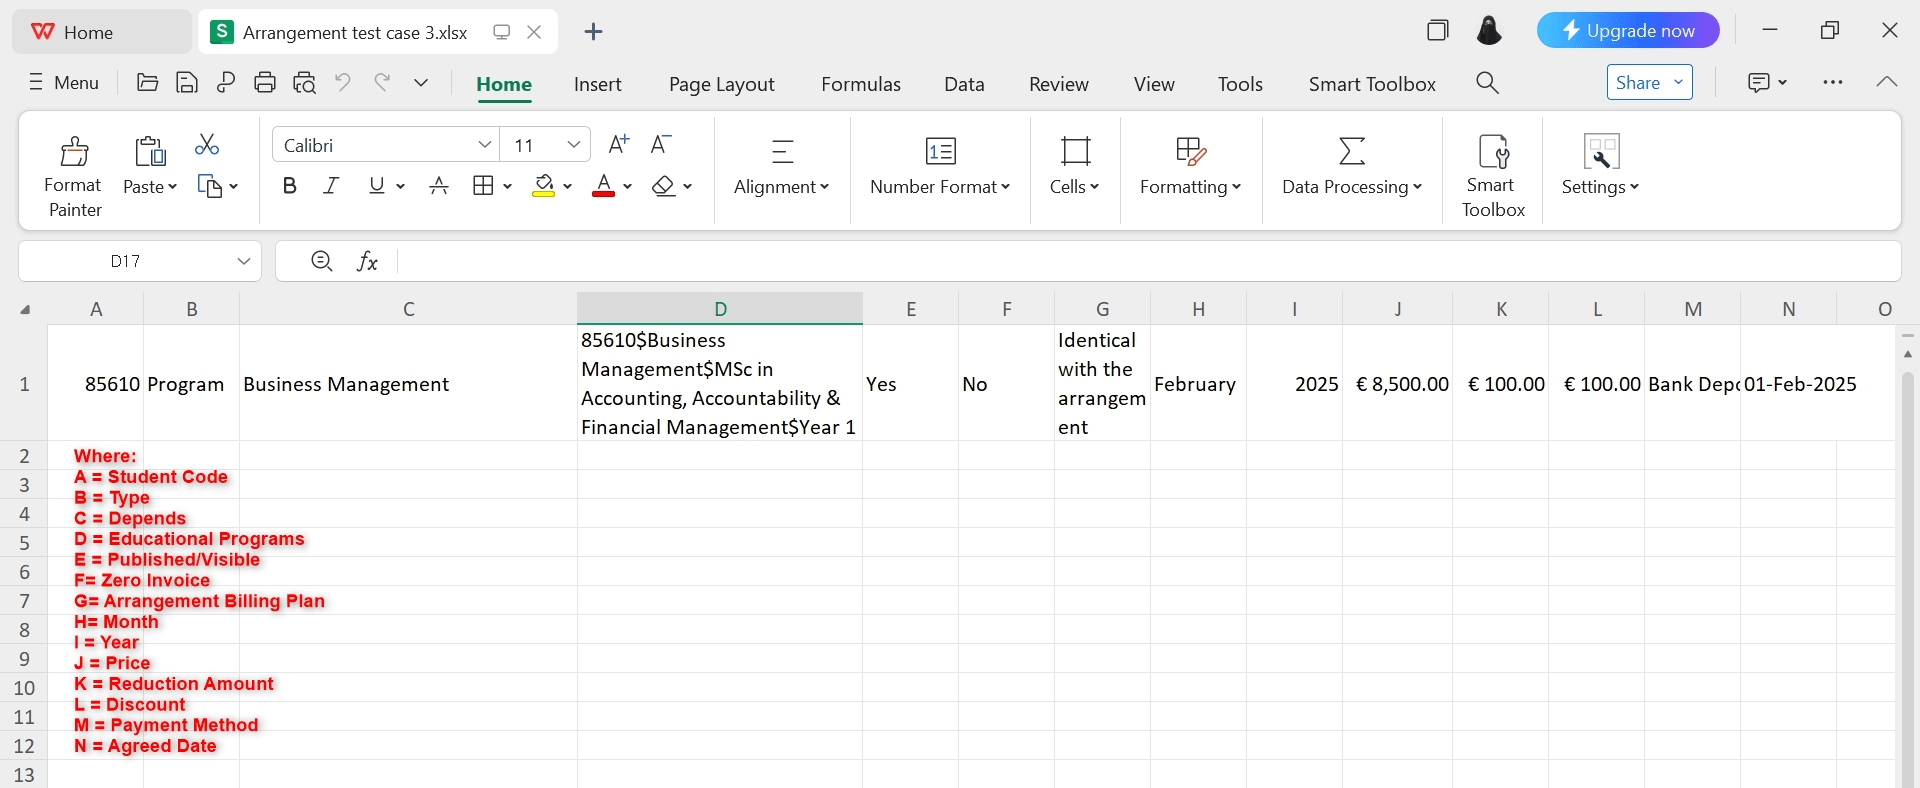
Program Type Arrangement
- In the first column, add Student Code.
- In the second column, define Type as Program.
- In the third column, add Program description.
- In the fourth column, define Educational Program/Specialty format as StudentCode$Grade$Stream&Educational Program Category (If Educational Program/Specialty is enabled) and vice versa.
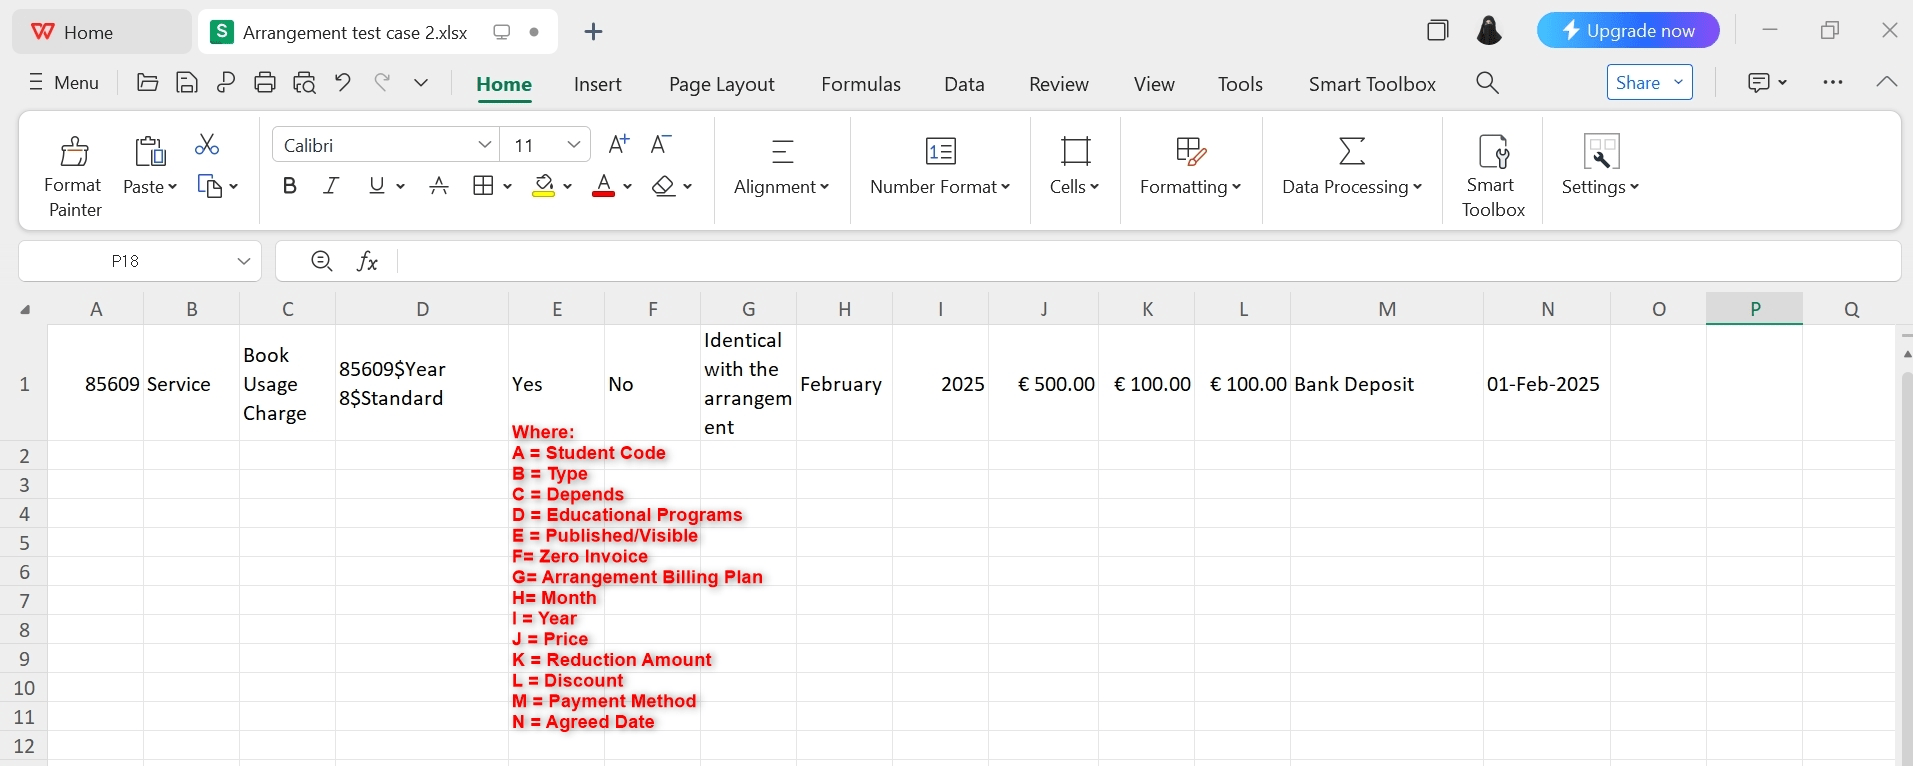
Service Type Arrangement
- In the first column, add Student Code.
- In the second column, define Type as Service.
- In the third column, add a full description of the Service.
- In the fourth column, define Educational Program/Specialty format as StudentCode$Grade$Stream&Educational Program Category (If Educational Program/Specialty is enabled) and vice versa.
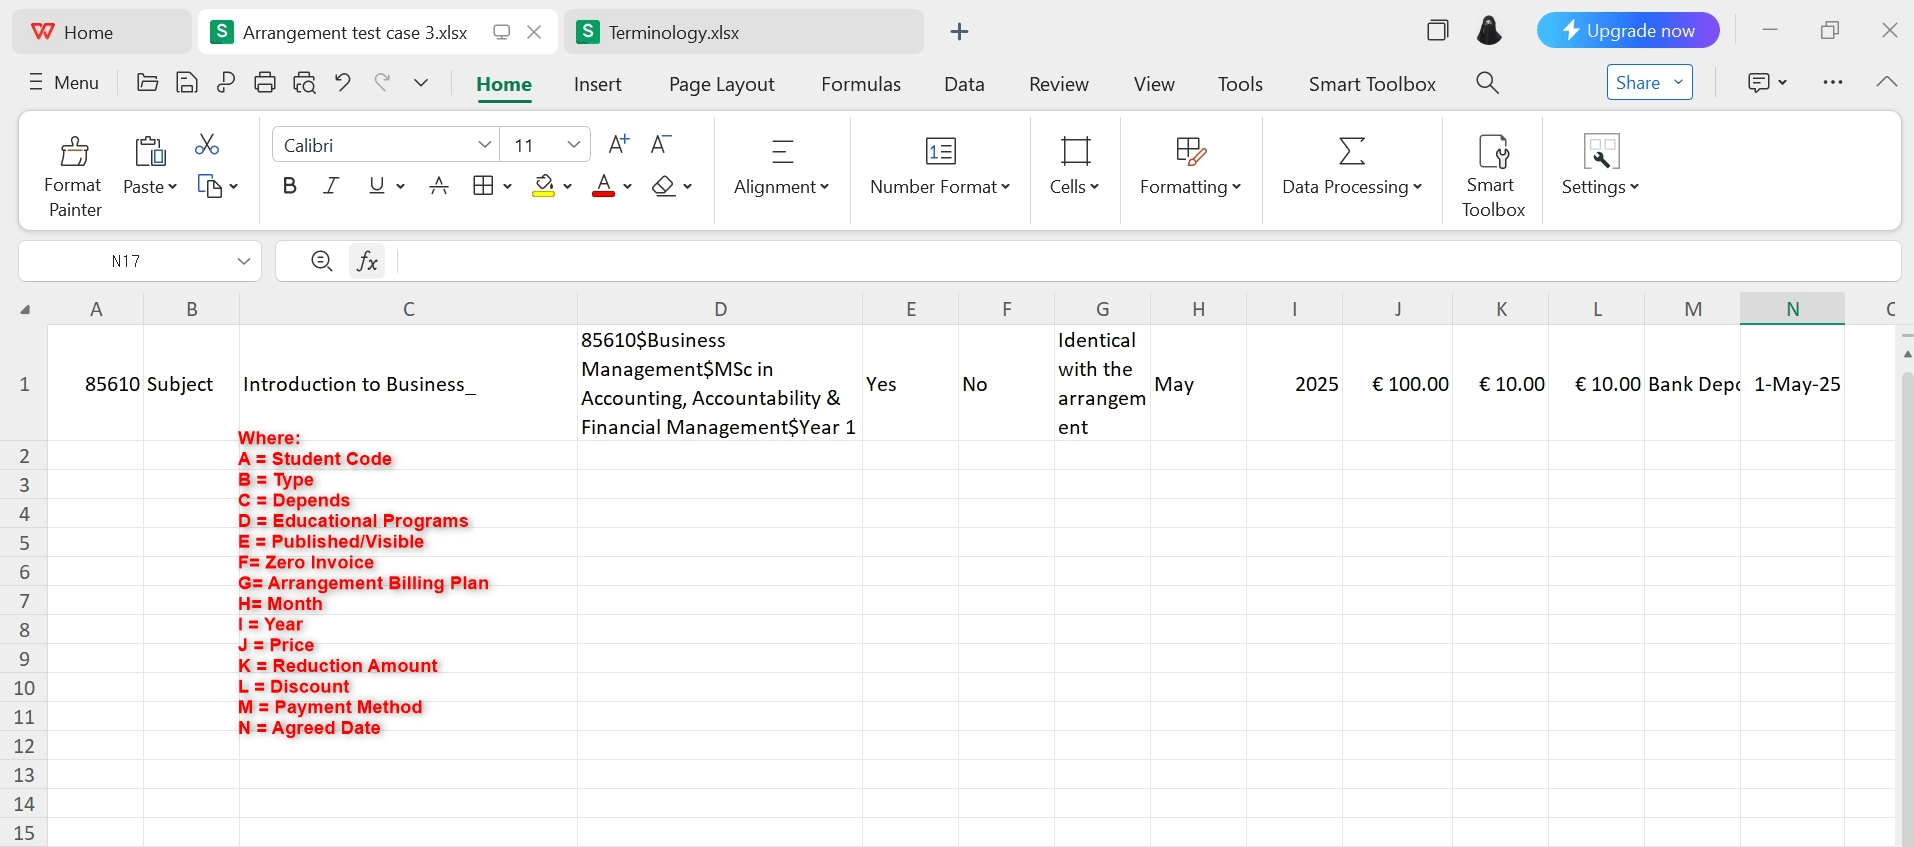
Subject Type Arrangement
- In the first column, add Student Code.
- In the second column, define Type as Subject.
- In the third column, add the full Subject description.
- In the fourth column, define Educational Program/Specialty format as StudentCode$Grade$Stream&Educational Program Category (If Educational Program/Specialty is enabled) and vice versa.
Verify Data
Once mapping is complete, click Verify Data.
Import Data
Once mapping is complete:
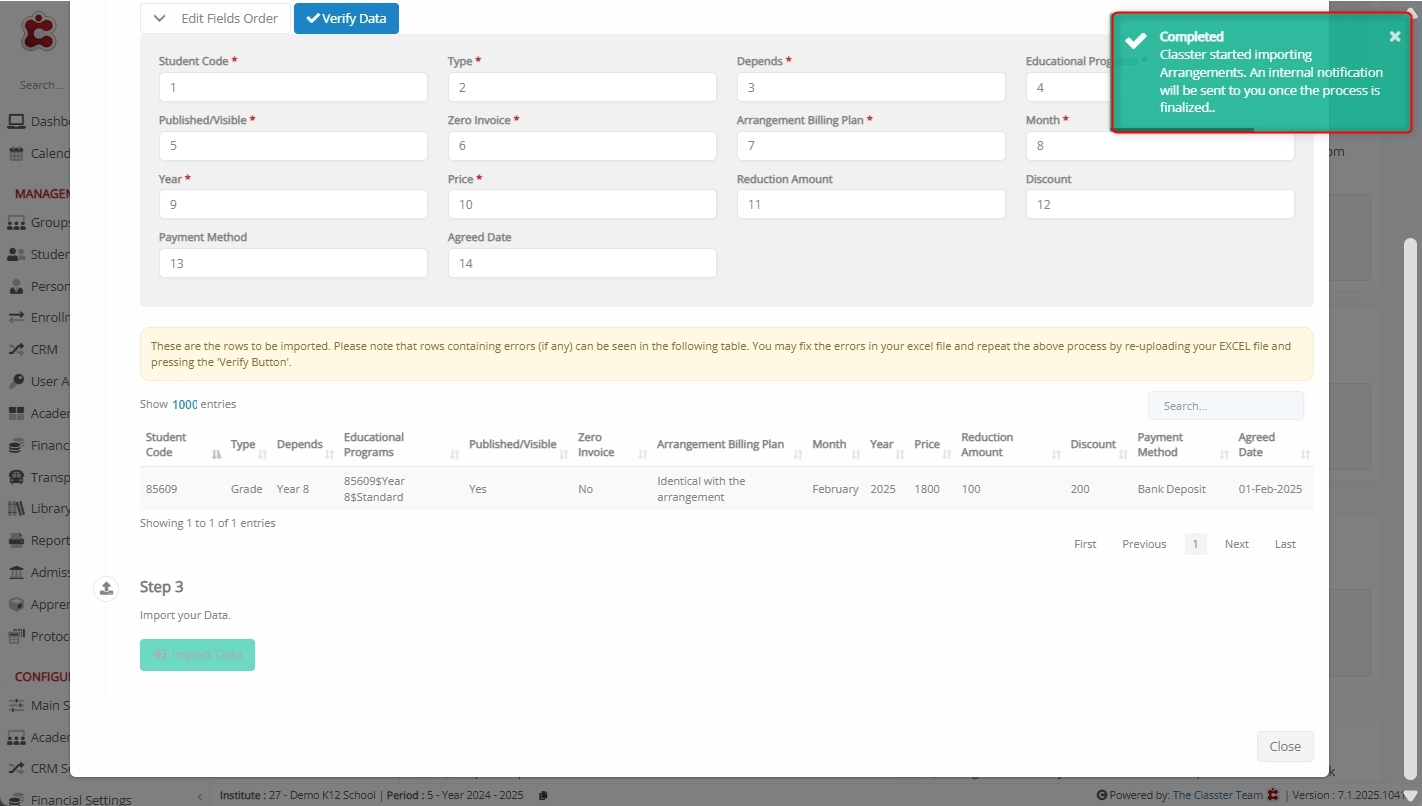
- Classter validates the data.
- If the data is correctly aligned, you see a preview of the records.
- In such a case, click the Import Data button to complete the process.

A confirmation message appears once Classter has started importing Arrangements.
Handling Errors
If errors are found, Classter highlights them in red for correction. In such a case:
- Ensure that all Mandatory Fields contain valid values and are mapped correctly.
- Confirm the Educational Program format in the Excel file as per your arrangement type.
- If you have the Educational Program Category/Specialty enabled, it must be included in the Educational Programs column (for HE).
- Verify that the Student has the exact Educational Program and Registered Status.
- Confirm that the Student is enrolled in the entity of the Type of the Arrangement, such as Grade/Program, Subject, or Service.
- Check that no financial arrangement is already saved for this program.
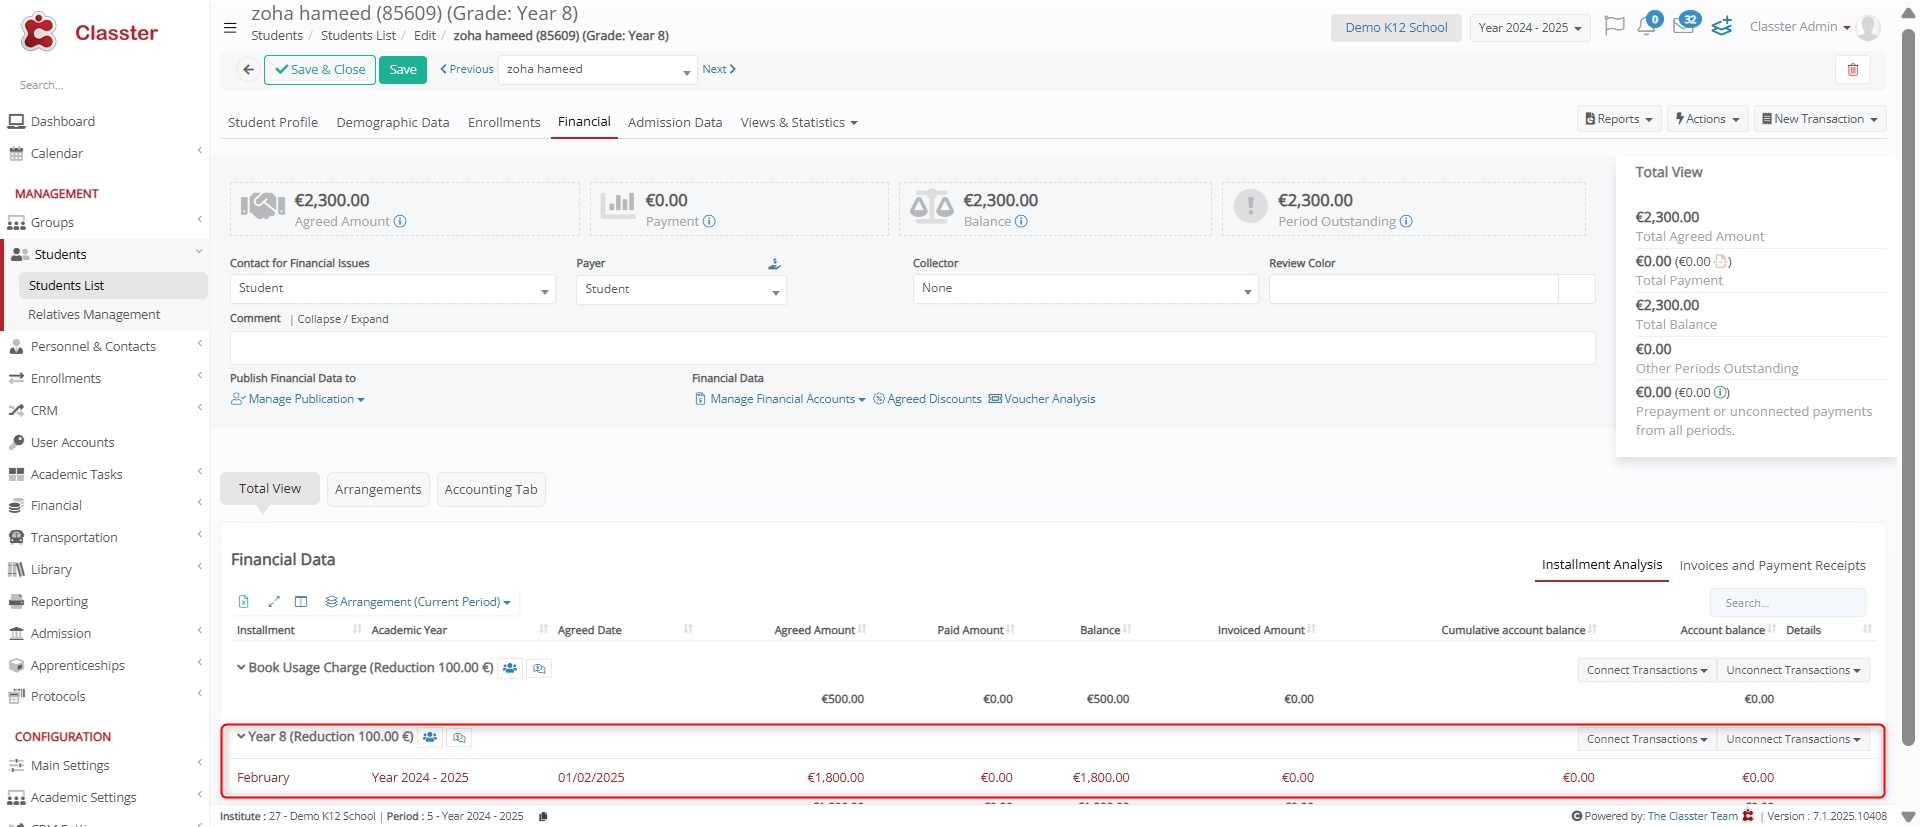
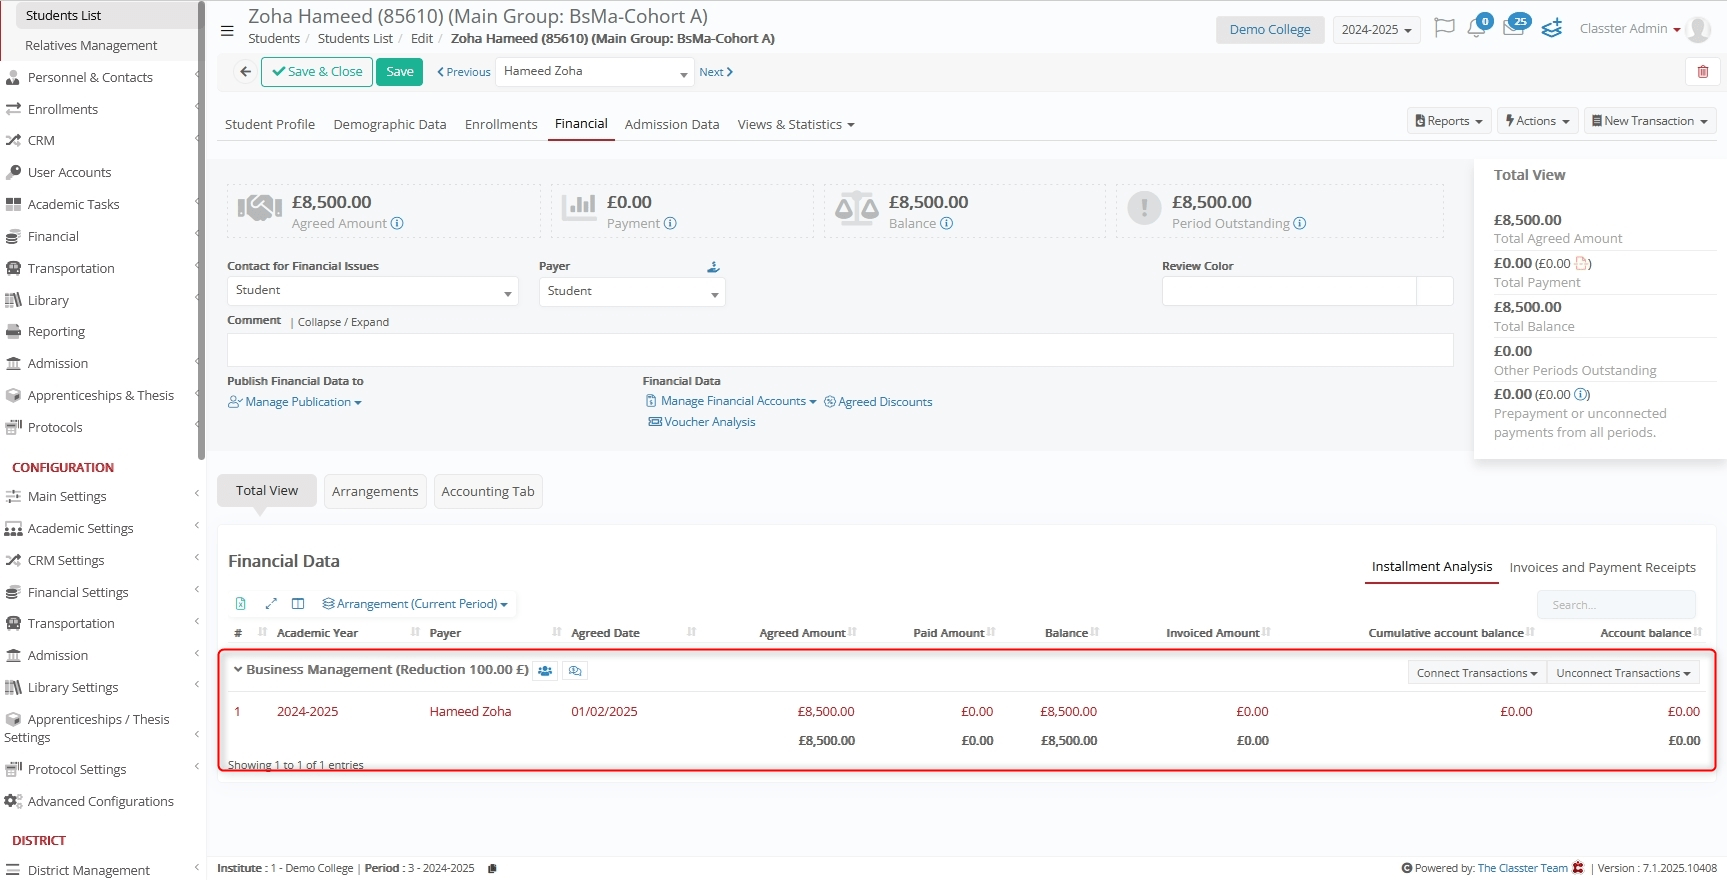
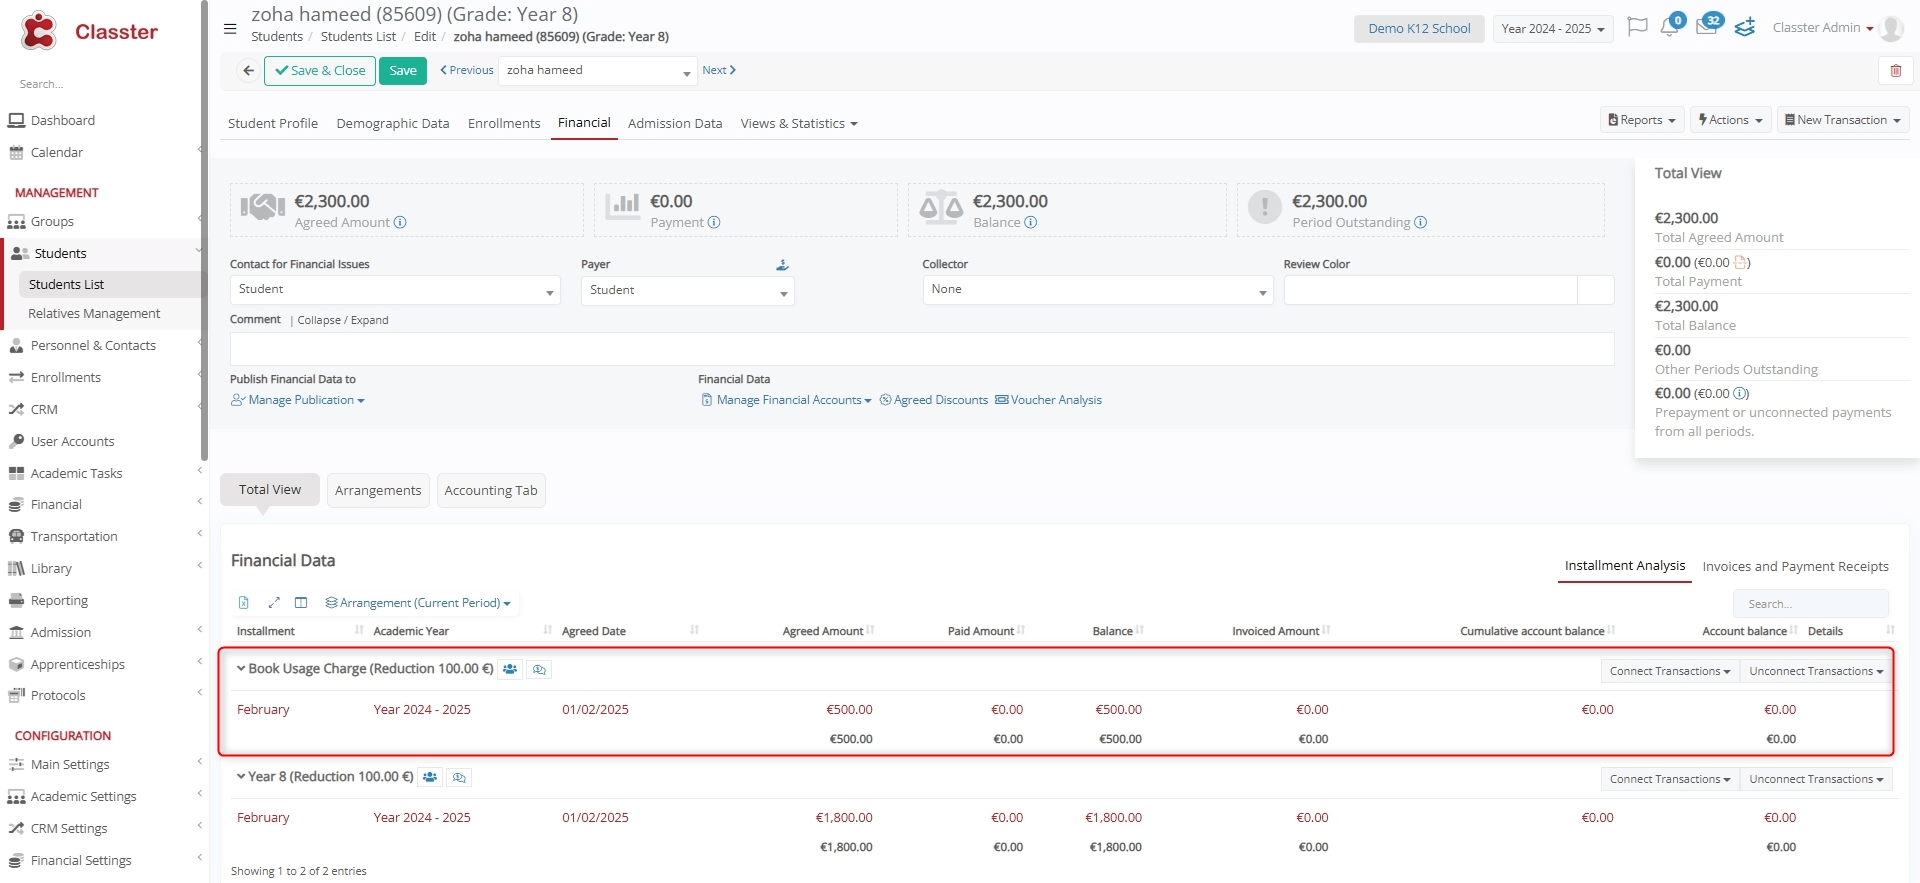
View Imported Arrangements
To view the list of newly imported arrangements, navigate to: Students > Students List > Edit a Student Profile > Financial > Total View > Financial Data and verify that all attributes are correctly assigned.
Grade/Program Type Arrangements
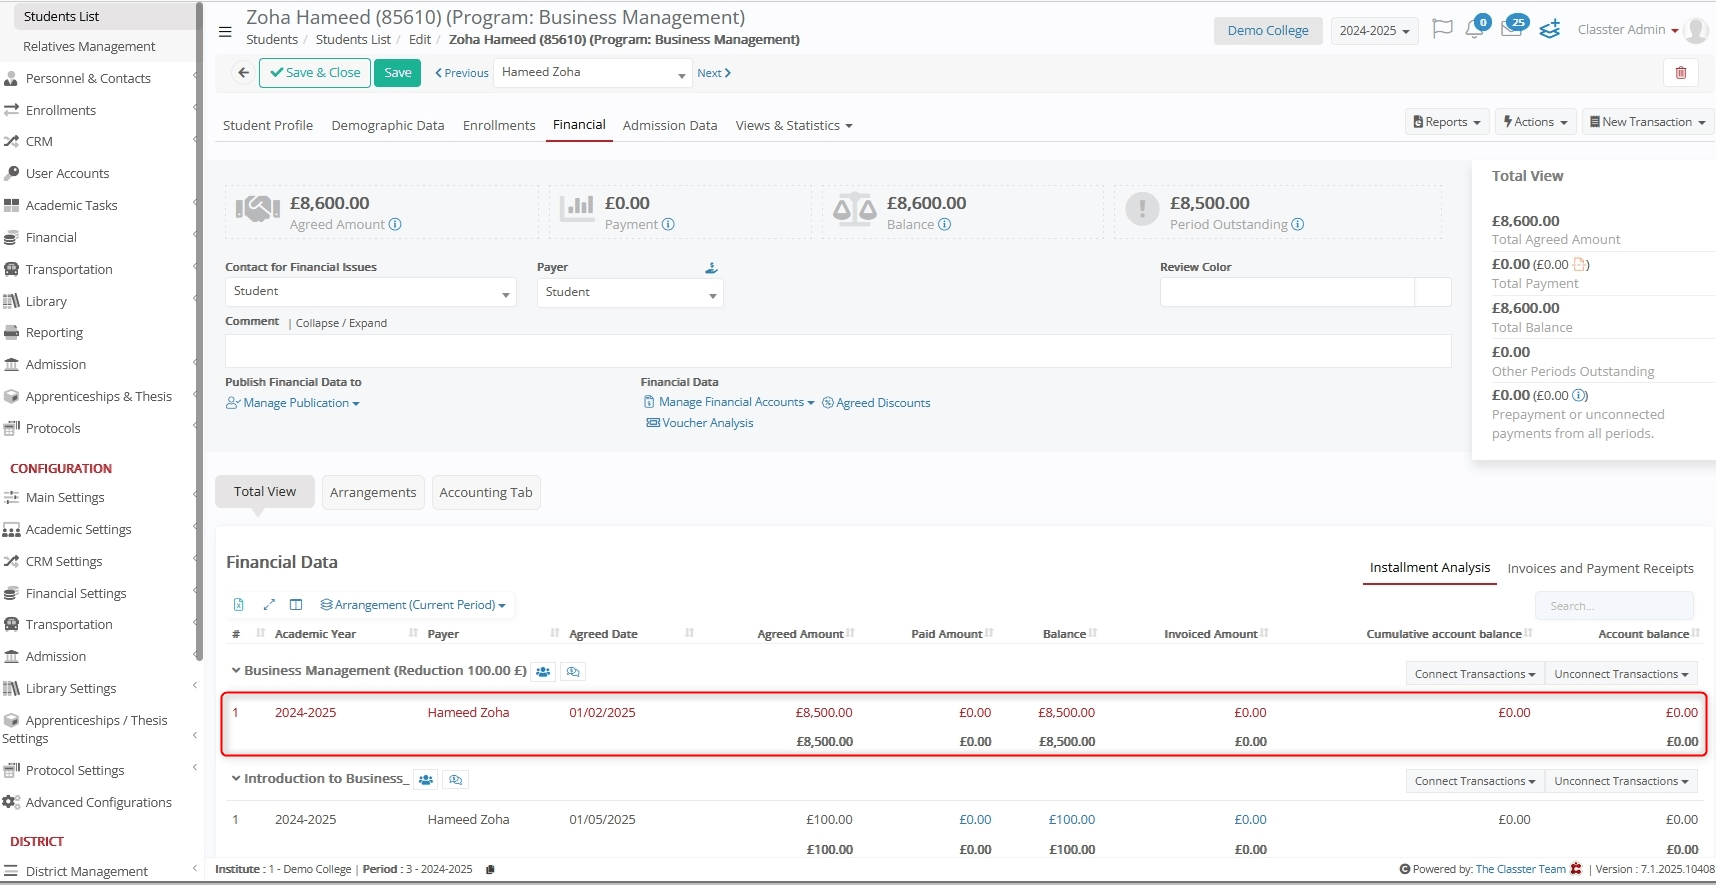
Program Type Arrangements
Service Type Arrangements
Subject Type Arrangements
Summary
By following these steps, Institutions can efficiently import financial arrangements into Classter. Properly formatted data, correct field mapping, and validation checks ensure a smooth and error-free import process.