

The Import Events function in Mass Imports allows Institutions to bulk upload event records into Classter using an Excel file. This feature automates the data entry process, reducing manual workload regarding Event management.
Specifically, the Import Events process involves selecting a file, mapping fields, verifying data, and finalizing the upload.
Key Considerations
Before proceeding with the import process, ensure the following:
- The first row of the Excel file should ideally contain column names to ensure proper mapping.
- The Excel file is correctly formatted with all necessary fields.
- Each column contains valid data based on the field type.
- Proper field mapping is essential for accurate event record creation.
How to Import Events
Follow the steps to import Events in Classter.
Navigate to Import Events
Log in to your Institute and navigate to: CONFIGURATION > Advanced Configurations > Mass Imports / actions > Import Events.

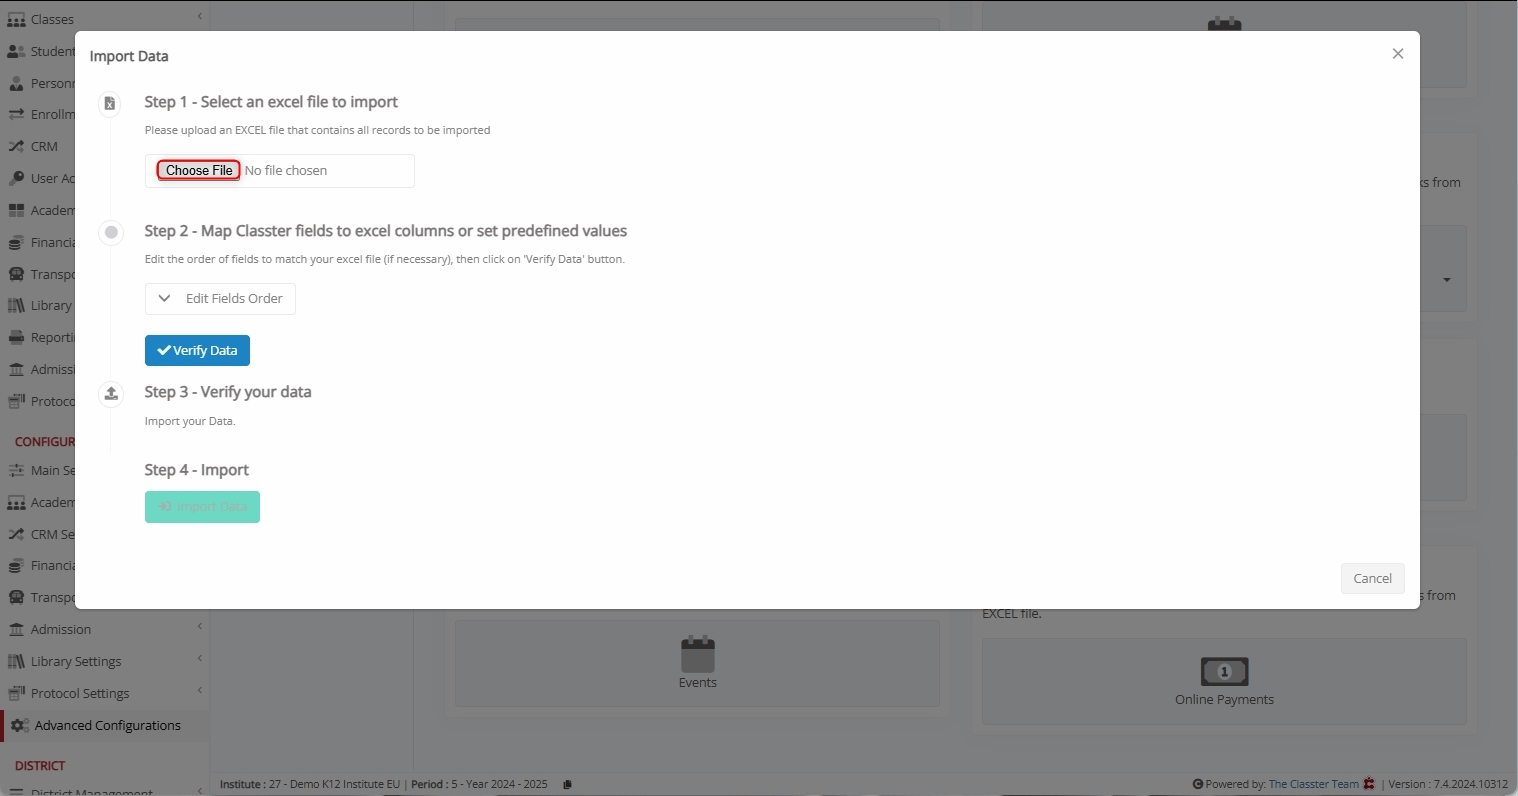
Select an Excel File to Import
Click Choose File to upload an Excel file containing all the required Event records.
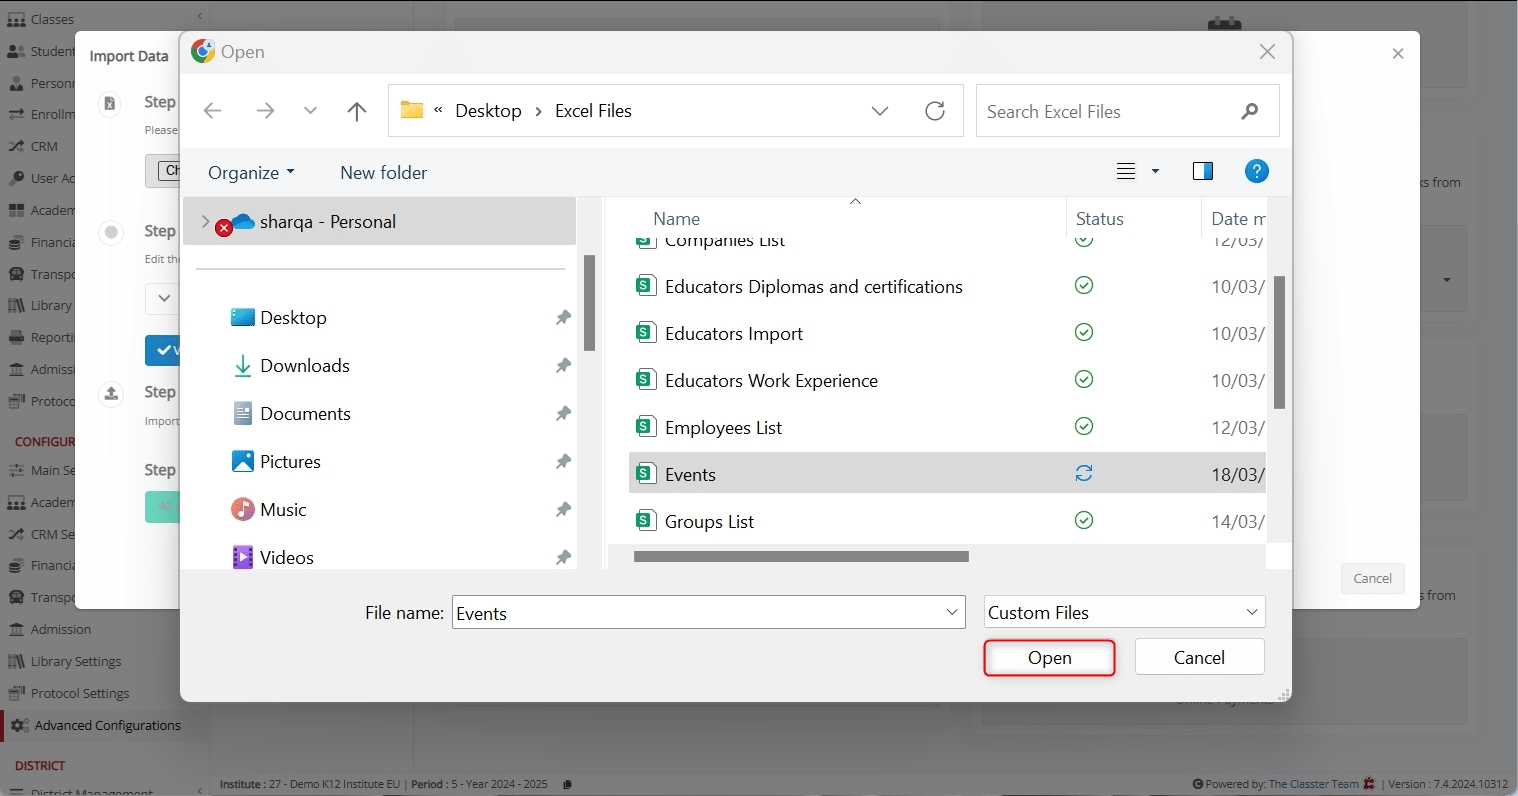
Choose the desired file and click Open.
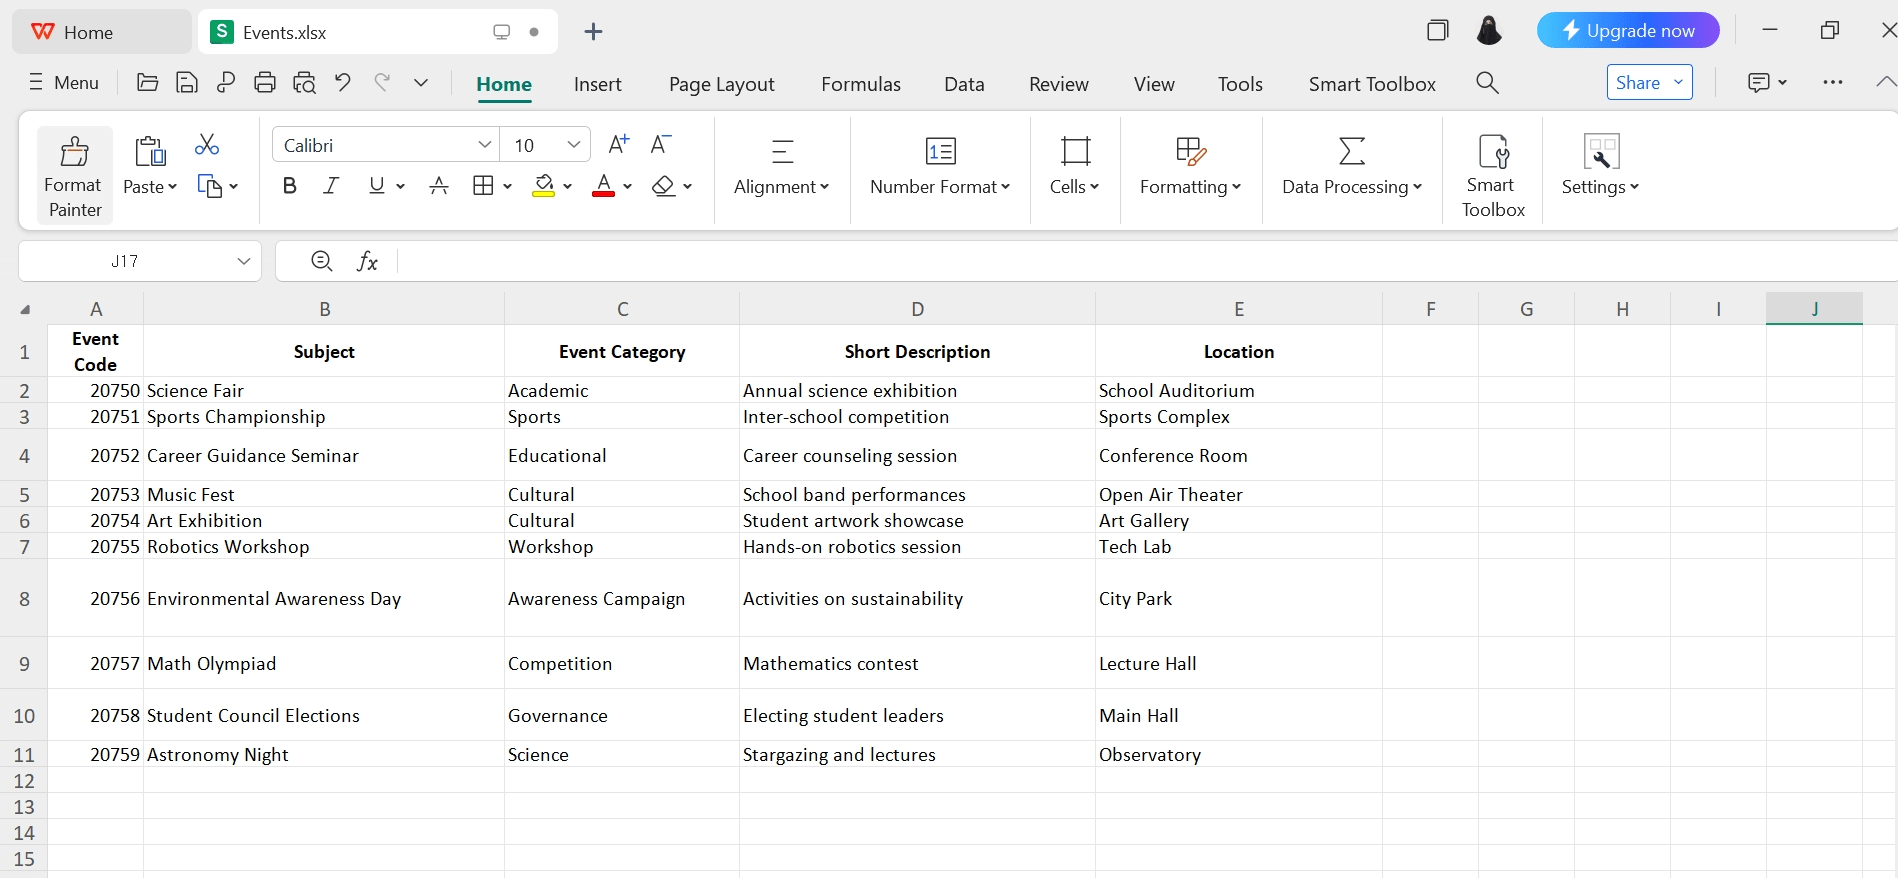
Here’s how an Excel file looks like.
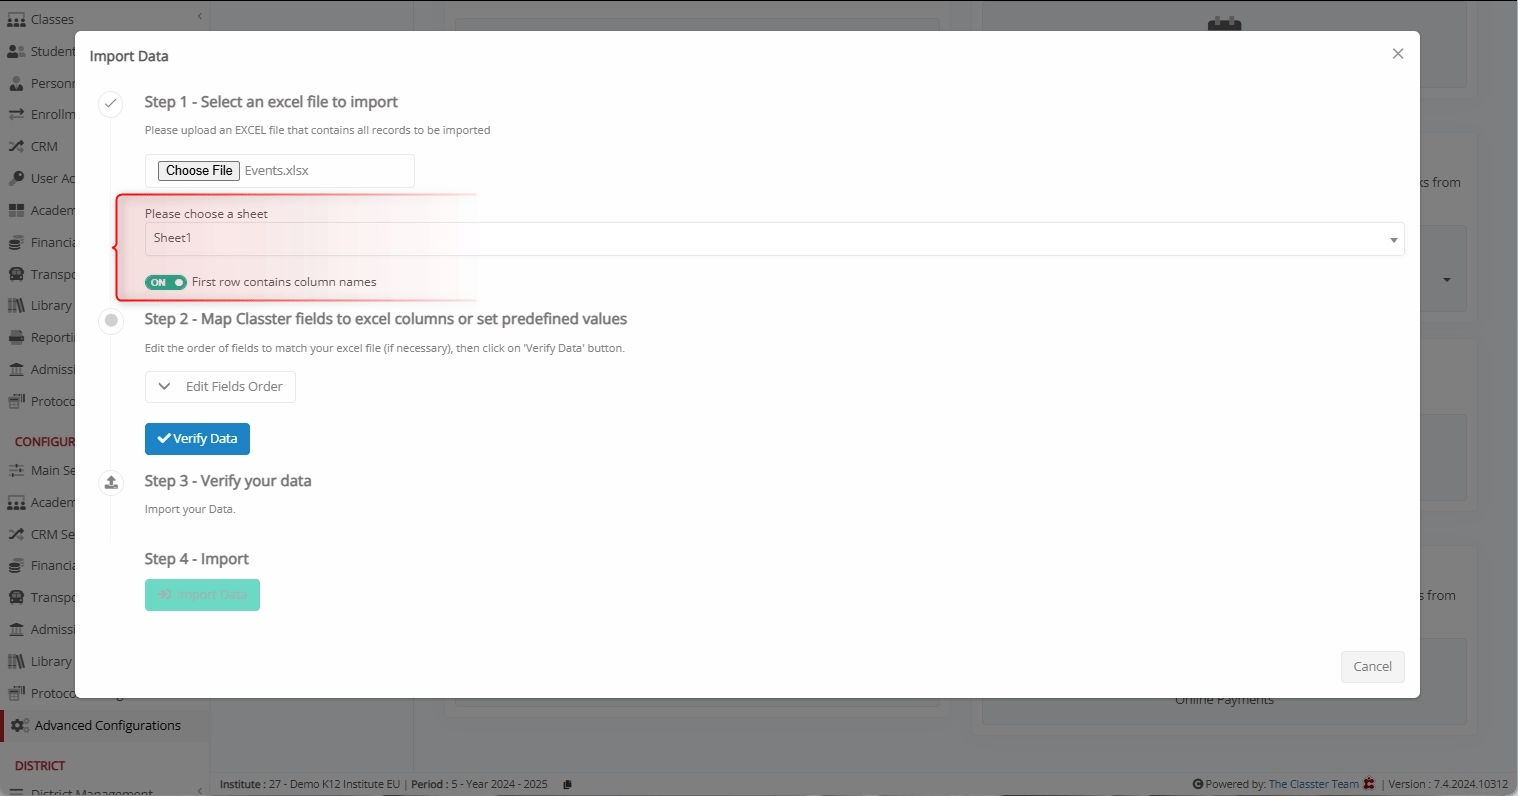
File Selection Options:
- Choose a Sheet: Select the correct sheet from the uploaded Excel file.
- First Row Contains Column Names: Ensure the first row is used for headers to simplify mapping.
Map Classter Fields to Excel Columns or Set Predefined Values
Before proceeding, click Edit Fields Order and configure the fields mapping.
Layouts
You can save the layout-mapping for later usage. This is used when we plan to do multiple imports, using exactly the same Excel format.
Additionally, you can use your pre-saved layouts by selecting them during the import to avoid doing the mapping again.
Mapping Method: Excel Value VS User Value VS Excel Values (Code)
When mapping fields, you can choose between three methods:
- Excel Value: Values are taken directly from each row of the uploaded Excel file. In this case, during mapping, use the “Select from” dropdown to choose the corresponding Excel column.
- User Value: A predefined value is applied to all Events in the Excel file. This value is manually set during the import process. In this case, from the “Select from” dropdown, select a specific value instead of an Excel column.
- Excel Values (Codes): Values are retrieved from the uploaded Excel file using internal system codes that correspond to predefined dropdown options in Classter. This method is particularly useful for fields such as Student or Teacher (optional fields), where each option in Classter has a specific code. During mapping, use the “Select from” dropdown to choose the Excel column containing these codes.
Mandatory Fields:
These fields must be mapped correctly to proceed. Notably, Classter provides the option to use either Excel Values or User Values for mapping:
- Event Code: Unique identifier for the Event.
- _Subject_: The theme/topic of the Event.
- Start Date: The start date of the Event.
- End Date: The end date of the Event.
- Start Time: The time the Event begins. Additionally, its time format in Excel should be like hh:mm (e.g. 14:45)
- End Time: The time the Event ends. Additionally, its time format in Excel should be like hh:mm (e.g. 14:45)
- Event Category: Defines the calendar category of the Event (e.g., School Event). Must match with the relevant dropdown list in CRM Settings > Dropdown lists > Calendar Categories.
Optional Fields:
These fields can be mapped if additional event details are required. Notably, Classter provides the option to use either Excel Values, User Values, or Excel Values (Codes) for mapping:
- Short Description: A summary or note about the Event.
- _Location_: The Location where the event will take place.
- Classroom: The specific Classroom or Room assigned for the Event.
- Visible in Calendar: Indicates whether the Event should be shown in the calendar view.
- Send Message to Recipients: Enables automated messaging to notify Event participants.
- Include Parents as Recipients (General Contact): Sends Event-related messages to Parents marked as general contacts.
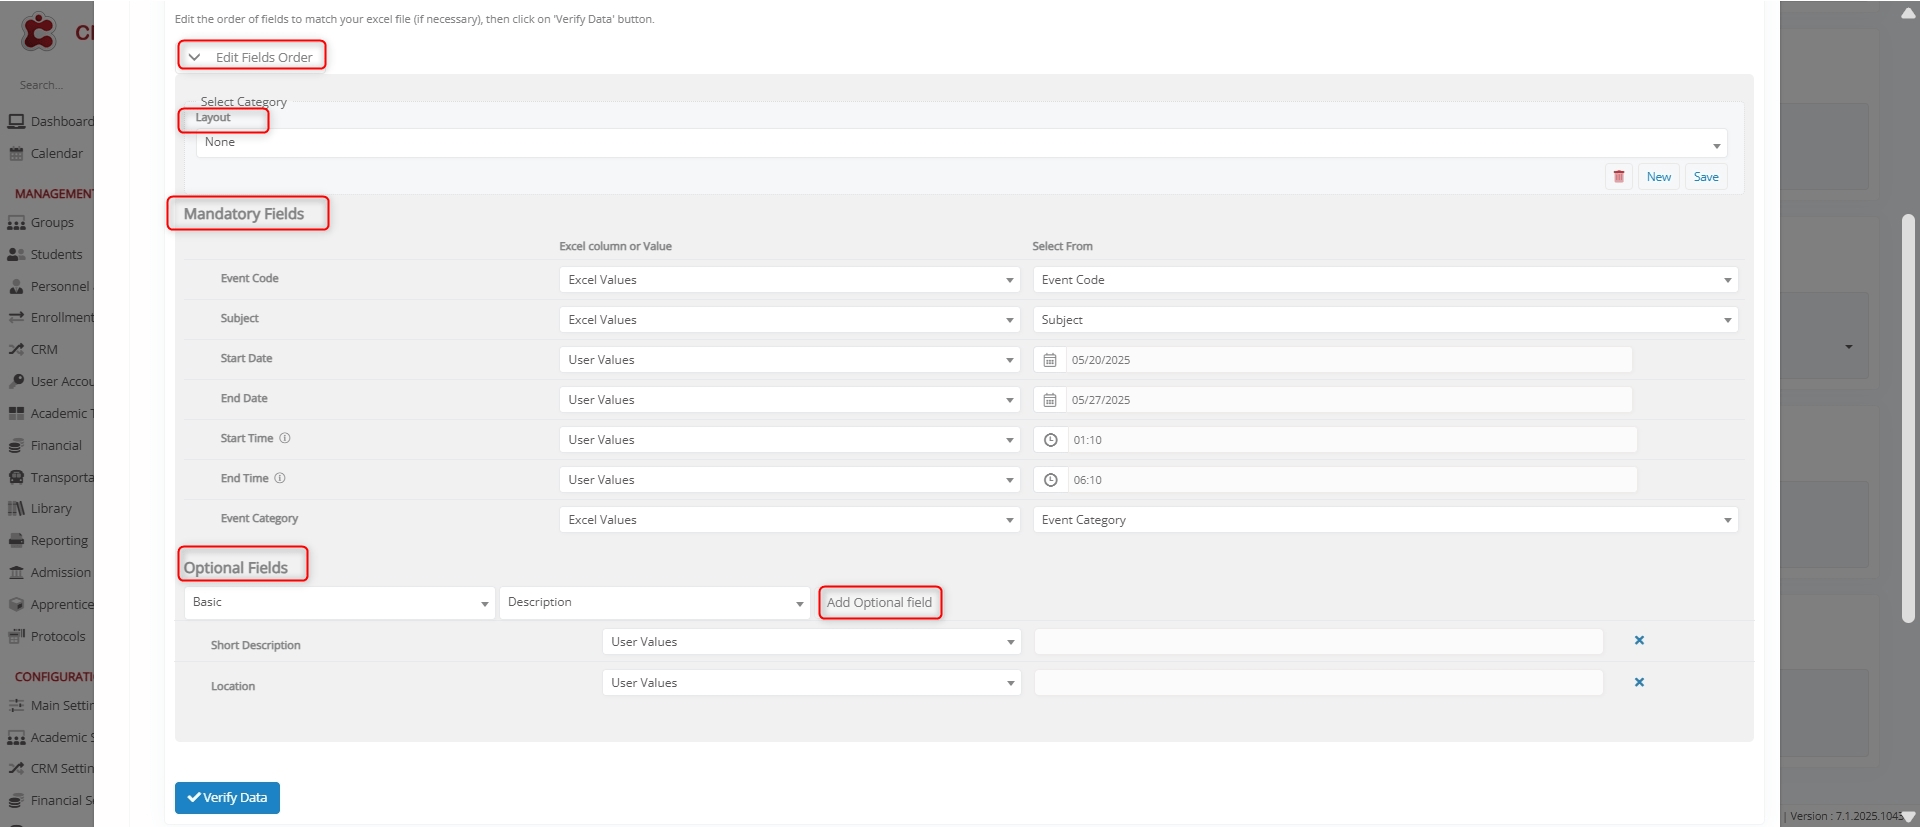
Verify Data
After completing the field mapping, click Verify Data.
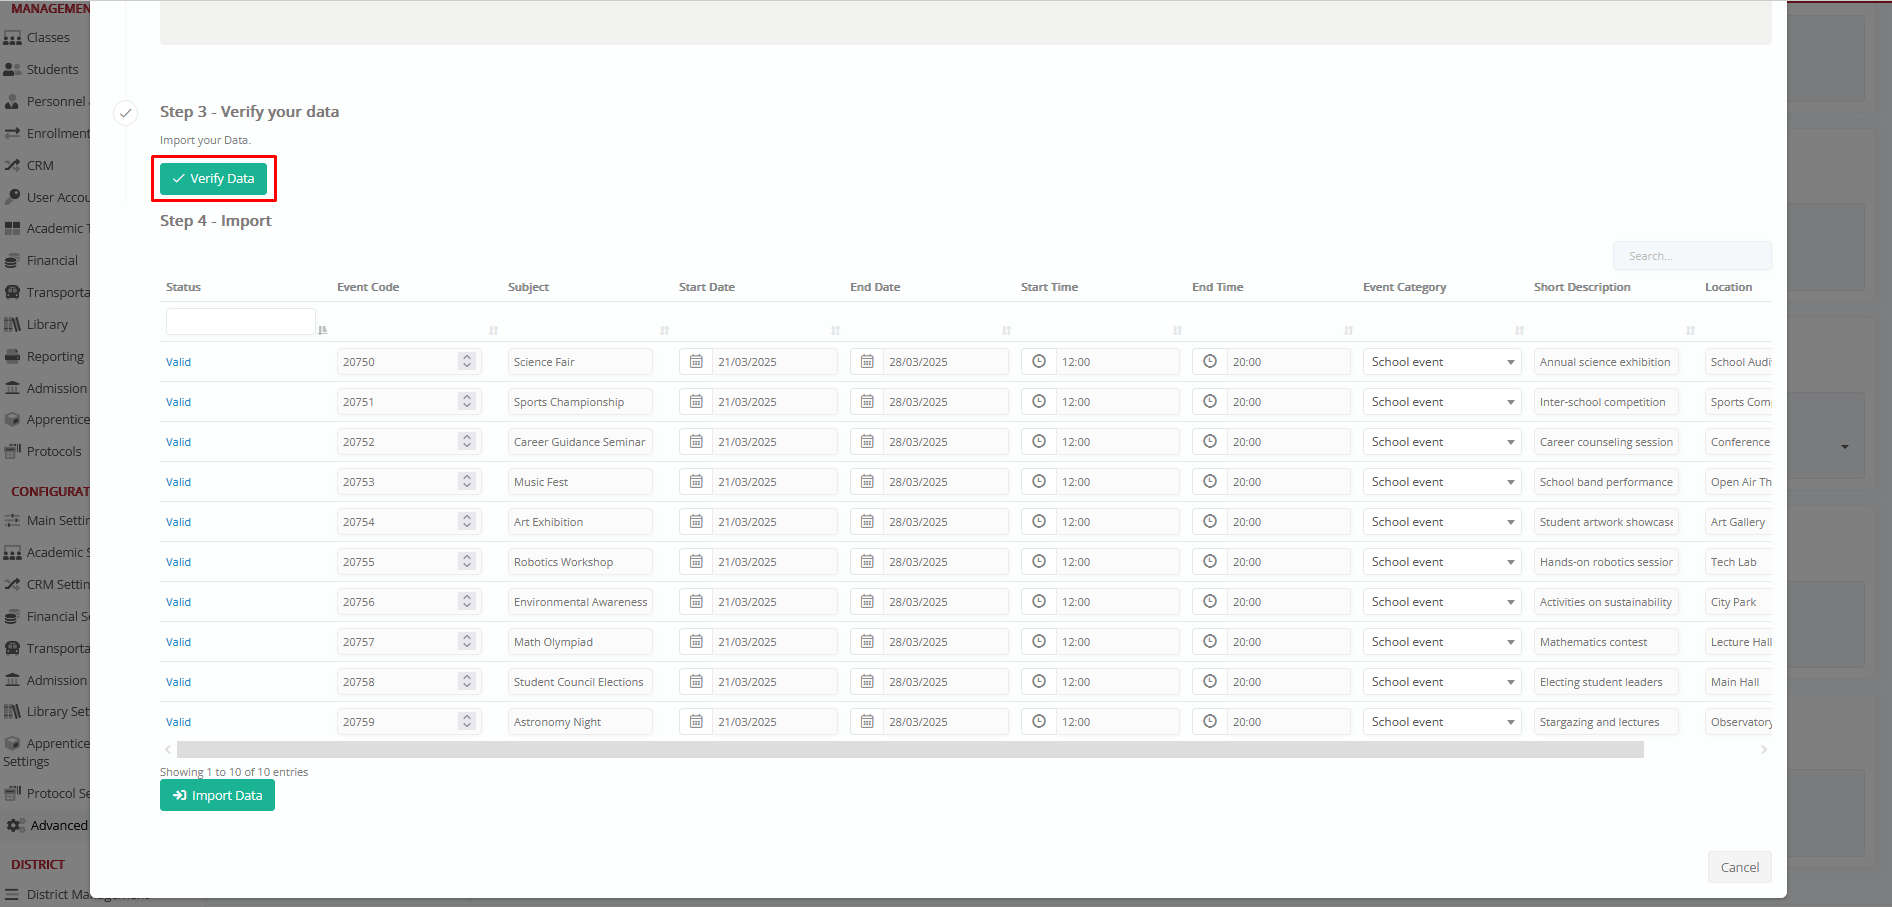
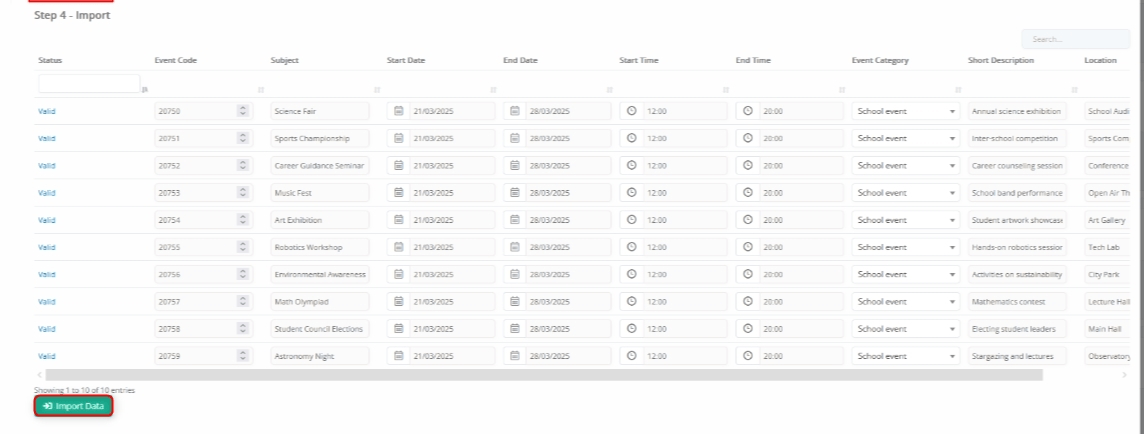
Import Data
Once mapping is complete:
- Classter validates the data.
- If the data is correctly aligned, a preview of the records appears.
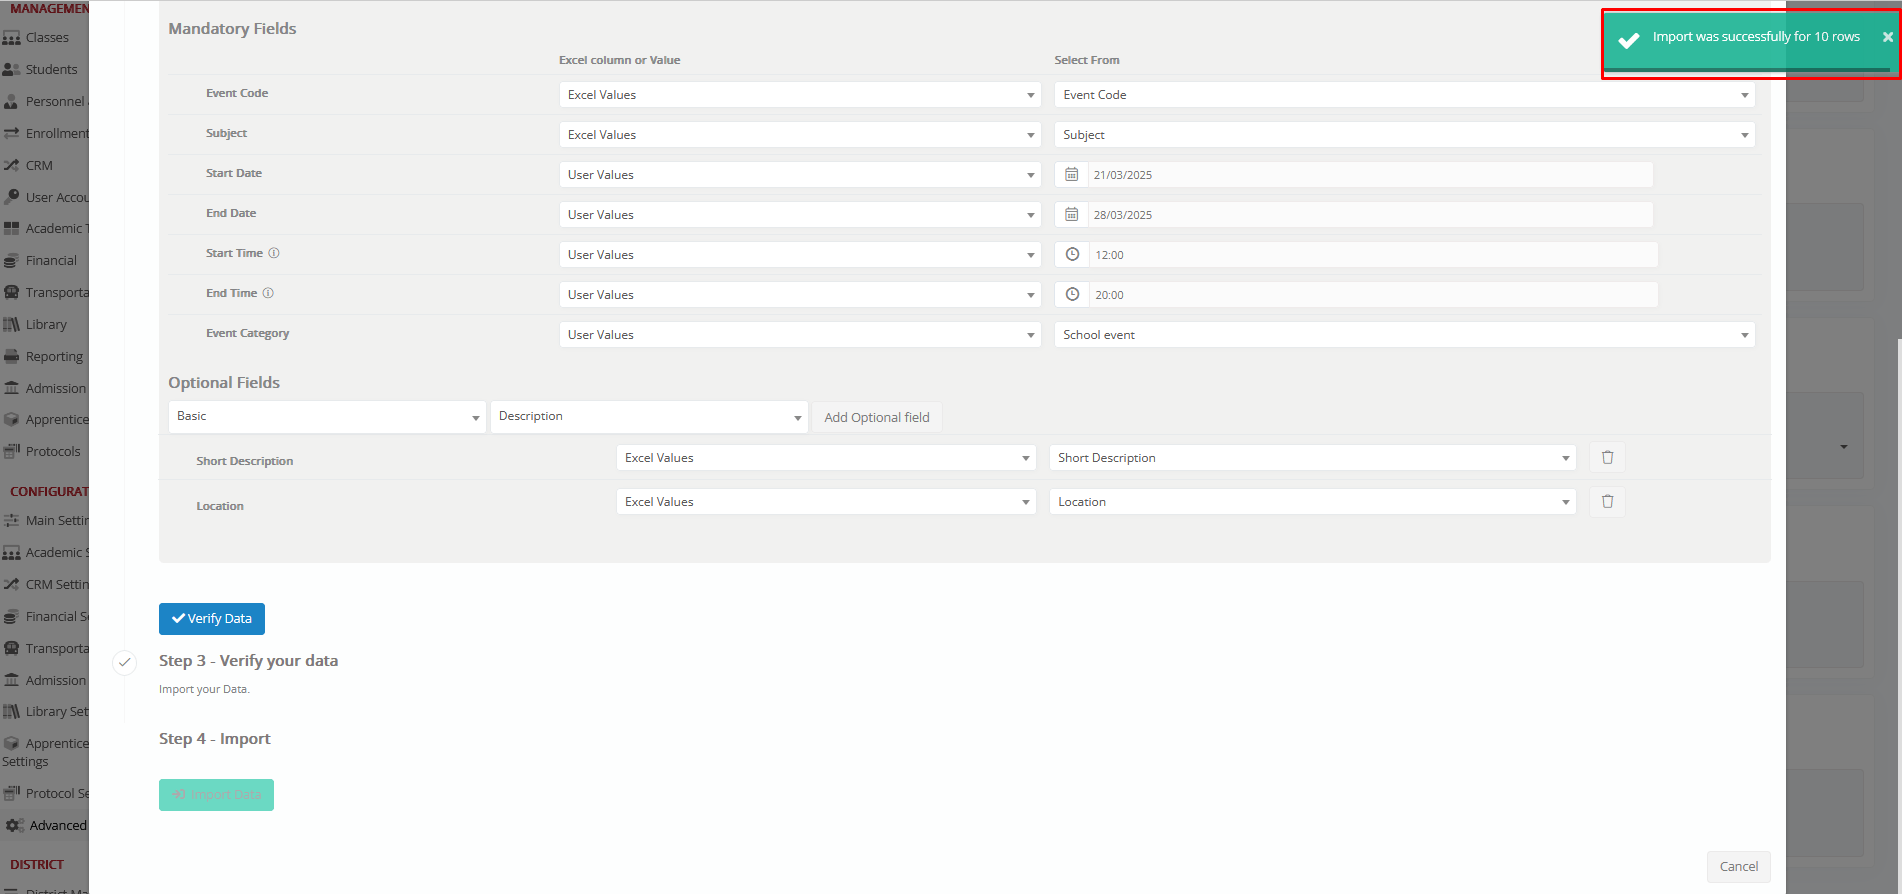
- Click the Import Data button to complete the process.
A confirmation message appears once the import is successful.
Handling Errors
If errors are detected (e.g., missing fields or incorrect column formatting), Classter highlights the corresponding fields in red for correction.
Ensure that:
- All fields contain valid values.
- Fields that refer to entities or dropdown lists, such as Event Category, _Students_, _Teachers_, etc., are in exact match with the relevant existing data in the system.
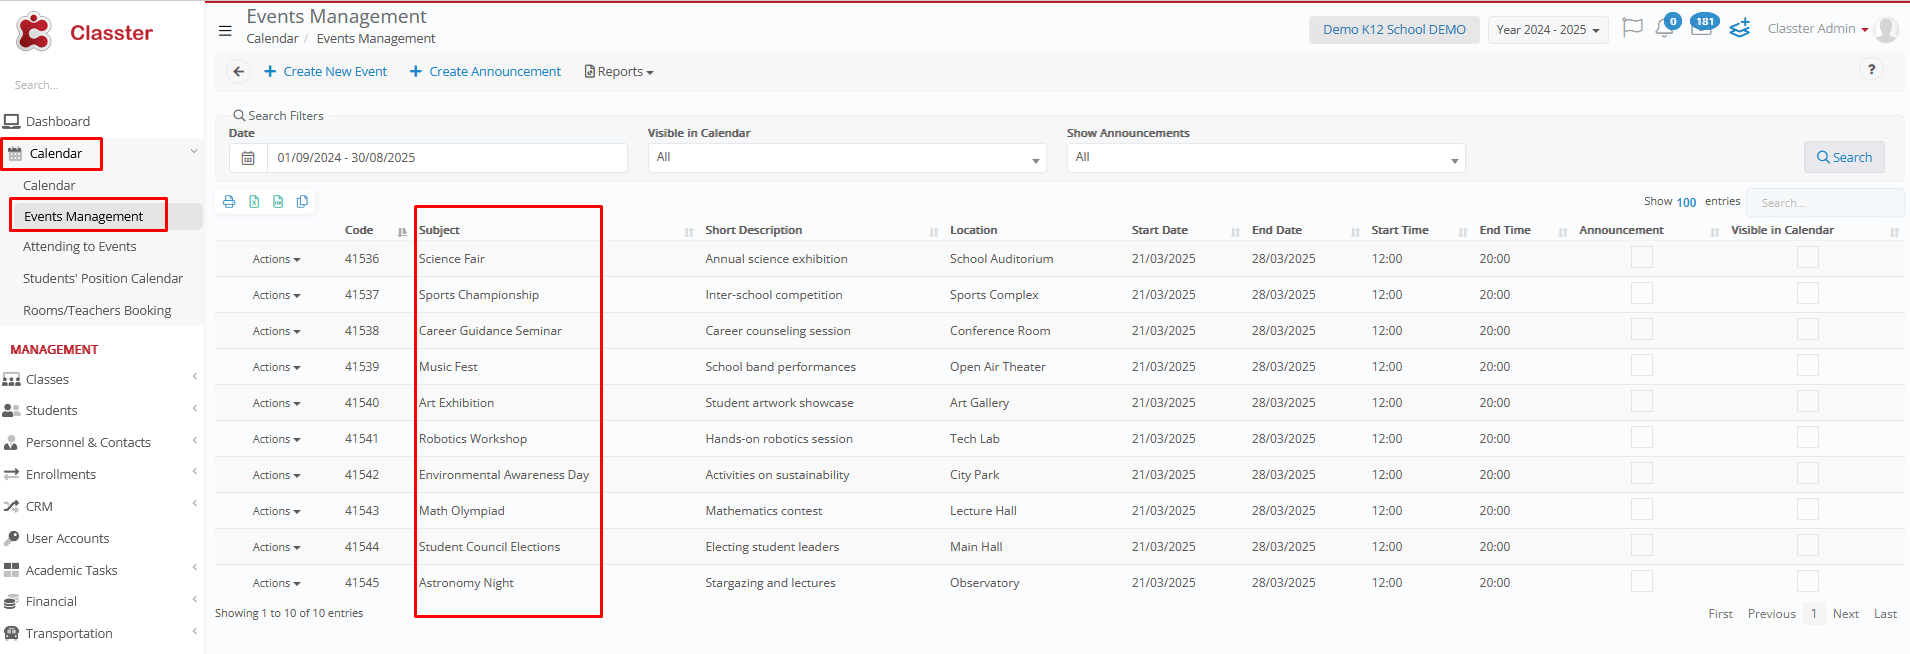
View Imported Events
Once you successfully import the data, the result is updated immediately. To verify imported events:
- Navigate to Calendar > Event Management.
- Use filters to search for newly imported events.
Summary
By following these steps, institutions can efficiently import event records into Classter. Properly formatted data, correct field mapping, and validation checks ensure an accurate and error-free import process.