Introduction
The Open Payments (Payment Link) feature allows students/parents and authorized payers to make payments directly, without needing to log into Classter, using pre-generated links. All related settings are organized under the dedicated Open Payments section within e-Payments, making configuration and management simple.
Payments can be made via:
- Global link – Payer identifies students using their Student Code or Payment Barcode.
- Student-specific link – Direct access to a student’s payment page.
Note: Enabled payment gateways – Only gateways provided in the settings are available for open payments.
Configuration
Basic Settings
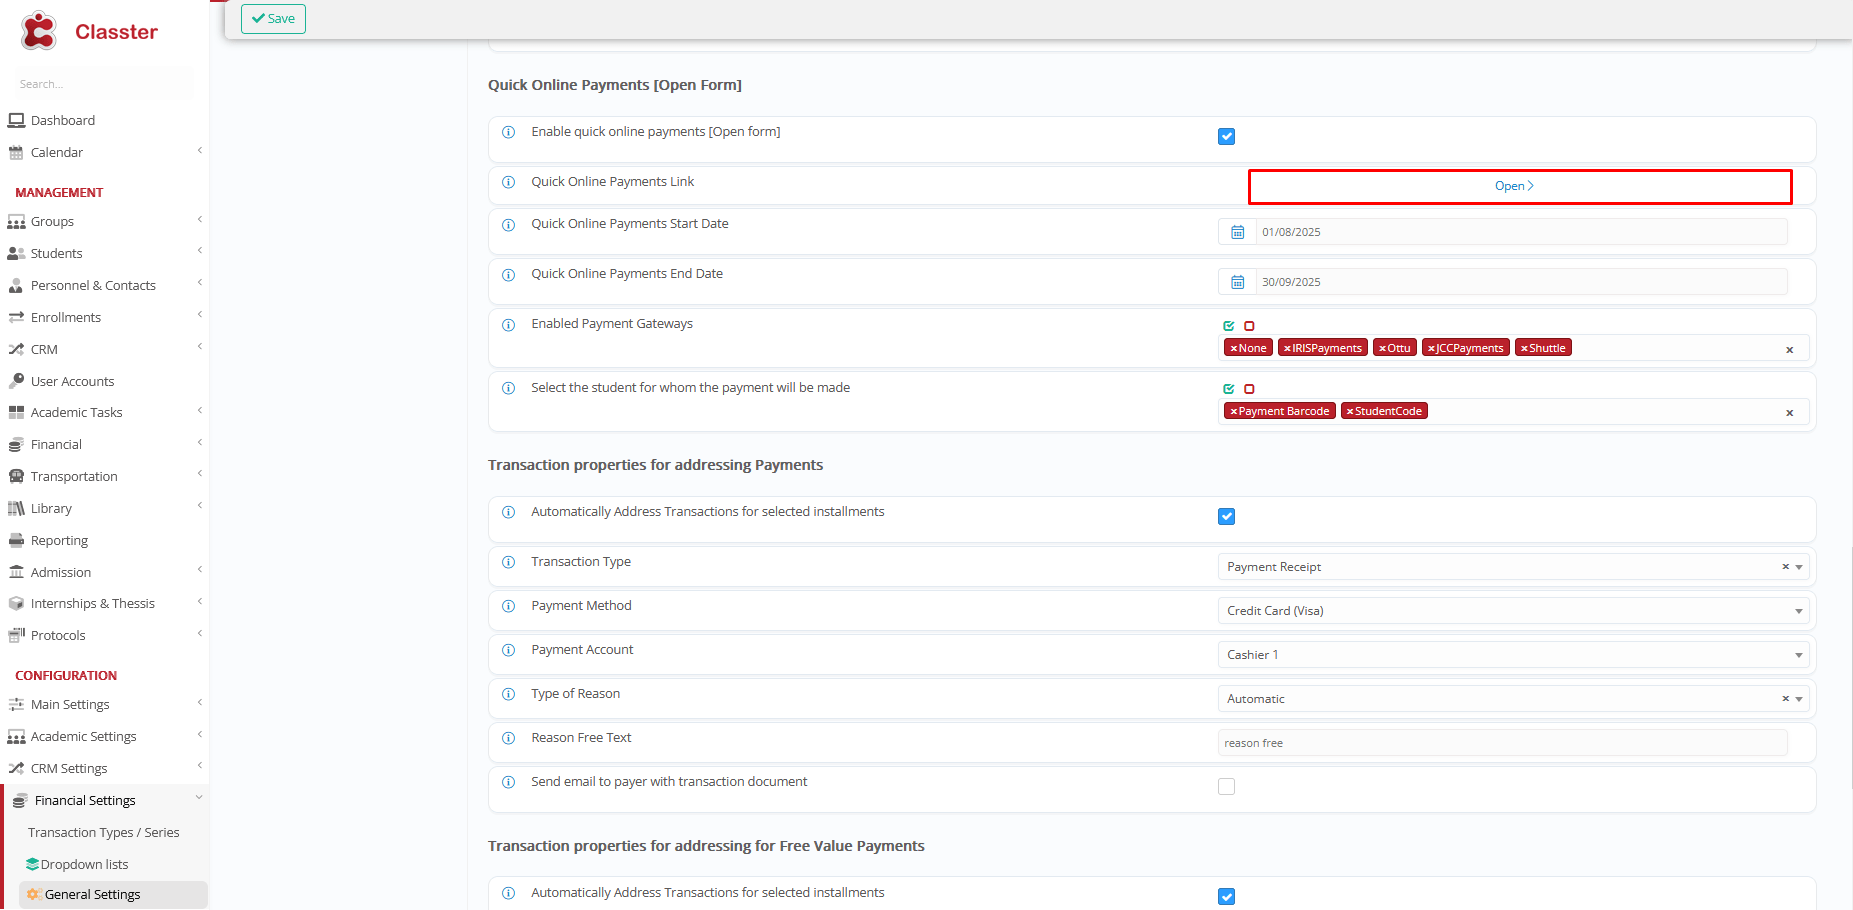
The following settings must be enabled and configured under the Quick Online Payments section:
Navigate to Configuration > Financial Settings > e-Payments > Quick Online Payments

- Enable Quick Online Payments [Open Form]
Activates the functionality for your institution. Classter can generate:- A global payment link for the institution (“Quick Online Payments Link” in settings)

-
- A unique link for each student

- Quick Online Payments Start Date
Set the start date when Quick Online Payments will be available. Payments are only processed after this date. - Quick Online Payments End Date
Set the end date when Quick Online Payments will no longer be available. Payments stop after this date. - Enabled Payment Gateways
Select which payment gateways will be available (e.g., IRIS Payments, Ottu, JCC Payments, Shuttle).
Global & Dedicated Link settings
There are two options to proceed with payment links:
- Global Quick Payments Link
With an Institute payment link (provided in the settings), which can be shared publicly with payers, and where the payer submits the student code or payment barcode during payment.
- Dedicated Quick Payments Link (Student-specific Link)
With a student-based link, generated from the Student Card > Financial section and provided individually for each student.
The following setting (“Select the student for whom the payment will be made”) options refer to the above:

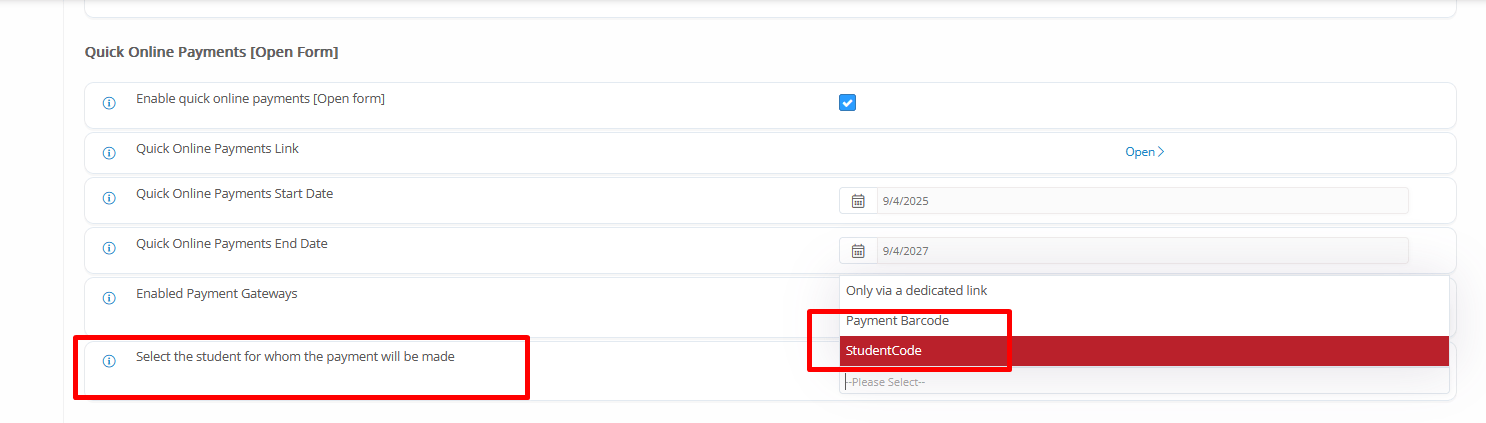
“Select the student for whom the payment will be made” options:
- Only via dedicated link
Feature works only with the individual/student-based payment link. Generated from the Student Card > Financial
- Payment Barcode & Student Code
Feature works with the company-level global payment link that can be shared with payers and the payer enters the relevant code upon payment.
! The Dedicated Link takes priority over Student Code and Barcode if all are enabled. Therefore, only the dedicated link will work.
Options summary:
|
Option |
Behavior |
|
Dedicated/Student-specific link |
Payer pays directly with an individual student link – Automatically identifies the student |
|
Student Code with Global link |
Payer enters the student’s Code using the Global Payment Link. |
|
Student Barcode with Global link |
Payer enters the student’s Barcode using the Global Payment Link. |
Tip: Choose the method based on your institution’s preferred workflow.
Important pre-requisite
Specific payment gateways are available for Quick Online Payments.
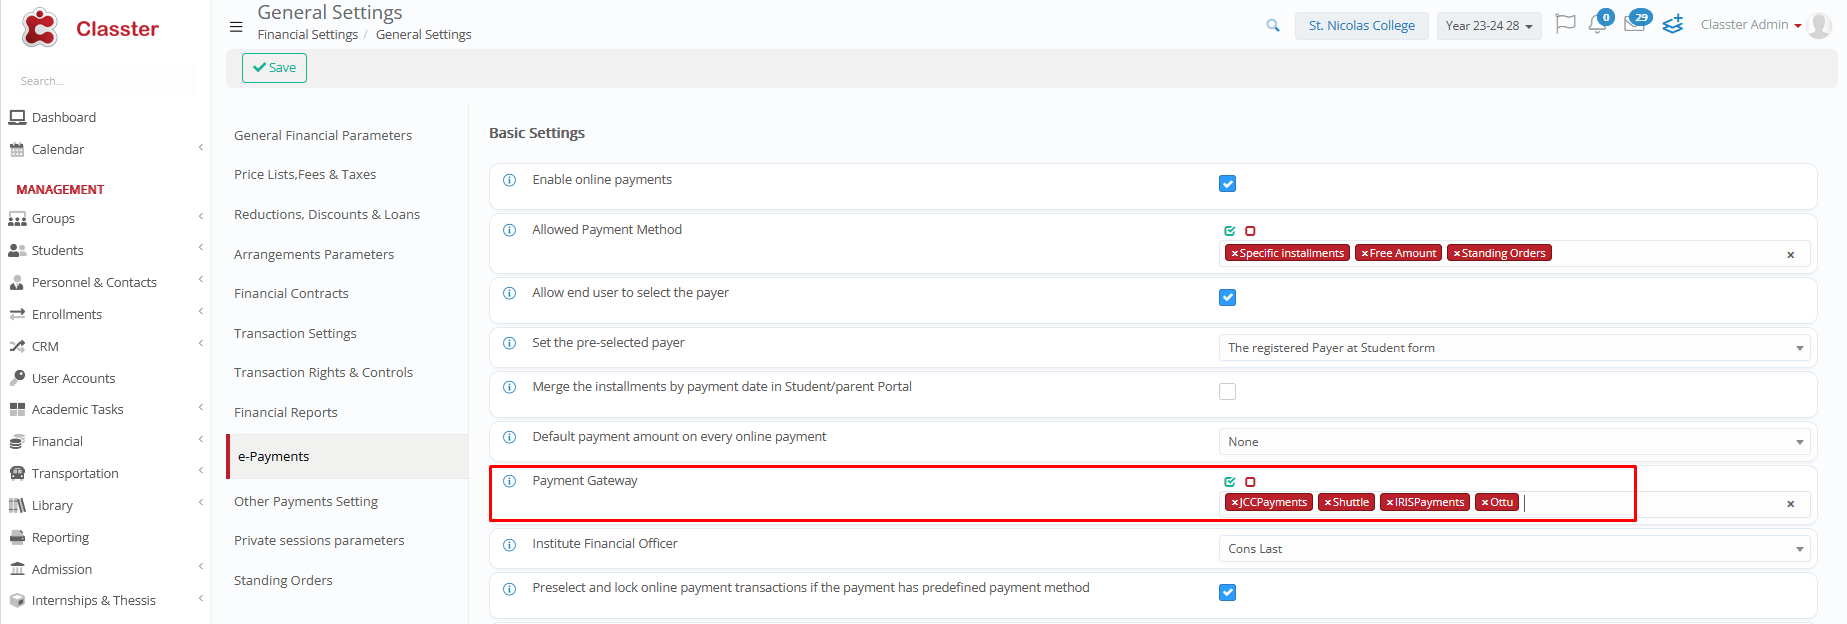
- The gateway(s) chosen at Quick Payment Links (Open Form) must also be enabled at the Institution’s Advance Settings > Payment Gateways:
- Financial Settings > General Settings > e-Payments > Basic Settings
-
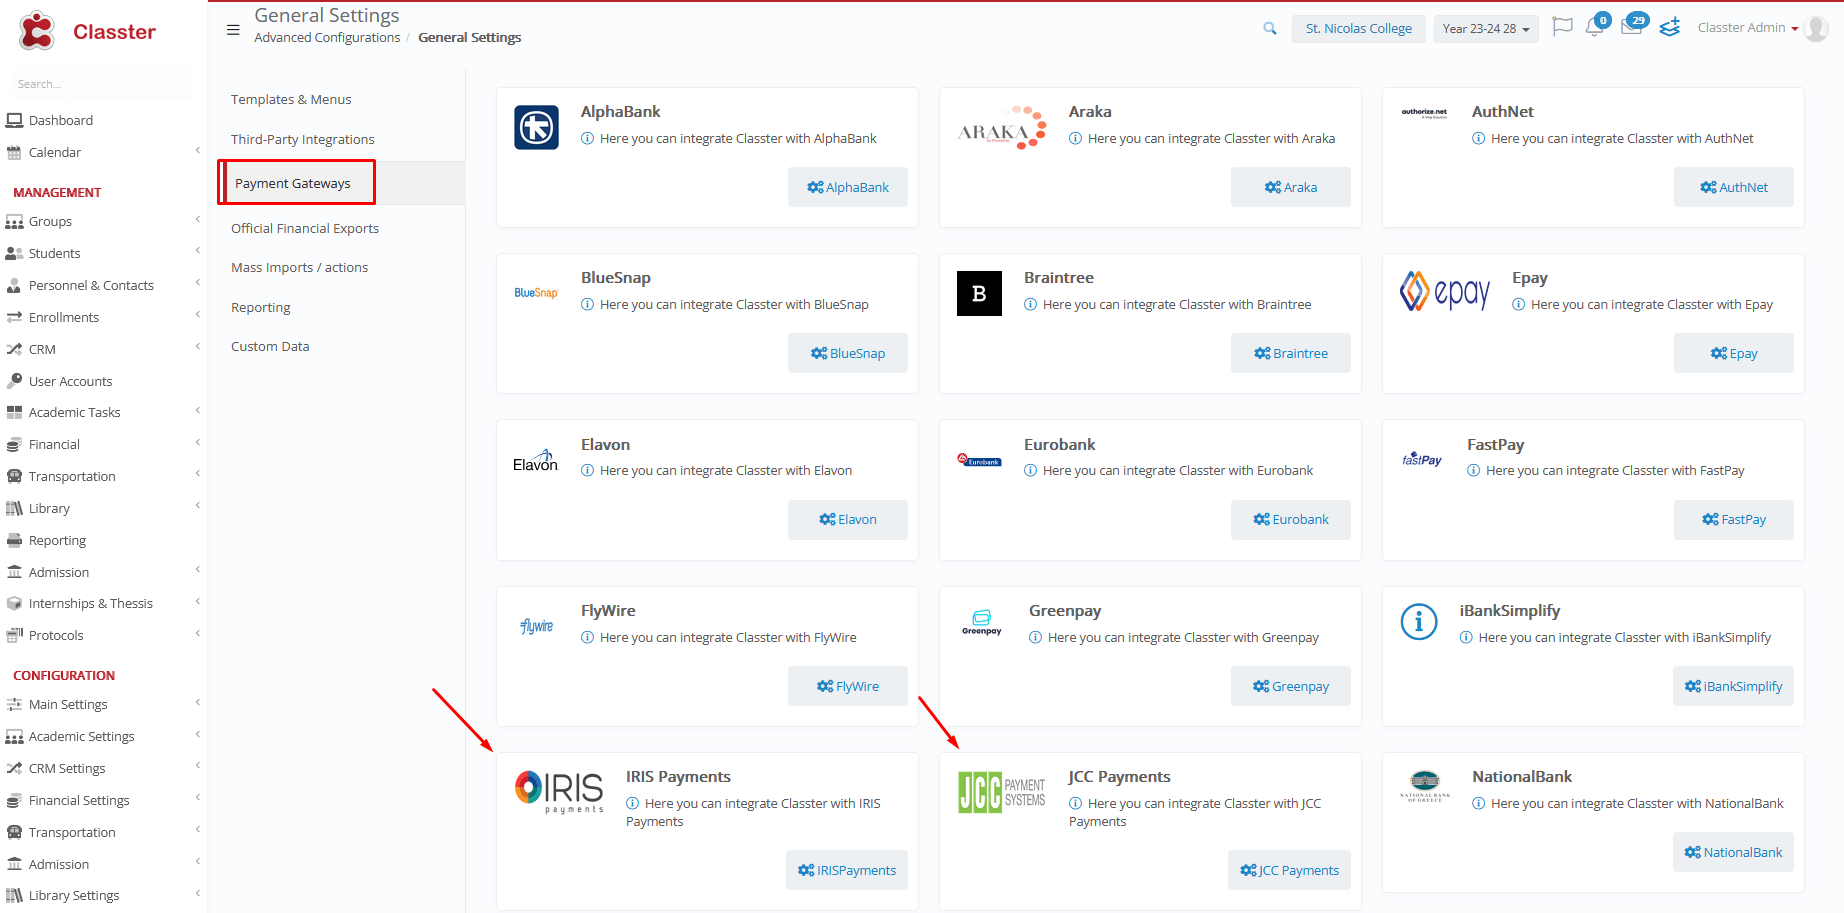
- Advanced Configurations > Payment Gateways > Select gateway > Enable & Configure
Important Note When Changing Settings
If a Quick Online Payments link was previously visited while certain options were disabled, the result is temporarily stored for 5 minutes.
This means:
- Recent changes may not appear immediately
- After 5 minutes, the link will use the updated settings
This temporary storage improves performance. Retrieving all options on every visit could slow down the site, and configuration changes are rare.
Dedicated Payment Link
When using the Dedicated Link, the link can be:
a) taken from the Student Card > Financial TAB
or
b) automatically sent to the payers, using the Notification Service
In details:
a)
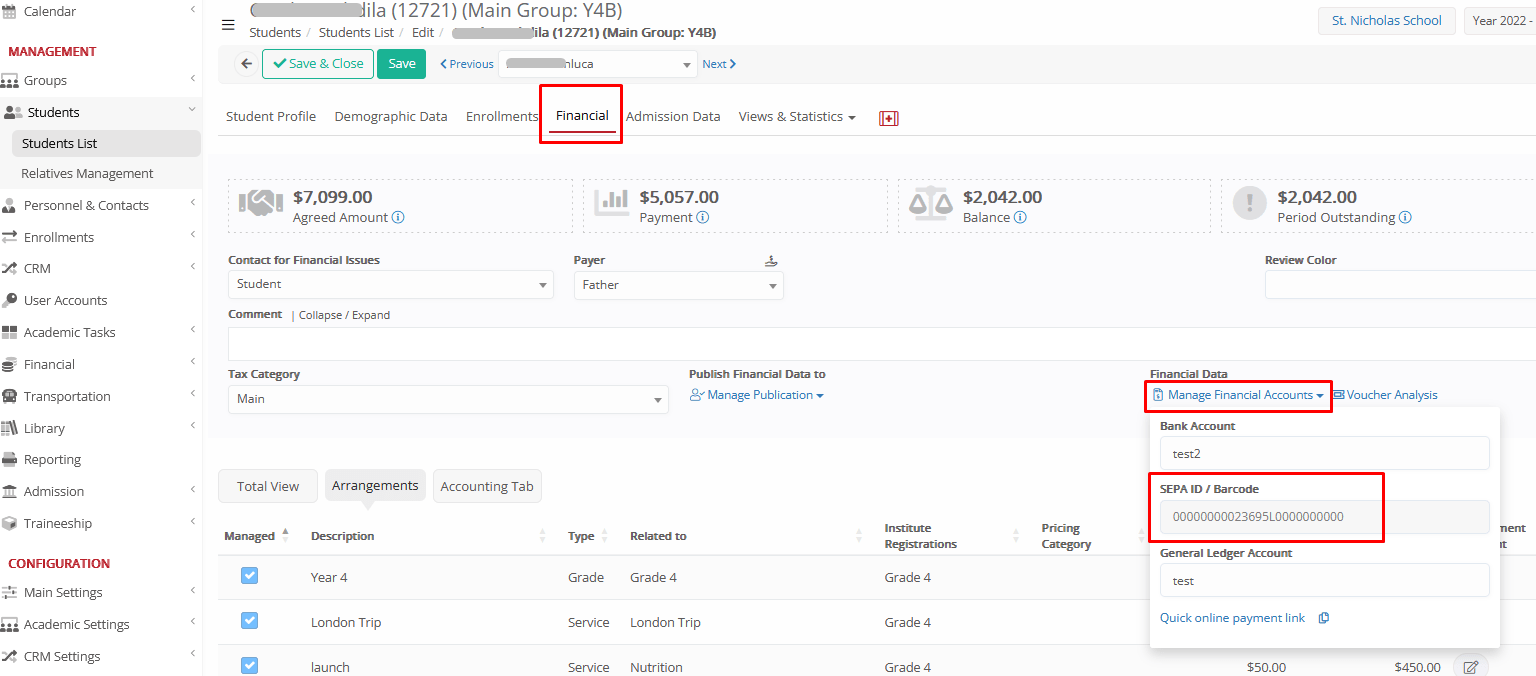
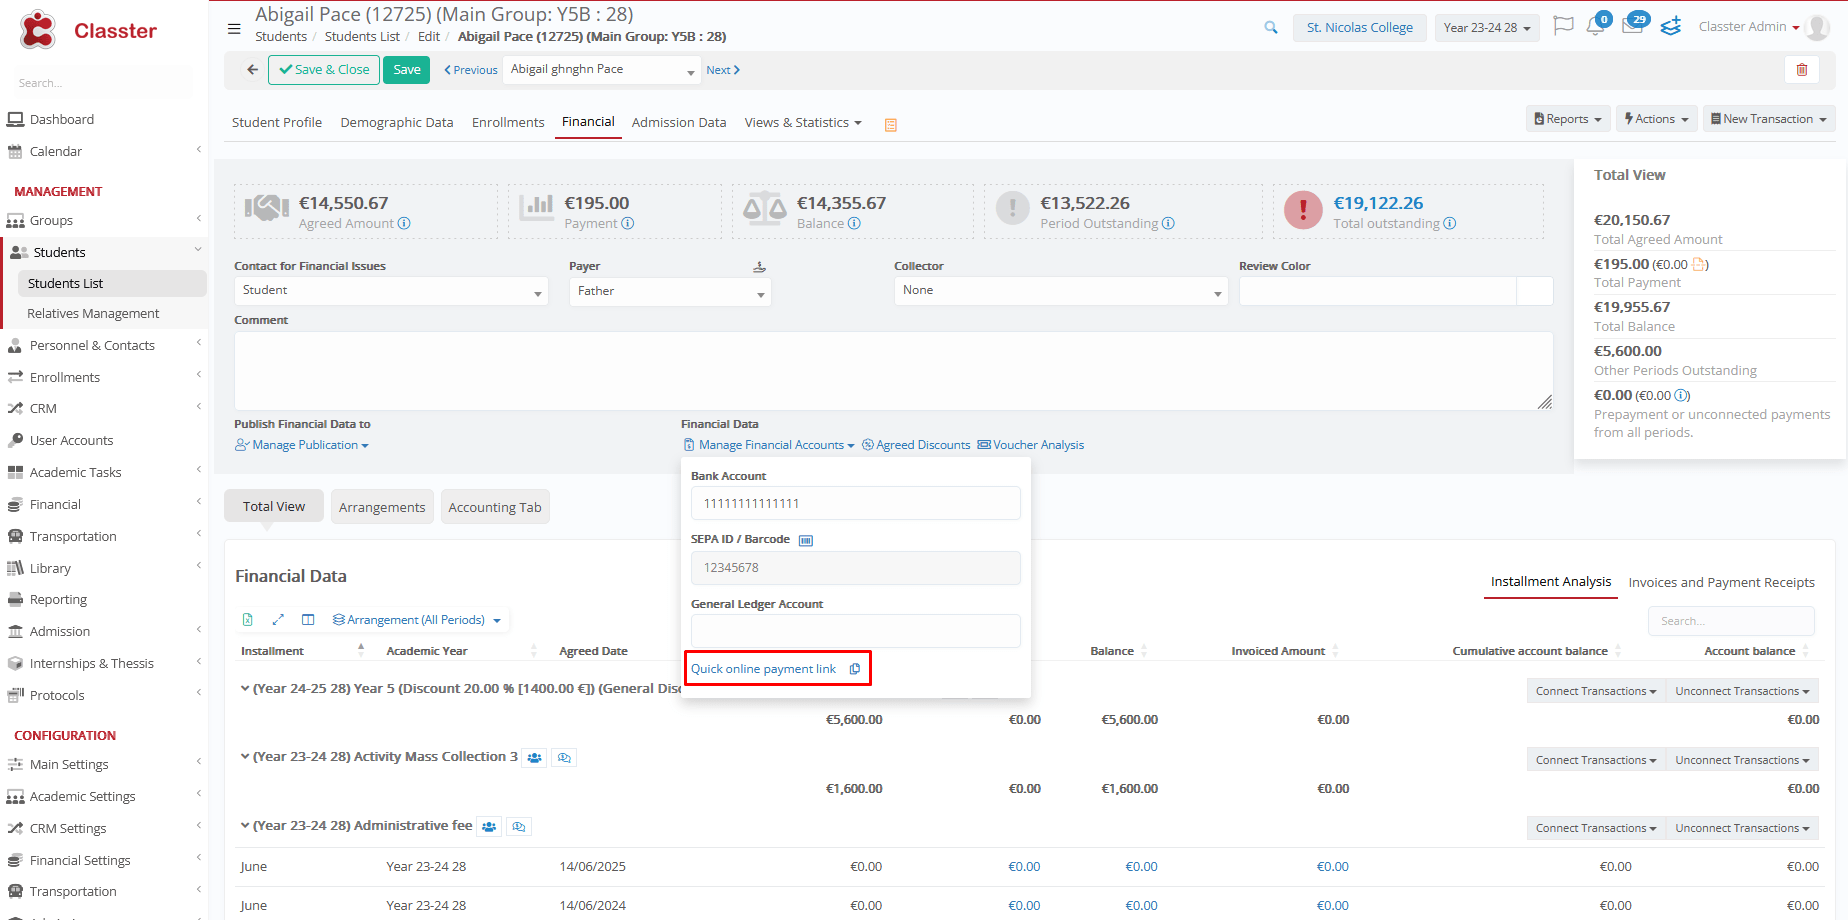
For the manual export, navigate to Student Form > Financial > Manage Financial Accounts if the Enable Quick Online Payments [Open Form] setting is enabled, you will see the below:

b)
For the automated e-mails, you must setup the Notification from the Advanced Configurations > Templates & Menus > Notification Service Configuration:
Create a notification service, with the supported types:
- General Financial Notification
- Delay Payment Notification
- Change Student Status Notification
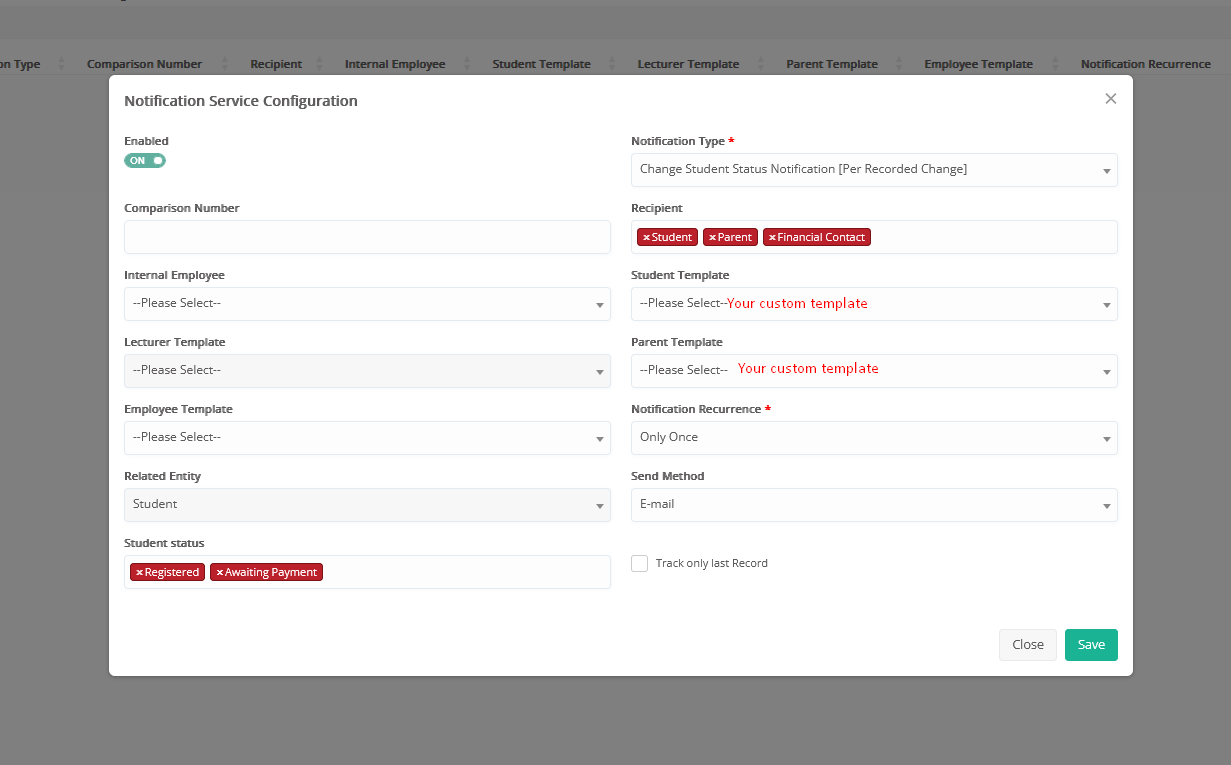
and use your own templates, which include the Dedicated Student Payment Link.
Create your templates from Advanced Configurations > Templates & Menus > Templates Editing

Priority:
- The Dedicated Link takes priority over Global Link using Student Code and Barcode if all are enabled. Therefore, only the dedicated link will work.
Global Payment Link
Global Payment Link is provided in the settings:
You must choose how users will identify the student for payment (Student Code or Barcode) at the following setting:
Provide the Global payment link and the Student Code or Payment Barcode to the payer.
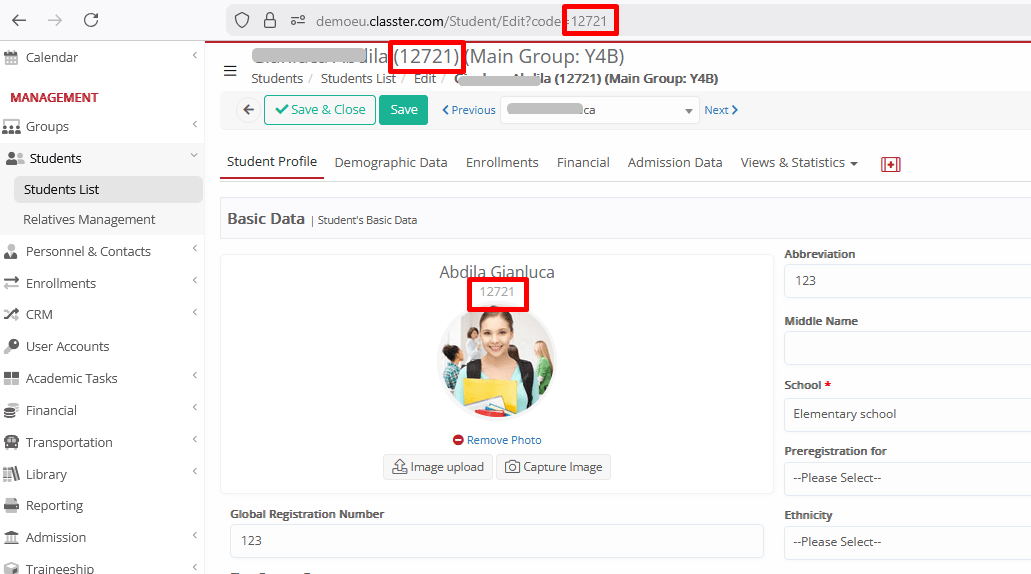
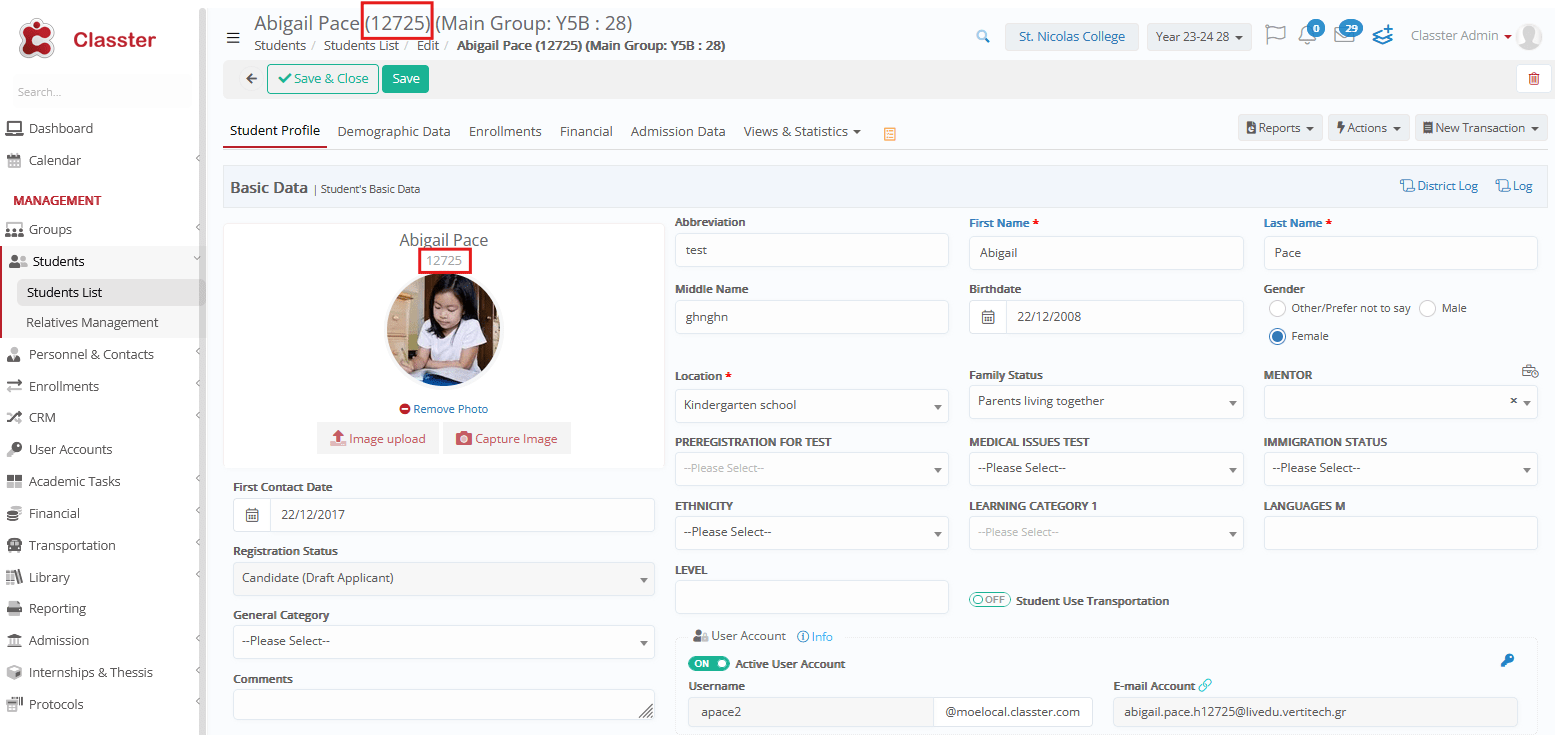
How to find the Student Code:
How to find the Student Payment Barcode:
Note: You can configure your settings to show student code at the Student Card. Navigate to Main settings > Basic Customization > Views & Forms > select Student Code on Show informational labels in Student form setting.
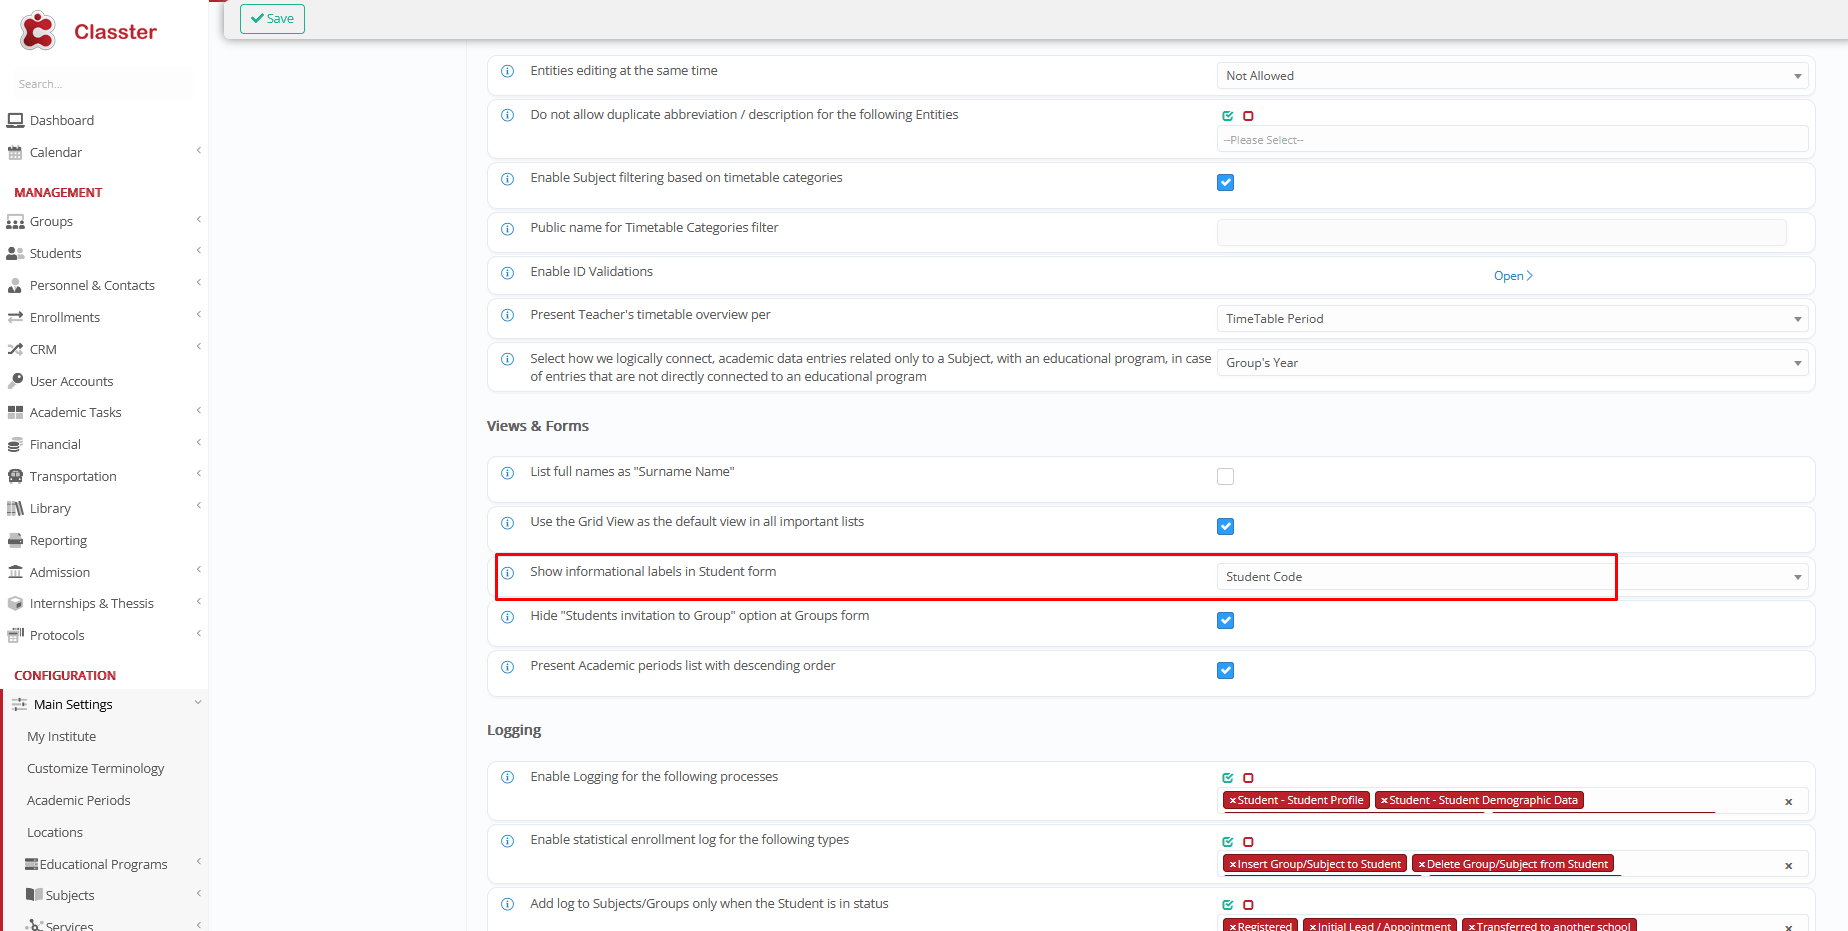
The Student code will be displayed in parentheses next to the student’s name (title of student form) or over the photograph in the student’s form.
Payment Step-by-Step
Using the Dedicated Student link, you will be redirected to the 2nd screen described below.
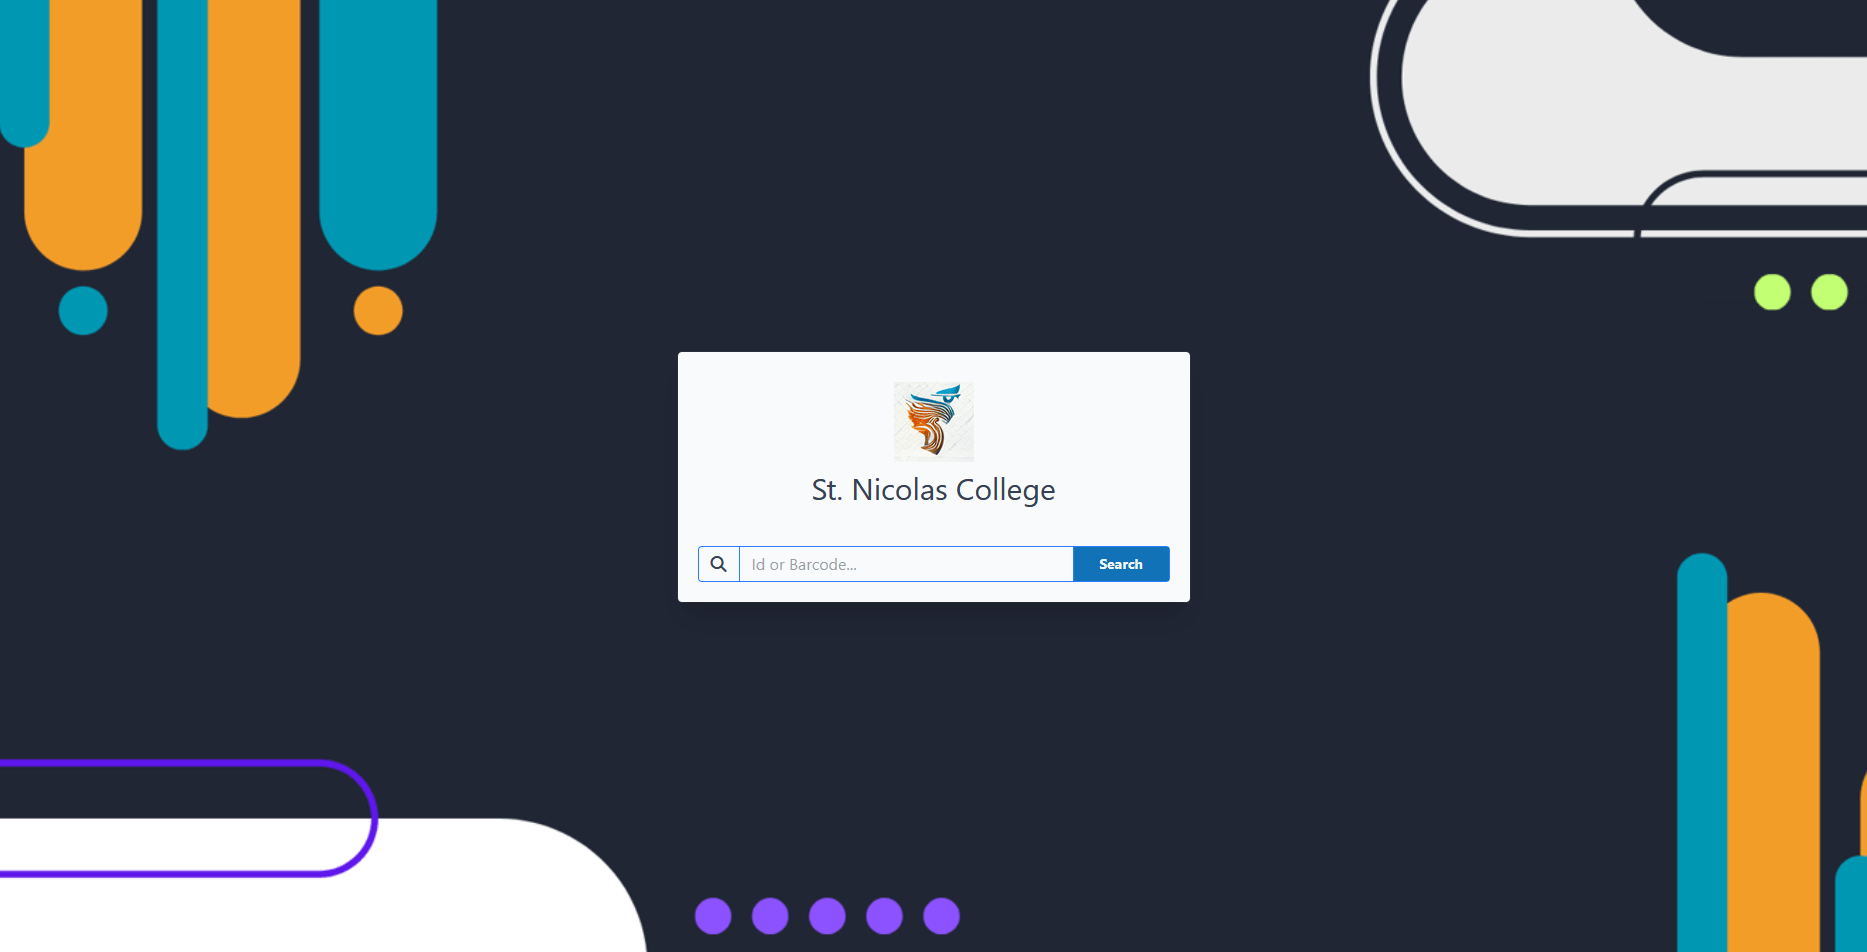
Using the payment Global link with Student Code/Barcode, the process starts as:
- Open the global URL.
- If Student Code/Barcode is selected, search using:
- Student Code
- Payment Barcode
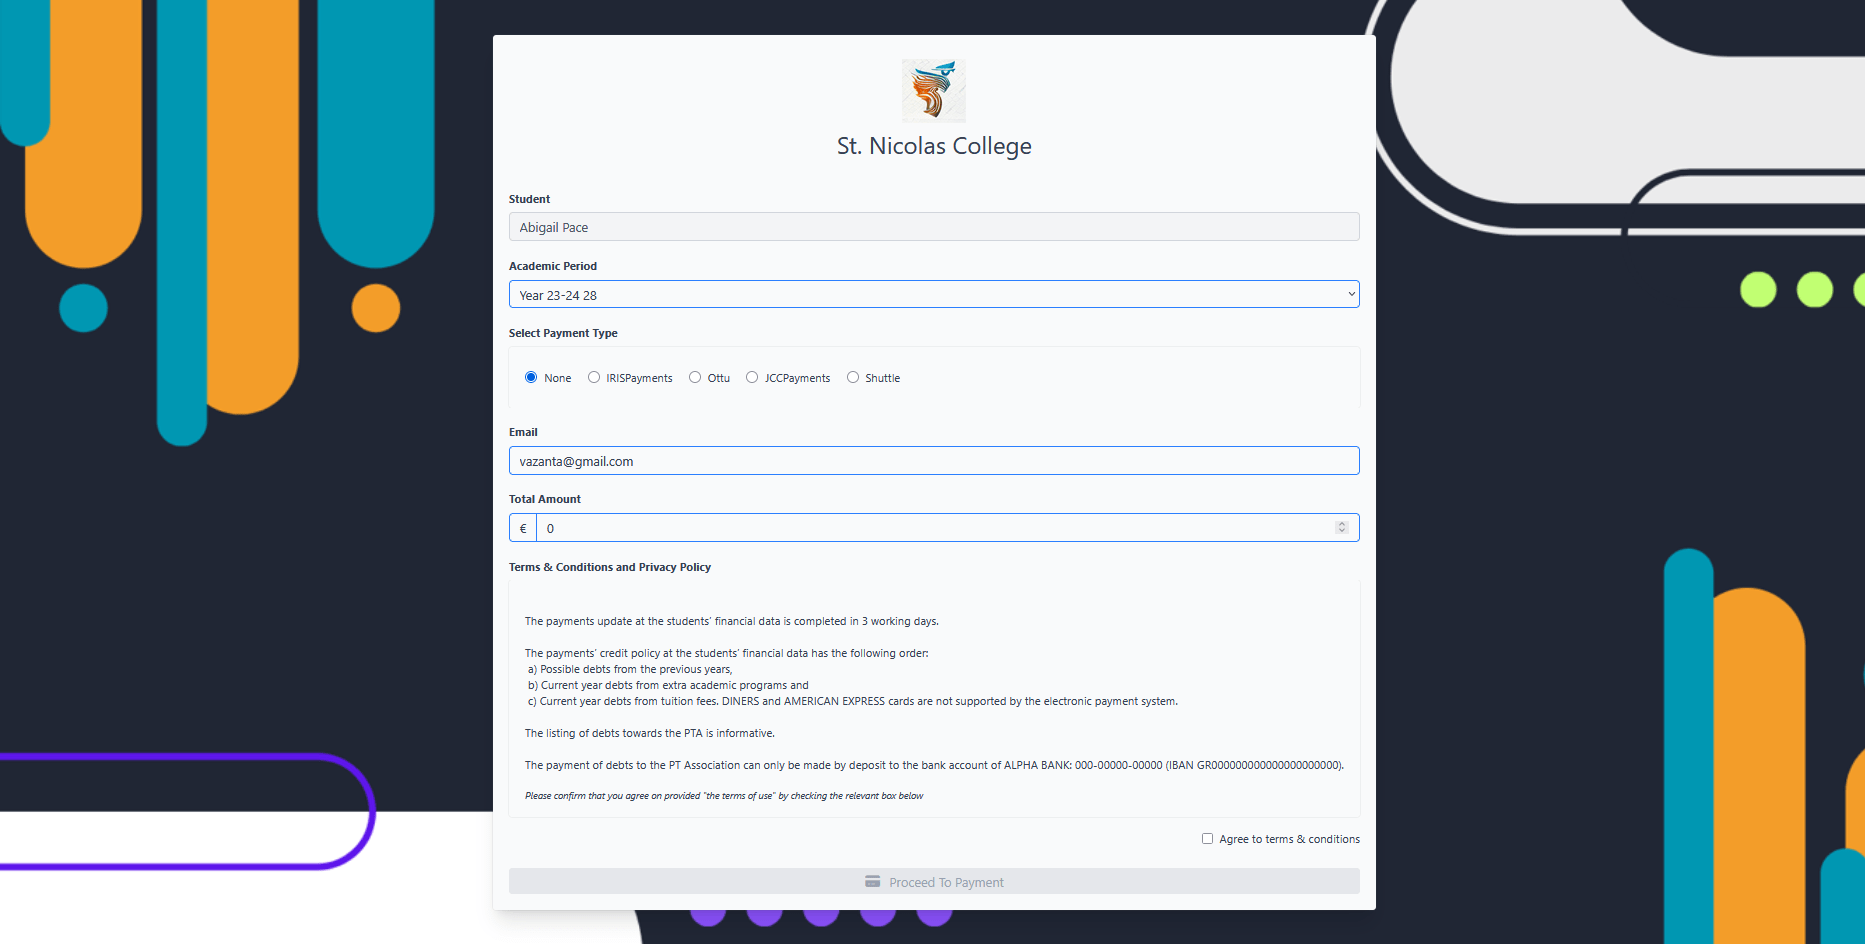
Fill in the fields
A popup will appear with the student’s basic information already pre-filled. The same popup opens if you click on the Dedicated Link (for the specific student only).
- Select the payment gateway.
- Enter the payment amount.
- Agree to the terms & conditions ☑.
Note: When multiple academic periods are available, an open arrangement with a credit balance exists
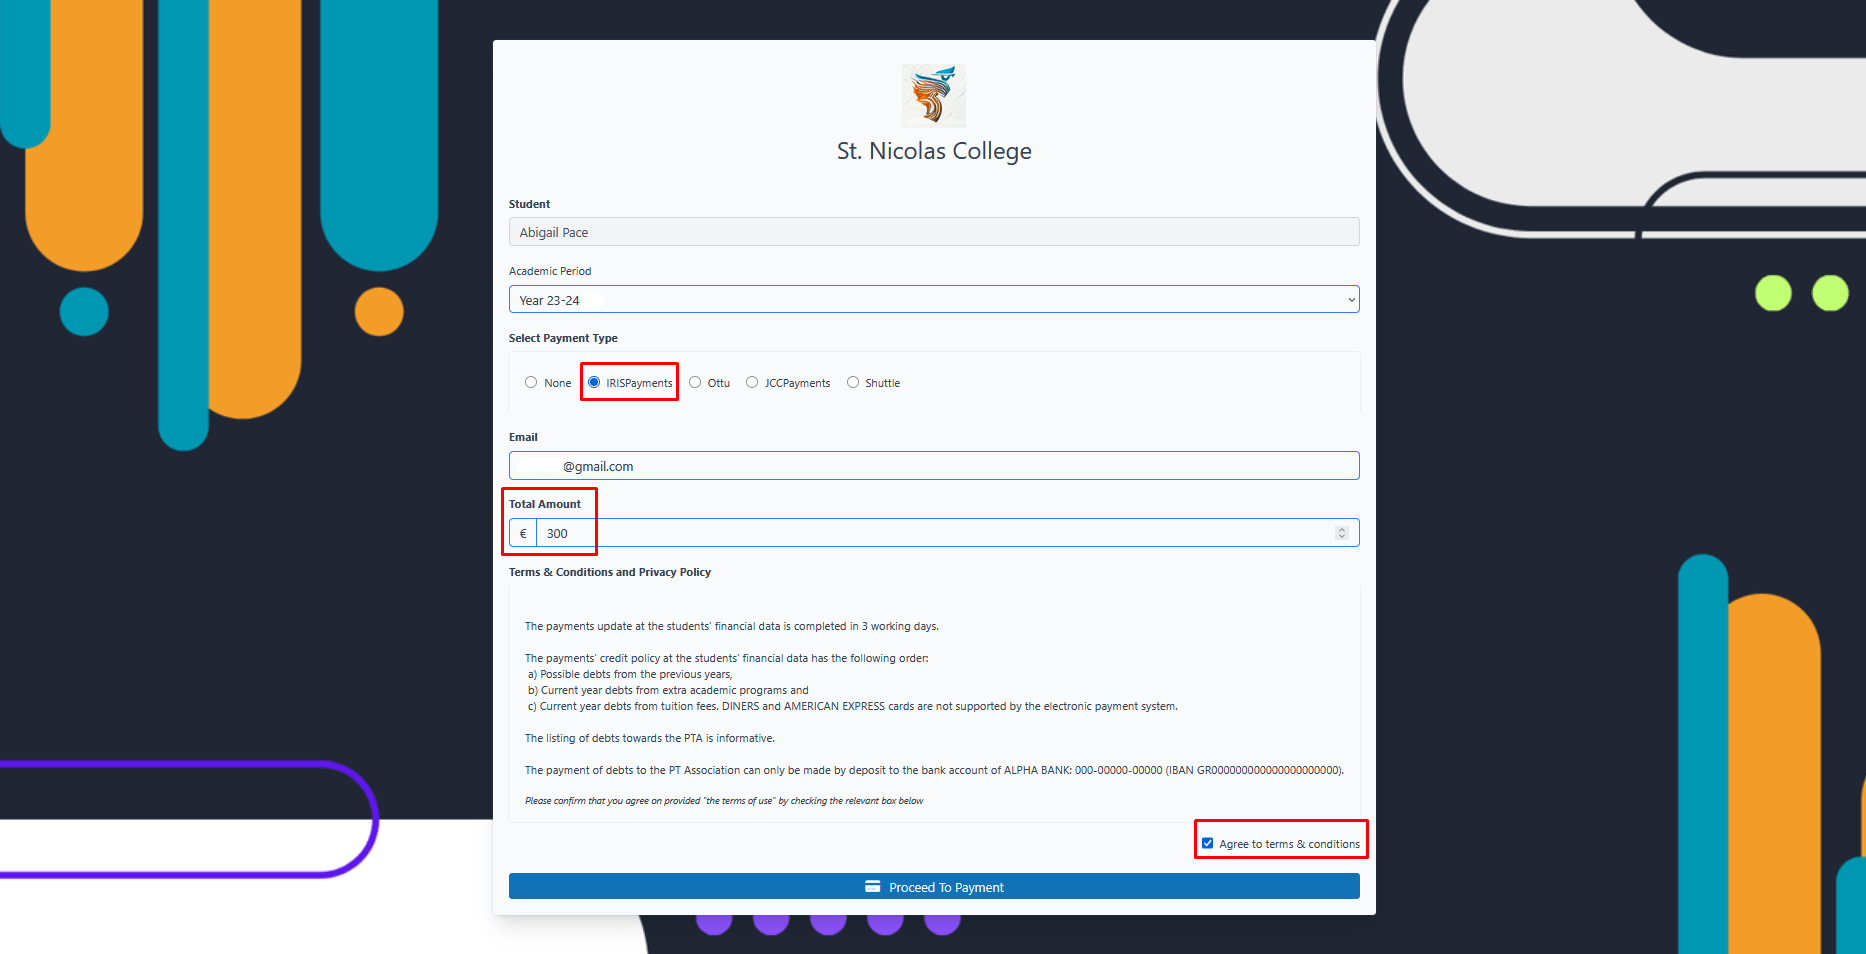
(This popup opens either by using the Dedicated Link or by entering the Student Code or Payment Barcode in the previous step.)
(Use the Dedicated Link to open the pre-filled student information popup.)
Payment Process
Based on the Payment Gateway you use:
1. You will be redirected to the payment page.
2. Enter your card details and complete the payment.
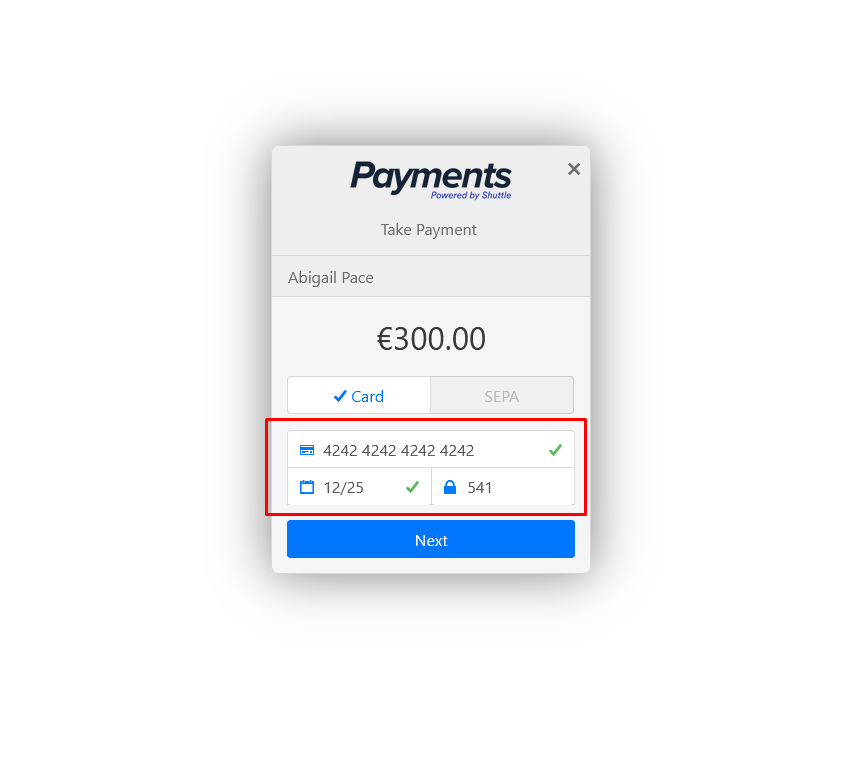
3. Follow any verification prompts to confirm the transaction.
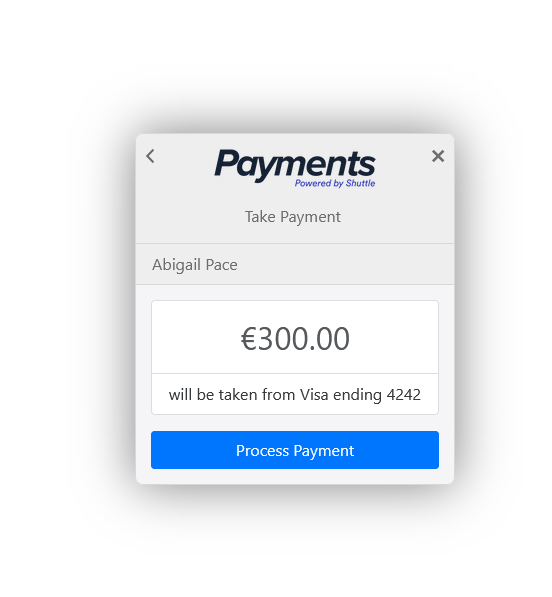
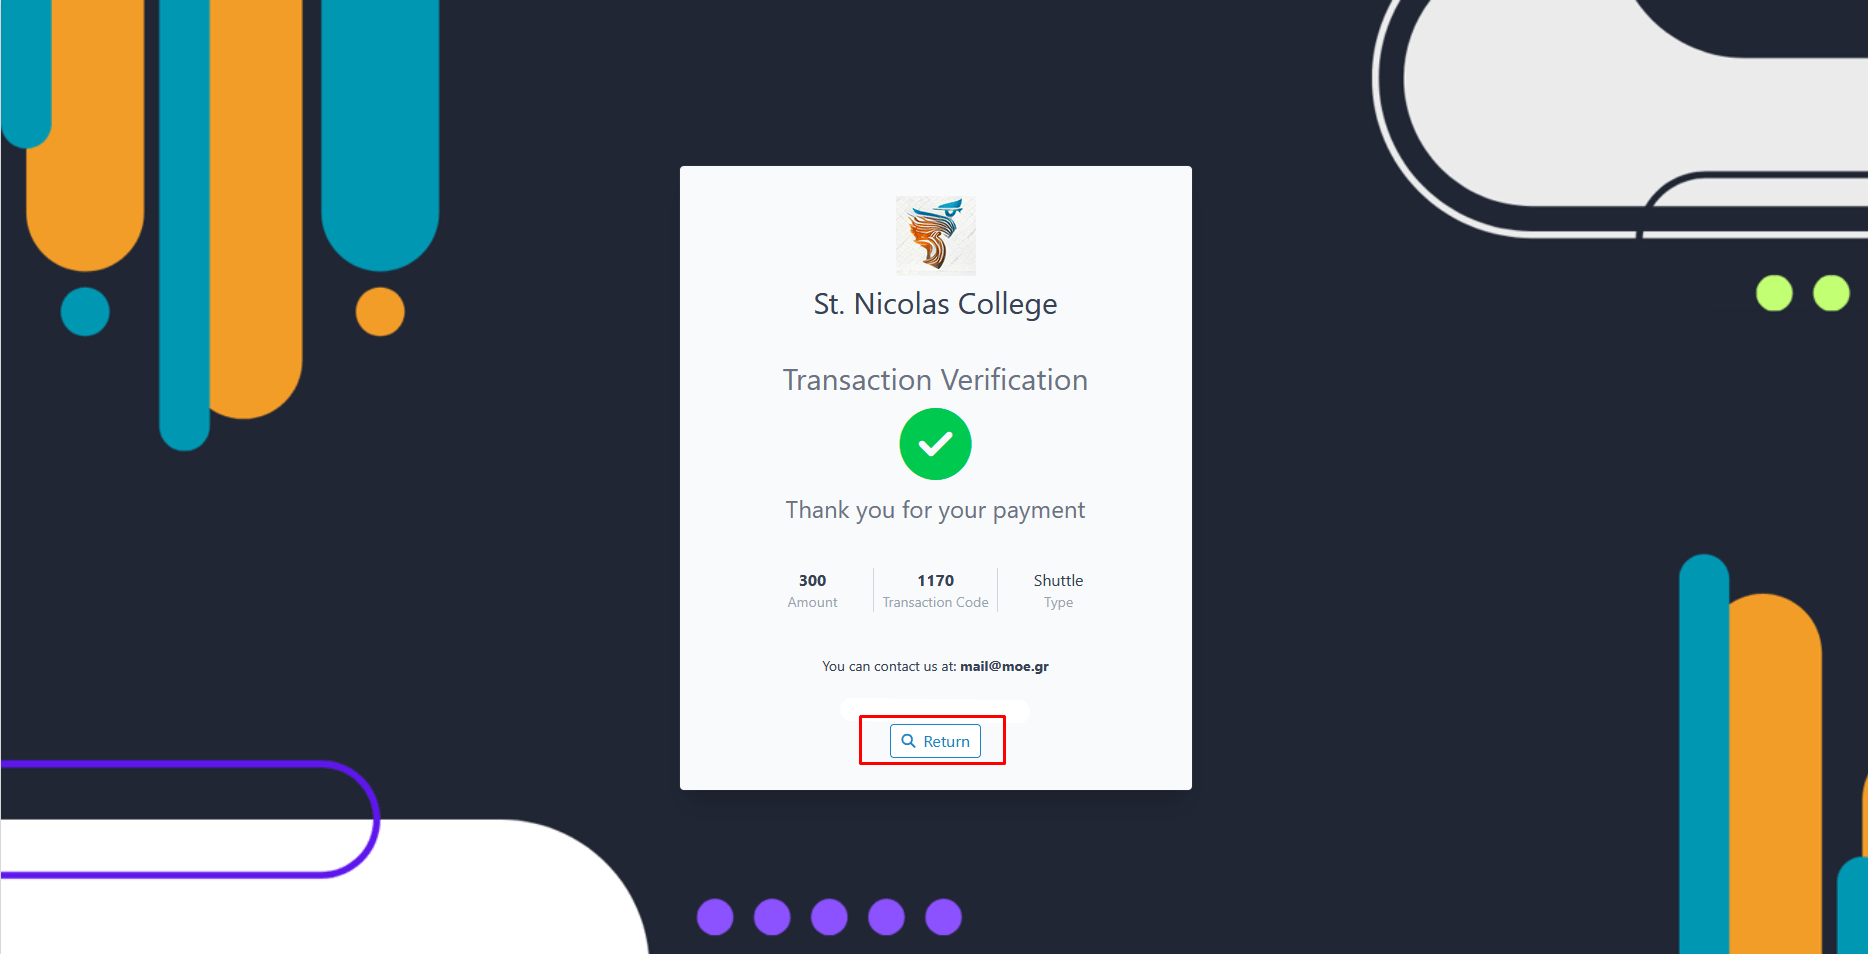
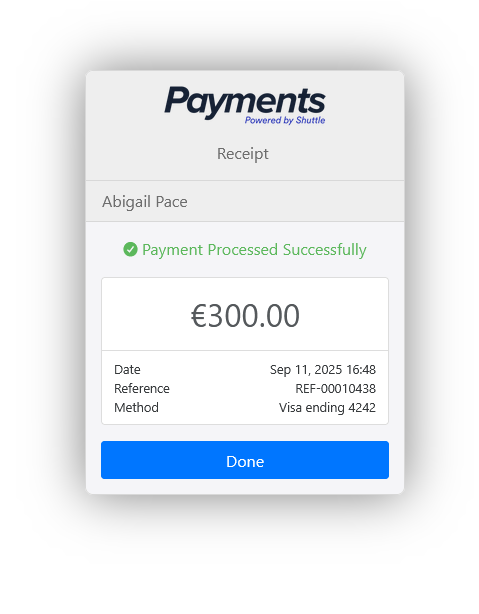
A confirmation window will appear once the payment is successfully completed.
Return to Online Payment Form
After completing a payment, the “Return” button brings the user back to the open payments form