

To streamline the management of official documents, Classter allows institutions to seamlessly combine the Protocols and Signatures modules. This integration automatically archives every signed document, assigns a unique protocol number for traceability, and securely stores it under the correct file category—enhancing compliance, auditability, and operational efficiency.
In this step-by-step guide, we will first explain how to configure and then connect both modules, so that your institution can seamlessly support digital signing workflows.
Configuration Steps
Enable the Module
Navigate to: Configuration > Protocol Settings > Protocol Settings
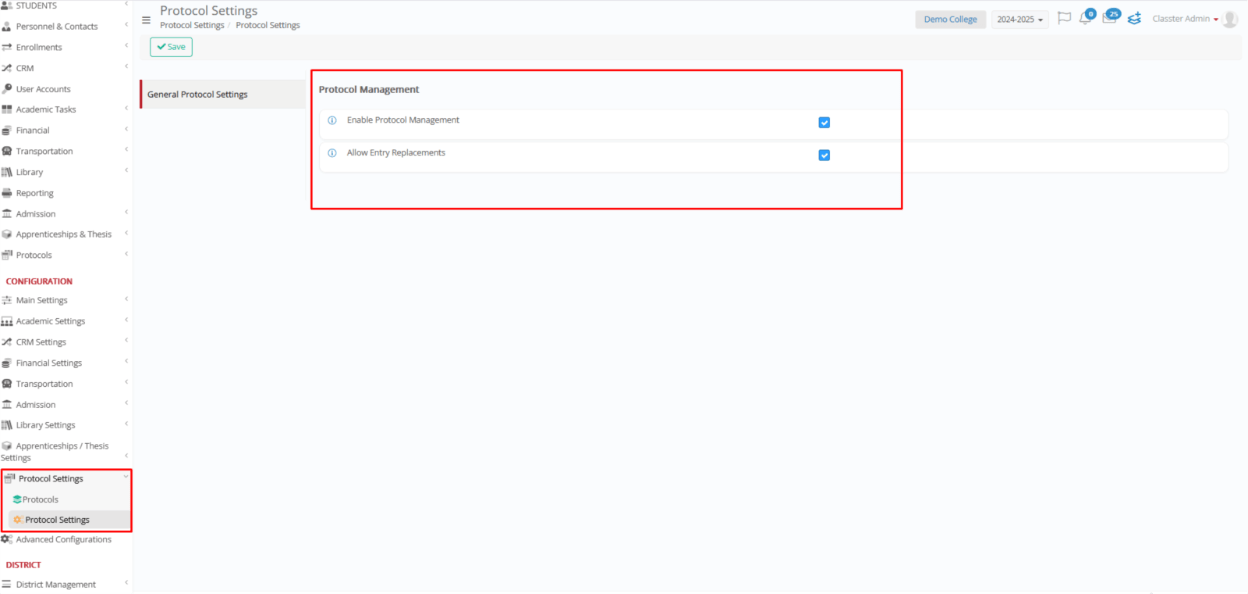
To begin with, activate the following settings:
- Enable Protocol Management: Turns on the protocol module.
- Allow Entry Replacements: (Optional) Enables full replacement of existing protocol entries without retaining history. Use with caution.
Create a New Protocol
Navigate to:
Configuration > Protocol Settings > Protocol > Create New> And fill in the following fields:
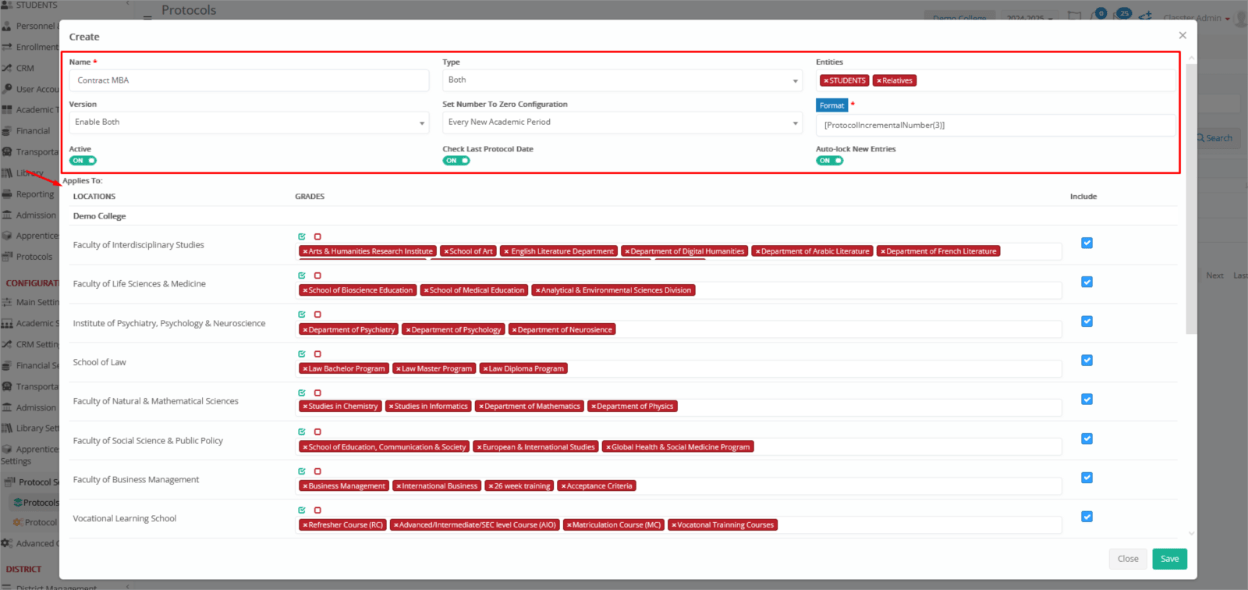
- Name: Initially, enter a meaningful title for the protocol (e.g., Incoming Official Letters, Outgoing Contracts).
- Type: Define the direction of the protocol:
- Incoming: For received documents
- Outgoing: For sent documents
- Both: Covers both incoming and outgoing traffic
- Entities: Select the applicable entities this protocol will be associated with (e.g., Students, Relatives, Employees, Suppliers, Groups, Contracts).
- Version: Define how the system will handle protocol updates:
- Disabled: No version tracking
- Add Document Appendix: Allows supplemental files
- Add New Versions: Enables version history
- Enable Both: Allows both appendices and versioning
- Set Number to Zero: Determine when the protocol numbering should reset:
- Never: Continuous numbering
- Each Academic Year: Resets every academic year
- Each Calendar Year: Resets every calendar year
- Each Month: Resets monthly
- Format: Specify the structure for the protocol number (e.g., YY/0001 or PREFIX/YYYY-###).

-
- Type (Numbering Base): Choose how the protocol number is constructed:
- Protocol Incremental Number: Sequential numbering only
- Creation Year: Prefixes based on year (e.g., 2025/001)
- Creation Date: Full date included in format (e.g., 2025-06-16/001)
- Creation Month: Year and month included (e.g., 2025-06/001)
- Digits: Set the number of digits in the incremental part of the protocol number (e.g., 3 = 001, 4 = 0001).
- Type (Numbering Base): Choose how the protocol number is constructed:
- Active: Toggle to enable or disable this protocol configuration.
- Check Last Protocol Date: If enabled, ensures new entries are registered after the most recent protocol date.
- Auto-lock New Entries: If enabled, newly created entries will be locked automatically to prevent editing.
- Applies to: Select the applicable Locations and Grades that this protocol will be available for (multi-select field).
Once saved, this protocol can be linked to reports and file categories to support automated document archiving.
Create an Files Category
To make use of protocols in a meaningful and organized way, you must define one or more Files Categories. These categories help group protocol documents based on their type or purpose and are essential for linking documents and reports to the appropriate protocol settings.
Navigate to: Configuration > Main Settings > Dropdown Lists
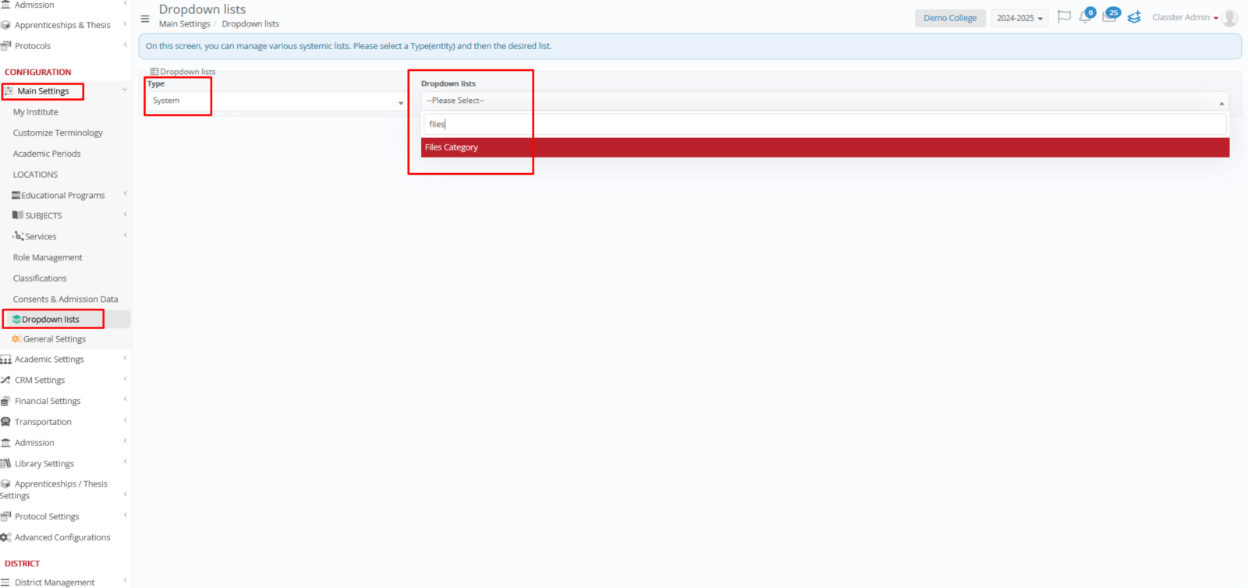
- Set Type: System & Select the list: Files Category
- Click Add New and define:
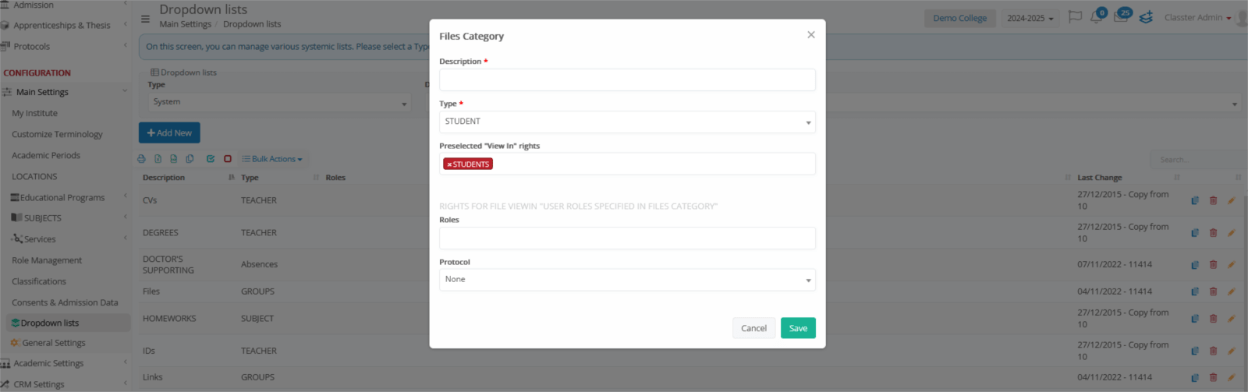
- Description: Enter the name of the file category.
- Type: Select the related entity type. Options include: Students, Relatives, Employees, Suppliers, Groups, Contracts, etc.
- Preselected “View In” Rights: Specify which user roles can view documents in this category. These rights are managed via the “USER ROLES SPECIFIED IN FILES CATEGORY” dropdown.
Rights for File View In “User roles specified in files category”
- Roles: This field appears under the ‘USER ROLES SPECIFIED IN FILES CATEGORY’ section. Choose which user roles are allowed to view this file category based on the assigned rights.
- Protocol: Link this file category to the appropriate protocol already created in the “Create a New Protocol” step above.
Where the Connections Happens
Link Reports to Protocols
To automatically archive documents created from reports:
Navigate to: Advanced Configurations > General Settings > Reporting > Report Designer
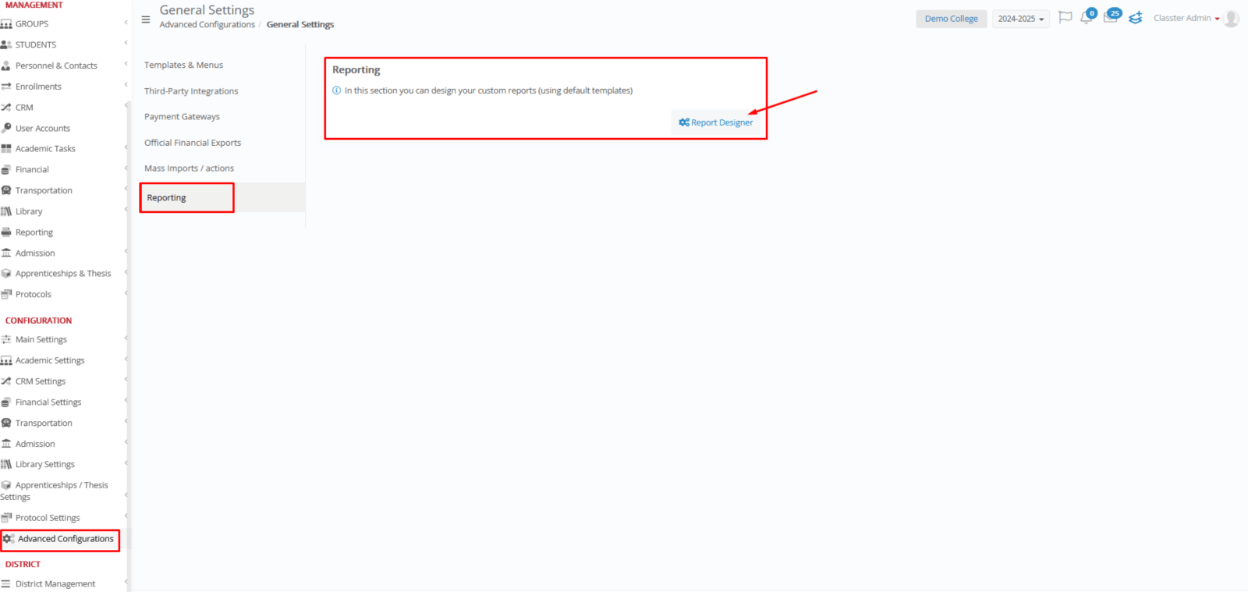
- Find the target report
- Use: Action > Edit Properties > Protocol
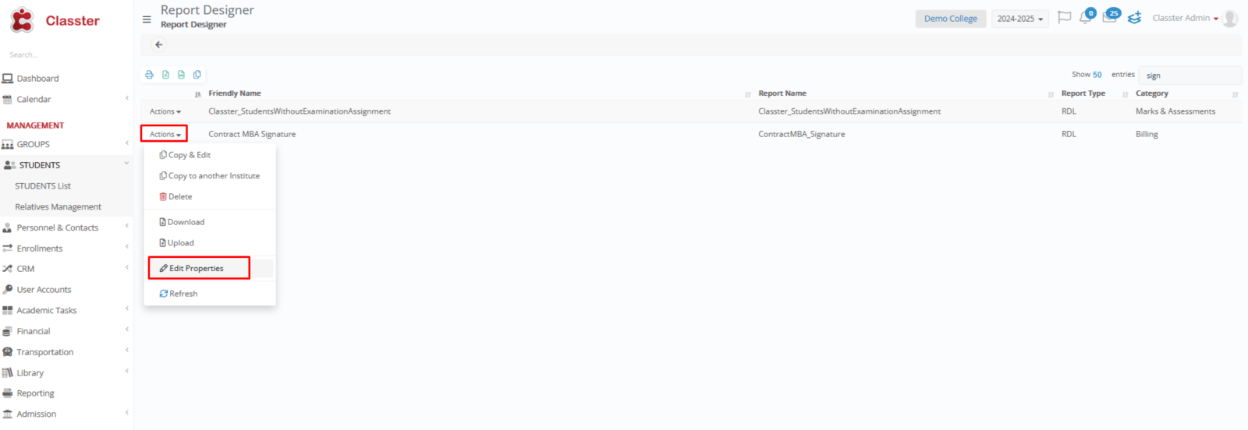
3. Assign the correct Entity/ies to whom the report refers, along with the appropriate Protocol and File Category.

Create a Signature Template
This step defines how a signature process is configured in Classter and determines how it interacts with users, reports, files, and other modules. To set it up:
Advanced Configurations > Signature Templates (create new or edit existing one)
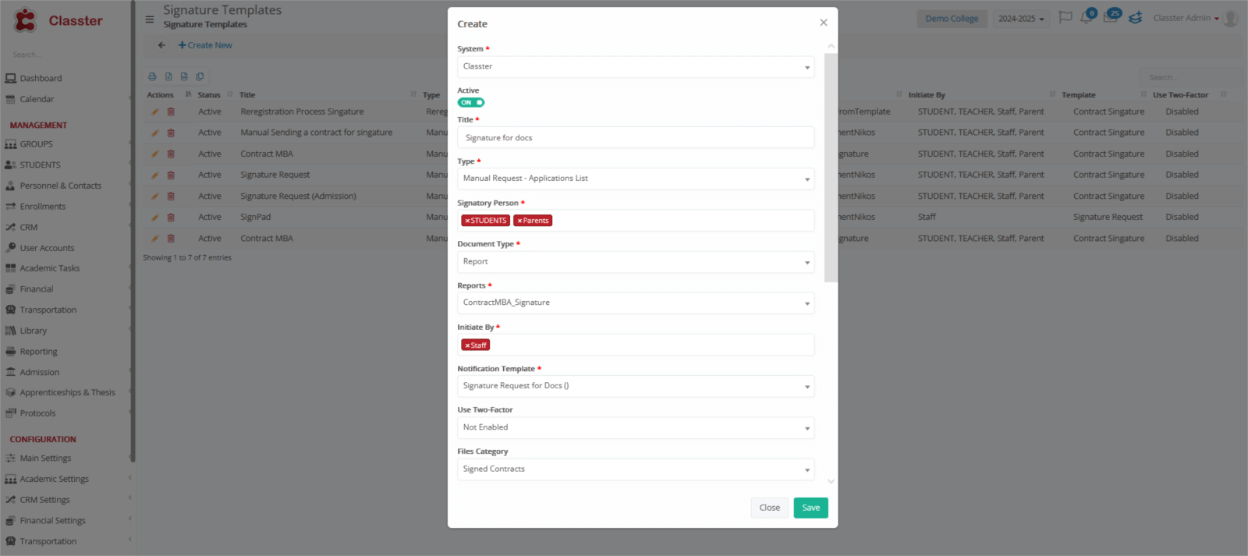
Template Settings
- System: Choose between Classter or Legal Sign
- Active: Enable or disable the template
- Title: Name of the signature process
- Type: The type determines the list or area in Classter where the signature request will be available.
- Signatory Person(s): Specify roles involved in signing (e.g., student, guardian, agent)
- Document Type: Report is used as the signature file, as defined in the template. Private Agreements are also supported for DocuSign.
- Report: Select the right report from the existing reports created under Advanced Configurations > Reporting > Report Designer. (If no suitable report exists, please contact Classter to have a custom report created based on your needs.) This report will be converted to PDF and sent to the signatory.
- Initiate By: Define who can trigger this (e.g., employee, parent)
- Notification Template: Predefined message for recipients, previously created via Advanced Configurations > Templates Editing > CRM > Signature Templates
- Use Two-Factor: Enable optional security via Main Settings > Security Settings
- Files Category: Must be created in Main Settings > Dropdown Lists > Type: System & Dropdown List: Files Category related to Signatures. Additionally, it can also be linked to a protocol.
- New student or educational program status: You can optionally configure the system to automatically update the student’s or program’s status once the signature process is completed. For example, this is typically used for Re-registration-type reports to change the student’s status to “Re-registered” after signing.
- Add signatures dynamically to the final document: Toggle switch (on/off)
- Protocol: Connect to a protocol to assign a unique protocol number and store the signed PDF under the Protocols module
- Information: Use this field to provide clear instructions to the recipient, such as how to sign the file, complete required sections, or review specific content before submission.
Important
Each signature request creates a unique case code, even for the same document. This helps track changes between submissions. In CRM > Signatures, entries with the same case code represent the same action signed by multiple users.
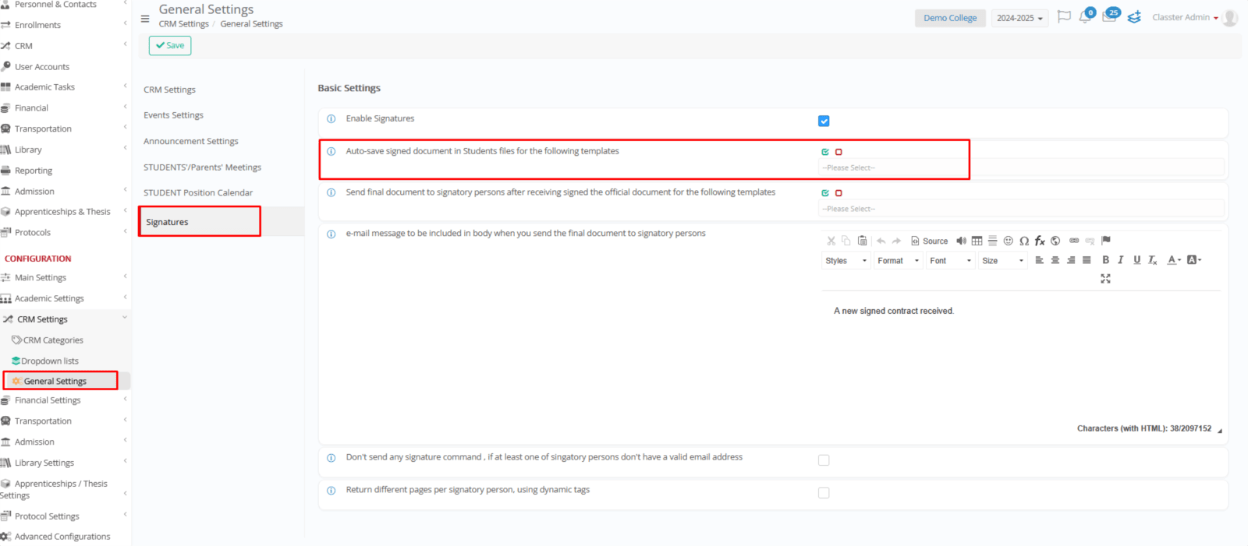
Note: To enable automatic saving of signed documents in the student files, go to Configuration > CRM Settings > General Settings > Signatures and select the templates under “Auto-save signed document in Students files for the following templates”. Do not forget this step—it ensures that the system saves documents in the correct location.
Result
After the document is signed, the system adds the signatures and the protocol number.
Example
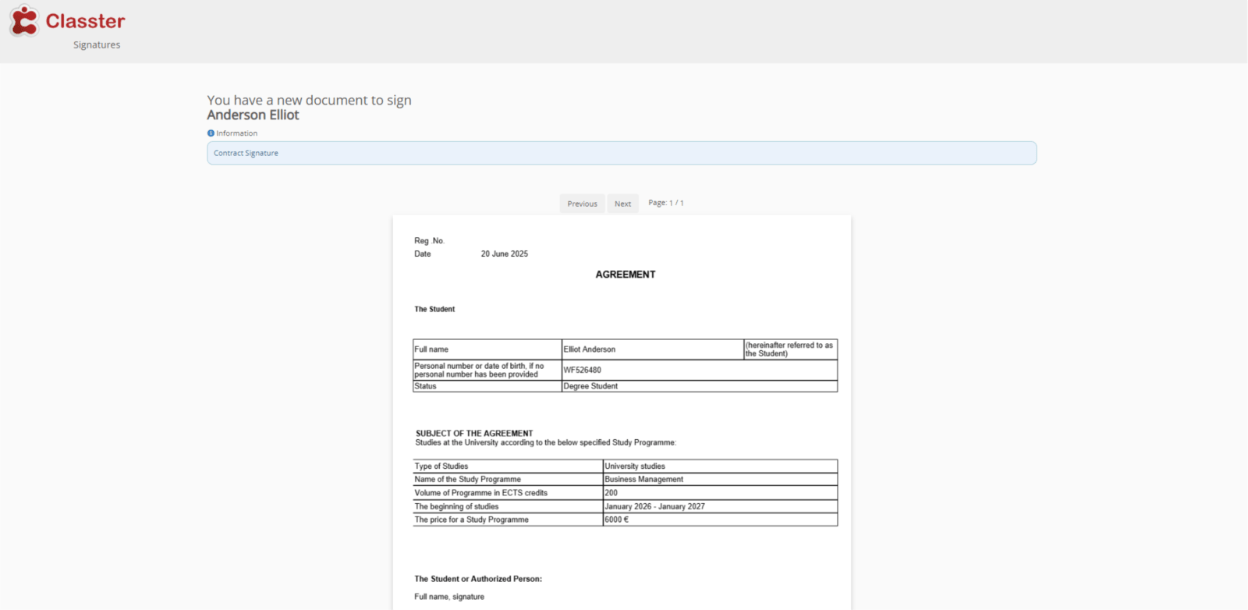
At this point, the following example shows how the document appears when a student receives it for signing. The system sends it directly to the signatory via email for review and action.
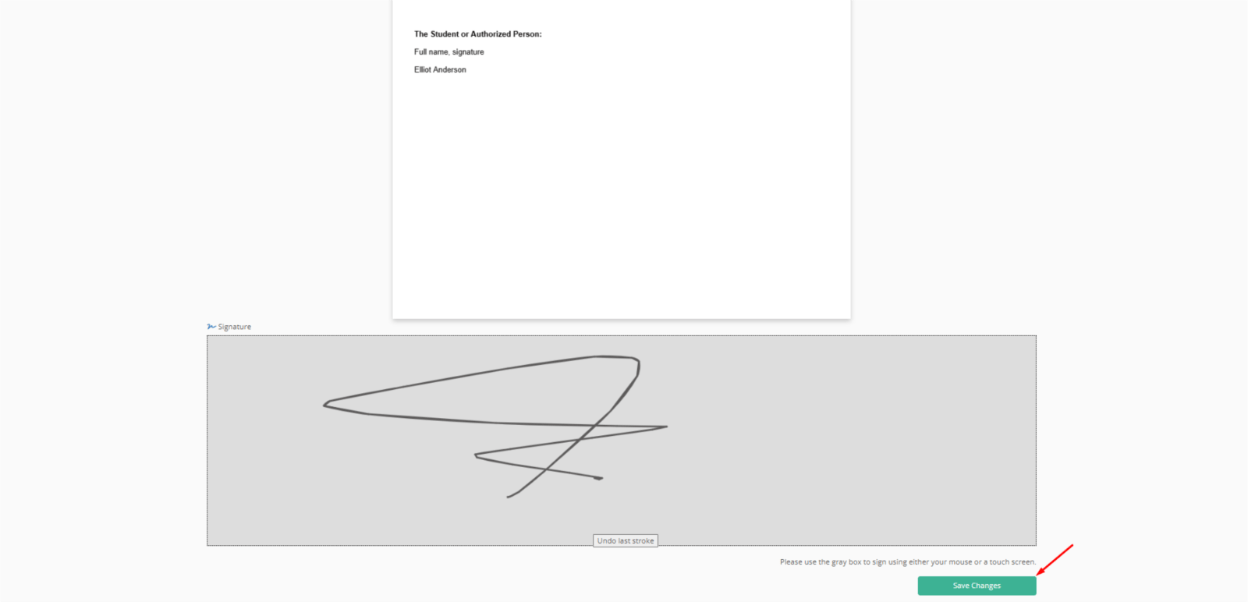
Complete the signing.
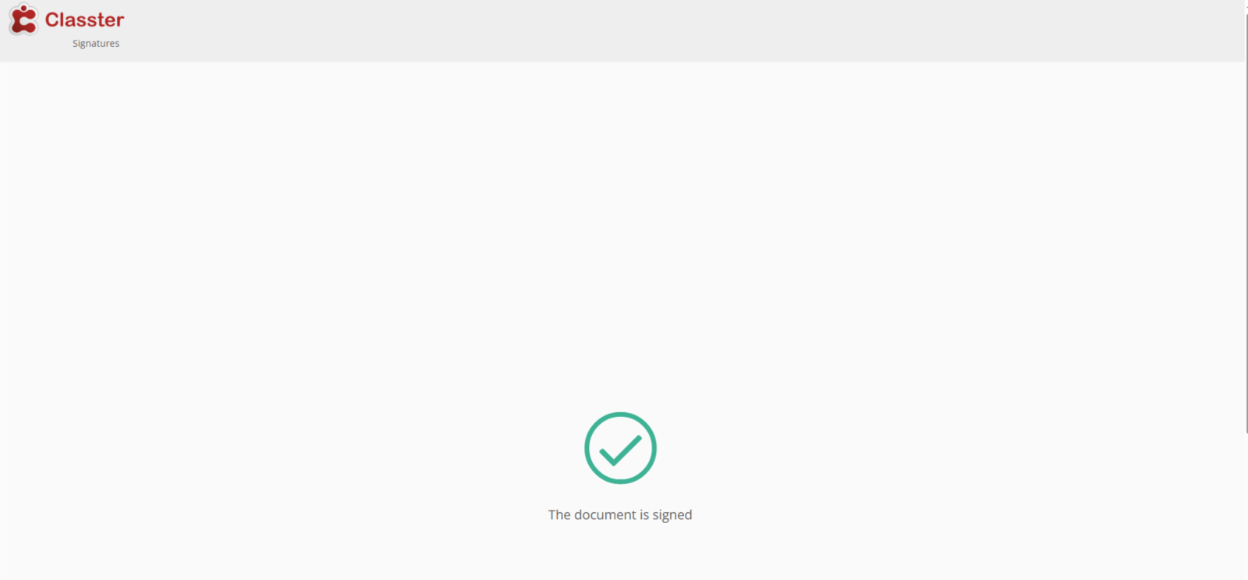
The system then returns the document with the protocol number and embedded signature.

Where to find these documents
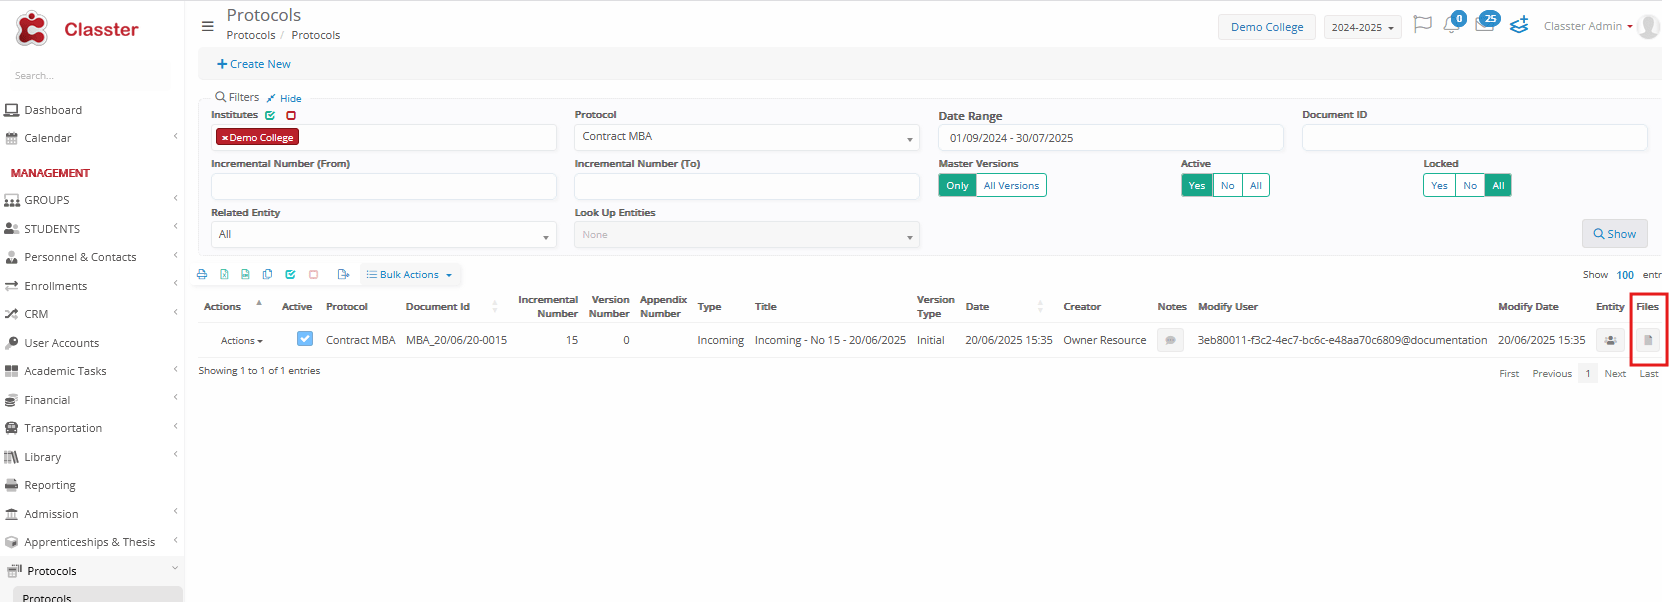
- You can download the document by navigating to Protocols > Protocols, applying the relevant filters, and clicking the Files button next to the specific entry.
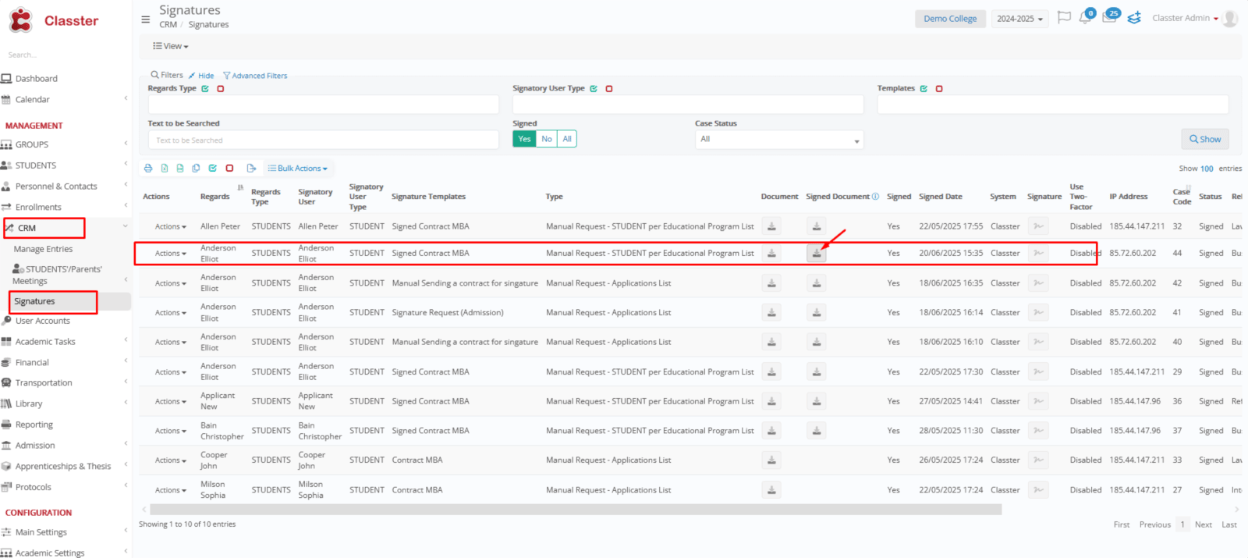
- Or go to CRM > Signatures, select the signed document, and click the download button.
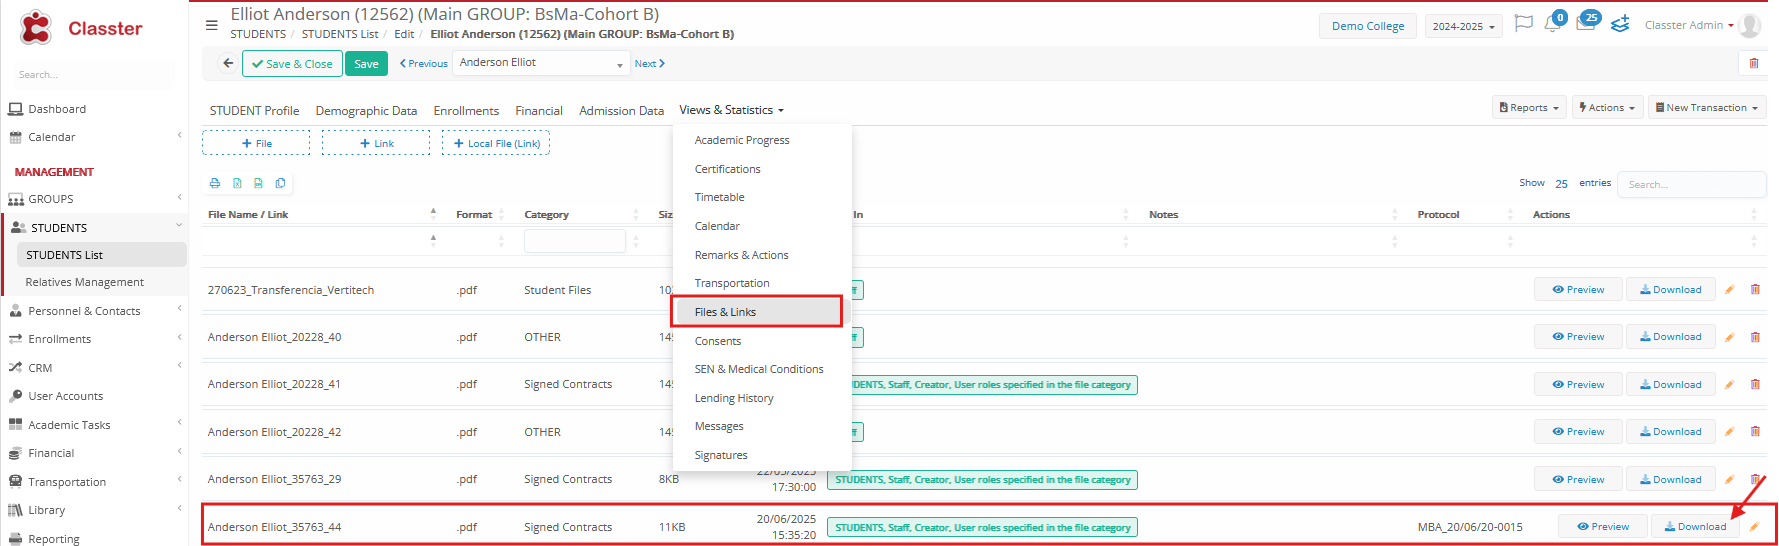
- Alternatively, you can navigate to the Student List, open the student’s profile, and download the signed document from the Files & Links tab.
After completing these steps, you fully configure your Classter environment to manage signed documents with protocol tracking, ensuring regulatory compliance, secure storage, and efficient workflows across departments.
This setup supports seamless coordination between users, documents, and signatures—making your institution’s administrative processes more transparent, automated, and auditable.
You might also be interested in:
Can I invalidate signed documents in Classter? – Classter Knowledge Base
What happens when I invalidate a signed document? – Classter Knowledge Base
What happens if the price of a financial arrangement changes? – Classter Knowledge Base
How do I create documents for signing in Classter? – Classter Knowledge Base
What types of documents can be signed in Classter? – Classter Knowledge Base