

Looking to integrate Google Maps into your application? This step-by-step guide will show you how to create a Google Maps API Key, enable the necessary services, and set up a billing account so you can start using Google Maps features like Directions, Geocoding, and Autocomplete in your projects.
Create a Google Maps API Key
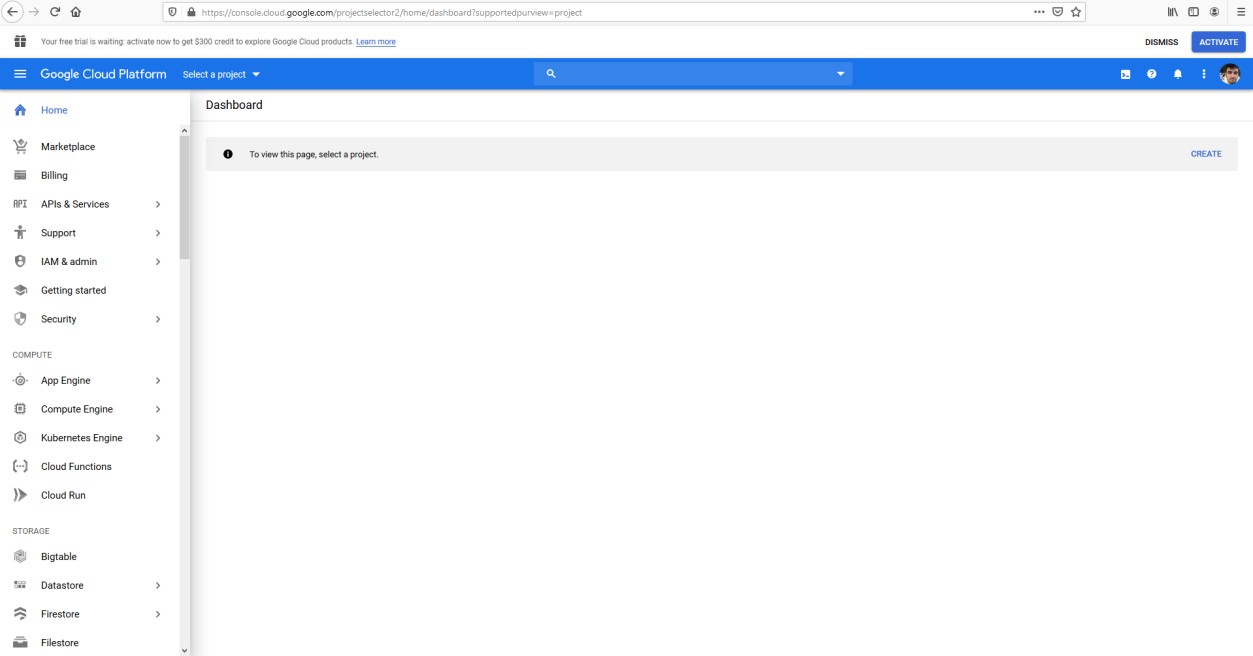
You first need a Google account, e.g., Gmail, then visit the following page by entering the URL: https://console.cloud.google.com/home/dashboard.
Note: As a prerequisite, you need to create a Billing Account (Described at the end).
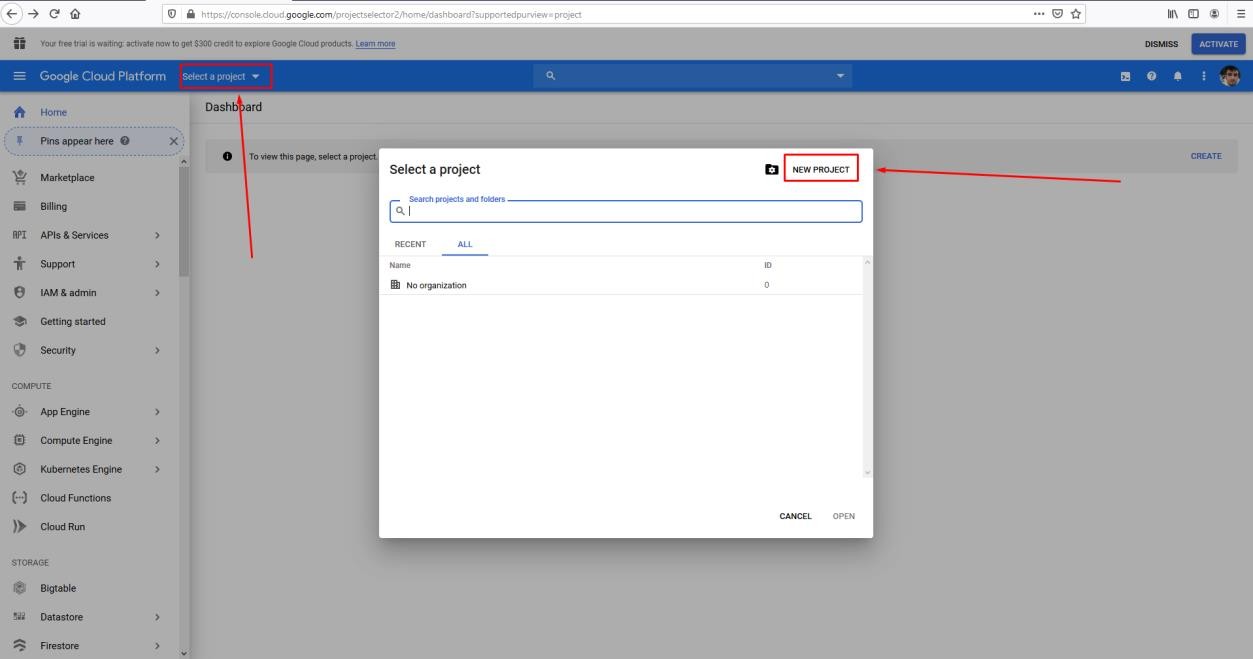
Next, click the Select a project button, and in the pop-up window that appears, select NEW PROJECT, as shown here.
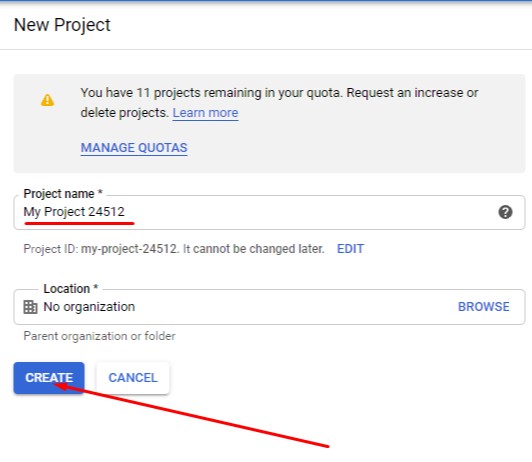
Next, you need to fill in a Project name and click on CREATE.
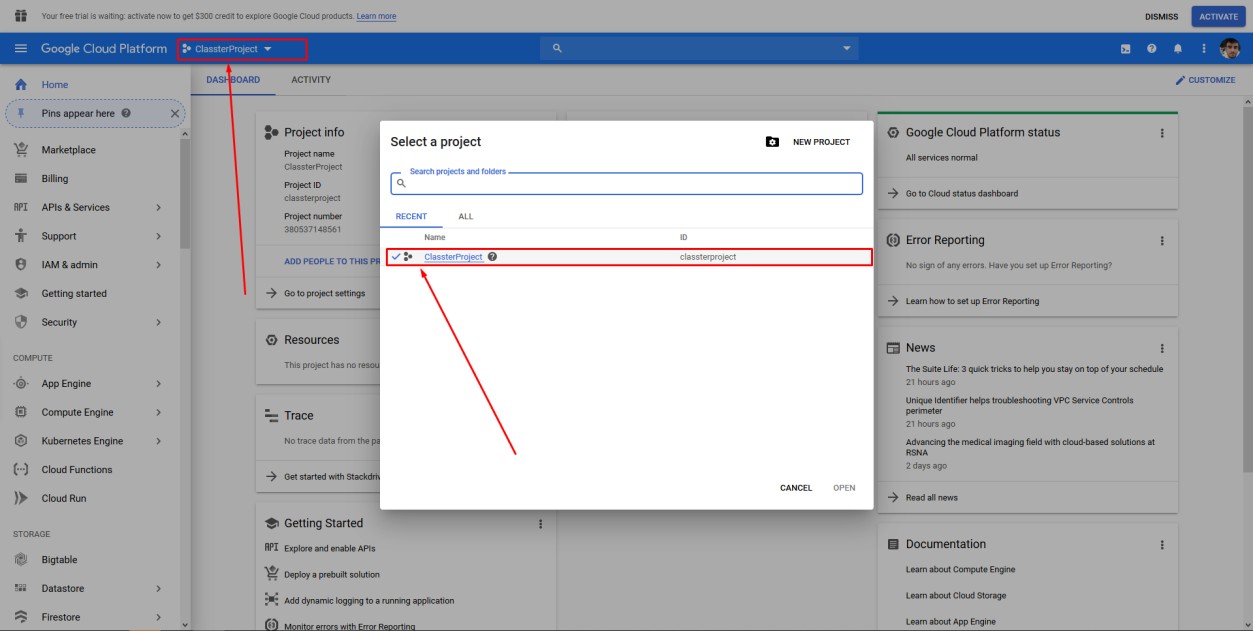
Creation may take a few seconds. Following the process, click on the ” Select a project option and then choose the project you created previously.
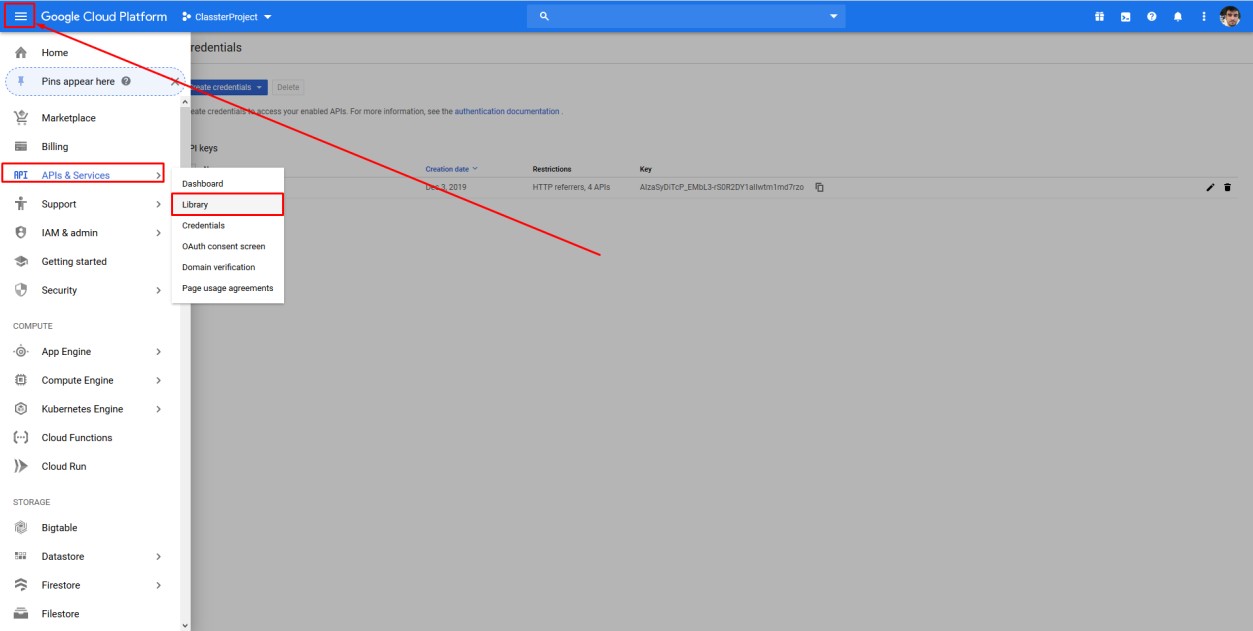
Next, go to the top left corner of the page to open the menu and then click on the API & Services tab. From the list that drops down, click on Library.
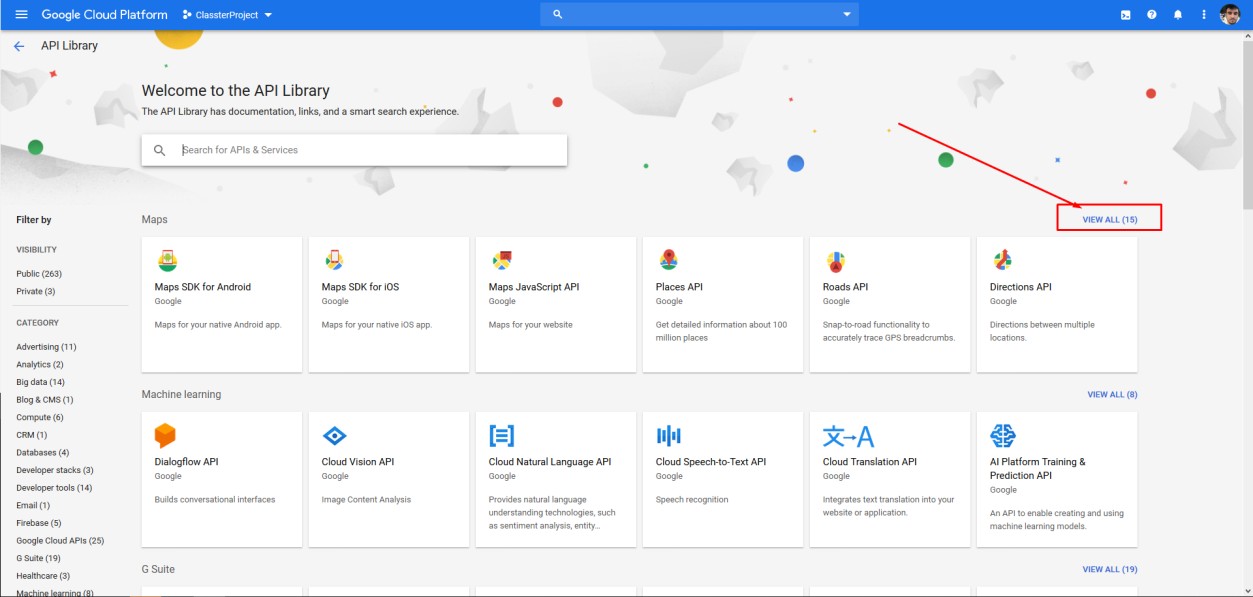
The API Library page will appear on your screen. Click on the VIEW ALL button, which is above the list of Maps.
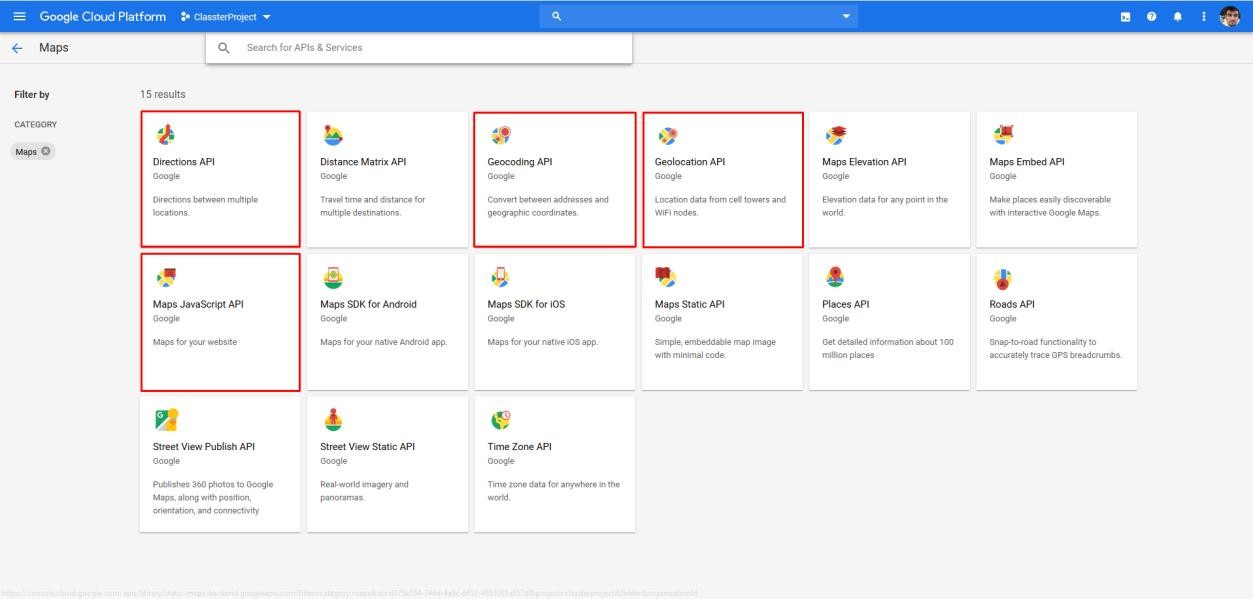
Select the following options:
- Directions API
- Geocoding API
- Geolocation API
- Maps JavaScript API
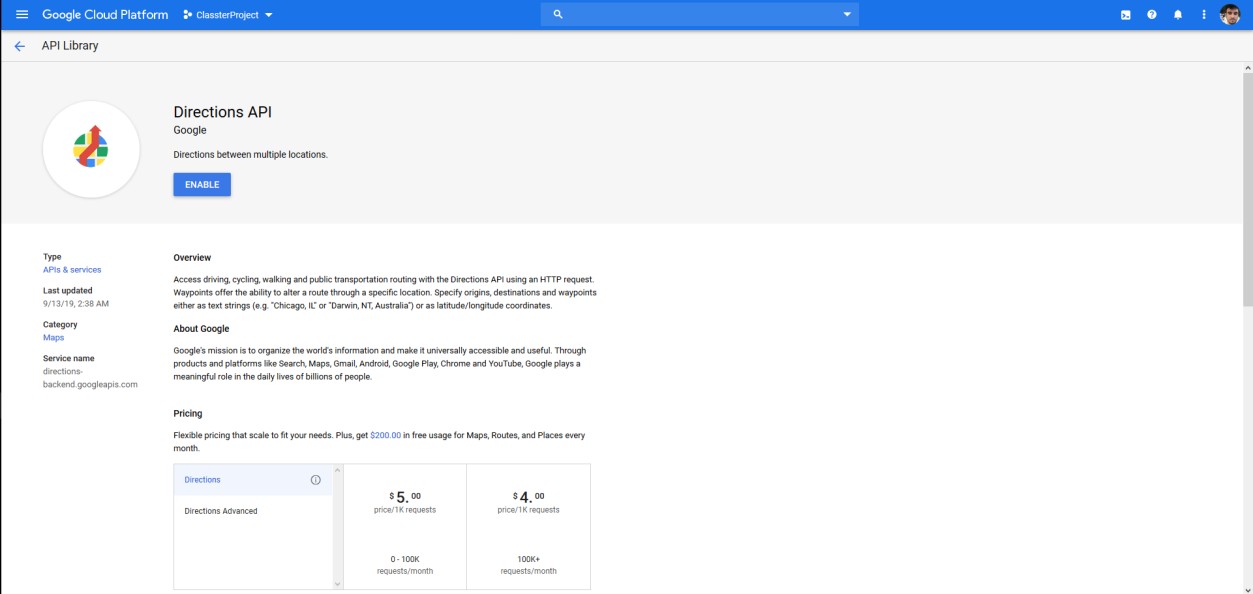
In our case, we have selected the Directions API. Now, let’s ENABLE it.
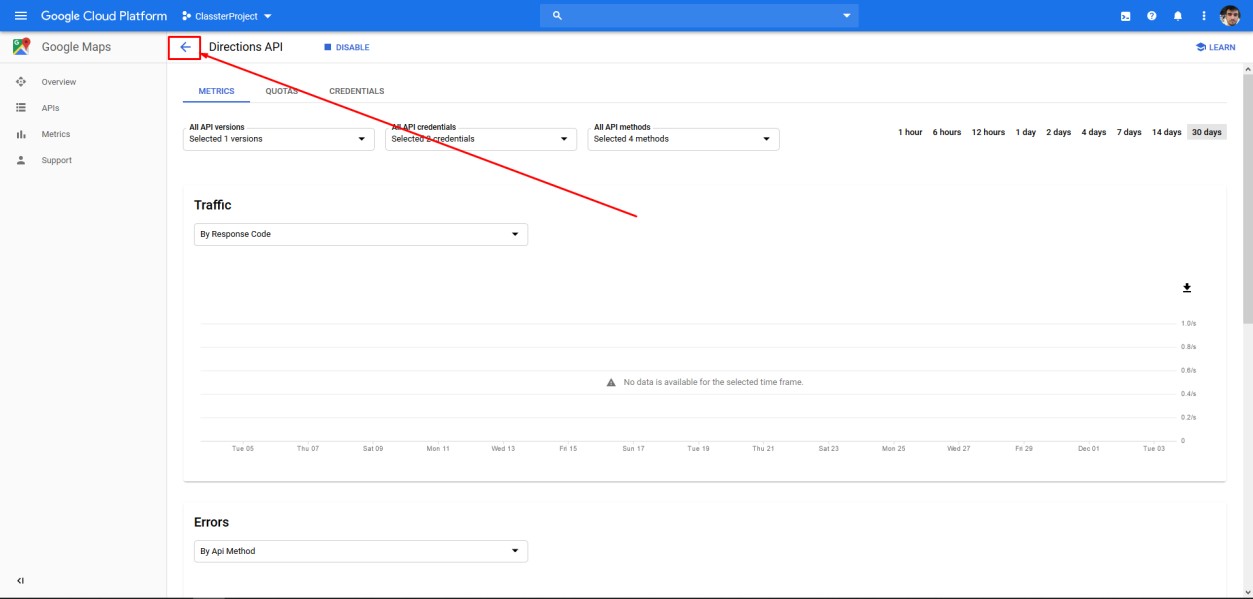
Click on the return arrow to switch back to the previous page.
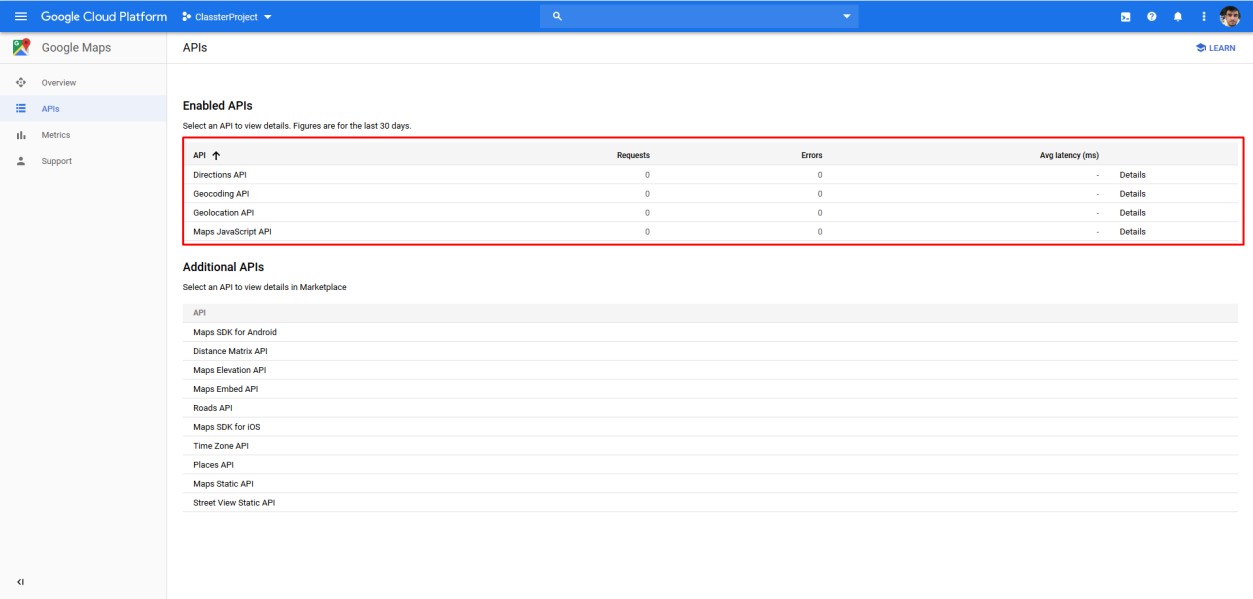
Follow the same process with the rest of the options.

Once you are done, you should be able to view the options.
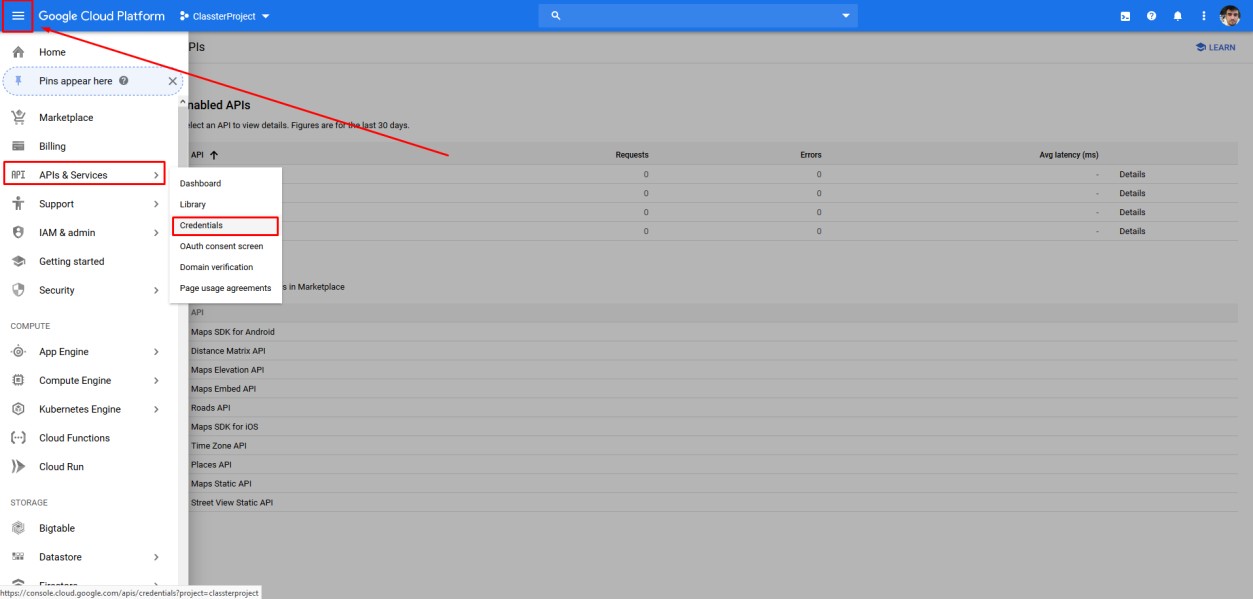
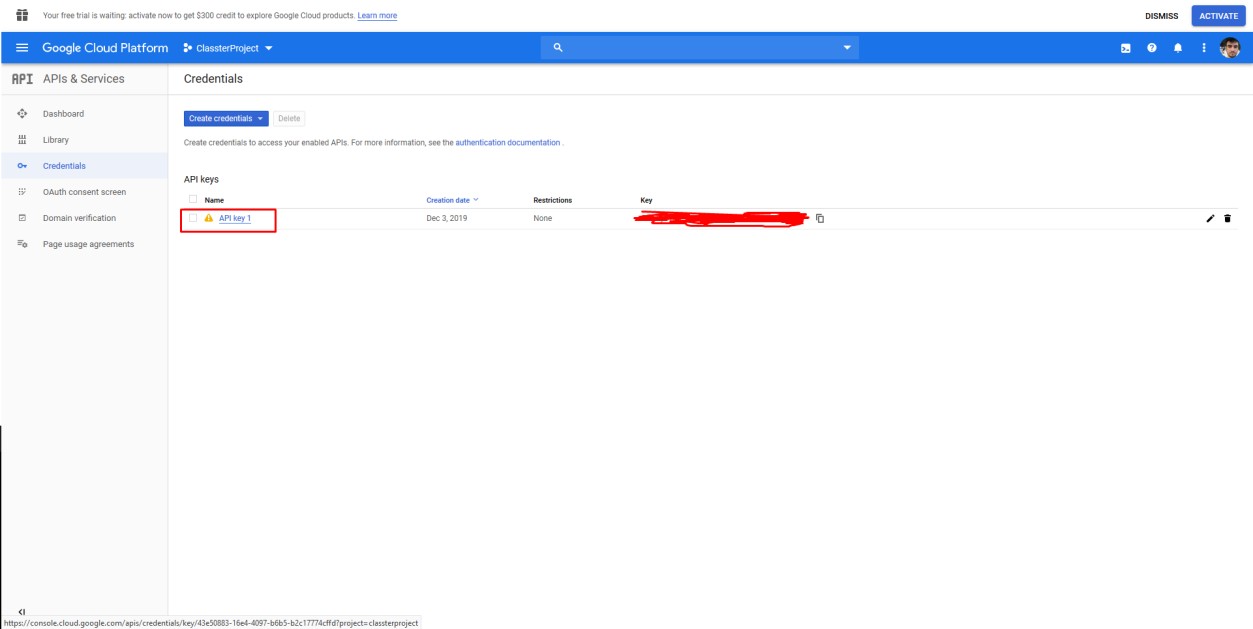
Next, select the menu by clicking on the menu button on the top left of the page. Select the API & Services tab, and from the dropdown list, click on the Credentials button.
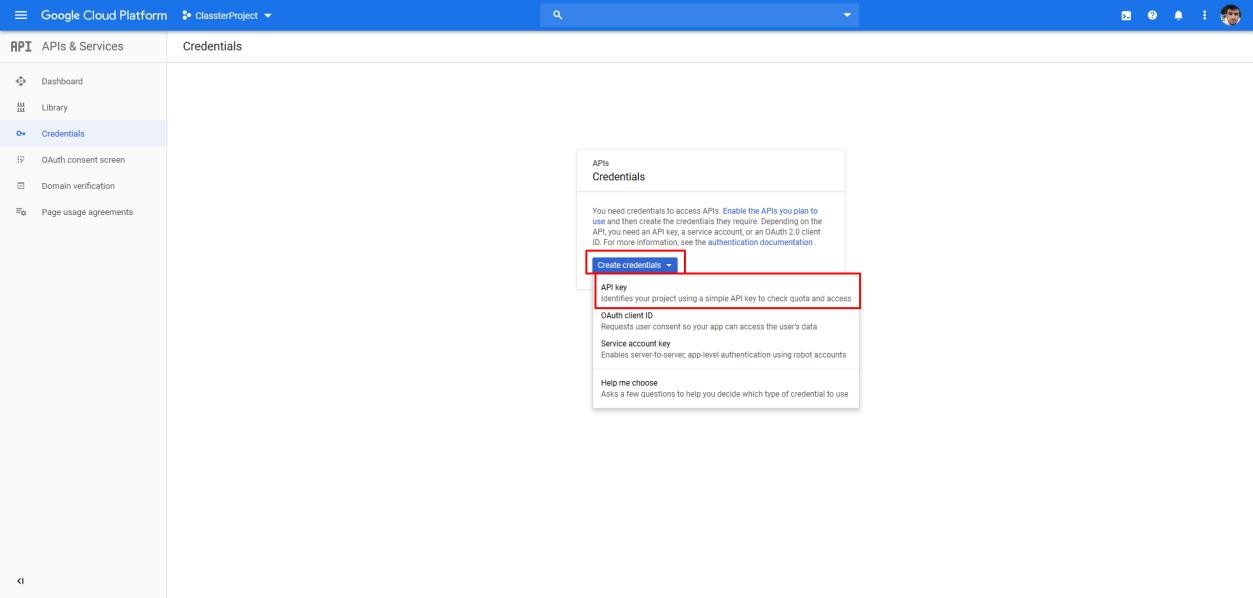
In the Credentials page, click on Create credentials and choose API Key from the drop-down list.
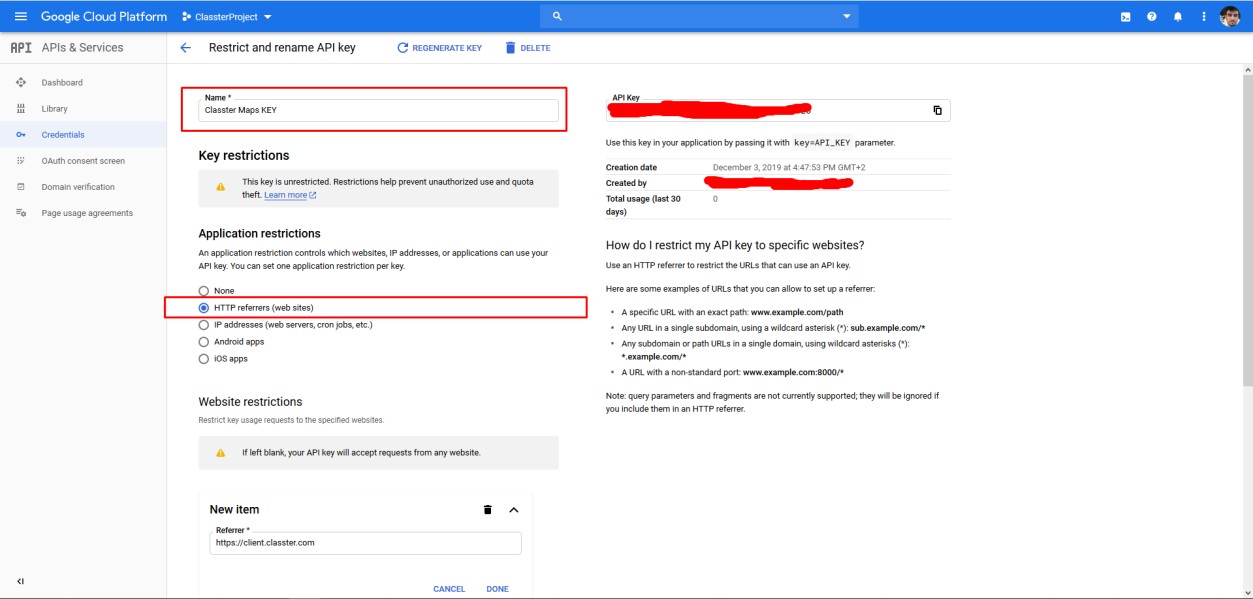
Once you have clicked on Create Credentials/ API Key, you will be able to see that the API Key has been created. Close the creation message and then click on the API key 1.
Here, you can view the information specified earlier. In the NEW ITEM section, enter https://client.classter.com, as Referrer, where you see client, you enter your company/institution name (e.g.
https://subdomain.classter.com/*) and then click on Done.
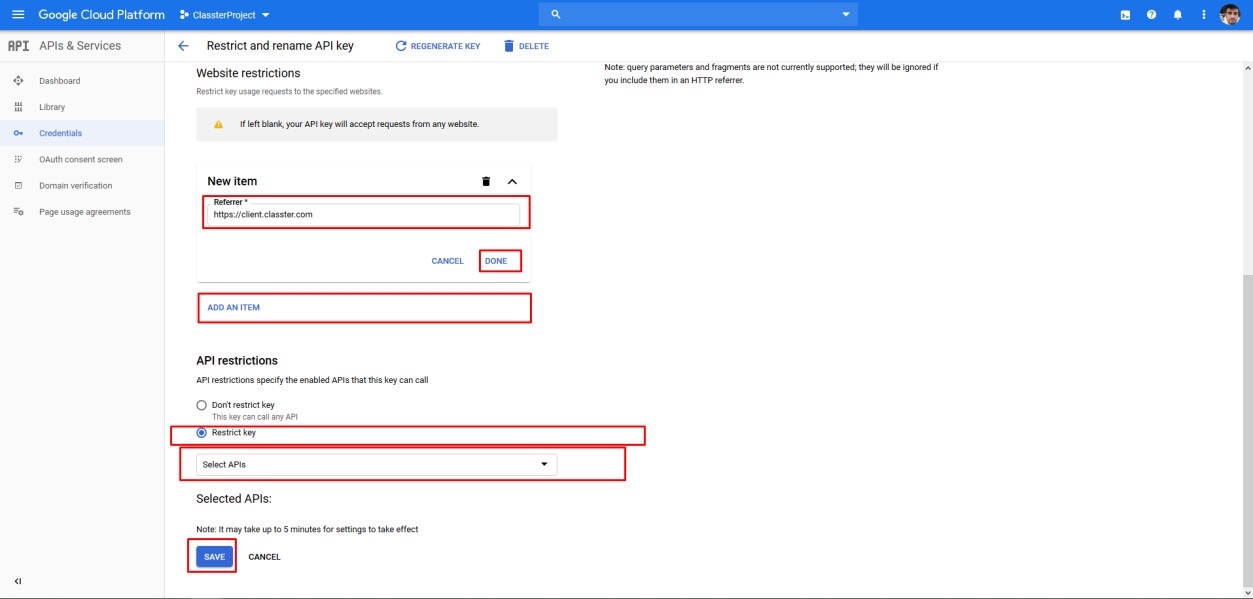
In addition, in the API restrictions, choose Restrict key, and in the select API’s field, specify the following:
- Directions API
- Geocoding API: If you want reverse geocoding or fallback
- Geolocation API
- Maps JavaScript API: Required if the JS Autocomplete widget is used
- Places API: Required for Autocomplete & Place Details
Once you have selected the API’S, click on Save.
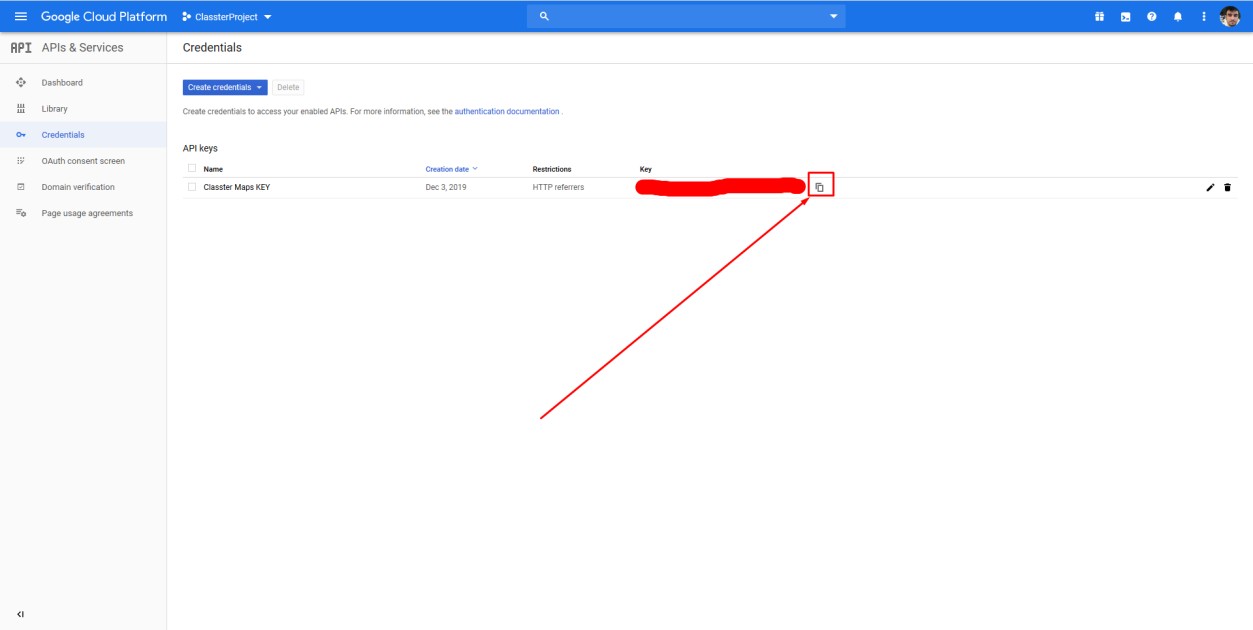
Click on the highlighted icon to copy the Google Maps API Key.
Creating a Billing Account
As we have mentioned at the beginning of this guide, you will need to create a Billing Account in order to pay for the creation of the Google Maps API Key.
In order to create a Billing Account, follow the following steps:
- First, from the main menu, click on the Billing tab.
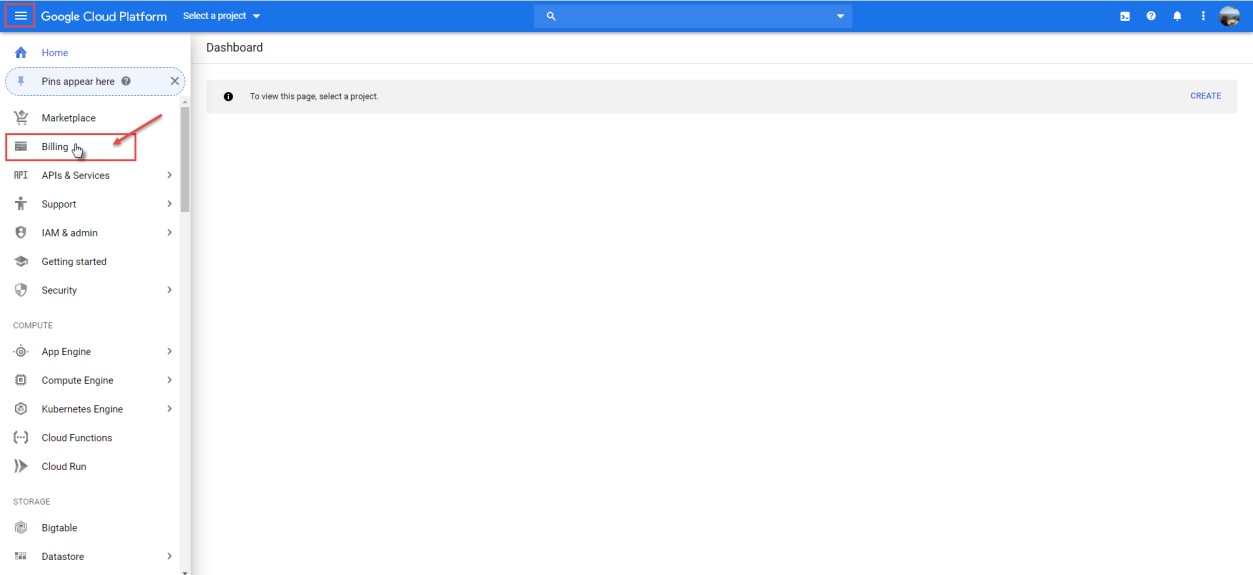
- As a result, you will be transferred to the Billing page.
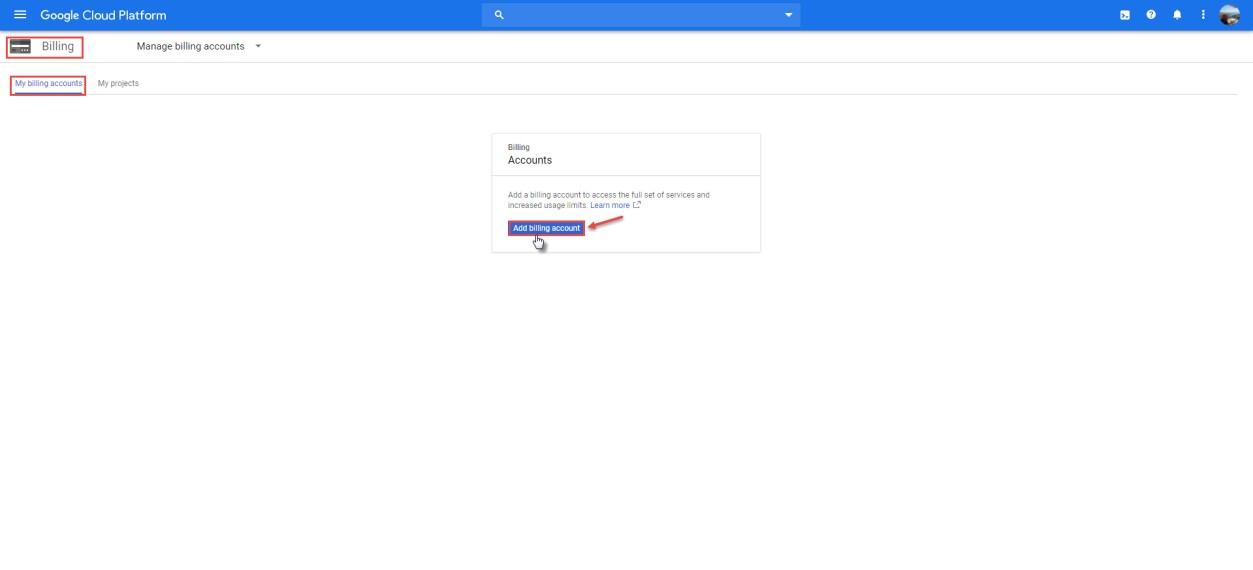
- In the Billing page, click on the Add billing account button to add a Billing Account in the creation page.
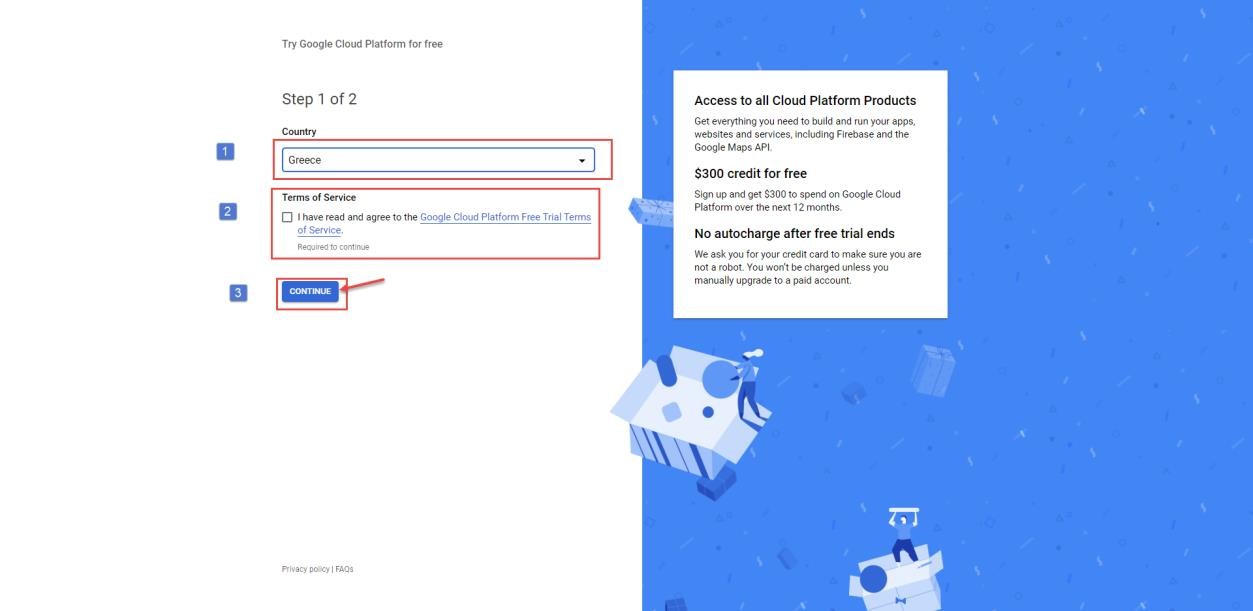
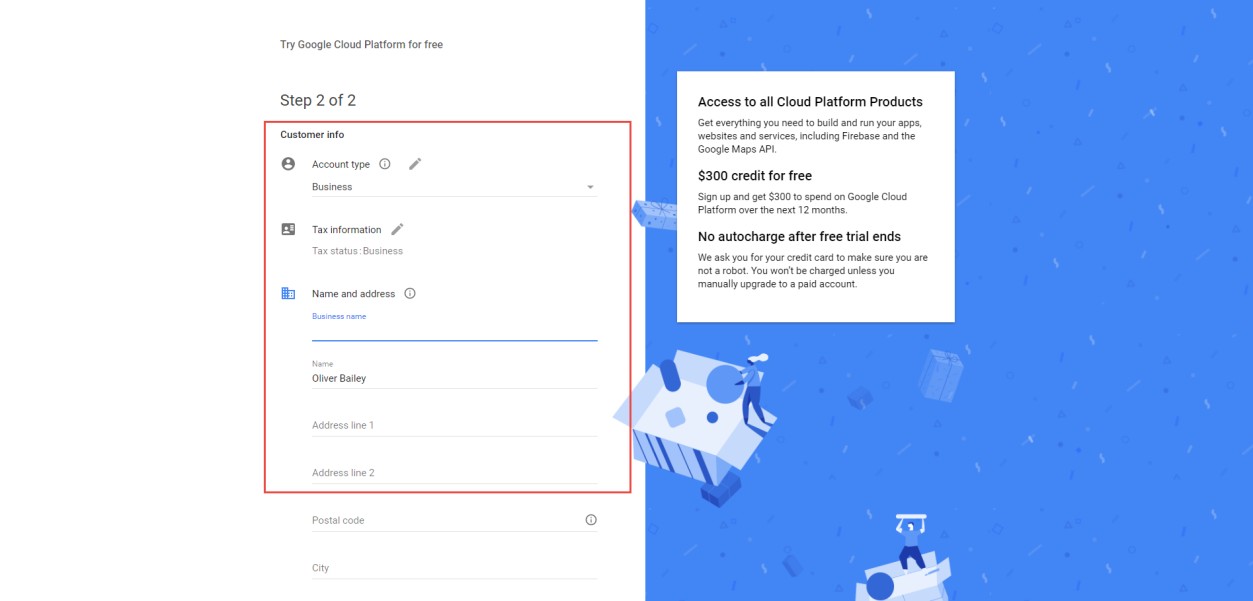
Fill in the information requested in both steps, and that’s the final step for creating a Billing Account.