Templates Editing
Here, we can manage all the messages sent by the Classter system. There are three types of messages we use, the first is automated messages e.g., when you reset your password, new user creation etc. The second type of messages are email templates used in the message center, e.g., email with ‘reply to field from available templates’ in message creation.
The third and last type of messages are notification messages, which may be sent automatically based on configuration done in the next section ‘Notification Service Configuration’.
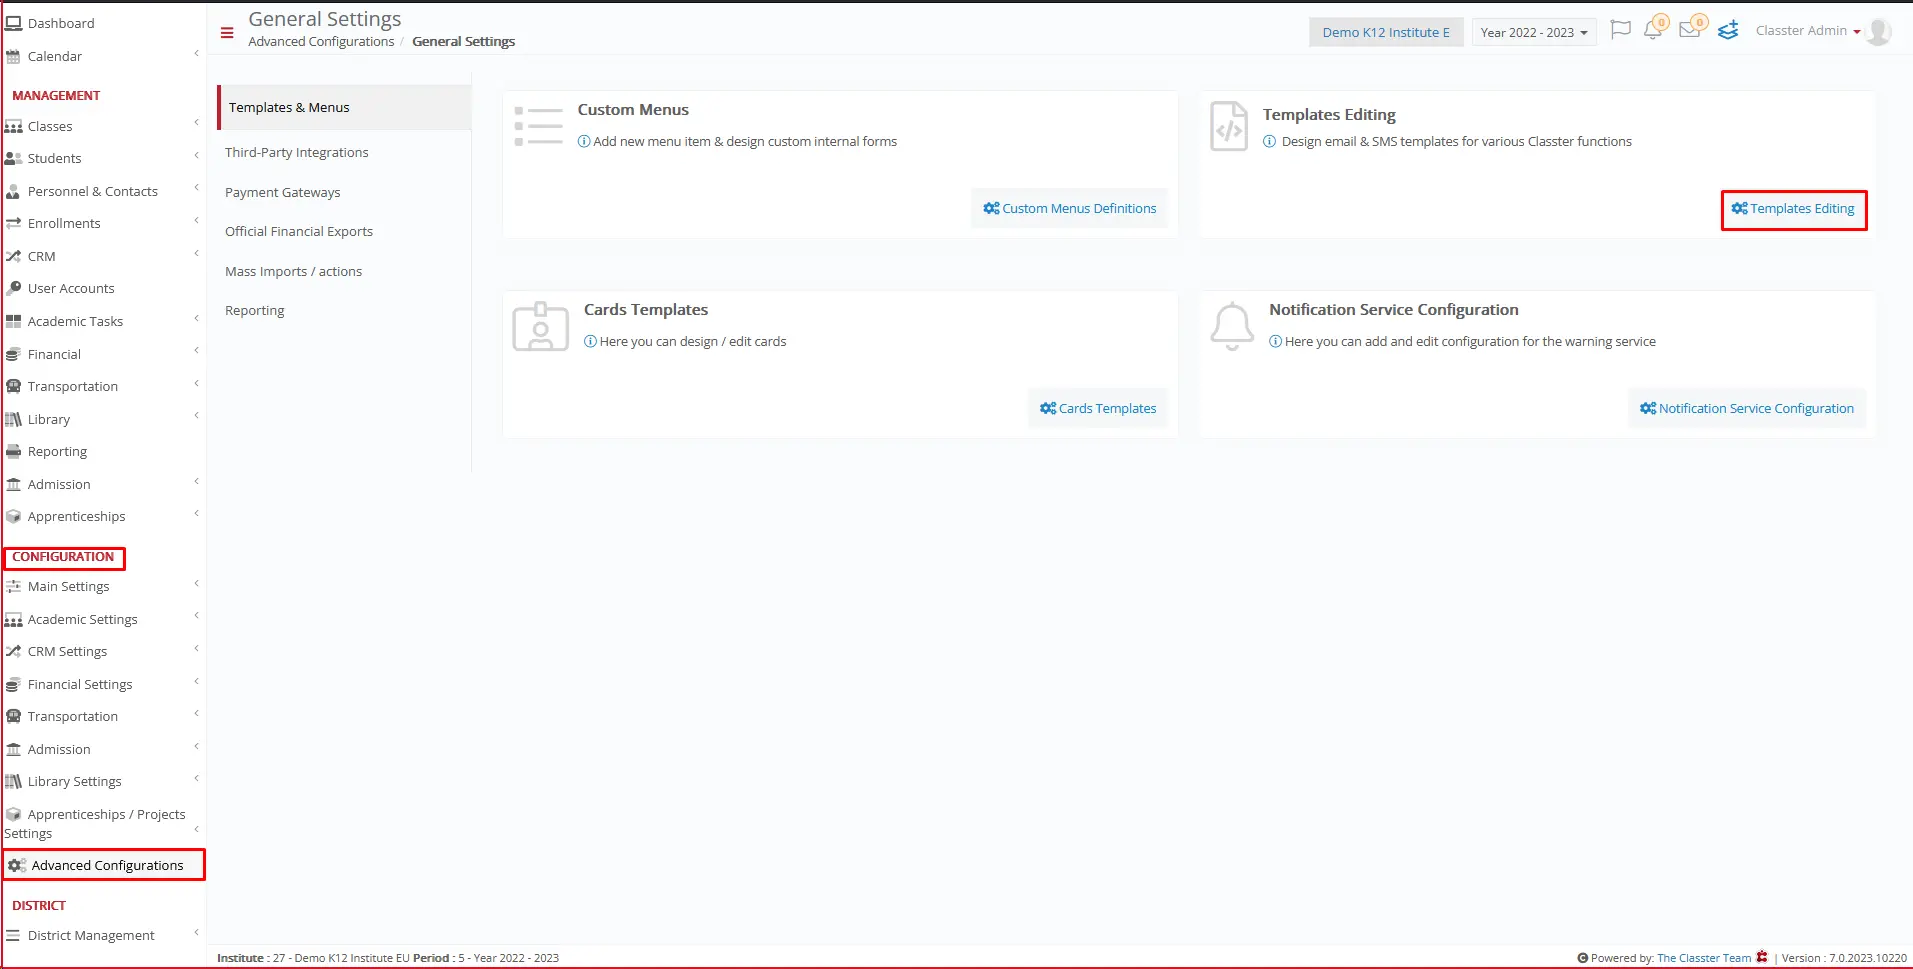
To view the templates editing page, follow the path: Dashboard > Configuration > Advanced Configuration > Templates Editing (Figure 1).
Figure 1
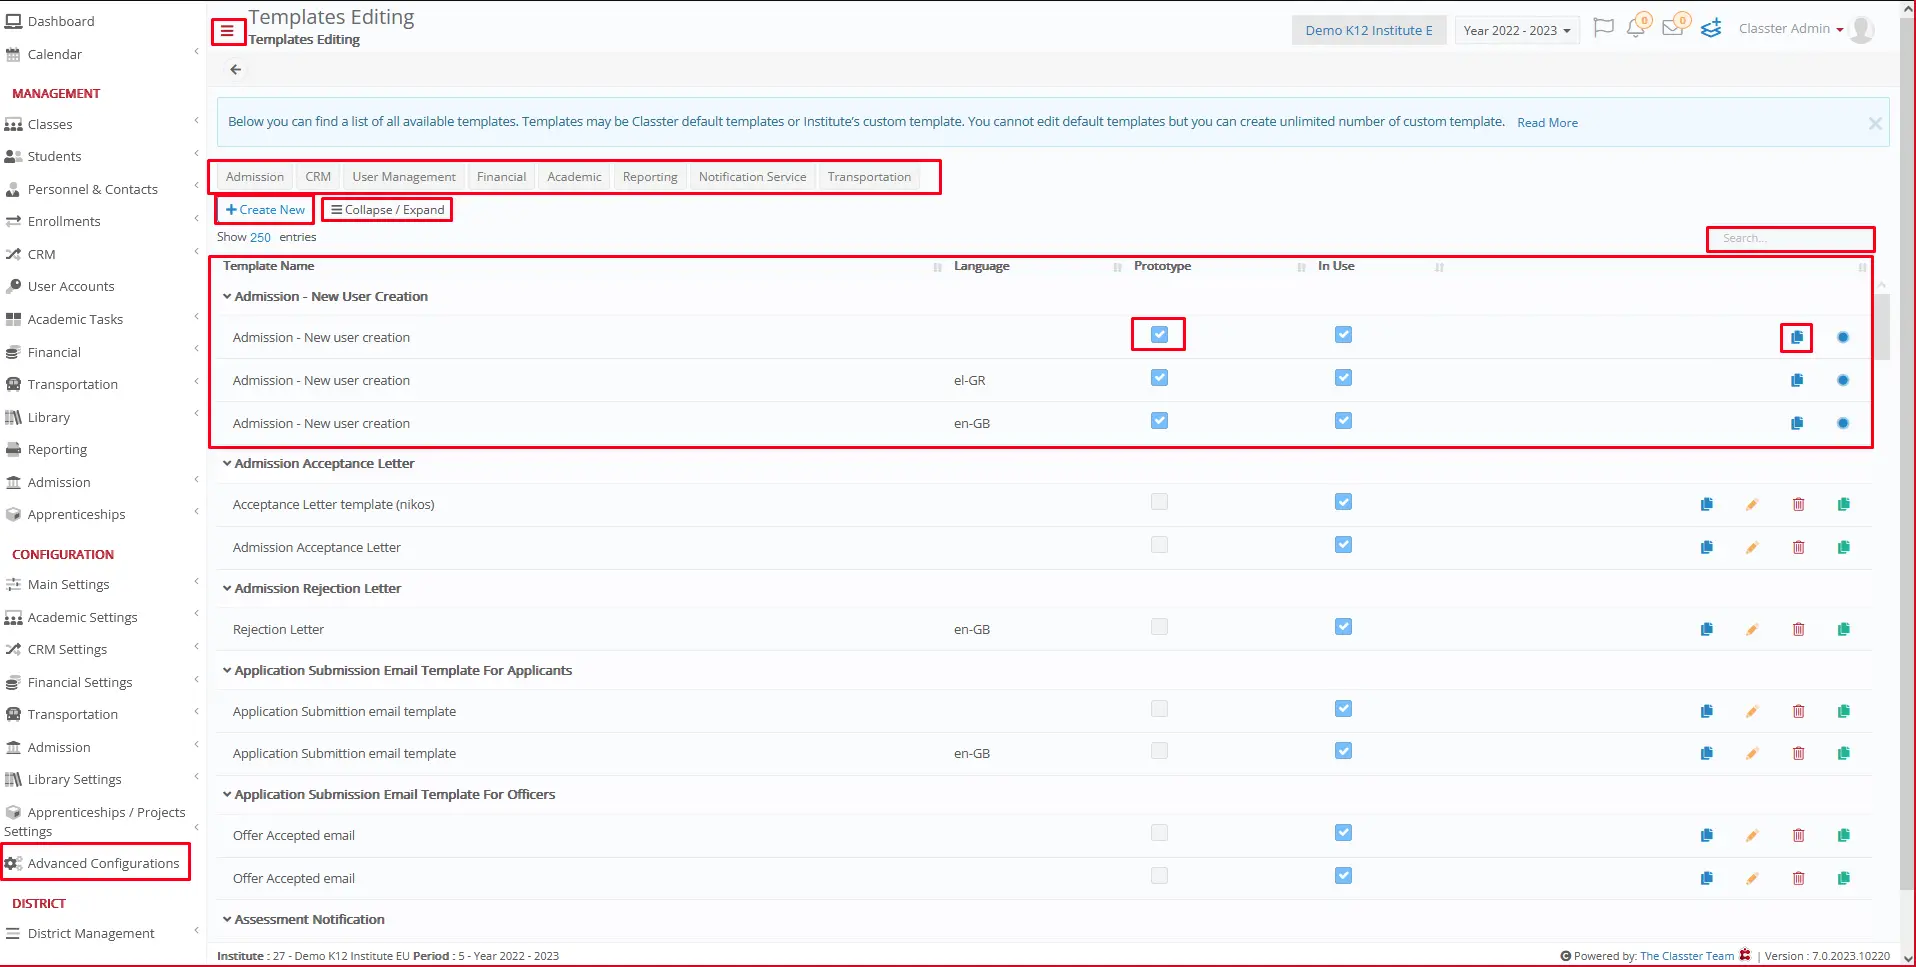
On this page, you can see the following (Figure 2):
- Help text, describing the use of this section.
- You can choose Template Categories. Select from Admissions, CRM, User Management, Financial, Academic, Reporting, and Notification Service.
Note: if no category is selected, then the page displays all template categories. - You can expand or collapse the list of templates by clicking on the respective button.
- Use the search field to locate a specific template.
- Click on the ‘+Create New’ button to create a new template.
- You can click on the ‘Create a new template based on this one’ button next to each template on the list to create a new template based on the one you selected.
- There are templates that are pre-set by Classter or added at your request.


