

This is a very important section of the core configuration manual. Dropdown lists exist in various parts of Classter. The core module has many dropdowns connected to the Application process as well as _Student_, _Teacher_, Parent, Employee forms. Bottom line, you can create the entities that are then available in dropdown lists.
Configuration > Main Settings > Dropdown Lists

Figure 91
On this page you will see the following (Figure 91):
- On the page you can see the Dropdown Lists/Filters
- Choose a dropdown list type which indicates where these lists belong e.g., System, _Student_ etc.
- Choose a specific list belonging to the type selected in the previous step. This option is filtered by the choice you made in the Type option. Since the choice of type was System then the first dropdown list of this type would be _Grade Level_.
- Below we will see all types and dropdown lists available.
System

Figure 92
Address Categories
Once you choose System from the type option and you choose Address Categories you will be taken to the following page (Figure 93).

Figure 93
On this page you will see the following (Figure 93):
- You can use the search field to find a specific address category.
- You can copy, edit, or delete an item on the list by clicking on the respective buttons.
- To create a new address category, click on the +add new button.
- Once you click on the +add new button you will see the following popup window (Figure 94):

Figure 94
- Add a description for this new address category e.g., Delivery Address.
- Click on the ‘Save’ button to save this new address category.
Once you click on the edit button (Figure 94) you will see a similar popup window with the creation popup window. Make your changes and click on the ‘Save’ button to save changes.
Cities
Once you choose System from the type option and you choose Cities you will be taken to the following page (Figure 121).

Figure 95
On this page you will see the following (Figure 95):
- You can change the order of the list by dragging and dropping the items on the list. Once you do it you will see a new button called ‘Save-Re-ordering’.
- If you have changed the order of the items on the list, you can click on the ‘Auto Order’ button to revert the order to its original order.
- You can use the search field to find a specific city.
- You can copy, edit, or delete an item on the list by clicking on the respective buttons.
- To create a new city, click on the +add new button.
Once you click on the +add new button you will see the following popup window (Figure 96):

Figure 96
- Add a description for this new city e.g., Berlin.
- Click on the ‘Save’ button to save this new city.
Once you click on the edit button (Figure 95) you will see a similar popup window with the creation popup window. Make your changes and click on the ‘Save’ button to save changes.
Contact Type
Once you choose System from the type option and you choose Contact Type you will be taken to the following page (Figure 97).

Figure 97
On this page you will see the following (Figure 97):
- You can change the order of the list by dragging and dropping the items on the list. Once you do it you will see a new button called ‘Save-Re-ordering’.

- If you have changed the order of the items on the list, you can click on the ‘Auto Order’ button to revert the order to its original order.
- You can use the search field to find a specific contact type.
- You can copy, edit, or delete an item on the list by clicking on the respective buttons.
- To create a new contact type, click on the +add new button.

Once you click on the +add new button you will see the following popup window (Figure 98):

Figure 98
- Add a description for this new contact type e.g., Parent Telephone Number.
- Select a General Contact from this dropdown option e.g., Home.
- Select a Type from the dropdown option e.g., Number.
- Click on the ‘Save’ button to save this new contact type.
Once you click on the edit button (Figure 97) you will see a similar popup window with the creation popup window. Make your changes and click on the ‘Save’ button to save changes.
Custom Fields Categories
Once you choose System from the type option and you choose Custom Fields Categories you will be taken to the following page (Figure 99).

Figure 99
On this page you will see the following (Figure 99):
- You can change the order of the list by dragging and dropping the items on the list. Once you do it you will see a new button called ‘Save-Re-ordering’.
- If you have changed the order of the items on the list, you can click on the ‘Auto Order’ button to revert the order to its original order.
- You can use the search field to find a specific Custom Field Category.
- You can copy, edit, or delete an item on the list by clicking on the respective buttons.
- To create a Custom Field Category, click on the +add new button.

Once you click on the +add new button you will see the following popup window (Figure 100):

Figure 100
- Add a description for this new custom field category e.g., Nationality.
- Add Info in this field regarding the category e.g., Where are you from.
- Select an entity from the Use in dropdown option e.g., Relatives.
- Click on the ‘Save’ button to save this new custom field category.
Once you click on the edit button (Figure 99) you will see a similar popup window with the creation popup window. Make your changes and click on the ‘Save’ button to save changes.
Dynamic Documents Categories
Once you choose System from the type option and you choose Dynamic Documents Categories you will be taken to the following page (Figure 101).

Figure 101
On this page you will see the following (Figure 101):
- You can change the order of the list by dragging and dropping the items on the list. Once you do it you will see a new button called ‘Save-Re-ordering’.
- If you have changed the order of the items on the list, you can click on the ‘Auto Order’ button to revert the order to its original order.
- You can use the search field to find a specific Dynamic Document Category.
- You can copy, edit, or delete an item on the list by clicking on the respective buttons.
- To create a Dynamic Document Category, click on the +add new button.
Once you click on the +add new button you will see the following popup window (Figure 102):

Figure 102
- Add a title for this new dynamic document category e.g., Additional Documentation.
- Add a description for this new custom field category e.g., Additional Documentation.
- If the is Required option is turned on, then the user must add document/s to this category.
- Click on the ‘Save’ button to save this new dynamic document category.
Once you click on the edit button (Figure 101) you will see a similar popup window with the creation popup window. Make your changes and click on the ‘Save’ button to save changes.
Dynamic Dropdowns
Once you choose System from the type option and you choose Dynamic Dropdowns you will be taken to the following page (Figure 103).
 Figure 103
On this page you will see the following (Figure 103):
- You can use the search field to find a specific Dynamic Document Category.
- You can copy, edit, or delete an item on the list by clicking on the respective buttons.
- To create a Dynamic Document Category, click on the +add new button.
- Once you create a new dynamic dropdown list you can add items to the list by clicking on the add items button (next to the copy button).
Once you click on the +add new button you will see the following popup window (Figure 104):

Figure 104
- Add a description for this new dynamic dropdown list e.g., Language.
- If the is _Consent_ option is turned on, then this dropdown list will be considered a _Consent_ dropdown list.
- Click on the ‘Save’ button to save this new dynamic dropdown list.
Once you click on the edit button (Figure 103) you will see a similar popup window with the creation popup window. Make your changes and click on the ‘Save’ button to save changes.
Once you have created the dynamic dropdown list, click on the add items button (Figure 103) to add options to this list. You will be transferred to the add items page (Figure 105).

Figure 105
On this page you will see the following (Figure 105):
- You can print, export, or copy this list of items/languages by clicking on the respective buttons on the left side of the page.
- You can use the search field to find a specific item in this case languages.
- You can copy, edit, or delete an item/language on the list by clicking on the respective buttons.
- You can click on the ‘Back’ button to return to the dynamic dropdowns page.
- To create an item/language, click on the +add new button.
Once you click on the +add new button you will see the following popup window (Figure 106):

Figure 106
- Add a description for this new list item/language e.g., Afrikaans.
- If the is Positive option is selected, then this list item/language will be considered a positive choice (does not apply on this list).
- Click on the ‘Save’ button to save this list item/language.
Once you click on the edit button (Figure 105) you will see a similar popup window with the creation popup window. Make your changes and click on the ‘Save’ button to save changes.
Files Category
Once you choose System from the type option and you choose File Categories you will be taken to the following page (Figure 107).

Figure 107
On this page you will see the following (Figure 107):
- You can print, export, or copy this list of file categories by clicking on the respective buttons on the left side of the page.
- You can use the search field to find a specific file category.
- You can copy, edit, or delete a file category on the list by clicking on the respective buttons.
- To create a file category, click on the +add new button.
Once you click on the +add new button you will see the following popup window (Figure 108):

Figure 108
- Add a description for this new file category e.g., Medical Exams.
- If the is Positive option is selected, then this list item/language will be considered a positive choice (does not apply on this list).
- Click on the ‘Save’ button to save this new file category.
Once you click on the edit button (Figure 107) you will see a similar popup window with the creation popup window. Make your changes and click on the ‘Save’ button to save changes.
Grade Level
Once you choose System from the type option and you choose _Grade Level_ you will be taken to the following page (Figure 109).

Figure 109
On this page you will see the following (Figure 109):
- You can use the search field to find a specific _Grade Level_.
- You can copy, edit, or delete a grade level on the list by clicking on the respective buttons.
- To create a grade level, click on the +add new button.
Once you click on the +add new button you will see the following popup window (Figure 110):

Figure 110
- Add a description for this new grade level e.g., Main.
- Click on the ‘Save’ button to save this new _Grade Level_.
Once you click on the edit button (Figure 109) you will see a similar popup window with the creation popup window. Make your changes and click on the ‘Save’ button to save changes.
Grade Type
Once you choose System from the type option and you choose _Grade Type_ you will be taken to the following page (Figure 109).

Figure 111
On this page you will see the following (Figure 111):
- You can use the search field to find a specific grade type.
- You can copy, edit, or delete a _Grade Type_ on the list by clicking on the respective buttons.
- To create a grade type, click on the +add new button.
Once you click on the +add new button you will see the following popup window (Figure 112):

Figure 112
- Add a description for this new grade type e.g., Main.
- Click on the ‘Save’ button to save this new _Grade Type_.
Once you click on the edit button (Figure 109) you will see a similar popup window with the creation popup window. Make your changes and click on the ‘Save’ button to save changes.
Group Type
Once you choose System from the type option and you choose _Group_ Type you will be taken to the following page (Figure 113).

Figure 113
On this page you will see the following (Figure 113):
- You can use the search field to find a specific group type.
- You can copy, edit, or delete a _Group_ type on the list by clicking on the respective buttons.
- To create a group type, click on the +add new button.
Once you click on the +add new button you will see the following popup window (Figure 114):

Figure 114
- Add a description for this new group type e.g., Main.
- If the is Main option is turned on, then this _Group_ type will be considered the default group type.
- If the End Date Check option is turned on, then the system will check for an end date.
- In the Global Code field enter the code for this group type (If applicable to your institution).
- Click on the ‘Save’ button to save this new group type.
Once you click on the edit button (Figure 113) you will see a similar popup window with the creation popup window. Make your changes and click on the ‘Save’ button to save changes.
Internal Messaging Categories
Once you choose System from the type option and you choose Internal Messaging Categories you will be taken to the following page (Figure 115).

Figure 115
On this page you will see the following (Figure 115):
- You can print, export, or copy this list of internal messaging categories by clicking on the respective buttons on the left side of the page.
- You can use the search field to find a specific internal messaging category.
- You can copy, edit, or delete an internal messaging category on the list by clicking on the respective buttons.
- To create a new internal messaging category, click on the +add new button.
Once you click on the +add new button you will see the following popup window (Figure 116):

Figure 116
- Add a description for this new internal messaging category e.g., Service Message.
- If the is Institute Notifications option is turned on, then this internal message category will be considered a Notification category.
- If the Send Push option is turned on, then this internal message category will send push Notifications.
- Click on the ‘Save’ button to save this new internal messaging category.
Once you click on the edit button (Figure 115) you will see a similar popup window with the creation popup window. Make your changes and click on the ‘Save’ button to save changes.
Message Center Rights
Once you choose System from the type option and you choose Message Center Rights you will be taken to the following page (Figure 117).

Figure 117
On this page you will see the following (Figure 117):
- You can print, export, or copy this list of Message Center Rights by clicking on the respective buttons on the left side of the page.
- You can use the search field to find a specific Message Center Right.
- You can edit or delete a Message Center Right on the list by clicking on the respective buttons.
- To create a new Message Center Right, click on the +add new button.
Once you click on the +add new button you will see the following popup window (Figure 118):

Figure 118
- Choose a user type you want to give rights to e.g., Staff/ Employees.
- Choose a receiver user type that you want the user type to be able to send emails to e.g., Admins, so now a staff or employee user can contact an admin.
- If the Deny Reply option is turned on, then receiver user types will not be able to answer to messages/emails sent by Staff/Employees user types.
- Click on the ‘Save’ button to save this new Message Center Right.
Once you click on the edit button (Figure 117) you will see a similar popup window with the creation popup window. Make your changes and click on the ‘Save’ button to save changes.
Nationality
Once you choose System from the type option and you choose Nationality you will be taken to the following page (Figure 119).

Figure 119
On this page you will see the following (Figure 119):
- You can change the order of the list by dragging and dropping the items on the list. Once you do it you will see a new button called ‘Save-Re-ordering’.
- If you have changed the order of the items on the list, you can click on the ‘Auto Order’ button to revert the order to its original order.
- You can use the search field to find a specific nationality.
- You can copy, edit, or delete a nationality on the list by clicking on the respective buttons.
- To create a new nationality, click on the +add new button.
Once you click on the +add new button you will see the following popup window (Figure 120):

Figure 120
- Add a description for this new nationality e.g., Maltese.
- Add a short code for this nationality e.g., MT.
- Choose a country to which this nationality belongs e.g., Malta.
- Click on the ‘Save’ button to save this new nationality.
Once you click on the edit button (Figure 119) you will see a similar popup window with the creation popup window. Make your changes and click on the ‘Save’ button to save changes.
Pointing System Periods
Once you choose System from the type option and you choose Pointing System Periods, you will be taken to the following page.

Figure 121
- Use the controls Copy, Delete, and Edit to create a copy of an existing pointing system period, delete the pointing system period, or edit the period.

Figure 122
- Click on the Add New button to add a new period.
- Add the description, the start and end date for the pointing period.
- Then click on Save.

Figure 123
Postal Codes
Once you choose System from the type option and you choose Postal Codes you will be taken to the following page (Figure 124).

Figure 124
On this page you will see the following (Figure 124):
- You can change the order of the list by dragging and dropping the items on the list. Once you do it you will see a new button called ‘Save-Re-ordering’.
- If you have changed the order of the items on the list, you can click on the ‘Auto Order’ button to revert the order to its original order.
- You can use the search field to find a specific postal code.
- You can copy, edit, or delete a postal code on the list by clicking on the respective buttons.
- To create a new postal code, click on the +add new button.
Once you click on the +add new button you will see the following popup window (Figure 125):

Figure 125
- Add a description for this new postal code e.g., 15351.
- Choose an Area/State to which this postal code belongs e.g., Pallini.
- Click on the ‘Save’ button to save this new postal code.
Once you click on the edit button (Figure 124) you will see a similar popup window with the creation popup window. Make your changes and click on the ‘Save’ button to save changes.
Pronunciation Titles
Once you choose System from the type option and you choose Pronunciation Titles you will be taken to the following page (Figure 126).

Figure 126
On this page you will see the following (Figure 126):
- You can change the order of the list by dragging and dropping the items on the list. Once you do it you will see a new button called ‘Save-Re-ordering’.
- If you have changed the order of the items on the list, you can click on the ‘Auto Order’ button to revert the order to its original order.
- You can use the search field to find a specific pronunciation title.
- You can copy, edit, or delete a pronunciation title on the list by clicking on the respective buttons.
- To create a new pronunciation title, click on the +add new button.
Once you click on the +add new button you will see the following popup window (Figure 127):

Figure 127
- Add a description for this new pronunciation title e.g., Sir.
- Choose a Sex to which this pronunciation title belongs e.g., Male.
- Click on the ‘Save’ button to save this new pronunciation title.
Once you click on the edit button (Figure 126) you will see a similar popup window with the creation popup window. Make your changes and click on the ‘Save’ button to save changes.
Religion
Once you choose System from the type option and you choose Religion you will be taken to the following page (Figure 128).

Figure 128
On this page you will see the following (Figure 128):
- You can change the order of the list by dragging and dropping the items on the list. Once you do it you will see a new button called ‘Save-Re-ordering’.
- If you have changed the order of the items on the list, you can click on the ‘Auto Order’ button to revert the order to its original order.
- You can use the search field to find a specific religion.
- You can copy, edit, or delete a religion on the list by clicking on the respective buttons.
- To create a new religion, click on the +add new button.
Once you click on the +add new button you will see the following popup window (Figure 129):

Figure 129
- Add a description for this new religion e.g., Atheist.
- Click on the ‘Save’ button to save this new religion.
Once you click on the edit button (Figure 128) you will see a similar popup window with the creation popup window. Make your changes and click on the ‘Save’ button to save changes.
Scientific Field
Once you choose System from the type option and you choose Scientific Field you will be taken to the following page (Figure 151).

Figure 130
On this page you will see the following (Figure 130):
- You can change the order of the list by dragging and dropping the items on the list. Once you do it you will see a new button called ‘Save-Re-ordering’.
- If you have changed the order of the items on the list, you can click on the ‘Auto Order’ button to revert the order to its original order.
- You can use the search field to find a specific scientific field.
- You can copy, edit, or delete a scientific field on the list by clicking on the respective buttons.
- To create a new scientific field, click on the +add new button.
Once you click on the +add new button you will see the following popup window (Figure 131):

Figure 131
- Description: Add a description for this scientific field e.g., Chemistry.
- Global Code: Add a global code if applicable e.g., 7
- Custom Lookup 1: You can choose to use a custom lookup list (Optional)
- Custom Lookup 2: You can choose to use a second custom lookup list (Optional)
- Parent Scientific Field: Choose a parent scientific field for the one you are creating e.g., Science (If applicable).
- Scientific Field Category: Choose an additional form of categorization of this new scientific field e.g., Scientific Field, Category A (optional).
- Scientific Field Use: Which system entities will be able to use this scientific field e.g., Both (_Teachers_ and _Subjects_).
- Click on the ‘Save’ button to save this new religion.
Once you click on the edit button (Figure 128) you will see a similar popup window with the creation popup window. Make your changes and click on the ‘Save’ button to save changes.
Scientific Field Category
Once you choose System from the type option and you choose Scientific Field Categories you will be taken to the following page (Figure 132).

Figure 132
On this page you will see the following (Figure 132):
- You can change the order of the list by dragging and dropping the items on the list. Once you do it you will see a new button called ‘Save-Re-ordering’.
- If you have changed the order of the items on the list, you can click on the ‘Auto Order’ button to revert the order to its original order.
- You can use the search field to find a specific scientific field category.
- You can copy, edit, or delete a scientific field category on the list by clicking on the respective buttons.
- To create a new scientific field category, click on the +add new button.
Once you click on the +add new button you will see the following popup window (Figure 133):

Figure 133
- Add a short description for this new scientific field category e.g., LNG
- Add a description for this new scientific field category e.g., Linguistics.
- Click on the ‘Save’ button to save this new scientific field category.
Once you click on the edit button (Figure 132) you will see a similar popup window with the creation popup window. Make your changes and click on the ‘Save’ button to save changes.
Subject Category
Once you choose System from the type option and you choose _Subject_ Category you will be taken to the following page (Figure 134).

Figure 134
On this page you will see the following (Figure 134):
- You can change the order of the list by dragging and dropping the items on the list. Once you do it you will see a new button called ‘Save-Re-ordering’.
- If you have changed the order of the items on the list, you can click on the ‘Auto Order’ button to revert the order to its original order.
- You can use the search field to find a specific subject category.
- You can copy, edit, or delete a _Subject_ category on the list by clicking on the respective buttons.
- To create a new subject category, click on the +add new button.
Once you click on the +add new button you will see the following popup window (Figure 135):

Figure 135
- Add a description for this new subject category e.g., IB.
- Turn the Compulsory option on to make this subject category compulsory.
- Turn the Regards foreign language program option on to indicate that this _Subject_ category relates to subjects of a language program.
- Turn on the Entrance Assessments option on if you want subjects in this category to have entrance assessments e.g., prerequisites etc.
- Choose a Certification Level category for this subject category e.g., Advanced.
- Click on the ‘Save’ button to save this new scientific field category.
Once you click on the edit button (Figure 134) you will see a similar popup window with the creation popup window. Make your changes and click on the ‘Save’ button to save changes.
Tax Offices
Once you choose System from the type option and you choose Tax Offices you will be taken to the following page (Figure 136).

Figure 136
On this page you will see the following (Figure 136):
- You can print, export, or copy this list of tax offices by clicking on the respective buttons on the left side of the page.
- You can use the search field to find a specific tax office.
- You can edit or delete a tax office on the list by clicking on the respective buttons.
- To create a new tax office, click on the +add new button.
Once you click on the +add new button you will see the following popup window (Figure 137):

Figure 137
- Add a code for this tax office e.g., G32-1CSZ65651.
- Add a description for this new tax office e.g., Pallini Tax Office.
- Enter the address of this tax office e.g., Eirinis 39.
- Enter the postal code belonging to the new tax office e.g., 15351.
- Enter the phone number of this new tax office e.g., 6944334438.
- Enter a second phone number if applicable.
- Turn the Active switch on to indicate this is an active tax office.
- Click on the ‘Save’ button to save this new Tax Office.
Once you click on the edit button (Figure 136) you will see a similar popup window with the creation popup window. Make your changes and click on the ‘Save’ button to save changes.
Teachers Type

Figure 138
Compensation Categories
Once you choose _Teachers_ from the type option and you choose Compensation Categories you will be taken to the following page (Figure 139).

Figure 139
On this page you will see the following (Figure 139):
- Add a Literal Category 1 e.g., Full Time.
- Add a Literal Category 2 e.g., Part Time.
- Click on the ‘Save’ button to save this new Compensation Categories.
Note: There are only two categories.
Employment Data
Once you choose_Teachers_ from the type option and you choose Employment Data you will be taken to the following page (Figure 160).

Figure 140
On this page you will see the following (Figure 140):
- You can print, export, or copy this list of tax offices by clicking on the respective buttons on the left side of the page.
- You can use the search field to find a specific employee data item.
- You can edit or delete an employee data item on the list by clicking on the respective buttons.
- To create a new employee data item, click on the +add new button.
Once you click on the +add new button you will see the following popup window (Figure 141):

Figure 141
- Add a description for this new employment data item e.g., Visiting Professor.
- Enter a short description for this employment data item e.g., VP.
- Enter the Global Code belonging to the new employment data item if applicable e.g., 56.
- Choose where this employment data item will be used in e.g., _Teachers_, Employees or in this case Both.
- Choose a type that defines what type of employee data this new employee data item concerns e.g., Lega Relationship (to the institution).
- Click on the ‘Save’ button to save this new employee data item.
Once you click on the edit button (Figure 140) you will see a similar popup window with the creation popup window. Make your changes and click on the ‘Save’ button to save changes.
Job Roles
Once you choose _Teachers_ from the type option and you choose Job Roles you will be taken to the following page (Figure 142).
 Figure 142
On this page you will see the following (Figure 142):
- You can print, export, or copy this list of tax offices by clicking on the respective buttons on the left side of the page.
- You can use the search field to find a specific job role.
- You can edit or delete a job role on the list by clicking on the respective buttons.
- To create a new job role, click on the +add new button.
Once you click on the +add new button you will see the following popup window (Figure 143):

Figure 143
- Add a description for this new job role e.g., Chemistry.
- Turn this option on to make the job role available in enrolments.
- Click on the ‘Save’ button to save this new job role.
Once you click on the edit button (Figure 142) you will see a similar popup window with the creation popup window. Make your changes and click on the ‘Save’ button to save changes.
Teacher Condition
Once you choose _Teachers_ from the type option and you choose Teacher Condition you will be taken to the following page (Figure 144).

Figure 144
On this page you will see the following (Figure 144):
- You can change the order of the list by dragging and dropping the items on the list. Once you do it you will see a new button called ‘Save-Re-ordering’.
- If you have changed the order of the items on the list, you can click on the ‘Auto Order’ button to revert the order to its original order.
- You can use the search field to find a specific teacher condition.
- To create a new _Teacher_ condition, click on the +add new button.
Once you click on the +add new button you will see the following popup window (Figure 145):

Figure 145
- Add a description for this new teacher condition e.g., Suspended.
- Click on the ‘Save’ button to save this new _Teacher_ condition.
Teacher Working Hours Type
Once you choose Teachers from the type option and you choose _Teacher_ Working Hours Type you will be taken to the following page (Figure 146).

Figure 146
On this page you will see the following (Figure 146):
- You can use the search field to find a specific type of teacher working hours.
- You can edit or delete a type of _Teacher_ working hours on the list by clicking on the respective buttons.
- To create a new teacher working hours type, click on the +add new button.
Once you click on the +add new button you will see the following popup window (Figure 143):

Figure 147
- Add a description for this new job _Teacher_ working hour type e.g., After School Work.
- Choose what type these working hours are e.g., Extra Working Hours.
- Enter a global code if applicable.
- Calculate in working hours as option defines if this type is Positive or Negative towards the total work hours of a teacher.
- Number of Hours field, here you can enter the number of hours associated with this teacher work hour type e.g., 4.
- Turn on this switch if you want to lock the teacher working hours after they have been verified by a supervisor or administrator.
- Click on the ‘Save’ button to save this new teacher working hour type.
Once you click on the edit button (Figure 146) you will see a similar popup window with the creation popup window. Make your changes and click on the ‘Save’ button to save changes.
Custom Field Absence/Leave Type
This dropdown list is a custom one created in conjunction to the customize terminology section. Once you choose Teachers from the type option and you choose _Teacher_ Working Hours Type you will be taken to the following page (Figure 168).

Figure 148
On this page you will see the following (Figure 168):
- You can change the order of the list by dragging and dropping the items on the list. Once you do it you will see a new button called ‘Save-Re-ordering’.
- If you have changed the order of the items on the list, you can click on the ‘Auto Order’ button to revert the order to its original order.
- You can use the search field to find a specific absence/leave type.
- You can copy, edit, or delete an absence/leave type on the list by clicking on the respective buttons.
- To create a new absence/leave type, click on the +add new button.
Once you click on the +add new button you will see the following popup window (Figure 149):

Figure 149
- Add a description for this new absence/leave type e.g., Exam Leave.
- Click on the ‘Save’ button to save this new absence/leave type.
Once you click on the edit button (Figure 148) you will see a similar popup window with the creation popup window. Make your changes and click on the ‘Save’ button to save changes.
In the _Teacher_ section you will find more custom field dropdowns that you can configure here in conjunction with the customize terminology section.
Students Type

Figure 150
Advertising Medium
Once you choose _Students_ from the type option and you choose Advertising Medium you will be taken to the following page (Figure 151).

Figure 151
On this page you will see the following (Figure 151):
- You can use the search field to find a specific advertising medium.
- You can edit or delete an advertising medium on the list by clicking on the respective buttons.
- To create a new advertising medium, click on the +add new button.
Once you click on the +add new button you will see the following popup window (Figure 152):

Figure 152
- Add a description for this new advertising medium e.g., Advertorial on Education Today.
- Click on the ‘Save’ button to save this new advertising medium.
Once you click on the edit button (Figure 151) you will see a similar popup window with the creation popup window. Make your changes and click on the ‘Save’ button to save changes.
Departure Type
Once you choose _Students_ from the type option and you choose Departure Type you will be taken to the following page (Figure 153).

Figure 153
On this page you will see the following (Figure 153):
- You can change the order of the list by dragging and dropping the items on the list. Once you do it you will see a new button called ‘Save-Re-ordering’.
- If you have changed the order of the items on the list, you can click on the ‘Auto Order’ button to revert the order to its original order.
- You can use the search field to find a specific departure type.
- You can copy, edit, or delete a departure type on the list by clicking on the respective buttons.
- To create a new departure type, click on the +add new button.
Once you click on the +add new button you will see the following popup window (Figure 154):

Figure 154
- Add a description for this new departure type e.g., Financial Difficulties.
- Add a short description for this new departure type e.g., Financial Difficulties
- Enter a global code if applicable.
- Click on the ‘Save’ button to save this new departure type.
Once you click on the edit button (Figure 154) you will see a similar popup window with the creation popup window. Make your changes and click on the ‘Save’ button to save changes.
Ethnicity
Once you choose _Students_ from the type option and you choose Ethnicity you will be taken to the following page (Figure 155).

Figure 155
On this page you will see the following (Figure 155):
- You can use the search field to find a specific ethnicity.
- You can edit or delete an ethnicity on the list by clicking on the respective buttons.
- To create a new ethnicity, click on the +add new button.
Once you click on the +add new button you will see the following popup window (Figure 156):

Figure 156
- Add a description for this new ethnicity e.g., Greek.
- Click on the ‘Save’ button to save this new ethnicity.
Once you click on the edit button (Figure 155) you will see a similar popup window with the creation popup window. Make your changes and click on the ‘Save’ button to save changes.
Family Status
Once you choose _Students_ from the type option and you choose Family Status you will be taken to the following page (Figure 157).

Figure 157
On this page you will see the following (Figure 157):
- You can print, export, or copy this list of tax offices by clicking on the respective buttons on the left side of the page.
- You can use the search field to find a specific family status.
- You can edit or delete a family status on the list by clicking on the respective buttons.
- To create a new family status, click on the +add new button.
Once you click on the +add new button you will see the following popup window (Figure 157):

Figure 158
- Add a description for this new family status e.g., Married.
- Choose a status type to connect with this new family status e.g., Same Sex Parents.
- Turn on the Active for all option to make the family status available to all users.
- Turn the Active for Adults option to make the family status available to Adult users only.
- Turn the Active for Minors option to make the family status available to Minor users only.
- Click on the ‘Save’ button to save this new family status.
Once you click on the edit button (Figure 157) you will see a similar popup window with the creation popup window. Make your changes and click on the ‘Save’ button to save changes.
General Category
Once you choose _Students_ from the type option and you choose General Category you will be taken to the following page (Figure 159).

Figure 159
On this page you will see the following (Figure 159):
- You can view active or inactive categories
- You can use the search field to find a specific category.
- You can edit or delete a category on the list by clicking on the respective buttons.
- To create a general category, click on the +add new button.
Once you click on the +add new button you will see the following popup window (Figure 159):

Figure 160
- Add a description for this new general category e.g., IB Programme.
- Click on the ‘Save’ button to save this new general category.
Once you click on the edit button (Figure 159) you will see a similar popup window with the creation popup window. Make your changes and click on the ‘Save’ button to save changes.
Immigration Status
Once you choose _Students_ from the type option and you choose Immigration Status you will be taken to the following page (Figure 161).

Figure 161
On this page you will see the following (Figure 161):
- You can use the search field to find a specific immigration status.
- You can edit or delete an immigration status on the list by clicking on the respective buttons.
- To create a new immigration status, click on the +add new button.
Once you click on the +add new button you will see the following popup window (Figure 162):

Figure 162
- Add a description for this new immigration status e.g., EU Resident.
- Click on the ‘Save’ button to save this new immigration status.
Once you click on the edit button (Figure 161) you will see a similar popup window with the creation popup window. Make your changes and click on the ‘Save’ button to save changes.
Apprenticeship/ Thesis Enrollment Status
Once you choose _Students_ from the type of option and you choose _Apprenticeship_/_Thesis_ Enrollment Status you will be taken to the following page (Figure 163).

Figure 163
On this page you will see the following (Figure 163):
- You can use the search field to find a specific status.
- You can edit or delete the status on the list by clicking on the respective buttons.
- To create a new status, click on the +add new button.
Once you click on the +add new button you will see the following popup window (Figure 164):

Figure 164
- Add a description for this new language.
- Select a status
- You can choose to set the status as the default status
- Check the box _Student_ Action if this should be done activated by students.
- Click on the ‘Save’ button to save this new status.
Once you click on the edit button (Figure 163) you will see a similar popup window with the creation popup window. Make your changes and click on the ‘Save’ button to save changes.
Apprenticeship/ Thesis Status
Once you choose _Students_ from the type option and you choose _Apprenticeship_/ _Thesis_ Status you will be taken to the following page (Figure 165).

Figure 165
On this page you will see the following (Figure 165):
- You can use the search field to find a specific status.
- You can edit or delete the status on the list by clicking on the respective buttons.
- To create a new status, click on the +add new button.
Once you click on the +add new button you will see the following popup window (Figure 164):

Figure 166
- Add a description for this new language.
- Select a status
- Click on the ‘Save’ button to save this new status.
Once you click on the edit button (Figure 165) you will see a similar popup window with the creation popup window. Make your changes and click on the ‘Save’ button to save changes.
Interview Status
Once you choose _Students_ from the type option and you choose Interview Status you will be taken to the following page (Figure 167).

Figure 167
On this page you will see the following (Figure 167):
- You can use the search field to find a specific status.
- You can edit or delete the status on the list by clicking on the respective buttons.
- To create a new status, click on the +add new button.
Once you click on the +add new button you will see the following popup window (Figure 164):

Figure 168
- Add a description for this new language e.g., Second Interview.
- Select the Type from the dropdown, i.e., Passed or Not Passed.
- Click on the ‘Save’ button to save this new status.
Once you click on the edit button (Figure 167) you will see a similar popup window with the creation popup window. Make your changes and click on the ‘Save’ button to save changes.
Languages
Once you choose _Students_ from the type option and you choose Languages you will be taken to the following page (Figure 169).

Figure 169
On this page you will see the following (Figure 169):
- You can use the search field to find a specific language.
- You can edit or delete a language on the list by clicking on the respective buttons.
- To create a new language, click on the +add new button.
Once you click on the +add new button you will see the following popup window (Figure 164):
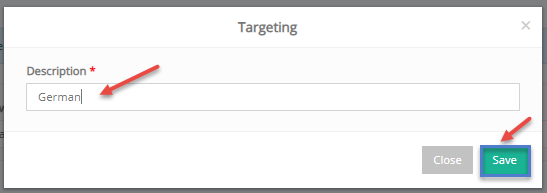
Figure 170
- Add a description for this new language e.g., German.
- Click on the ‘Save’ button to save this new language.
Once you click on the edit button (Figure 169) you will see a similar popup window with the creation popup window. Make your changes and click on the ‘Save’ button to save changes.
Medical Examinations & Vaccinations
Once you choose _Students_ from the type option and you choose Medical Examinations & Vaccinations you will be taken to the following page (Figure 171).

Figure 171
On this page you will see the following (Figure 171):
- You can use the search field to find a specific medical examination or vaccination.
- You can edit or delete a medical examination or vaccination on the list by clicking on the respective buttons.
- To create a new medical examination, vaccination, special requirement, available drug click on the +Actions button and choose the option you want.
Once you click on the +Actions button/+medical examination you will see the following popup window (Figure 172):

Figure 172
- Add a description for this new Medical Examination e.g., Head Screening.
- Dose/Repeat field: the number of doses or repetitions needed for this medical examination e.g., 0
- Product Code field: medication product code if applicable.
- Is prerequired switch: turn on if this medical examination is prerequired.
- Include in Statistics switch: if this option is turned on this data will be included in statistical reports.
- Global Code field: enter global code number if applicable.
- Click on the ‘Save’ button to save this new medical examination.
Once you click on the edit button (Figure 171) you will see a similar popup window with the creation popup window. Make your changes and click on the ‘Save’ button to save changes.
Once you click on the +Actions button/+Vaccinations you will see the following popup window (Figure 173):

Figure 173
- Add a description for this new vaccination e.g., Flu Shot.
- Dose/Repeat field: the number of doses or repetitions needed for this vaccination e.g., 1
- Product Code field: medication product code if applicable.
- Is prerequired switch: turn on if this vaccination is prerequired.
- Include in Statistics switch: if this option is turned on this data will be included in statistical reports.
- Global Code field: enter global code number if applicable.
- Click on the ‘Save’ button to save this new vaccination.
Once you click on the edit button (Figure 171) you will see a similar popup window with the creation popup window. Make your changes and click on the ‘Save’ button to save changes.
Once you click on the +Actions button/+Special Requirement you will see the following popup window (Figure 174):

Figure 174
- Add a description for this special requirement e.g., Coconut Allergy.
- Dose/Repeat field: the number of doses or repetitions needed for this coconut allergy e.g., 0 (if applicable).
- Product Code field: medication product code if applicable.
- Is prerequired switch: turn on if this special requirement info is prerequired.
- Include in Statistics switch: if this option is turned on this data will be included in statistical reports.
- Global Code field: enter global code number if applicable.
- Click on the ‘Save’ button to save this special requirement.
Once you click on the edit button (Figure 171) you will see a similar popup window with the creation popup window. Make your changes and click on the ‘Save’ button to save changes.
Once you click on the +Actions/+Available Drug you will see the following popup window (Figure 175):

Figure 175
- Add a description for this available drug e.g., EpiPen.
- Dose/Repeat field: the number of doses or repetitions needed for this available drug e.g., 0 (if applicable).
- Product Code field: medication product code if applicable.
- Is prerequired switch: turn on if this available drug is prerequired.
- Include in Statistics switch: if this option is turned on this data will be included in statistical reports.
- Global Code field: enter global code number if applicable.
Click on the ‘Save’ button to save this available drug.
Once you click on the edit button (Figure 171) you will see a similar popup window with the creation popup window. Make your changes and click on the ‘Save’ button to save changes.
Medical Issues
Once you choose _Students_ from the type option and you choose Medical Issues you will be taken to the following page (Figure 176).

Figure 176
On this page you will see the following (Figure 176):
- You can use the search field to find a specific medical issue.
- You can edit or delete a medical issue on the list by clicking on the respective buttons.
- To create a new medical issue, click on the +add new button.
Once you click on the edit button (Figure 176) you will see a similar popup window with the creation popup window. Make your changes and click on the ‘Save’ button to save changes.
Preregistration For
Once you choose _Students_ from the type option and you choose Preregistration For you will be taken to the following page (Figure 177).

Figure 177
On this page you will see the following (Figure 177):
- You can print, export, or copy list of reasons by clicking on the respective buttons
- You can use the search field to find a specific preregistration for.
- You can edit or delete a reason on the list by clicking on the respective buttons.
- To create a new reason, click on the +add new button.
Once you click on the +add new button you will see the following popup window (Figure 178):

Figure 178
- Add a description.
- Click on the ‘Save’ button to save the changes.
Once you click on the edit button (Figure 177) you will see a similar popup window with the creation popup window. Make your changes and click on the ‘Save’ button to save changes.
Reasons
Once you choose_Students_ from the type option and you choose Reasons you will be taken to the following page (Figure 179).

Figure 179
On this page you will see the following (Figure 177):
- You can print, export, or copy list of reasons by clicking on the respective buttons
- You can use the search field to find a specific reason.
- You can edit or delete a reason on the list by clicking on the respective buttons.
- To create a new reason, click on the +add new button.
Once you click on the +add new button you will see the following popup window (Figure 180):

Figure 180
- Add a description for this reason e.g., Change of Agreement.
- Type option: choose a type for this reason e.g., Change arrangement
- Click on the ‘Save’ button to save this reason.
Once you click on the edit button (Figure 179) you will see a similar popup window with the creation popup window. Make your changes and click on the ‘Save’ button to save changes
Recommendation Type
Once you choose _Students_ from the type option and you choose Recommendation Type you will be taken to the following page (Figure 181).

Figure 181
On this page you will see the following (Figure 181):
- You can print, export, or copy list of reasons by clicking on the respective buttons.
- You can use the search field to find a specific recommendation type.
- You can edit or delete a recommendation type on the list by clicking on the respective buttons.
- To create a new recommendation type, click on the +add new button.
Once you click on the +add new button you will see the following popup window (Figure 182):

Figure 182
- Add a description for this recommendation type e.g., By an Employee.
- Type option: choose a type of entity associated with this description e.g., Officer
- Click on the ‘Save’ button to save this recommendation type.
Once you click on the edit button (Figure 181) you will see a similar popup window with the creation popup window. Make your changes and click on the ‘Save’ button to save changes.
SEN & Medical Conditions
Once you choose _Students_ from the type option and you choose SEN & Medical Conditions you will be taken to the following page (Figure 183).

Figure 183
On this page you will see the following (Figure 183):
- You can use the search field to find a specific SEN or medical condition.
- You can edit or delete a SEN or medical condition on the list by clicking on the respective buttons.
- To create a new SEN or Medical Condition, click on the +actions button and choose between +Medical Condition or +Allergy.

- Once you click on the +Medical Condition button from the +Actions dropdown button you will see the following popup window appear (Figure 184).


Figure 184
- Add a description for this Medical Condition e.g., Dyslexia.
- Emergency actions: describe the actions that need to be taken in case of medical emergency or learning impediment e.g., Oral Examinations.
- Severity option: choose how severe this condition is e.g., Medium.
- Global Code field: enter a global code if applicable.
- Is SEN: turn on if this condition is or is associate with special education needs.
- Include in Statistics option: if this option is turned on this condition and associated data will be included in the reporting of statistical data.
- Click on the ‘Save’ button to save this Medical Condition.
Once you click on the edit button (Figure 183) you will see a similar popup window with the creation popup window. Make your changes and click on the ‘Save’ button to save changes.
Once you click on the +Allergies button from the +Actions dropdown button you will see the following popup window appear (Figure 185).

Figure 185
- Add a description for this allergy e.g., Coconut.
- Emergency actions: describe the actions that need to be taken in case of an allergy attack e.g., Use EpiPen.
- Severity option: choose how severe this condition is e.g., High.
- Global Code field: enter a global code if applicable.
- Is SEN: turn on if this condition is or is associate with special education needs.
- Include in Statistics option: if this option is turned on this condition and associated data will be included in the reporting of statistical data.
- Click on the ‘Save’ button to save this Medical Condition.
Once you click on the edit button (Figure 183) you will see a similar popup window with the creation popup window. Make your changes and click on the ‘Save’ button to save changes.
SEN Status
Once you choose _Students_ from the type option and you choose SEN Status you will be taken to the following page (Figure 186).

Figure 186
On this page you will see the following (Figure 186):
- You can change the order of the list by dragging and dropping the items on the list. Once you do it you will see a new button called ‘Save-Re-ordering’.
- If you have changed the order of the items on the list, you can click on the ‘Auto Order’ button to revert the order to its original order.
- You can use the search field to find a specific SEN status.
- You can copy, edit or delete a SEN status on the list by clicking on the respective buttons.
- To create a new SEN status, click on the +add new button.
Once you click on the +add new button you will see the following popup window (Figure 187):

Figure 187
- Add a description for this new SEN status e.g., None.
- Click on the ‘Save’ button to save this new SEN status.
Once you click on the edit button (Figure 186) you will see a similar popup window with the creation popup window. Make your changes and click on the ‘Save’ button to save changes.
Status
Once you choose _Students_ from the type option and you choose Status you will be taken to the following page (Figure 188).

Figure 188
On this page you will see the following (Figure 188):
- You can change the order of the list by dragging and dropping the items on the list. Once you do it you will see a new button called ‘Save-Re-ordering’.
- If you have changed the order of the items on the list, you can click on the ‘Auto Order’ button to revert the order to its original order.
- You can print, export, or copy list of reasons by clicking on the respective buttons
- You can use the search field to find a specific status.
- You can copy, edit, or delete a status on the list by clicking on the respective buttons.
- To create a new status, click on the +add new button.
Once you click on the +add new button you will see the following popup window (Figure 189):

Figure 189
- Description: Add a description for this new status e.g., Registered.
- Color Name: Add a color to identify this status in the list of statuses
- Status Type: Choose a status type to connect (relate to the function) to this new status e.g., Registered
- Include in Institution’s Register: If this is turned on then this status will be included in institution register.
- Online Courses: Turn this on to include this status in online class enrolments.
- Re-registration to Academic Period (Check according to date): Turn this on to include this status in re-registration to academic periods (checks according to date) cases.
- Re-registration from Academic Period: Turn this on to include this status in re-registration from academic periods cases.
- Re-registration to Academic Period: Turn this on to include this status in re-registration to academic periods cases.
- Application Status: Choose an application status that corresponds to the new status you are creating e.g., Registered Student.
- Provider Action: Choose the action to be taken if user _Student_ attains registered status e.g., Auto-Creation of Provider Account.
Click on the ‘Save’ button to save this new status.
Once you click on the edit button (Figure 188) you will see a similar popup window with the creation popup window. Make your changes and click on the ‘Save’ button to save changes.
Subject Status
Once you choose _Students_ from the type option and you choose _Subject_ Status you will be taken to the following page (Figure 190).

Figure 190
On this page you will see the following (Figure 190):
- You can change the order of the list by dragging and dropping the items on the list. Once you do it you will see a new button called ‘Save-Re-ordering’.
- If you have changed the order of the items on the list, you can click on the ‘Auto Order’ button to revert the order to its original order.
- You can use the search field to find a specific subject status.
- You can copy, edit, or delete a _Subject_ status on the list by clicking on the respective buttons.
- To create a new subject status, click on the +add new button.
Once you click on the +add new button you will see the following popup window (Figure 191):

Figure 191
- Description: Add a description for this new subject status e.g., Pass.
- Type: This _Subject_ status regards a type which indicates subject has been passed.
- Mark Success: If this is turned on it indicates that this status is marked as a success.
- Mark Failure: If this is turned on it indicates that this status is marked as a failure.
- Exemption of Marks: If this is turned on then this status will exempt from the marking process.
- Online Courses: Turn this on to include this status in online class enrolments.
- Outstanding Approval: Turn this on this status will require approval by supervisor or admin.
- Absence Failure: Turn this on if this status indicates failure based on absences.
- Retake: Turn this on, to indicate that this subject with this status can be retaken.
- Compensatory Pass: Turn this on to indicate that the subject in this _Subject_ status is passed via transfer credits or other reasons.
- Attendance Exclusion: Select the attendance exclusion option from the dropdown list.
Click on the ‘Save’ button to save this new subject status.
Once you click on the edit button (Figure 190) you will see a similar popup window with the creation popup window. Make your changes and click on the ‘Save’ button to save changes.
Traineeship Attendance Status
Once you choose _Students_ from the type option and you choose Traineeship Attendance Status you will be taken to the following page (Figure 192).

Figure 192
On this page you will see the following (Figure 192):
- You can print, copy, or export list by clicking on the respective buttons.
- You can use the search field to find a specific status.
- You can copy, edit, or delete a transfer reason on the list by clicking on the respective buttons.
- To create a new status, click on the +add new button.
Once you click on the +add new button you will see the following popup window (Figure 193):

Figure 193
- Add a description for this new transfer reason e.g., Present.
- Check if should be marked as a Presence.
- Click on the ‘Save’ button to save this new status.
Once you click on the edit button (Figure 192) you will see a similar popup window with the creation popup window. Make your changes and click on the ‘Save’ button to save changes.
Traineeship Final Results
Once you choose _Students_ from the type option and you choose Traineeship Final Results you will be taken to the following page (Figure 194).

Figure 194
On this page you will see the following (Figure 194):
- You can print, copy, or export list by clicking on the respective buttons.
- You can use the search field to find a specific result.
- You can copy, edit, or delete a transfer reason on the list by clicking on the respective buttons.
- To create a result, click on the +add new button.
Once you click on the +add new button you will see the following popup window (Figure 195):

Figure 195
- Add a description for this new result.
- Check if this should be marked as a pass or not.
- Click on the ‘Save’ button to save this new transfer reason.
Once you click on the edit button (Figure 194) you will see a similar popup window with the creation popup window. Make your changes and click on the ‘Save’ button to save changes.
Transfer Reason
Once you choose _Students_ from the type option and you choose Transfer Reasons you will be taken to the following page (Figure 196).

Figure 196
On this page you will see the following (Figure 196):
- You can print, copy, or export list by clicking on the respective buttons.
- You can use the search field to find a specific transfer reason.
- You can copy, edit, or delete a transfer reason on the list by clicking on the respective buttons.
- To create a new transfer reason, click on the +add new button.
Once you click on the +add new button you will see the following popup window (Figure 197):

Figure 197
- Add a description for this new transfer reason e.g., Academic Reasons.
- Type option: this transfer reason regards a type which indicates _Student_ transferred to this school.
- Global Code field: add a global code if applicable.
- Click on the ‘Save’ button to save this new transfer reason.
Once you click on the edit button (Figure 196) you will see a similar popup window with the creation popup window. Make your changes and click on the ‘Save’ button to save changes.
Type of Studies
Once you choose _Students_ from the type option and you choose Type of Studies you will be taken to the following page (Figure 198).

Figure 198
On this page you will see the following (Figure 198):
- You can change the order of the list by dragging and dropping the items on the list. Once you do it you will see a new button called ‘Save-Re-ordering’.
- If you have changed the order of the items on the list, you can click on the ‘Auto Order’ button to revert the order to its original order.
- You can use the search field to find a specific type of studies.
- You can copy, edit, or delete a type of studies on the list by clicking on the respective buttons.
- To create a new type of studies, click on the +add new button.
Once you click on the +add new button you will see the following popup window (Figure 199):

Figure 199
- Add a description for this new type of studies e.g., Full Time.
- Add short description for this type of studies e.g., FT.
- Global Code field: add a global code if applicable.
- Click on the ‘Save’ button to save this new type of studies.
Once you click on the edit button (Figure 198) you will see a similar popup window with the creation popup window. Make your changes and click on the ‘Save’ button to save changes.
Certification Categories/ Qualification Levels
Once you choose _Students_ from the type option and you choose Certification Categories/ Qualification Levels you will be taken to the following page (Figure 200).

Figure 200
On this page you will see the following (Figure 200):
- You can use the search field to find a specific certification categories/qualification level.
- You can copy, edit, or delete a Certification Category/Qualification Level on the list by clicking on the respective buttons.
- To create a new Certification Category/Qualification Level, click on the +add new button.
Once you click on the +add new button you will see the following popup window (Figure 201):

Figure 201
- Add a description.
- Enable the default accounting tab.
- Select a default report for this certification category/qualification level from the dropdown.
- Select a transaction category from the dropdown.
- Select a transaction type from the dropdown.
- Enable the qualification switch if this is a qualification.
- Click on the ‘Save’ button to save.
Once you click on the edit button (Figure 200) you will see a similar popup window with the creation popup window. Make your changes and click on the ‘Save’ button to save changes.
Certification Units/ Qualification Marks
Once you choose _Students_ from the type option and you choose Certification Units/ Qualification Marks you will be taken to the following page (Figure 202).

Figure 202
On this page you will see the following (Figure 202):
- You can use the search field to find a specific certification units/qualification mark.
- You can copy, edit, or delete a certification unit/qualification mark on the list by clicking on the respective buttons.
- To create a new certification unit/qualification mark, click on the +add new button.
Once you click on the +add new button you will see the following popup window (Figure 201):

Figure 203
- Add a description.
- Add a value.
- Add an account information.
- Add the send account details.
- Enable the provisional switch for provisional grades.
- Enable the qualification switch for qualification marks.
- Click on the ‘Save’ button to save this new type of studies.
Once you click on the edit button (Figure 202) you will see a similar popup window with the creation popup window. Make your changes and click on the ‘Save’ button to save changes.
In the _Students_ Type you can also create custom dropdown lists by using a custom dropdown and by customizing terminology for that dropdown.
Certification Levels/ Qualification Exam Boards
Once you choose _Students_ from the type option and you choose Certification Levels/ Qualification Exam Boards you will be taken to the following page (Figure 204).

Figure 204
On this page you will see the following (Figure 204):
- You can use the search field to find a specific certification levels/qualification exam board.
- You can copy, edit, or delete a type of studies on the list by clicking on the respective buttons.
- To create a new certification levels/qualification exam board, click on the +add new button.
Once you click on the +add new button you will see the following popup window (Figure 199):

Figure 205
- Add a description
- Enable the unit switch to mark this as a unit.
- Enable the qualification switch to mark this as a qualification.
- Select the category from a category dropdown.
- Add certification units
- Add an account.
- Add second account information.
- Click on the ‘Save’ button to save.
Once you click on the edit button (Figure 205) you will see a similar popup window with the creation popup window. Make your changes and click on the ‘Save’ button to save changes.
Qualification/ Certification Status
Once you choose _Students_ from the type option and you choose Qualification/ Certification Status you will be taken to the following page (Figure 206).

Figure 206
On this page you will see the following (Figure 206):
- You can use the search field to find a specific qualification/certification status.
- You can copy, edit, or delete a qualification/certification status on the list by clicking on the respective buttons.
- To create a new qualification/certification status, click on the +add new button.
Once you click on the +add new button you will see the following popup window (Figure 207):

Figure 207
- Add a description for this new qualification/certification status.
- Select a certification status type.
- Click on the ‘Save’ button to save.
Once you click on the edit button (Figure 206) you will see a similar popup window with the creation popup window. Make your changes and click on the ‘Save’ button to save changes.
In the _Students_ Type you can also create custom dropdown lists by using a custom dropdown and by customizing terminology for that dropdown.
Relatives Type

Figure 208
Grade Level
Once you choose Relatives from the type option and you choose _Grade Level_ you will be taken to the following page (Figure 209).

Figure 209
On this page you will see the following (Figure 209):
- You can change the order of the list by dragging and dropping the items on the list. Once you do it you will see a new button called ‘Save-Re-ordering’.
- If you have changed the order of the items on the list, you can click on the ‘Auto Order’ button to revert the order to its original order.
- You can use the search field to find a specific _Grade Level_.
- You can copy, edit, or delete an _Grade Level_ on the list by clicking on the respective buttons.
- To create a new _Grade Level_, click on the +add new button.
Once you click on the +add new button you will see the following popup window (Figure 210):

Figure 210
- Add a description for this new _Grade Level_ e.g., College.
- Click on the ‘Save’ button to save this new _Grade Level_.
Once you click on the edit button (Figure 209) you will see a similar popup window with the creation popup window. Make your changes and click on the ‘Save’ button to save changes.
Parent Status
Once you choose Relatives from the type option and you choose Parent Status you will be taken to the following page (Figure 211).

Figure 211
On this page you will see the following (Figure 211):
- You can change the order of the list by dragging and dropping the items on the list. Once you do it you will see a new button called ‘Save-Re-ordering’.
- If you have changed the order of the items on the list, you can click on the ‘Auto Order’ button to revert the order to its original order.
- You can use the search field to find a specific parent status.
- You can copy, edit, or delete a parent status on the list by clicking on the respective buttons.
- To create a new parent status, click on the +add new button.
Once you click on the +add new button you will see the following popup window (Figure 212):

Figure 212
- Add a description for this new parent status e.g., Divorced.
- Click on the ‘Save’ button to save this new parent status.
Once you click on the edit button (Figure 211) you will see a similar popup window with the creation popup window. Make your changes and click on the ‘Save’ button to save changes.
Partner Specialty
Once you choose Relatives from the type option and you choose Partner Specialty you will be taken to the following page (Figure 213).

Figure 213
On this page you will see the following (Figure 213):
- You can change the order of the list by dragging and dropping the items on the list. Once you do it you will see a new button called ‘Save-Re-ordering’.
- If you have changed the order of the items on the list, you can click on the ‘Auto Order’ button to revert the order to its original order.
- You can use the search field to find a specific partner specialty.
- You can copy, edit, or delete a partner specialty on the list by clicking on the respective buttons.
- To create a new partner specialty, click on the +add new button.
Once you click on the +add new button you will see the following popup window (Figure 214):

Figure 214
- Add a description for this new partner specialty e.g., Lawyer.
- Click on the ‘Save’ button to save this new partner specialty.
Once you click on the edit button (Figure 213) you will see a similar popup window with the creation popup window. Make your changes and click on the ‘Save’ button to save changes.
Relative Categories
Once you choose Relatives from the type option and you choose Relative Types you will be taken to the following page (Figure 215).

Figure 215
On this page you will see the following (Figure 215):
- You can print, copy, or export list by clicking on the respective buttons.
- You can use the search field to find a specific relative type.
- You can copy, edit, or delete a relative type on the list by clicking on the respective buttons.
- To create a new relative type, click on the +add new button.
Once you click on the +add new button you will see the following popup window (Figure 216):

Figure 216
- Add a description for this new relative type e.g., Foster Parent.
- Enable the relevant switch.
- Click on the ‘Save’ button to save.
Once you click on the edit button (Figure 215) you will see a similar popup window with the creation popup window. Make your changes and click on the ‘Save’ button to save changes.
Relative Types
Once you choose Relatives from the type option and you choose Relative Types you will be taken to the following page (Figure 217).

Figure 217
On this page you will see the following (Figure 217):
- You can print, copy, or export list by clicking on the respective buttons.
- You can use the search field to find a specific relative type.
- You can copy, edit, or delete a relative type on the list by clicking on the respective buttons.
- To create a new relative type, click on the +add new button.
Once you click on the +add new button you will see the following popup window (Figure 218):

Figure 218
- Add a description for this new relative type e.g., Foster Parent.
- Siblings switch: if this is turned on then this type will be considered a sibling of a student.
- Internal Type of Relationship switch: if this is turned on then this type will be considered as an alternative relative of a _Student_.
- Parent switch: if this is turned on then this type will be considered a parent of a student.
- Click on the ‘Save’ button to save this new partner specialty.
Once you click on the edit button (Figure 217) you will see a similar popup window with the creation popup window. Make your changes and click on the ‘Save’ button to save changes.
In the Relative Type you can also create custom dropdown lists by using a custom dropdown and by customizing terminology for that dropdown.
Employee Type

Figure 219
Other Contact Category
Once you choose Employee from the type option and you choose Other Contact Category you will be taken to the following page (Figure 220).

Figure 220
On this page you will see the following (Figure 220):
- You can print, copy, or export list by clicking on the respective buttons.
- You can use the search field to find a specific contact category.
- You can copy, edit, or delete a contact category on the list by clicking on the respective buttons.
- To create a new contact category (other), click on the +add new button.
Once you click on the +add new button you will see the following popup window (Figure 221):

Figure 221
- Add a description for this new contact category (other) e.g., Bus Chaperon.
- Type option: choose the type of entity you want to connect with this category e.g., foe the Bus Chaperon category we will choose to include the employee type.
- Internal Employee switch: if this is turned on then this contact category will be for use with institution employees and will mark entities connected to this category as internal employees.
- Locked switch: if this is turned on then this contact category will be un-editable.
- Driver switch: if this is turned on then this contact category will be for employees who are considered drivers for the institution.
- Co-Drivers switch: if this is turned on then this contact category will be for employees who are considered co-drivers for the institution e.g., in our case bus chaperons.
- Doctor switch: if this is turned on then this contact category will be for employees who are considered/ are doctors for the institution.
- Internship switch: if this is turned on then this contact category will be for employees who are considered interns for the institution.
- Enable Portal Access switch: if this is turned on then the entities e.g., employees of this contact category will have access to the portal with their own accounts, rights and privileges.
- Company switch: if this is turned on then the entities e.g., employees of this contact category will be considered as if they belonged to a separate company.
- Click on the ‘Save’ button to save this new contact category (other).
Once you click on the edit button (Figure 220) you will see a similar popup window with the creation popup window. Make your changes and click on the ‘Save’ button to save changes.
In the Employee Type you can also create custom field dropdown lists by using a custom dropdown and by customizing terminology for that dropdown.
Service Type
 Figure 222
Activities Classes
Once you choose Service from the type option and you choose Activities Classes you will be taken to the following page (Figure 223).

Figure 223
On this page you will see the following (Figure 223):
- You can print, copy, or export list by clicking on the respective buttons.
- You can use the search field to find a specific activity class.
- You can copy, edit, or delete an activity class on the list by clicking on the respective buttons.
- To create a new activity class, click on the +add new button.
Once you click on the +add new button you will see the following popup window (Figure 224):

Figure 224
- Add a description for this new service category e.g., sport clubs.
- Add a limit.
- Select a classroom from the dropdown.
- Select a _Teacher_ from the dropdown.
- Click on the ‘Save’ button to save.
Once you click on the edit button (Figure 223) you will see a similar popup window with the creation popup window. Make your changes and click on the ‘Save’ button to save changes.
Service Categories
Once you choose Service from the type option and you choose Service Categories you will be taken to the following page (Figure 225).

Figure 225
On this page you will see the following (Figure 225):
- You can print, copy, or export list by clicking on the respective buttons.
- You can use the search field to find a specific service category.
- You can copy, edit, or delete a service category on the list by clicking on the respective buttons.
- To create a new service category (other), click on the +add new button.
Once you click on the +add new button you will see the following popup window (Figure 226):

Figure 226
- Add a description for this new service category e.g., sport clubs.
- Daily Pricing Type option: choose the type of pricing method you wish to connect to this new service category e.g., if services are in this service category then they will be charged to _Students_ monthly.
- Account field: enter the institutions bank account number.
- General Ledger (Alternative) Account field: enter an alternative bank account if applicable.
- Book Invoicing switch: if this is turned on then the services in this service category will be invoiced in the institution books.
- Registered once per family switch: if this is turned on then services in this service category can only accept registration from once from each _Student_.
- Set preselected visibility to payers/parents as hidden switch: if this is turned on then this contact category will be for employees who are considered/ are doctors for the institution.
- Internship switch: if this is turned on then this contact category will be for employees who are considered interns for the institution.
- Enable Portal Access switch: if this is turned on then the entities e.g., employees of this contact category will have access to the portal with their own accounts, rights, and privileges.
- Company switch: if this is turned on then the entities e.g., employees of this contact category will be considered as if they belonged to a separate company.
- Click on the ‘Save’ button to save this new contact category (other).
Once you click on the edit button (Figure 225) you will see a similar popup window with the creation popup window. Make your changes and click on the ‘Save’ button to save changes.
Services Type
Once you choose Service from the type option and you choose Services Types you will be taken to the following page (Figure 227).

Figure 227
On this page you will see the following (Figure 227):
- You can change the order of the list by dragging and dropping the items on the list. Once you do it you will see a new button called ‘Save-Re-ordering’.
- If you have changed the order of the items on the list, you can click on the ‘Auto Order’ button to revert the order to its original order.
- You can use the search field to find a specific service type.
- You can copy, edit, or delete a service type on the list by clicking on the respective buttons.
- To create a new service type, click on the +add new button.
Once you click on the +add new button you will see the following popup window (Figure 228):

Figure 228
- Add a description for this new service type e.g., Every day since this will signify that this service type is for services of everyday frequency.
- Click on the ‘Save’ button to save this new service type.
Once you click on the edit button (Figure 227) you will see a similar popup window with the creation popup window. Make your changes and click on the ‘Save’ button to save changes.
Note: All fields, options and switches with a red asterisk are mandatory and they need to be filled out, activated/deactivated etc. Failure to do so may lead to the inability to save changes or create new items, entities etc.