Quick Alerts
Introduction
Quick Alerts in Classter empower back-office and teacher users to quickly create and manage time-sensitive notifications directly within the CRM environment.
This feature displays alerts across key areas of the portal, such as Attendance screens, ensuring that _Teachers_ are immediately informed about important, time-critical situations involving their students.
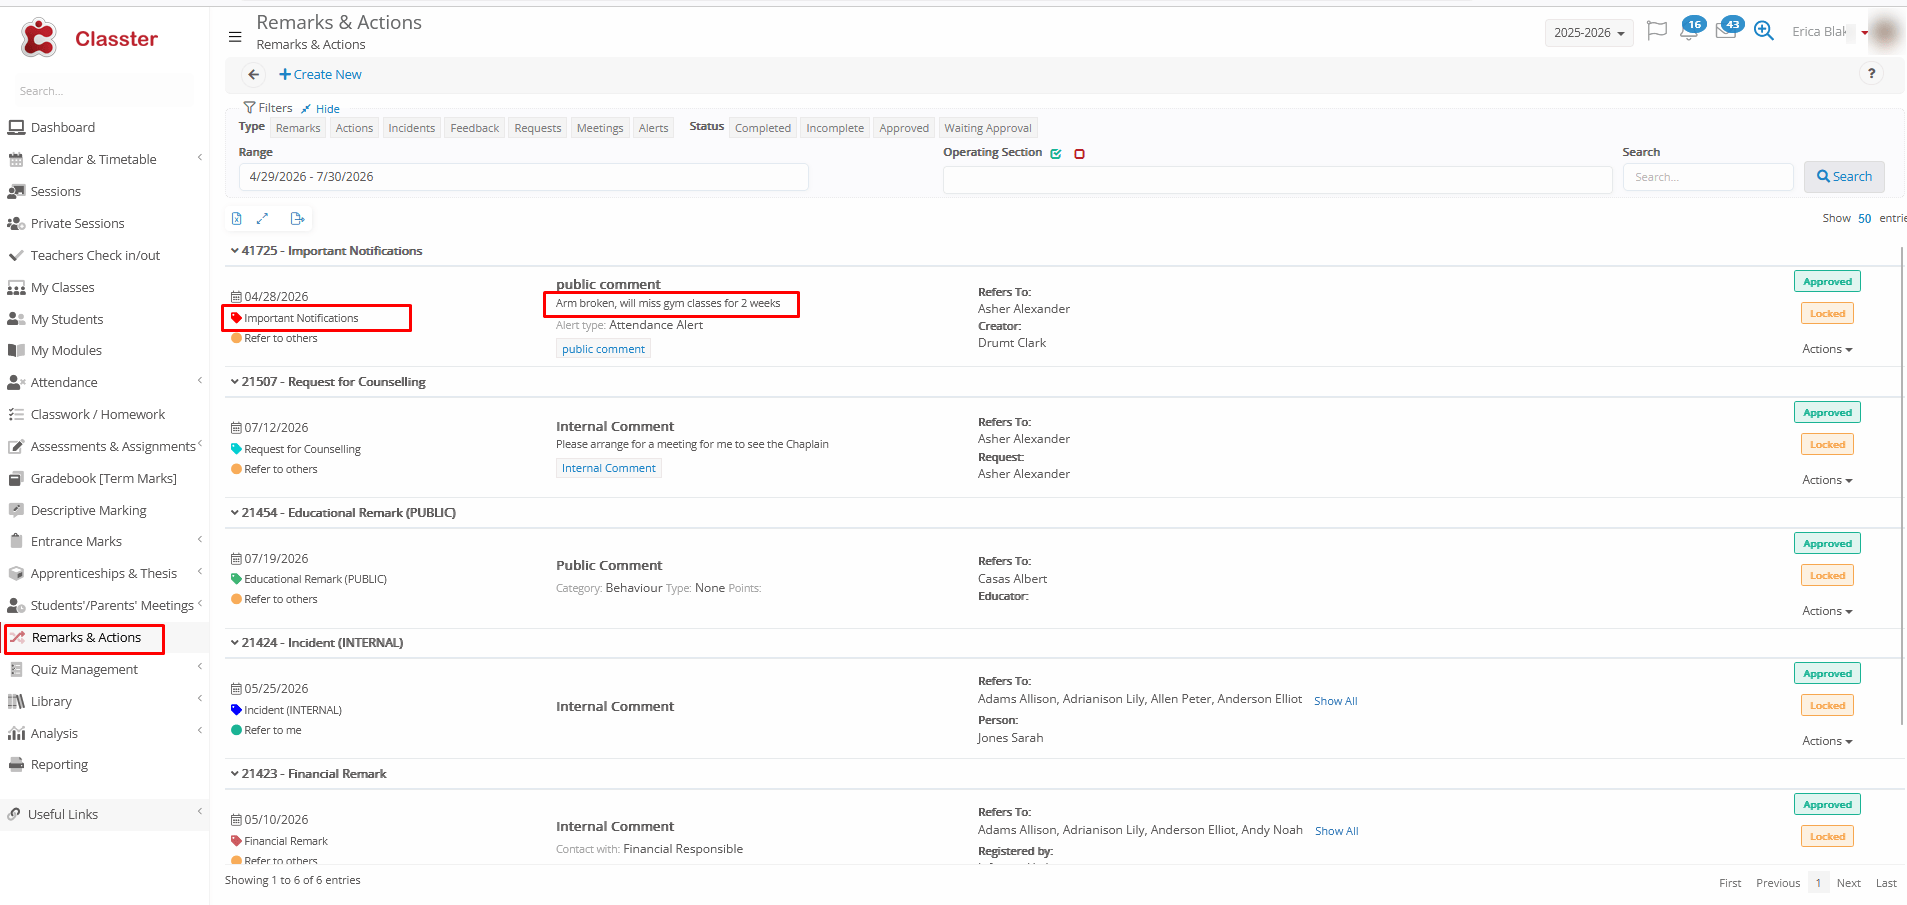
For example, if a student has an accident and breaks their arm, an alert can be created to indicate that the student is exempt from Gym classes for two weeks. During the specified alert period, this notification will be prominently displayed in the Teachers Portal, helping staff stay informed and respond appropriately.
By surfacing critical information exactly when and where it is needed, Quick Alerts enhance communication, improve awareness, and support better decision-making across the school.
Settings & CRM Categories
To activate Quick alerts, navigate to:
ACONFIGURATION > CRM Settings > General settings > CRM Settings
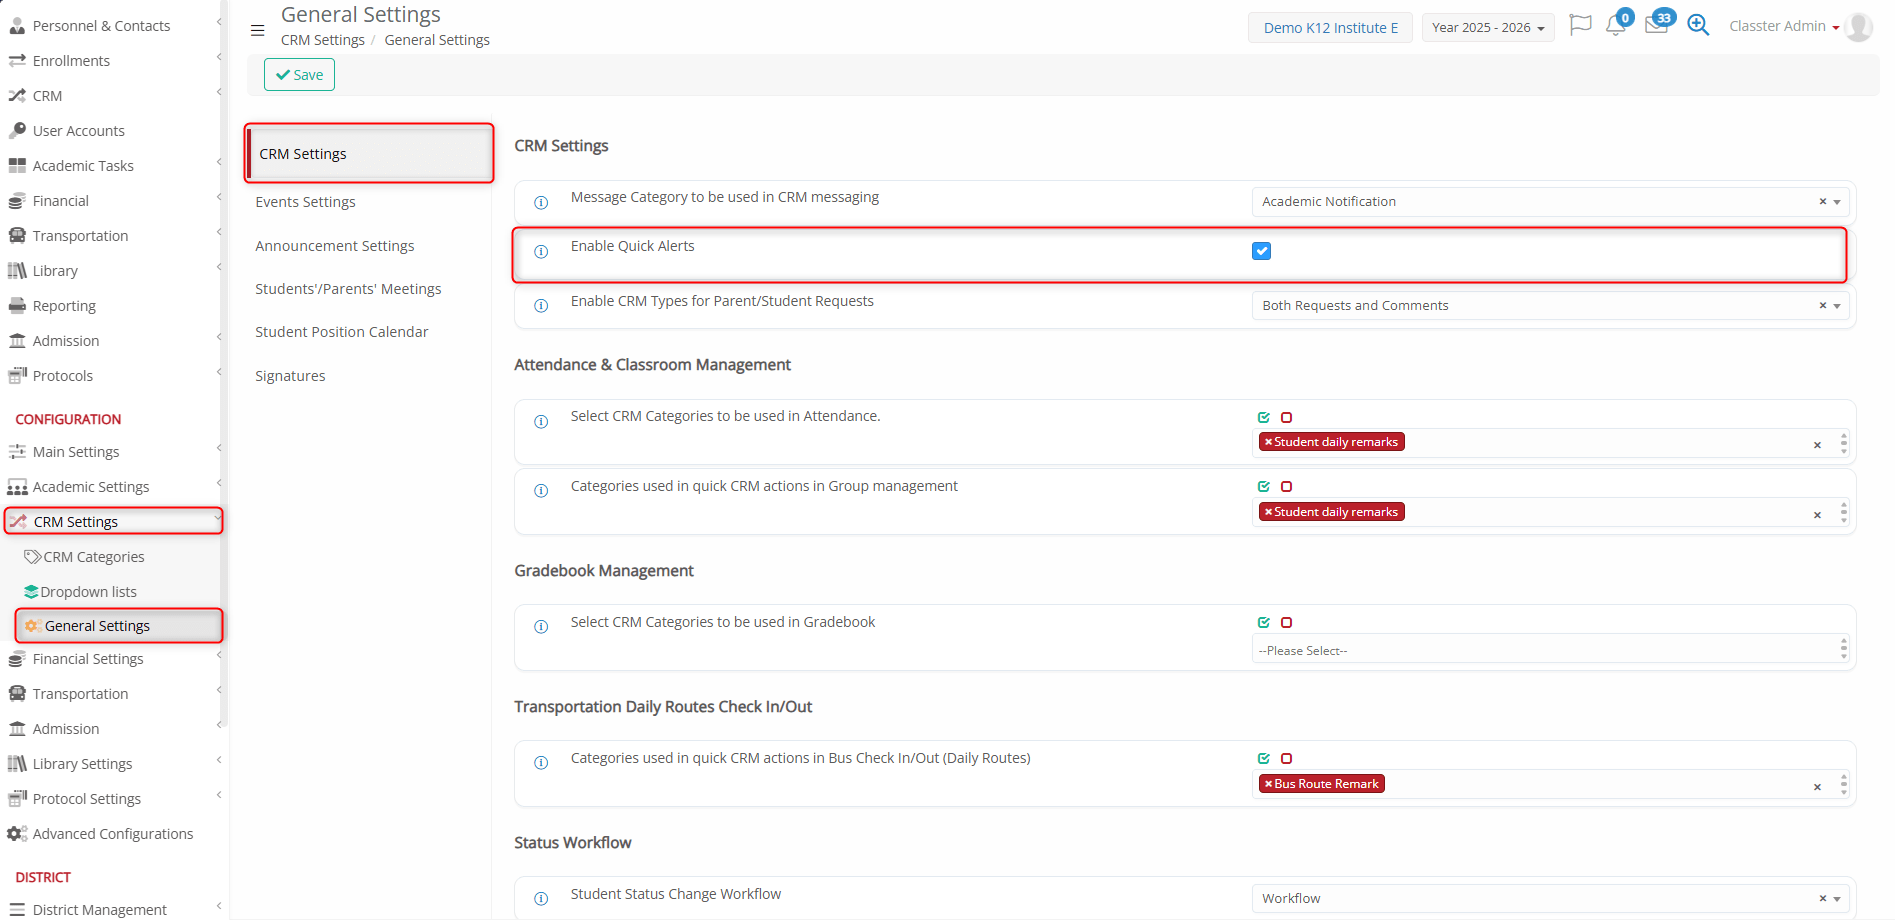
Set CRM Types, Categories and configure rights:
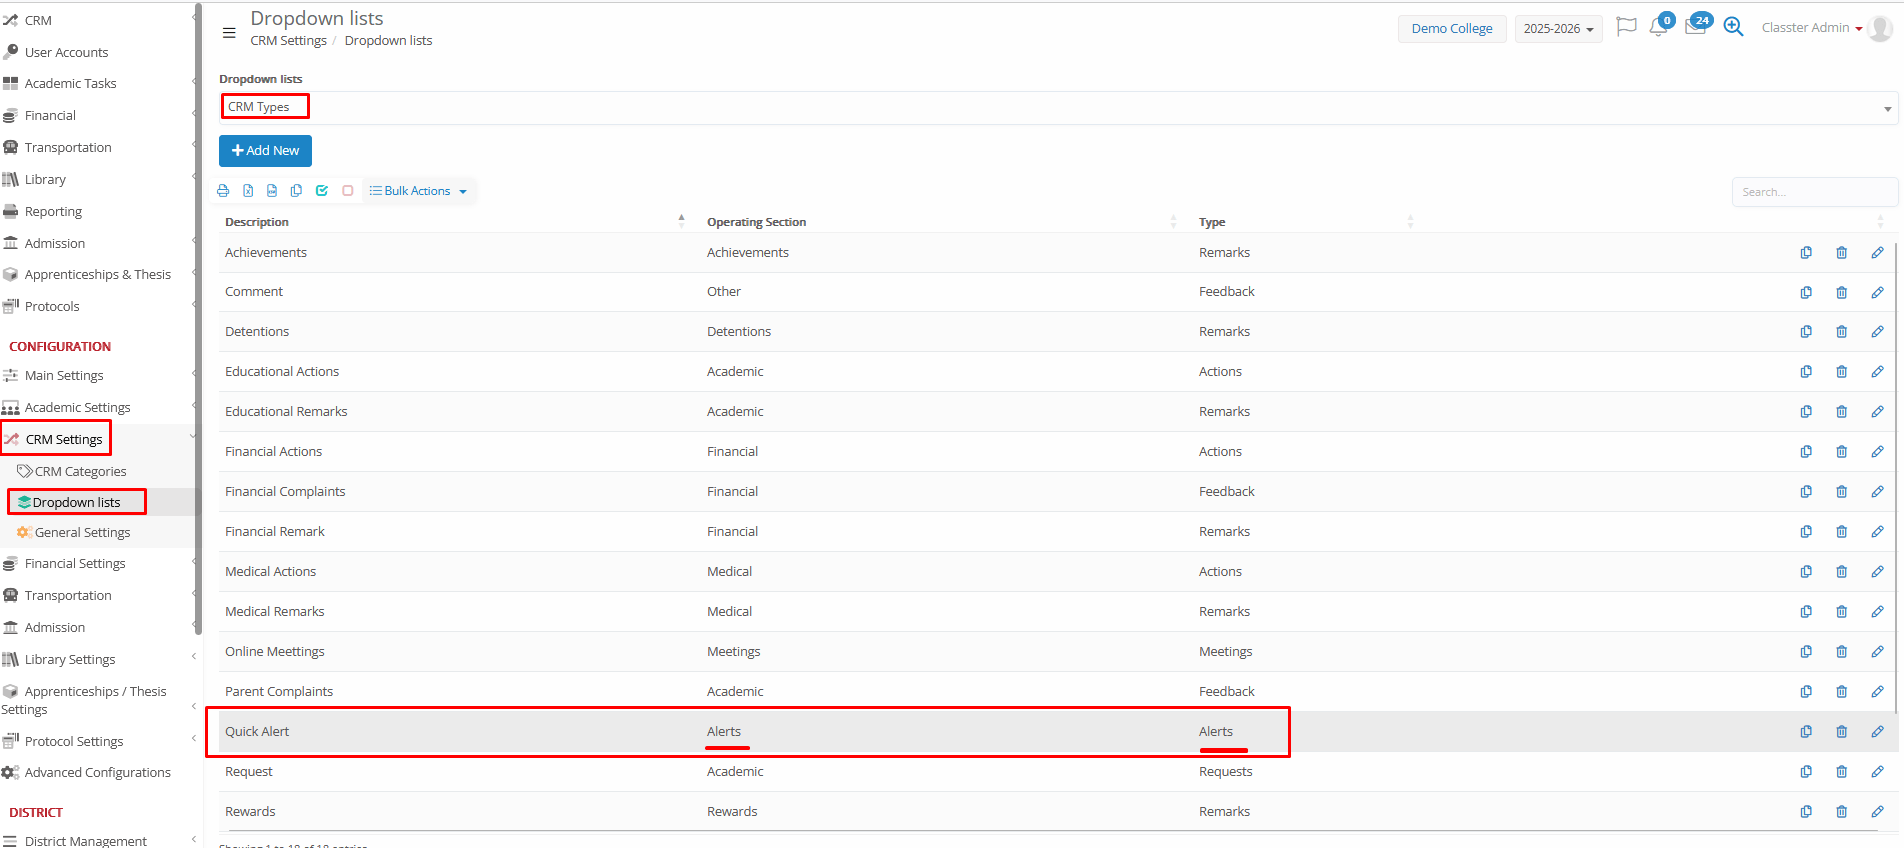
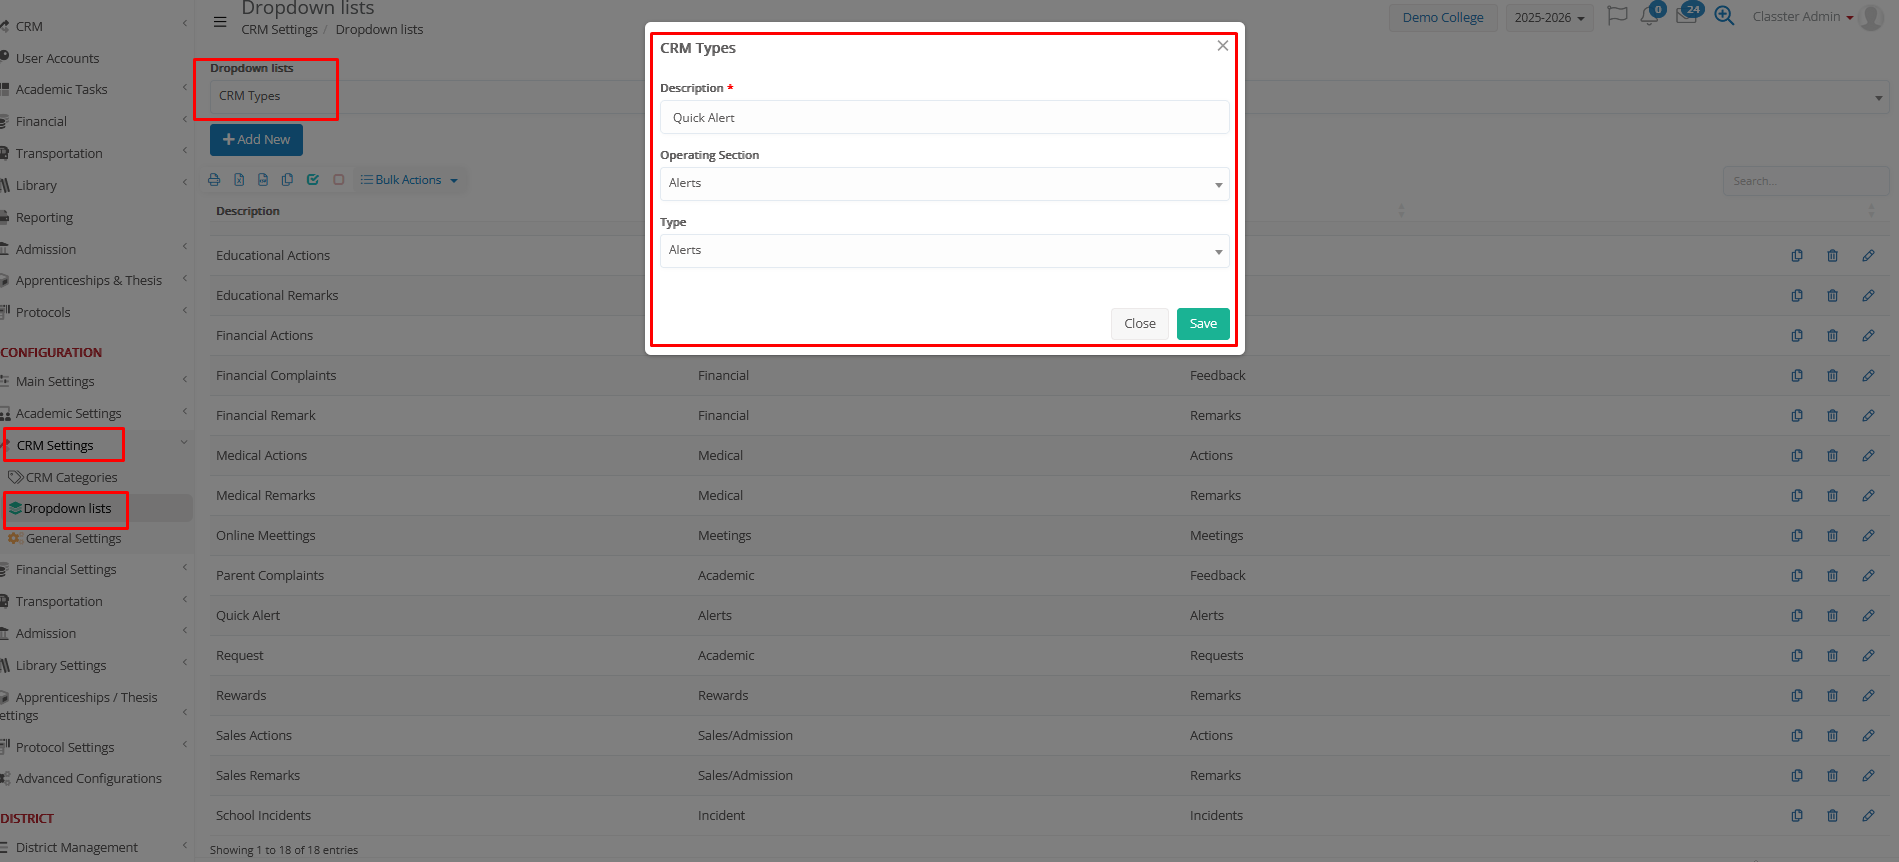
Make sure a Quick Alert Type, is already set:
CONFIGURATION > CRM Settings > Dropdown Lists > CRM Type
To configure a relevant CRM Category and manage the data fields and access to view, edit, approve etc. navigate to:
CONFIGURATION > CRM settings > CRM Categories
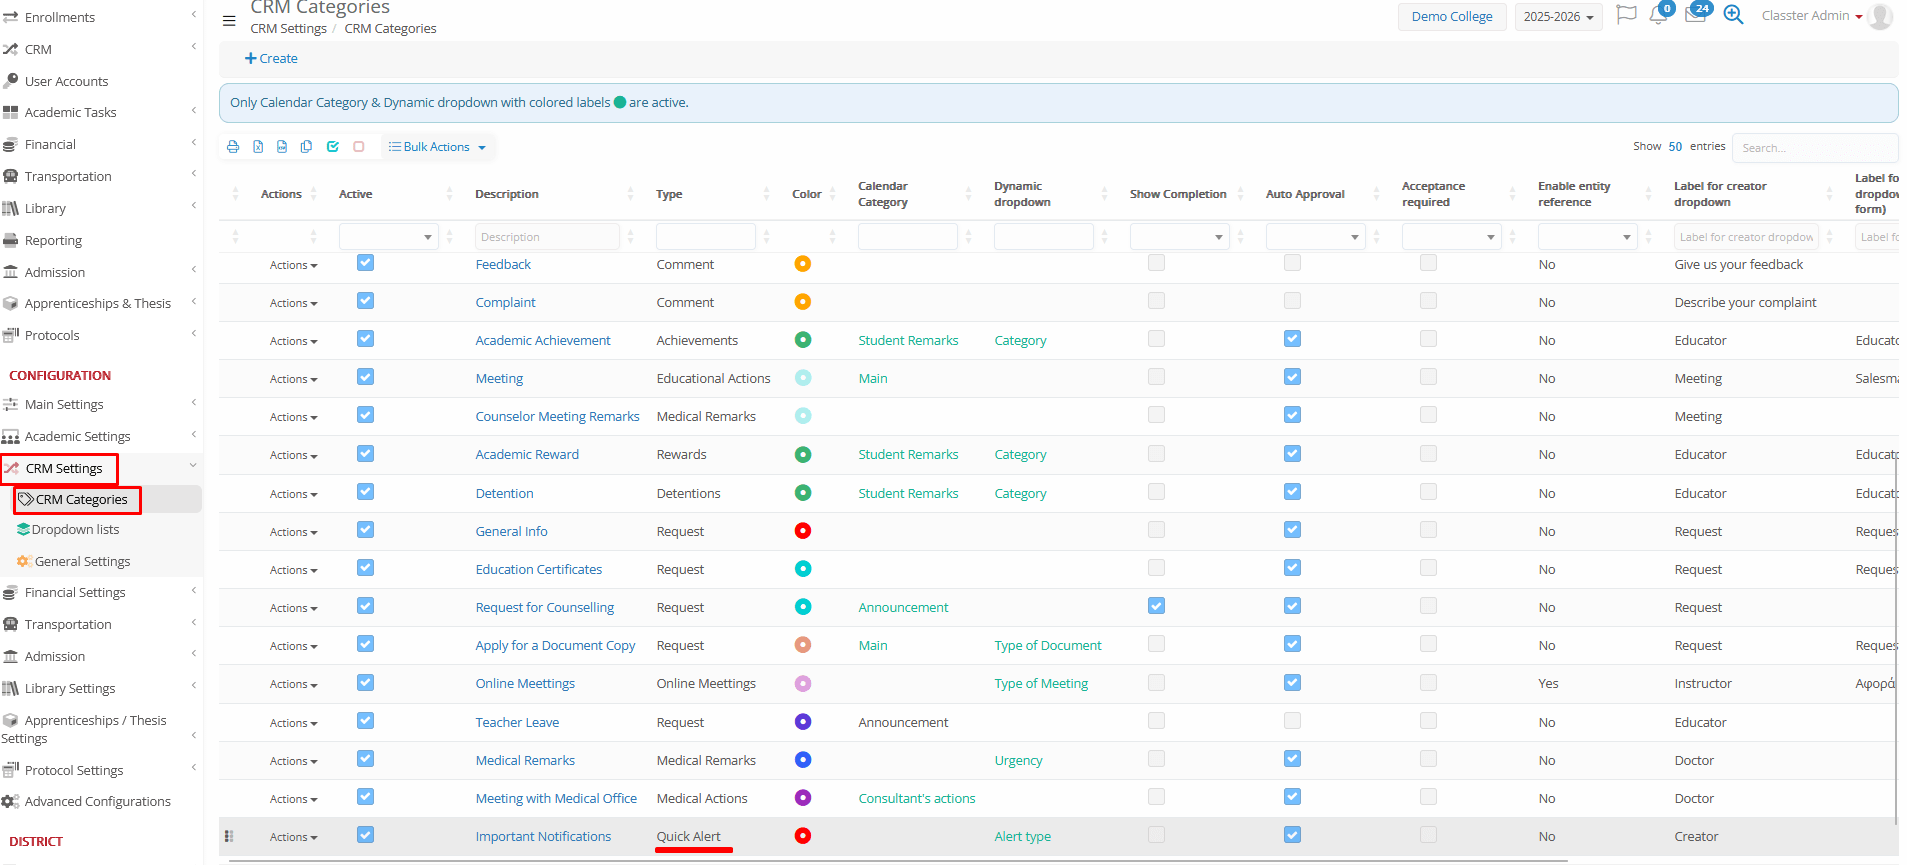
Create a CRM Category, connected to your Quick Alert Type, and setup the desired fields for the entries:
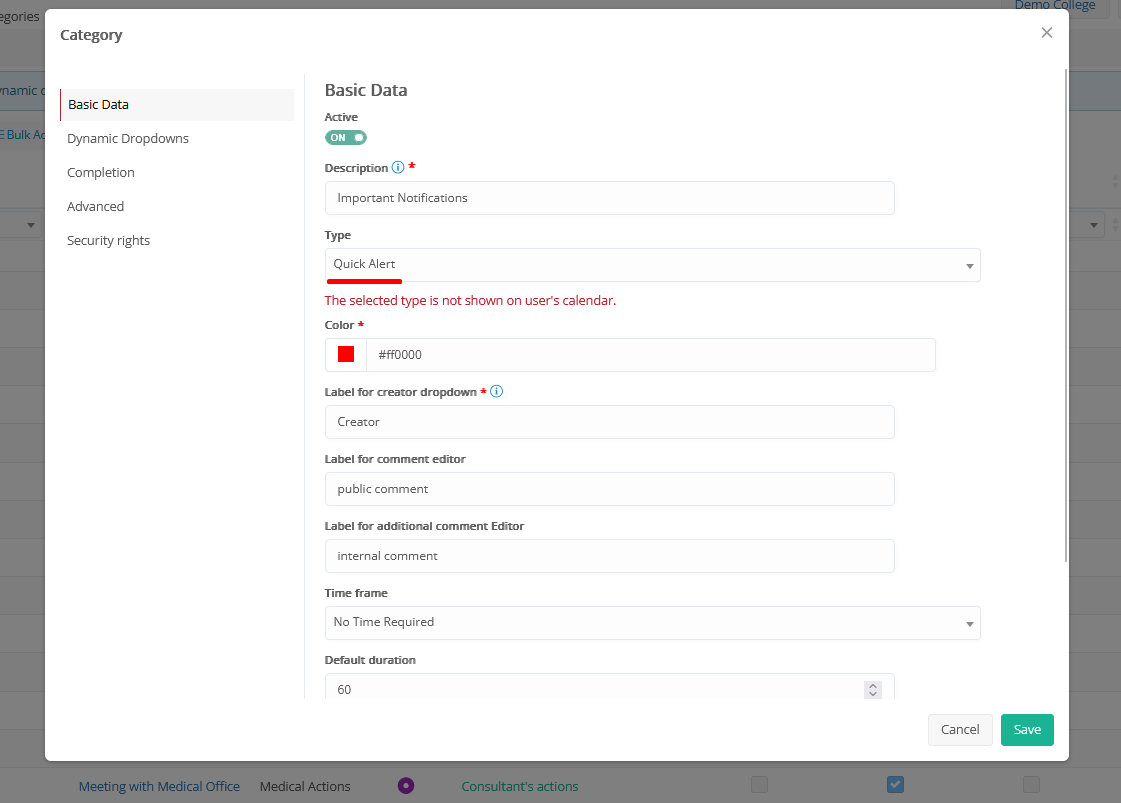
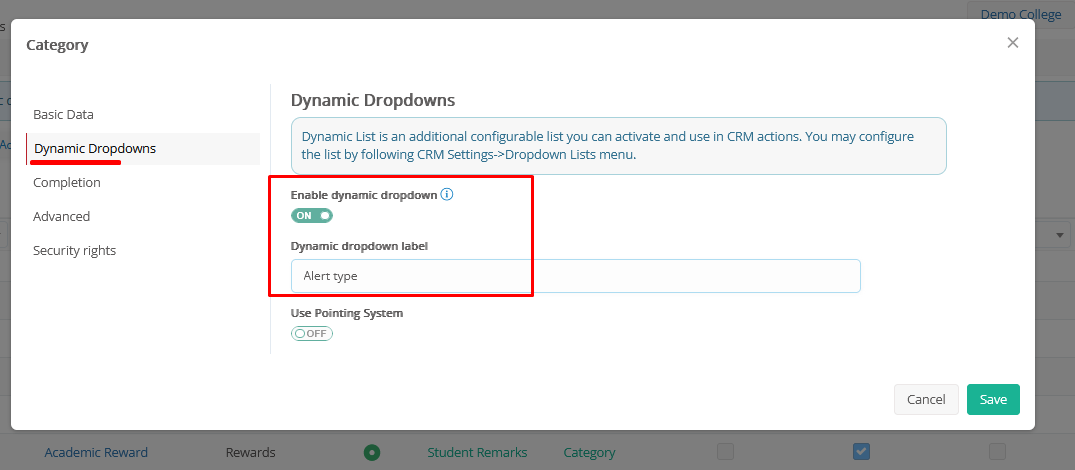
You can also enable the dynamic dropdown within the category, to define the type of alert, such as attendance alert, health issues, family issue etc.:
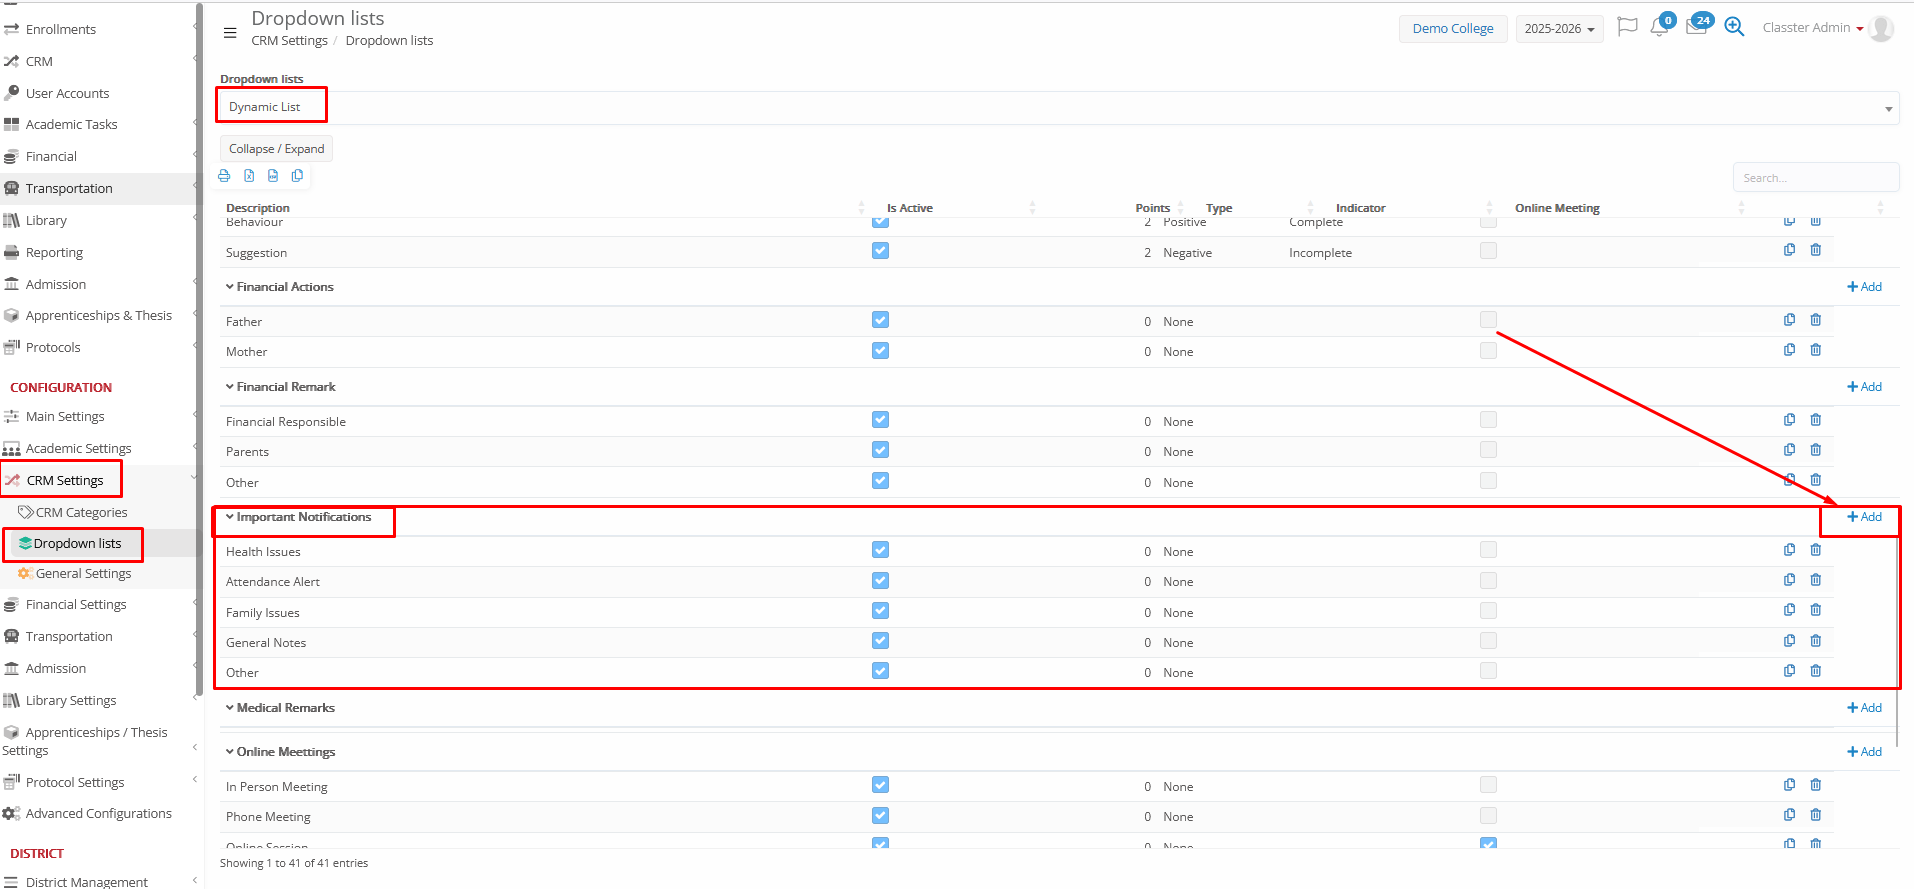
To setup the dynamic dropdown, navigate to CONFIGURATION > CRM Settings > Dropdown Lists > Dynamic List
Search for your CRM Category by name (the CRM category must be already saved with the dynamic dropdown enabled), and add/create your dropdown list:
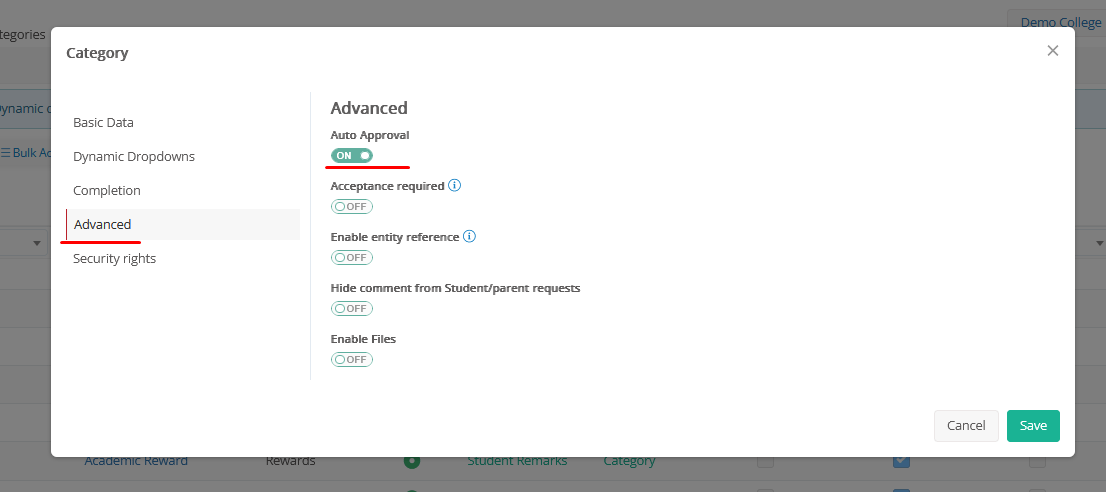
At the CRM Category, the auto-approval is also recommended, so the alerts will be automatically shown after creation.
If the auto-approval is not set, then a back-office user, with the relevant rights (from the CRM category – security rights Tab), must Approve them from the list of CRM actions (MANAGEMENT > CRM > Manage Entries > Action – Approve).
Finally, setup the security rights, so define who can create, view, edit, approve, complete these quick alerts:
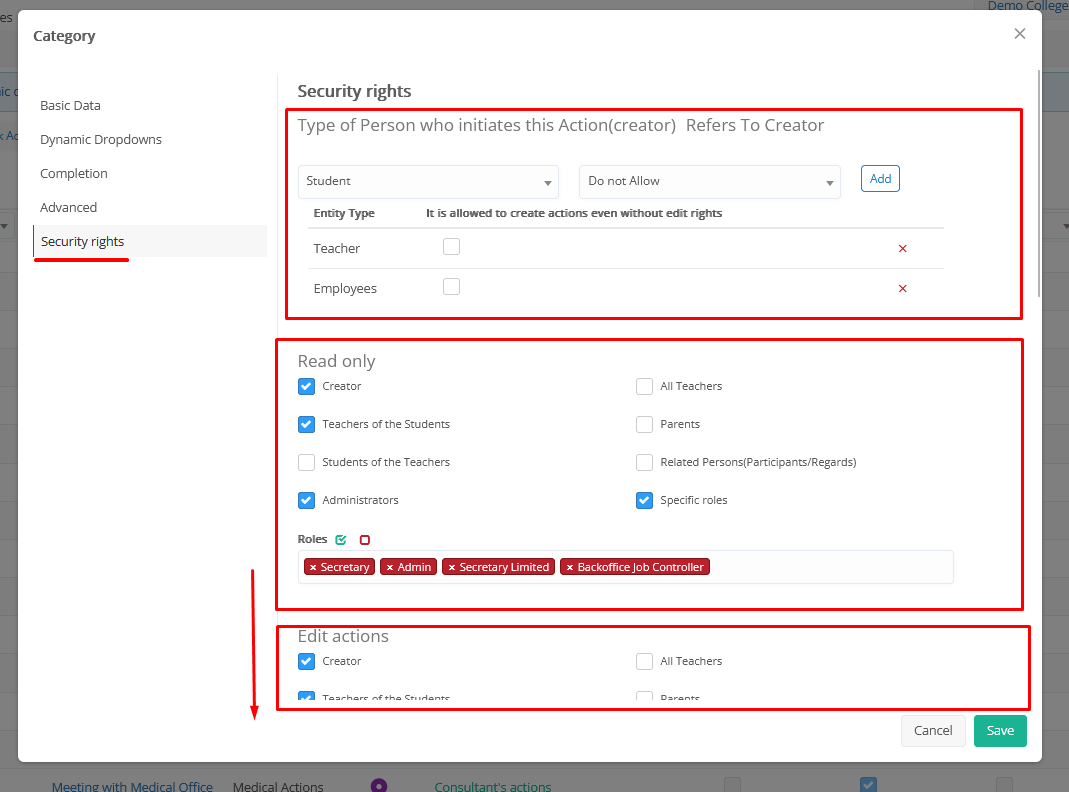
- Type of person who initiates the action: Who can create a quick alert (e.g. Employees, _Teachers_).
- Read only: Who can view only the alert (e.g. the _Teachers_ of the student)
- Edit actions: Who can edit existing alerts (e.g. the Creator, Employees, _Teachers_)
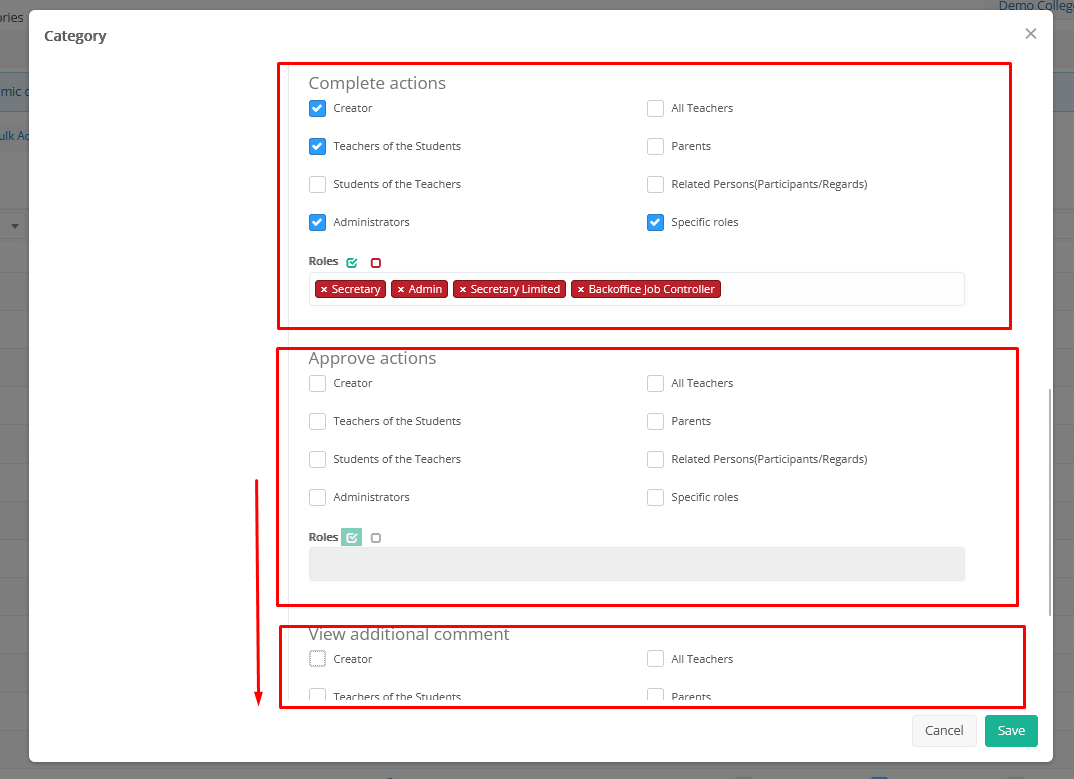
- Complete actions: Who can set the alert as complete (e.g. the Creator, Employees)
- Approve actions: If auto-approval is set as recommended above, there is no need to set up these privileges and use this workflow. Otherwise, set the users to approve the alerts in order to appear to the users (e.g. Specific employee roles)
- View additional comment: View the 2nd comment (internal) in the CRM category (e.g. Administrators only)
Creation
Admin / Back-office users
As an admin / back-office user (based on relevant rights in the CRM category), you can find the quick alert creation in the Student List – row Action as below:
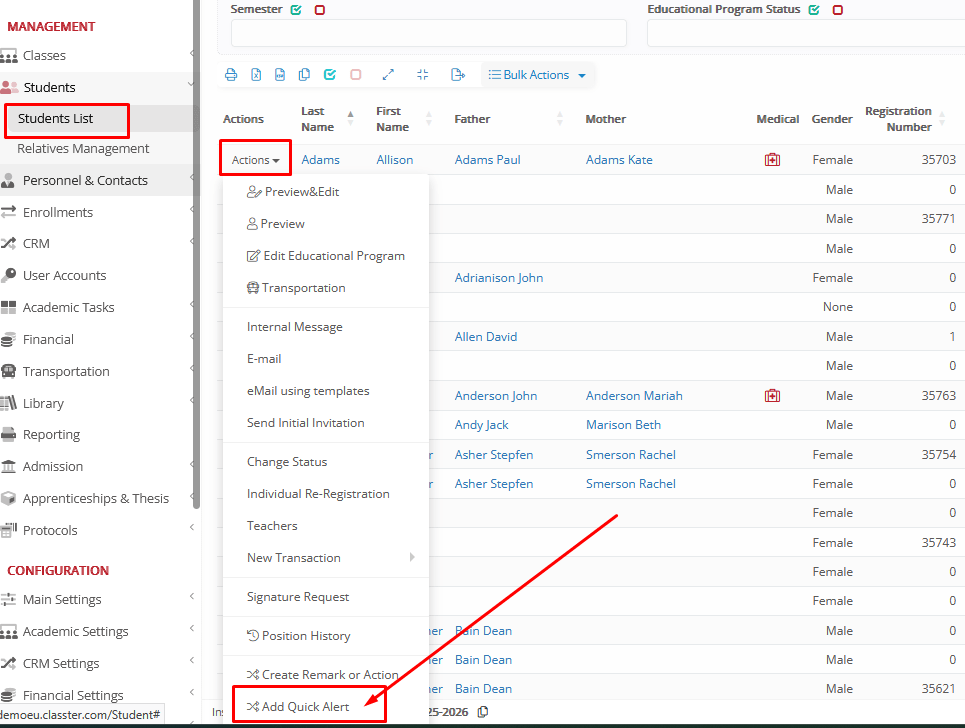
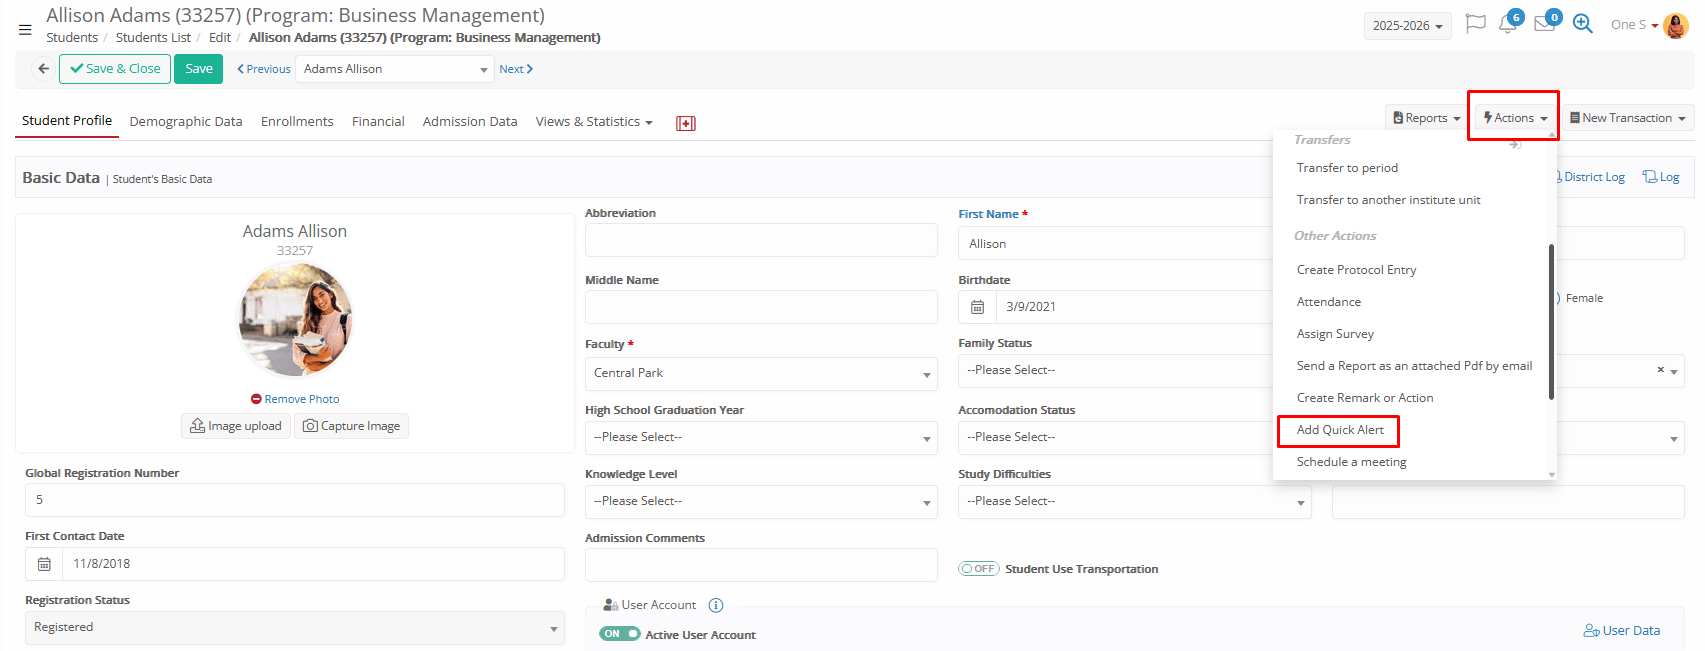
As well as in the Student Card > Actions as below:
Teachers
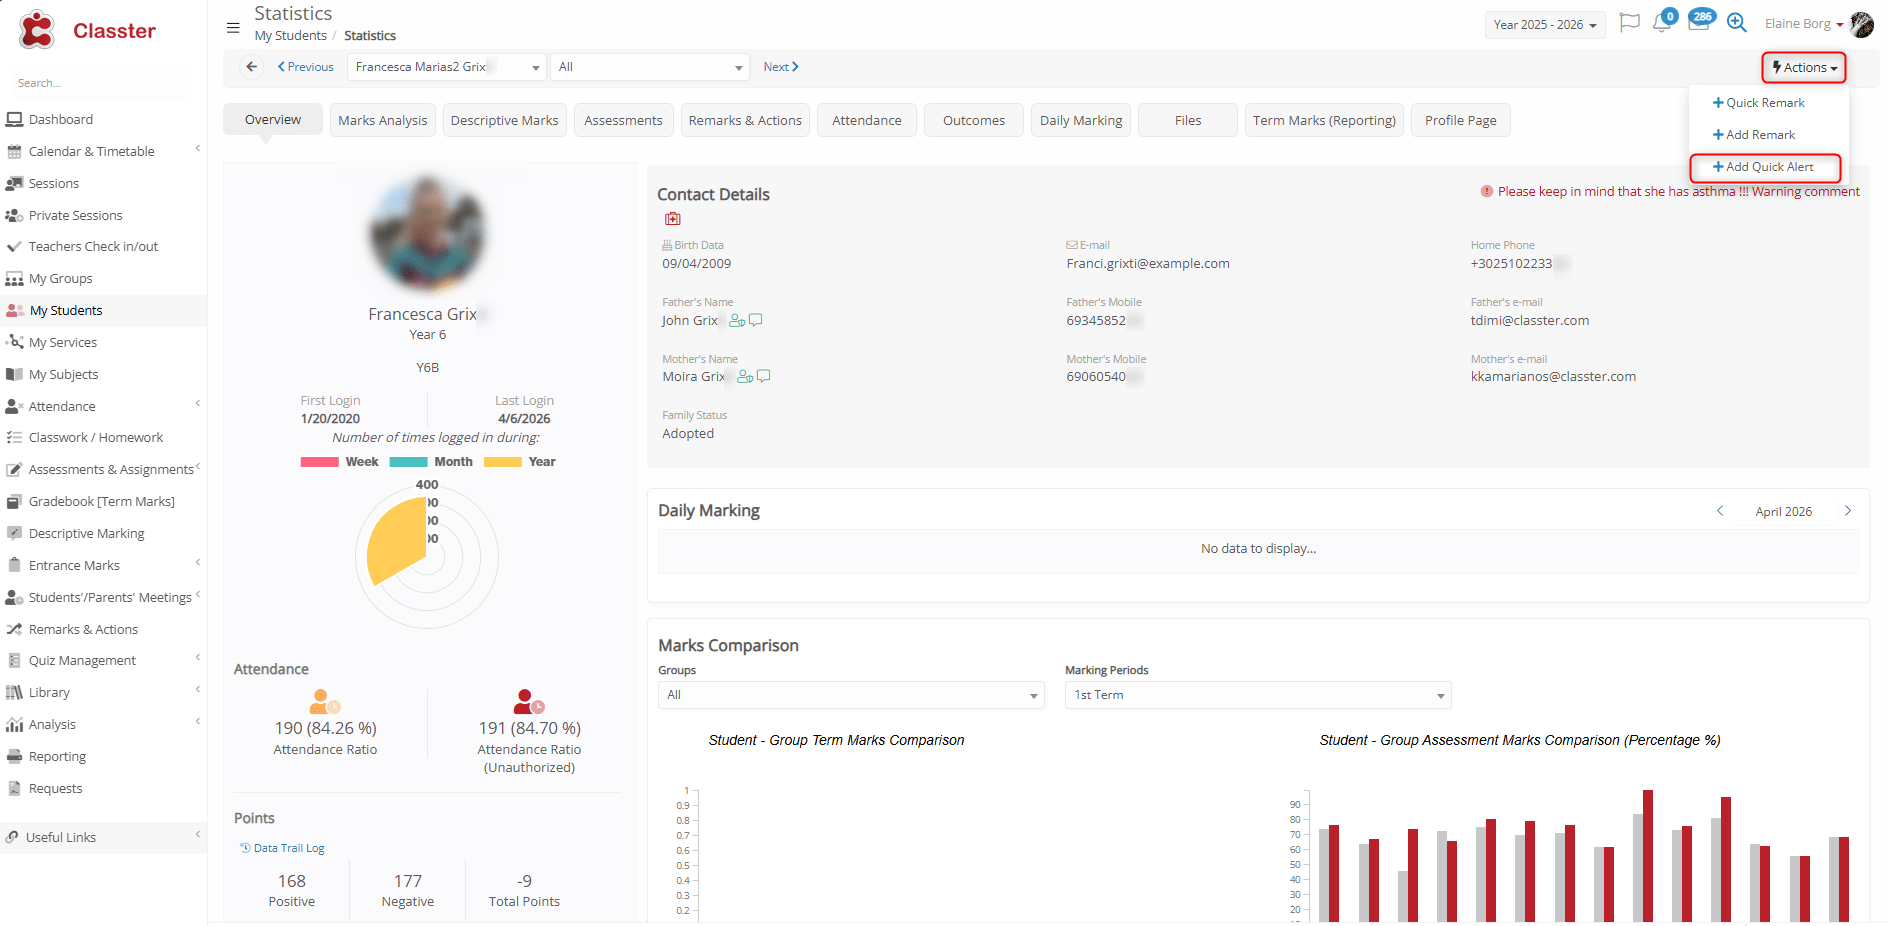
As a _Teacher_ (based on relevant rights in the CRM category), you can find the quick alert creation in the Student Card > Actions as below:

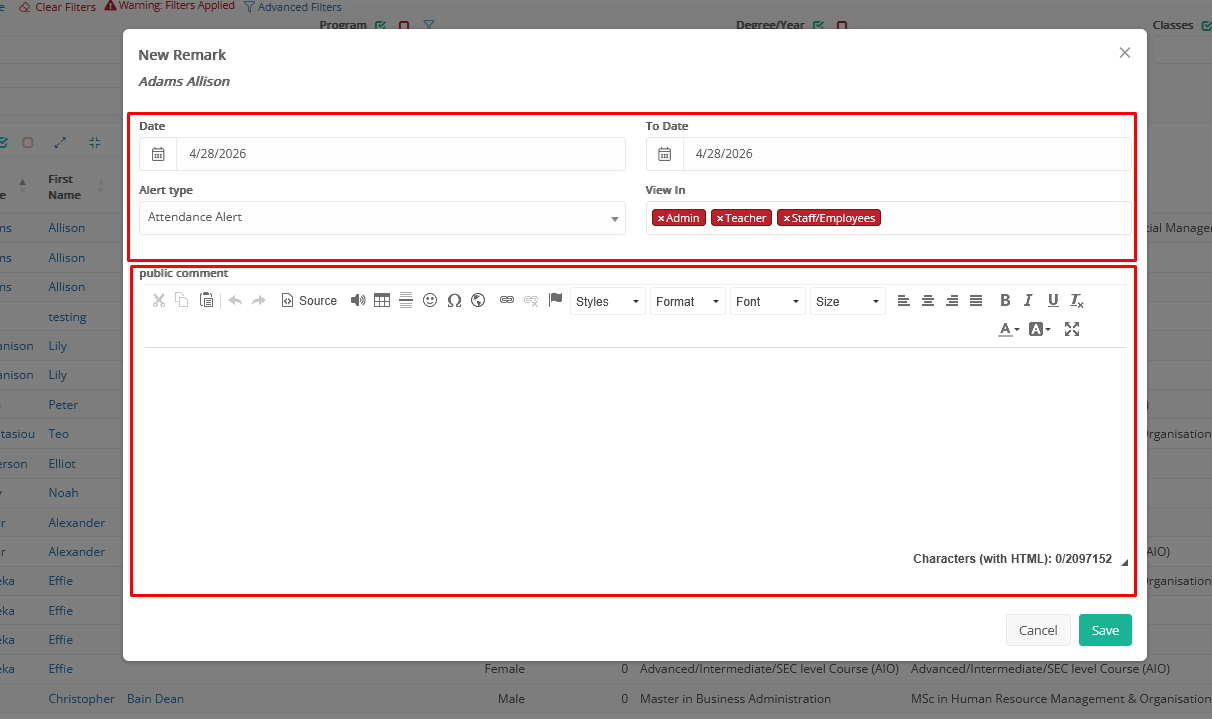
Dates From – To will always appear, since quick alerts are designed for special cases for a specific period of time.
Other fields, rather than the main comment, will appear based o the CRM category configuration.
If no CRM category is defined, then any option regarding the Quick alerts action will not be visible.
Where to find
The Quick Alert is available for:
- Admins / Back-office Users
- _Teachers_
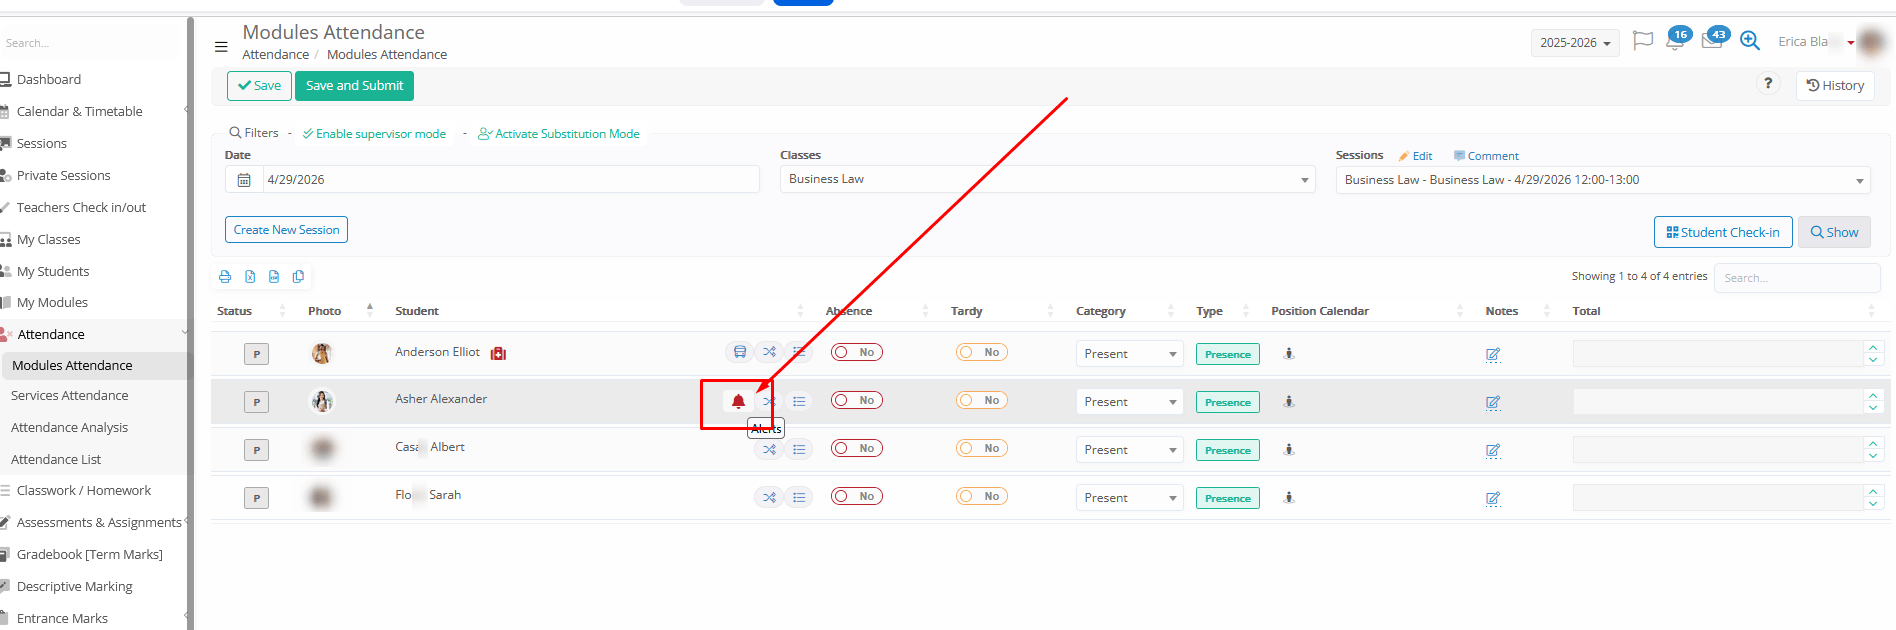
Users can see the Quick alerts (Teachers & Back-office):
In Attendance

In Remarks and Actions