

This guide outlines how to configure and use Classter’s online signature functionality for internal and external stakeholders such as Students, Teachers, Parents, Guardians, Academic/Financial Contacts, Payers, Agents.
Supported Signature Methods
Classter supports four digital signature systems (All require a Classter Signatures Module License):
- Classter Embedded: Not certified but fully embedded in the system. Supports multiple signatories and does not require an external license.
- LegalSign: A UK-certified platform that supports multi-party signatures, partial embedding in Classter, and advanced form fields. Requires an external license.
- DocuSign: A globally recognized certified solution that supports complex workflows, including dual signatories and precise signature field placement. Requires an external license.
- Signature Pad: Devices used to electronically capture handwritten signatures on an LCD touchpad using a pen-type stylus. This method is ideal for institutions that require in-person signed agreements (e.g., walk-in enrollments or on-site signings).
| Method | Certified | Multi-signatory | Requires License |
| Classter Embedded | ❌ | ✅ | ❌ |
| Legal Sign |
✅ (UK) |
✅ | ✅ |
| DocuSig |
✅ (Global) |
✅ | ✅ |
| Signature Pad | ❌ | ✅ | ❌ |
Getting Started
To configure signature functionality correctly in Classter, follow this step-by-step setup process:
- Enable the Signatures module: Go to CRM Settings > General Settings > Signatures and activate the module. (License required)
- Create or verify a File Category: Navigate to Main Settings > Dropdown Lists > Type: System & Dropdown List: Files Category. This setting defines where to store signed documents and can also link them to a protocol.
- Create a CRM Notification Template: Go to Advanced Configurations > Templates Editing > CRM > Signature Templates. This template will be used to notify signatories.
- Ensure the required report exists: A Classter employee should create the signature report in Advanced Configurations > Reporting > Report Designer.
- Create a protocol if needed: Although optional, protocols may be required to track official signed documents linked to the file category.
- Create or edit a Signature Template: Navigate to Advanced Configurations > Signature Templates.
Once these steps are completed, all signature methods can support:
- Document routing to students, guardians, payers, etc.
- Role-based signature ordering
- Auto-saving to Student > Files & Links
- Optional automatic status updates upon signing
Classter Embedded
Note: The following configuration steps refer to both Classter Embedded and LegalSign signatures.
Step 1: Create Files Category for your signed documents
This file category is specifically intended for use with signature workflows.
To make use of signatures in a meaningful and organized way, you must define one or more Files Categories. These categories help group signed documents based on their type or purpose and are essential for linking documents and reports to the appropriate signature settings.
Navigate to: Configuration > Main Settings > Dropdown Lists
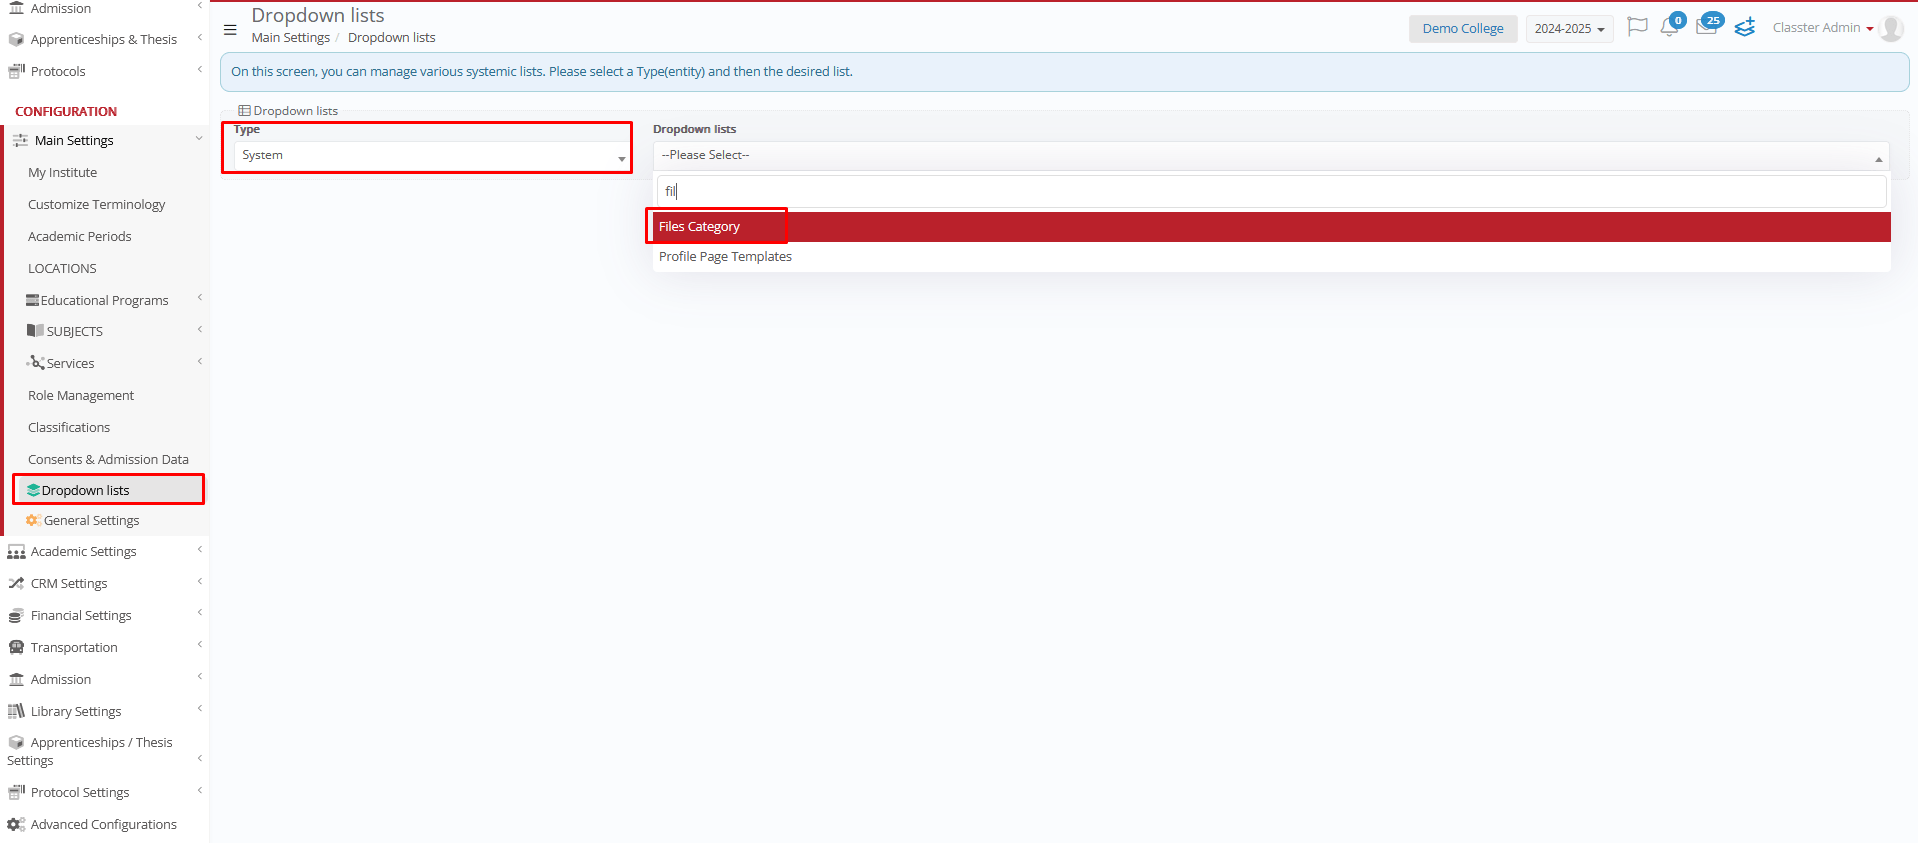
- Set Type: System
- Select the list: Files Category
- Click Add New to create a new entry, or edit an existing one if needed:
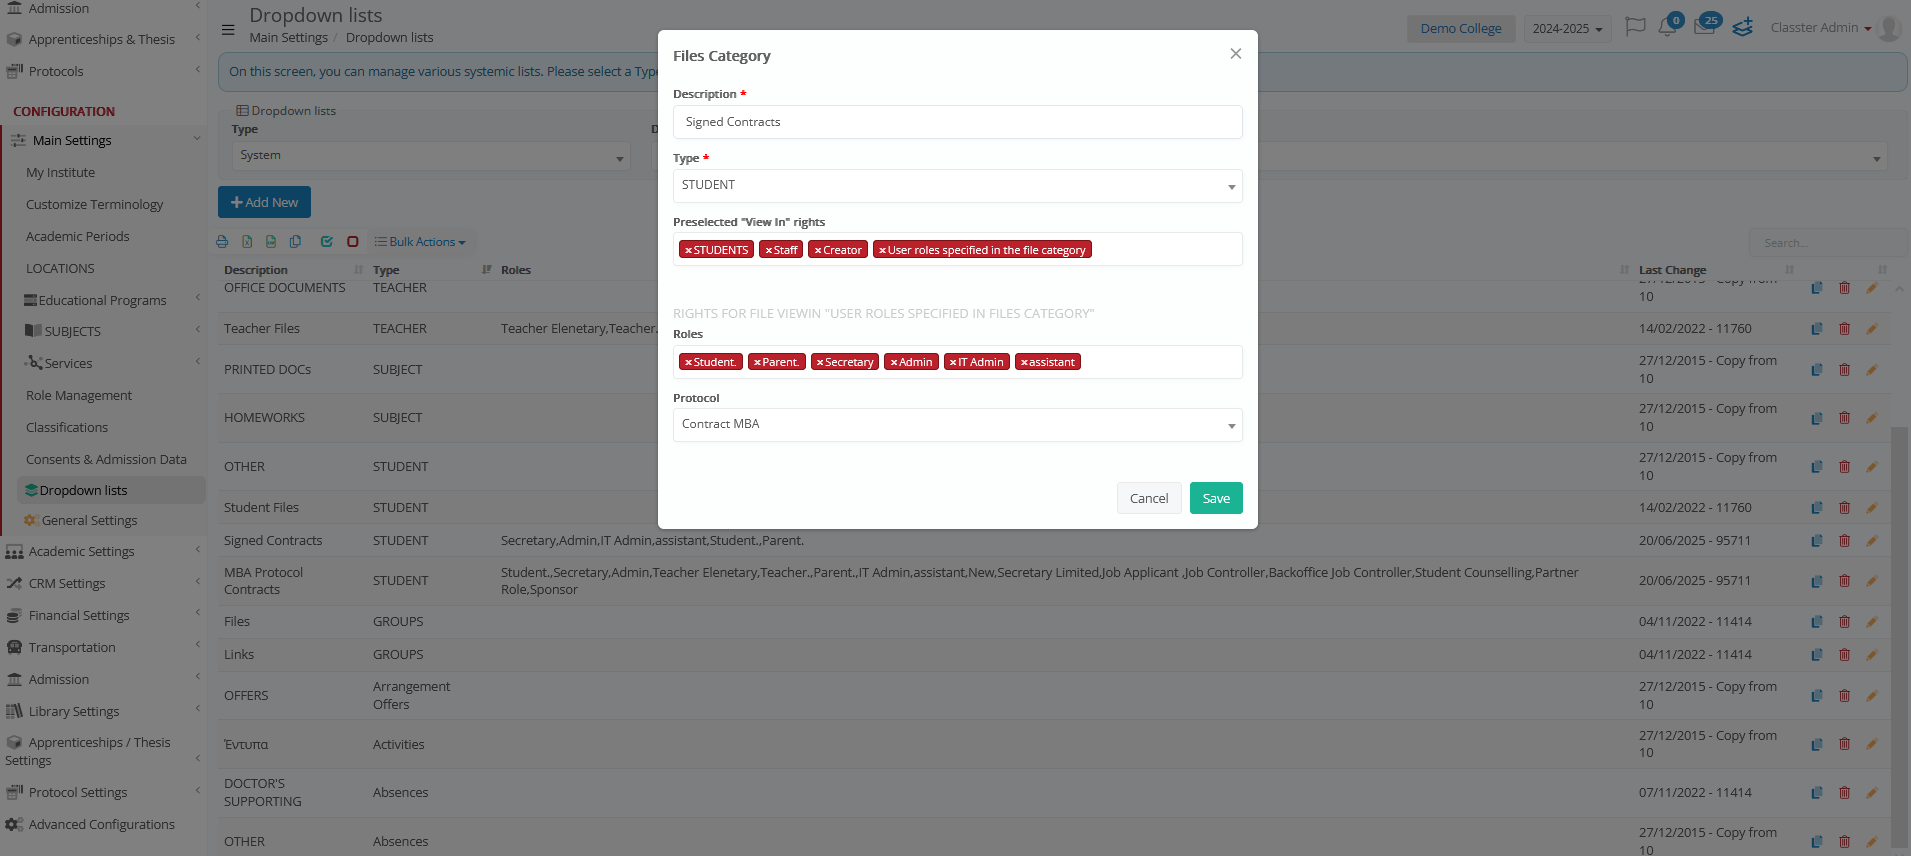
- Description: Enter the name of the file category.
- Type: Select the related entity type. Options include Students, Relatives, Employees, Suppliers, Groups, Contracts, etc.
- Preselected “View In” Rights: Specify which user roles can view documents in this category. These rights are managed via the “USER ROLES SPECIFIED IN FILES CATEGORY” dropdown.
Rights for File View In “User roles specified in files category”
- Roles: This field appears under the ‘USER ROLES SPECIFIED IN FILES CATEGORY’ section. Choose which user roles can view this file category according to the assigned access rights.
- Protocol: Link this file category to the appropriate protocol.
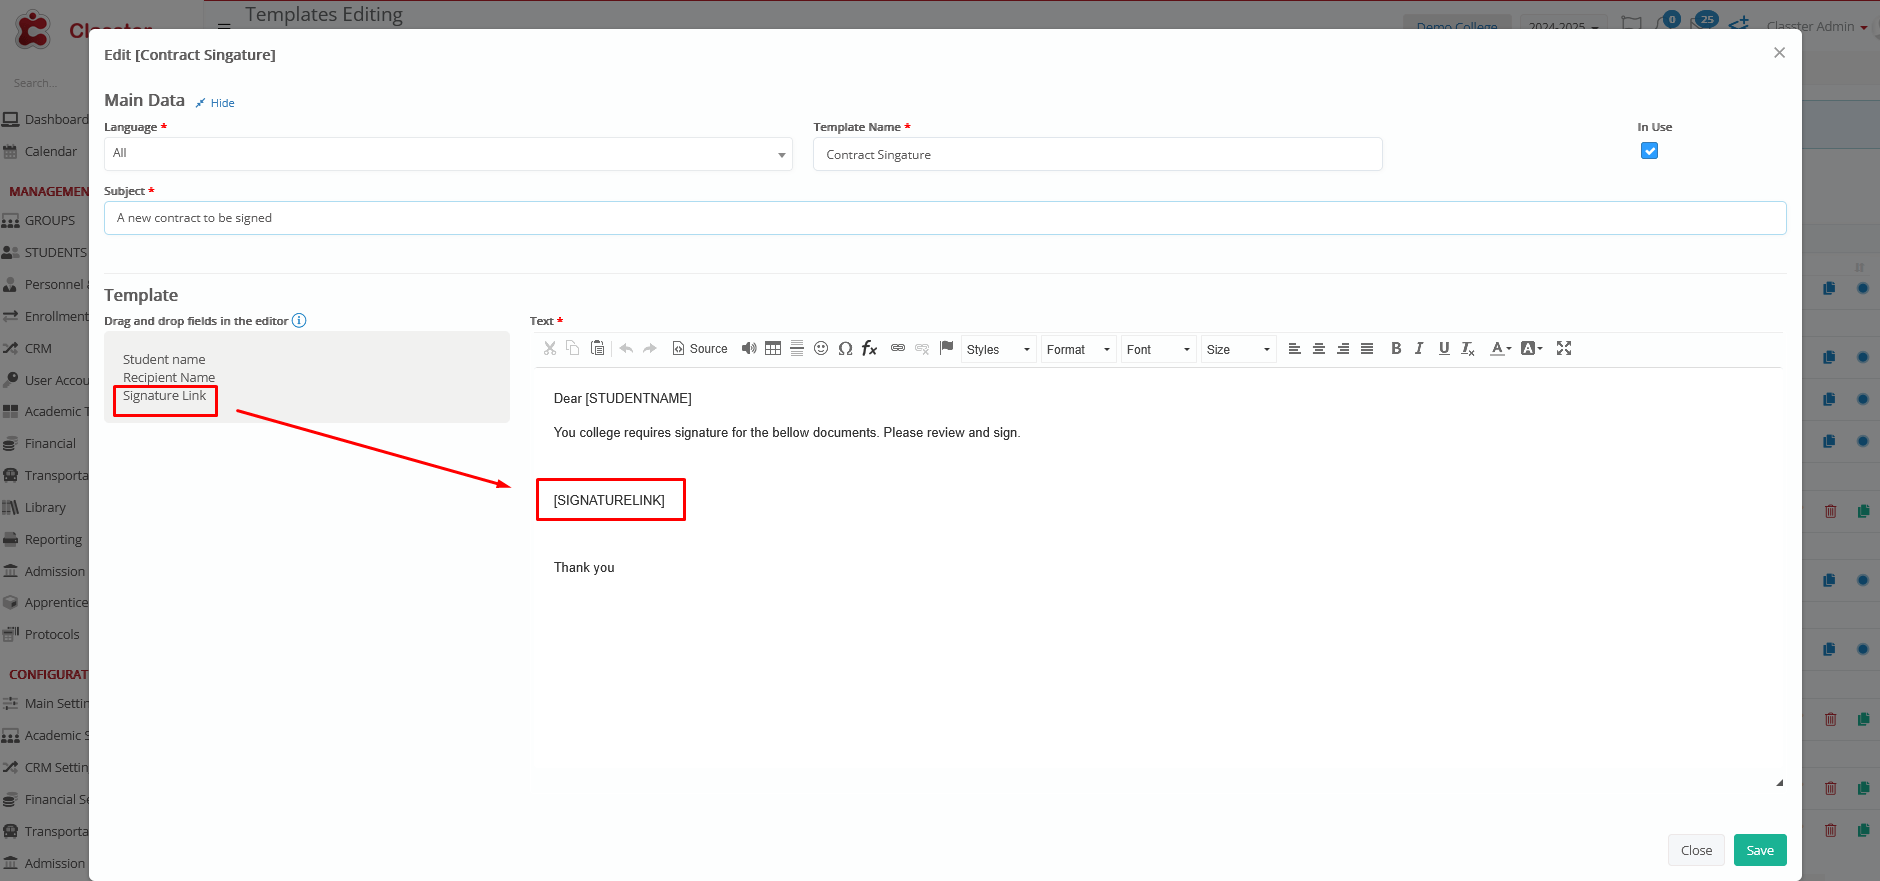
Step 2: Notification Template
Advanced Configurations > Templates Editing
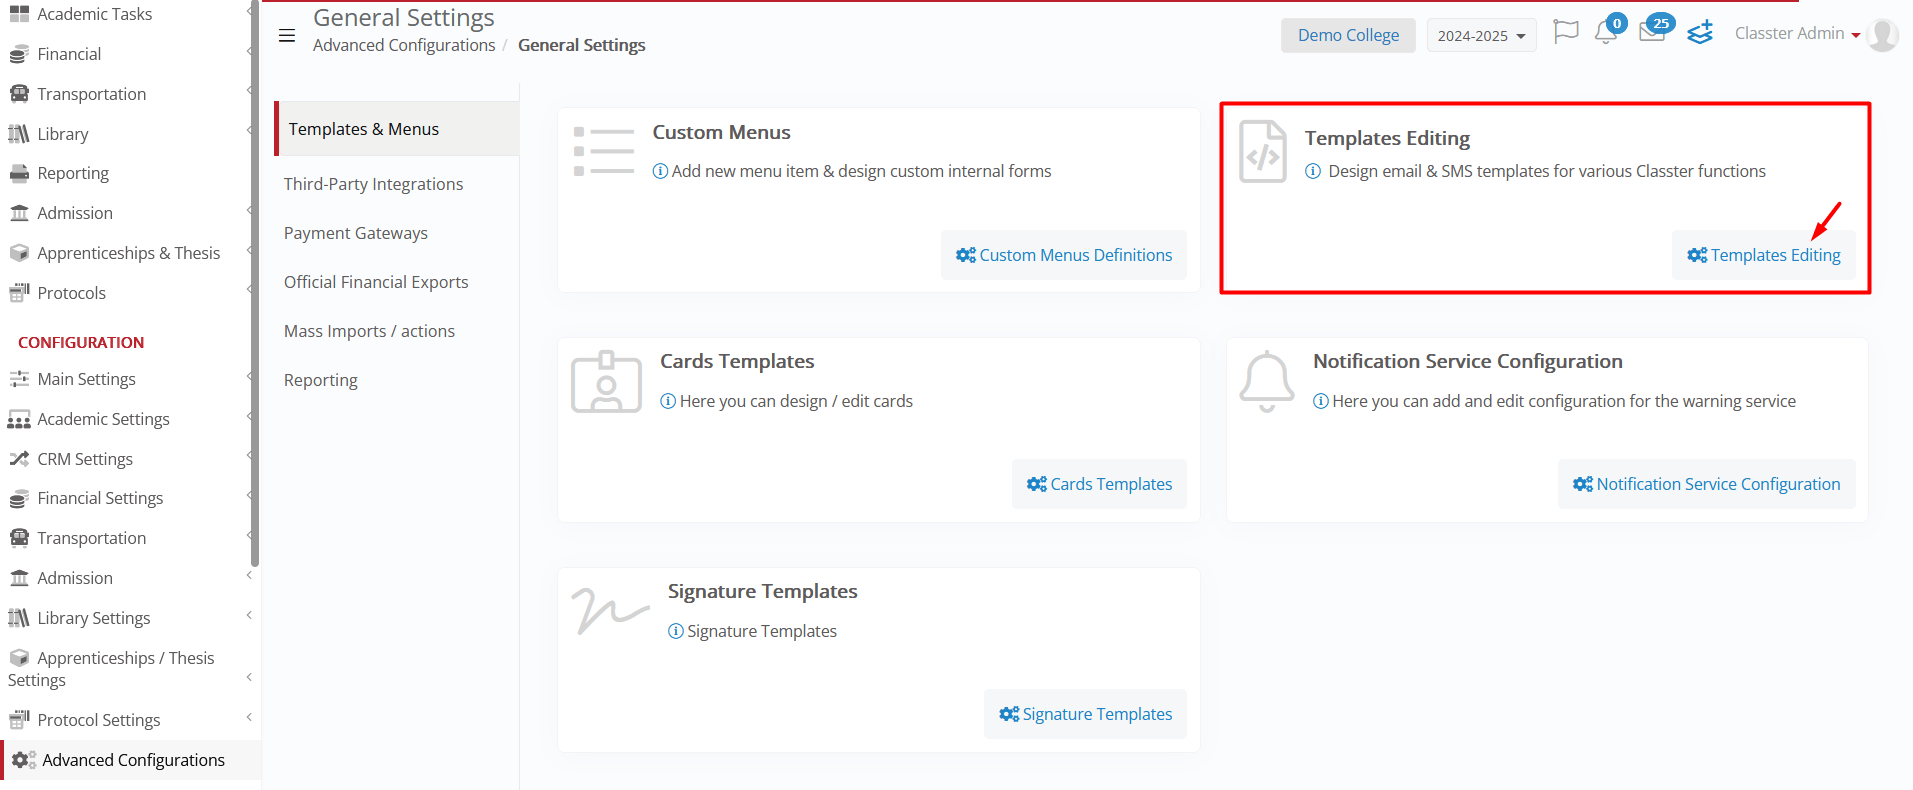
- Type: Signature Template (find them under CRM Templates) and create new or edit existing one.
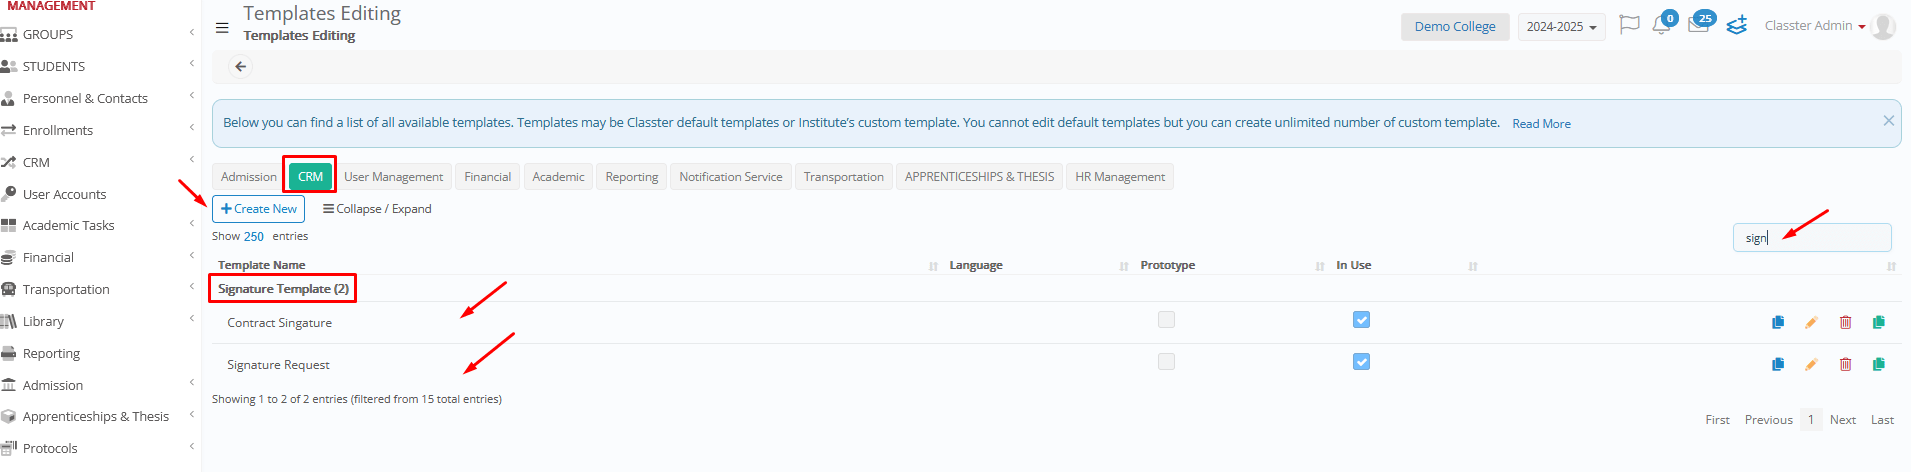
- Add subject, message text, and drag & drop any related field into the body of the message.
Step 3: Create Signature Template
This step defines how a signature process is configured in Classter and determines how it interacts with users, reports, files, and other modules. To set it up:
Advanced Configurations > Signature Templates (create new or edit existing one)
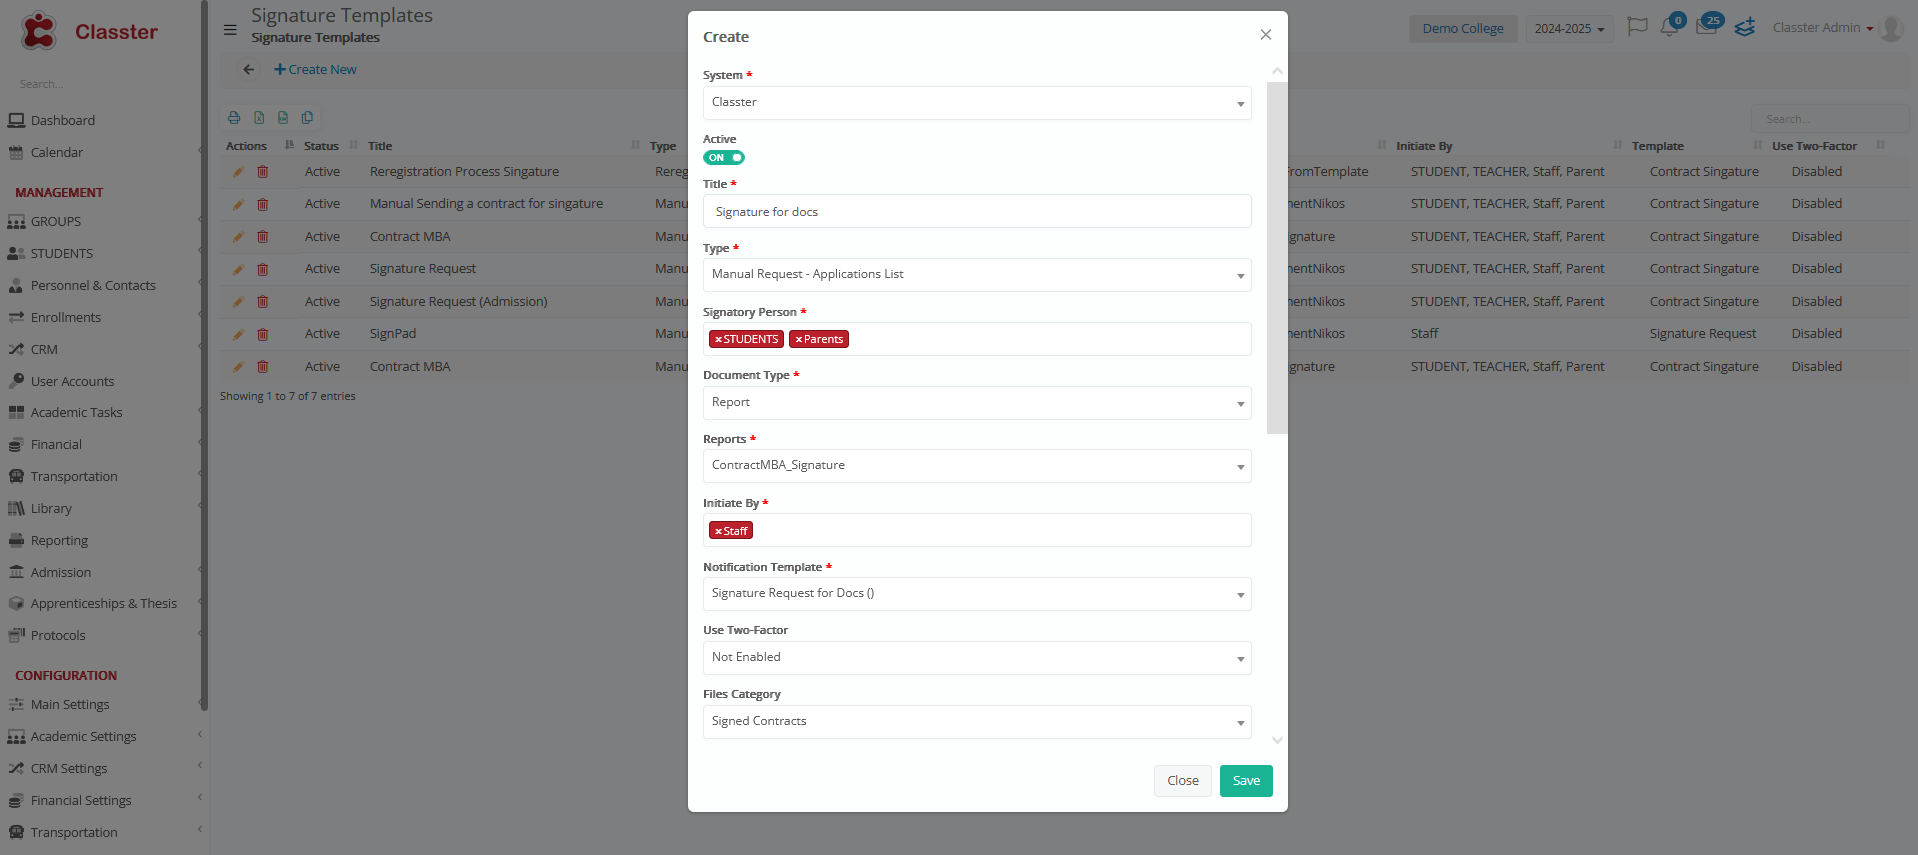
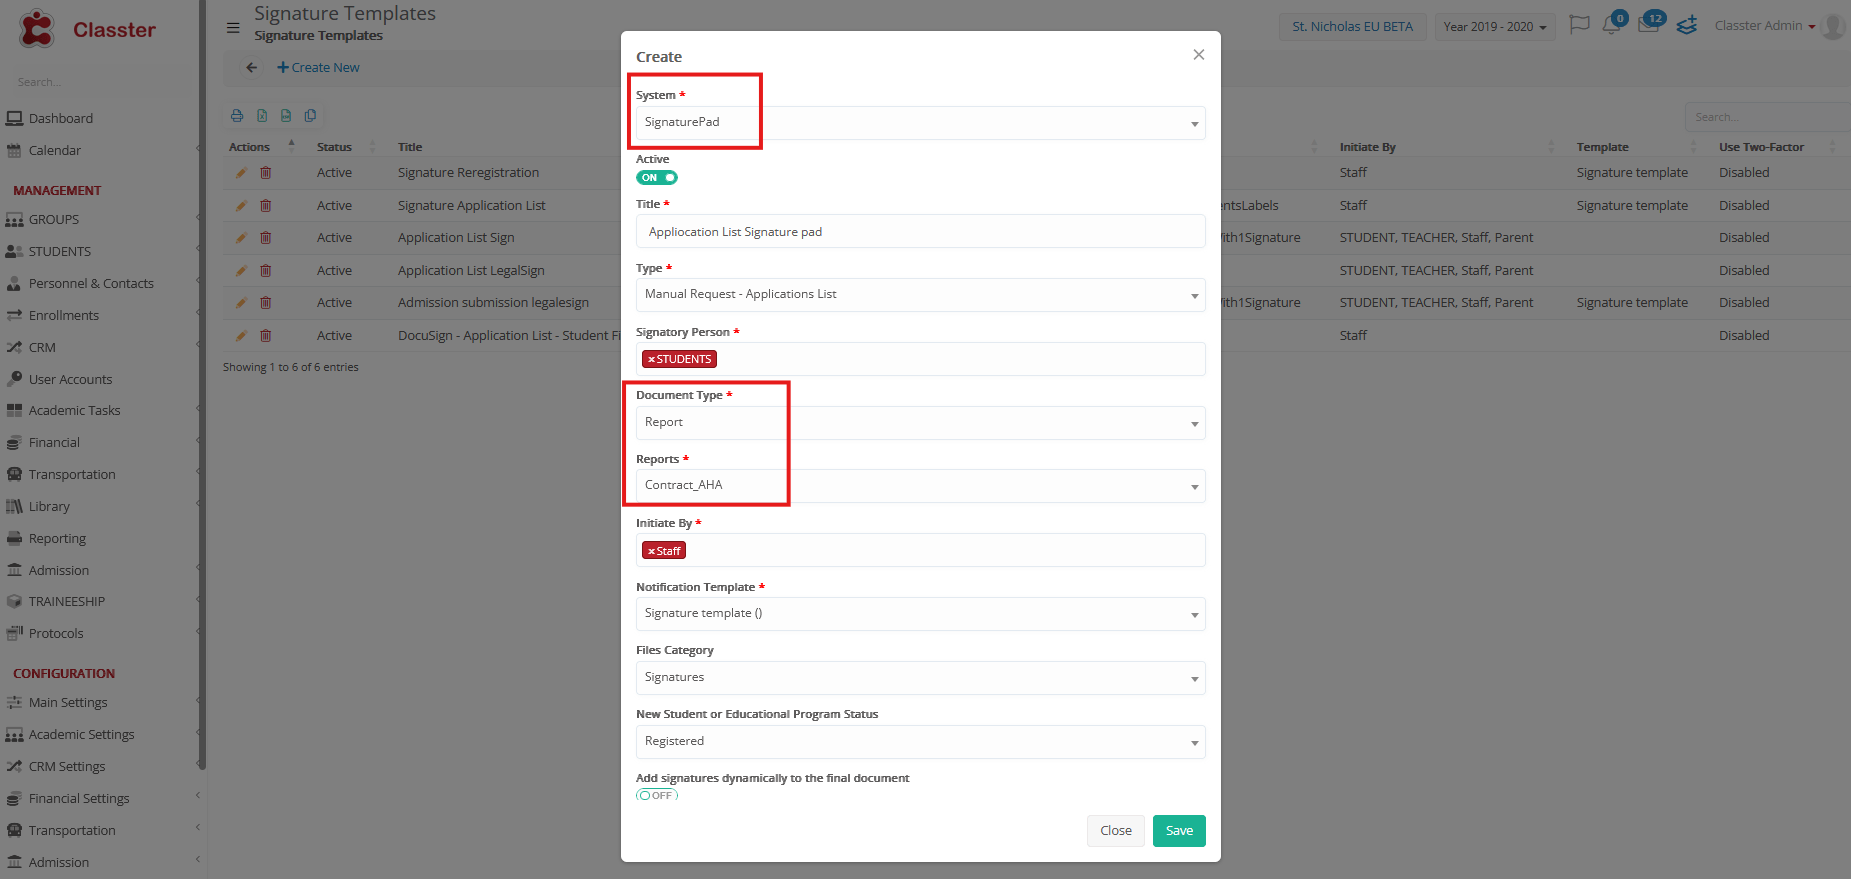
Template Settings
- System: Choose between Classter or Legal Sign
- Active: Enable or disable the template
- Title: Name of the signature process
- Type: The type determines the list or area in Classter where the signature request will be available.
- Signatory Person(s): Specify roles involved in signing (e.g., student, guardian, agent)
- Document Type: Report is used as the signature file, as defined in the template. Private Agreements are also supported for DocuSign.
- Report: Select the right report from the existing reports created under Advanced Configurations > Reporting > Report Designer. (If no suitable report exists, please contact Classter to have a custom report created based on your needs.) This report will be converted to PDF and sent to the signatory.
- Initiate By: Define who can trigger this (e.g., employee, parent)
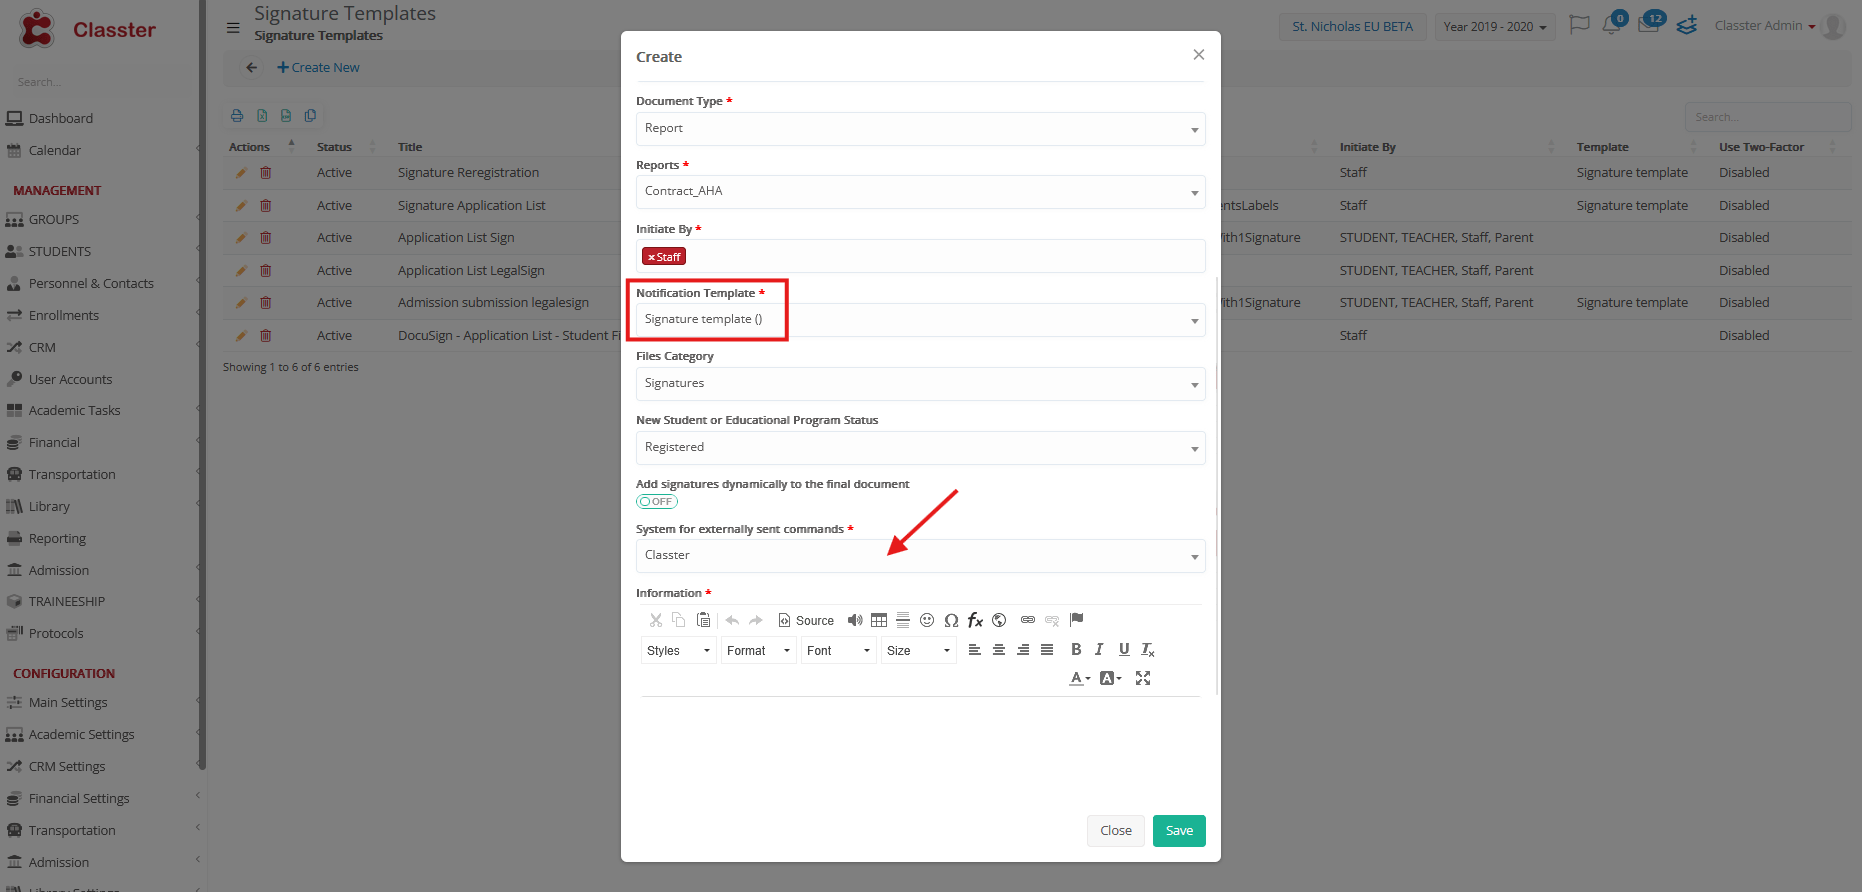
- Notification Template: Predefined message for recipients, previously created via Advanced Configurations > Templates Editing > CRM > Signature Templates
- Use Two-Factor: Enable optional security via Main Settings > Security Settings
- Files Category: Must be created in Main Settings > Dropdown Lists > Type: System & Dropdown List: Files Category related to Signatures. Can also be linked to a protocol
- New student or educational program status: Optional automatic update of the student’s or program’s status once the signature process is completed — typically used for Re-registration-type reports to automatically change the student’s status to “Re-registered” after signing.
- Add signatures dynamically to the final document: Toggle switch (on/off)
- Protocol: Optionally connect to a protocol to assign a unique protocol number and store the signed PDF under the Protocols module
- Information: Use this field to provide clear instructions to the recipient, such as how to sign the file, complete required sections, or review specific content before submission.
Important
Each signature request creates a unique case code, even for the same document. This helps track changes between submissions. In CRM > Signatures, entries with the same case code represent the same action signed by multiple users.
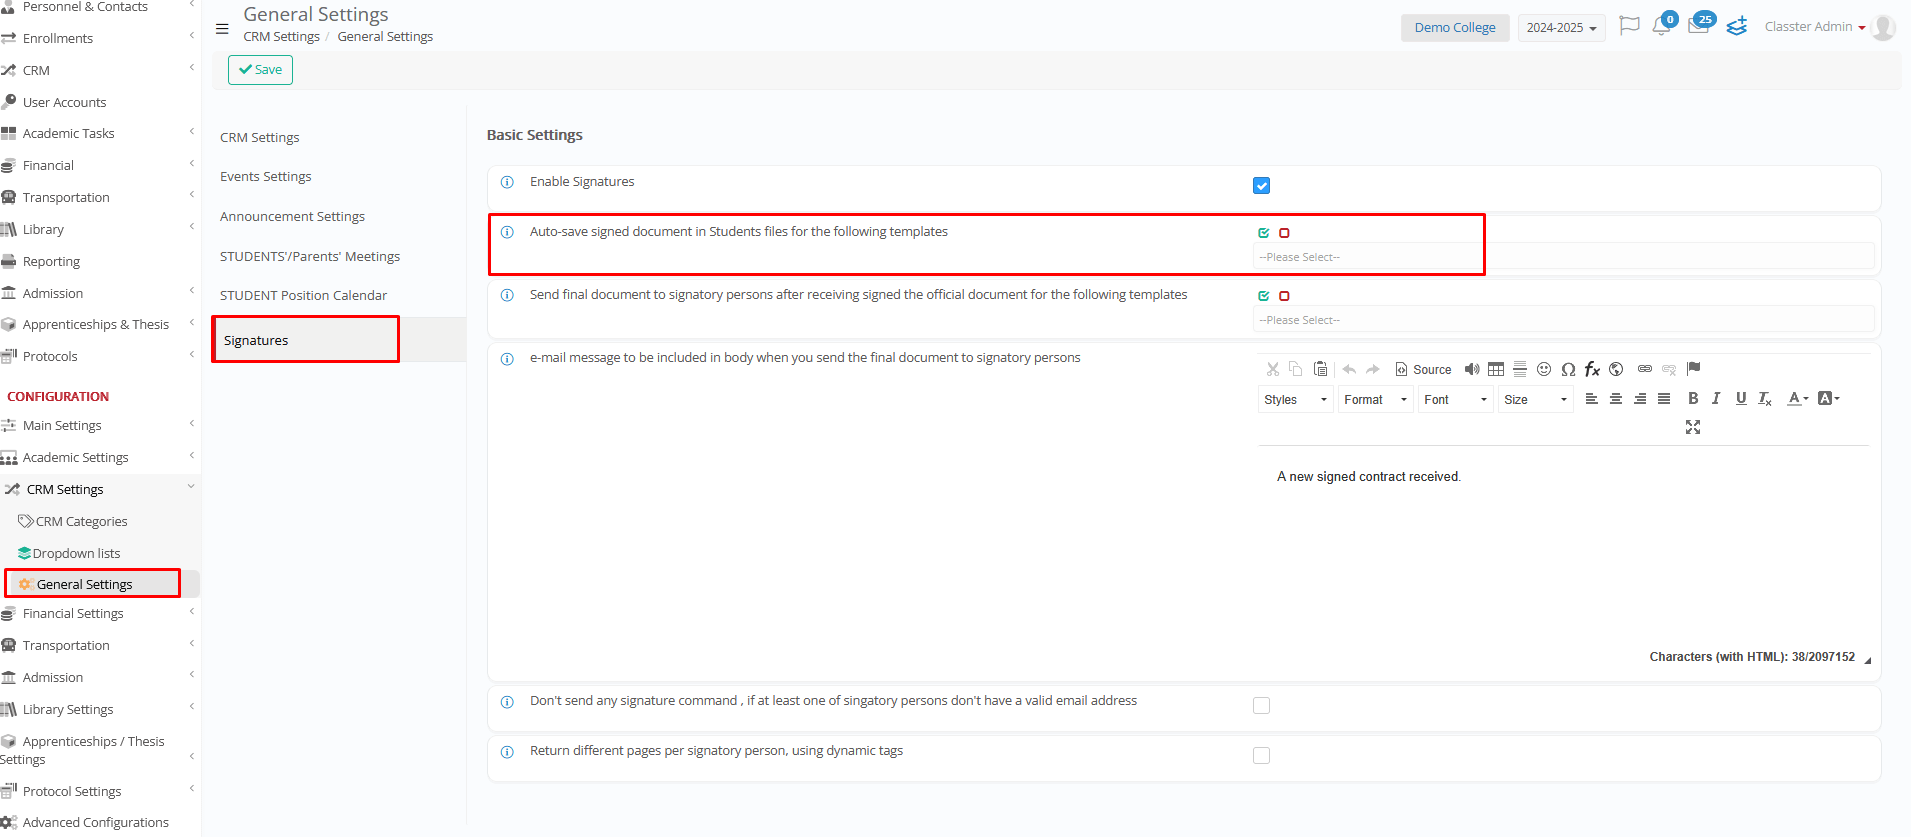
Note: To enable automatic saving of signed documents in the student files, go to Configuration > CRM Settings > General Settings > Signatures and select the templates under “Auto-save signed document in Students files for the following templates”. Do not forget this step—it ensures documents are saved to the correct location.
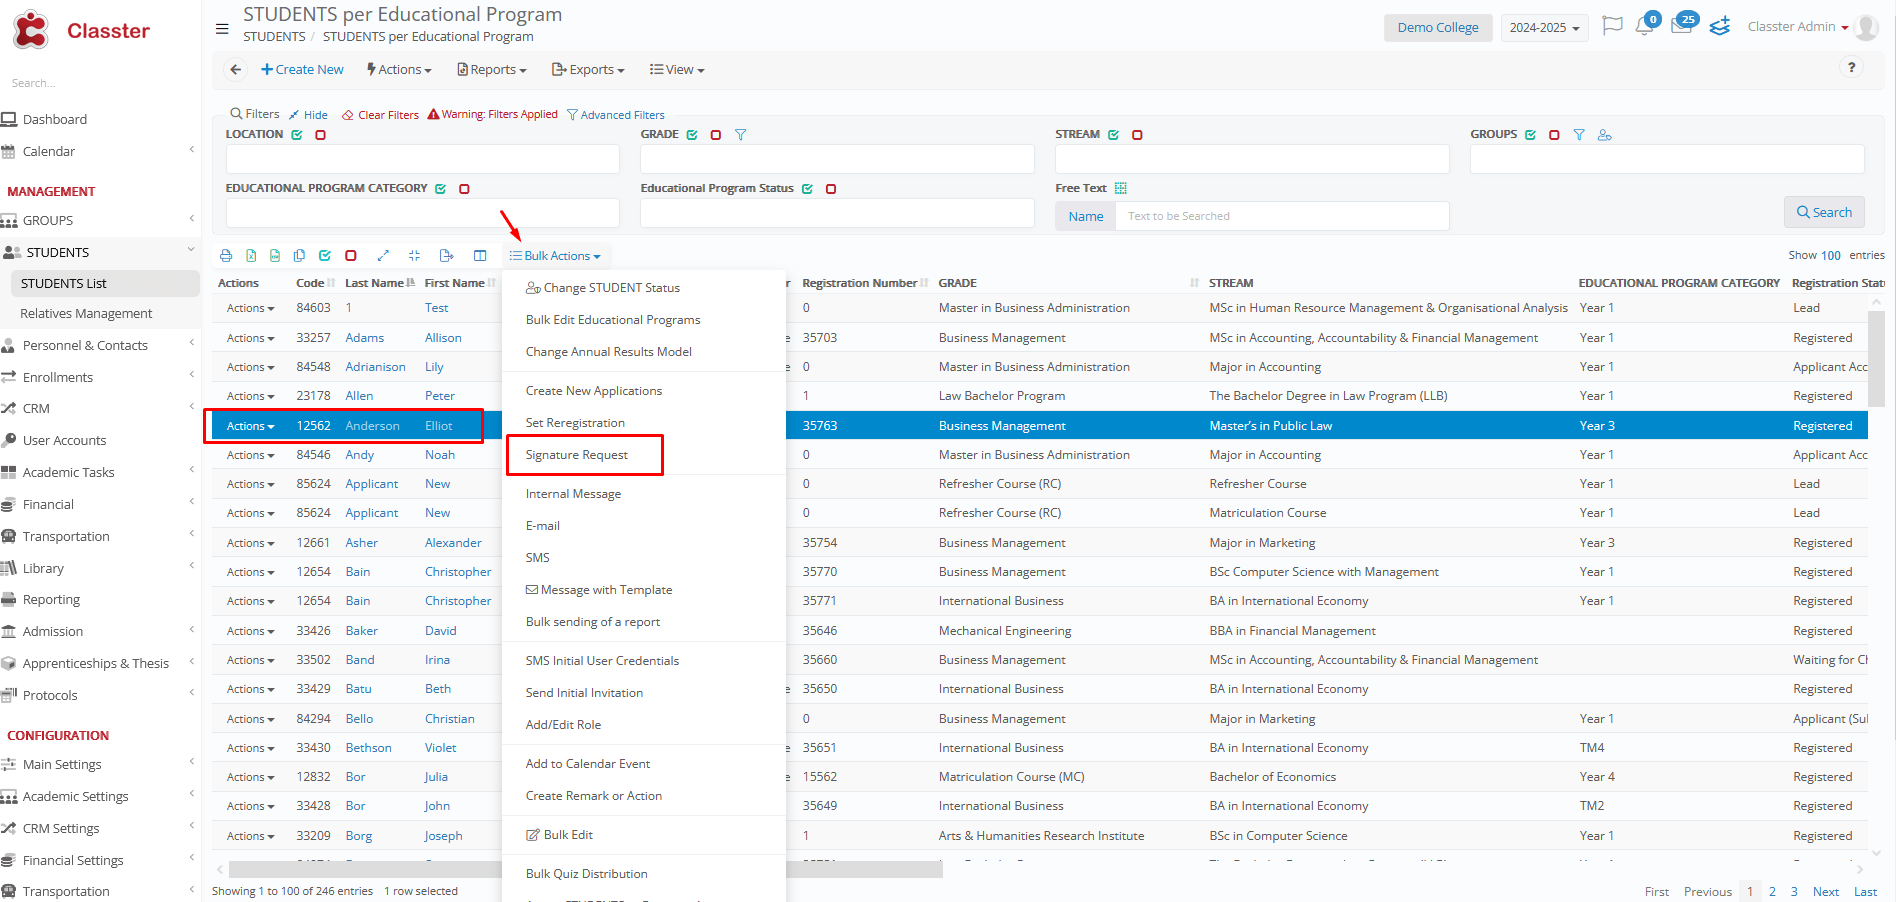
Step 4: Send Request
Student list > Students per Educational Program list (in our example the signature request is per educational program, which is why it is accessed from this list)
- Select student
- Use Actions or Bulk Actions (select only one student if the document is meant to take a protocol number)
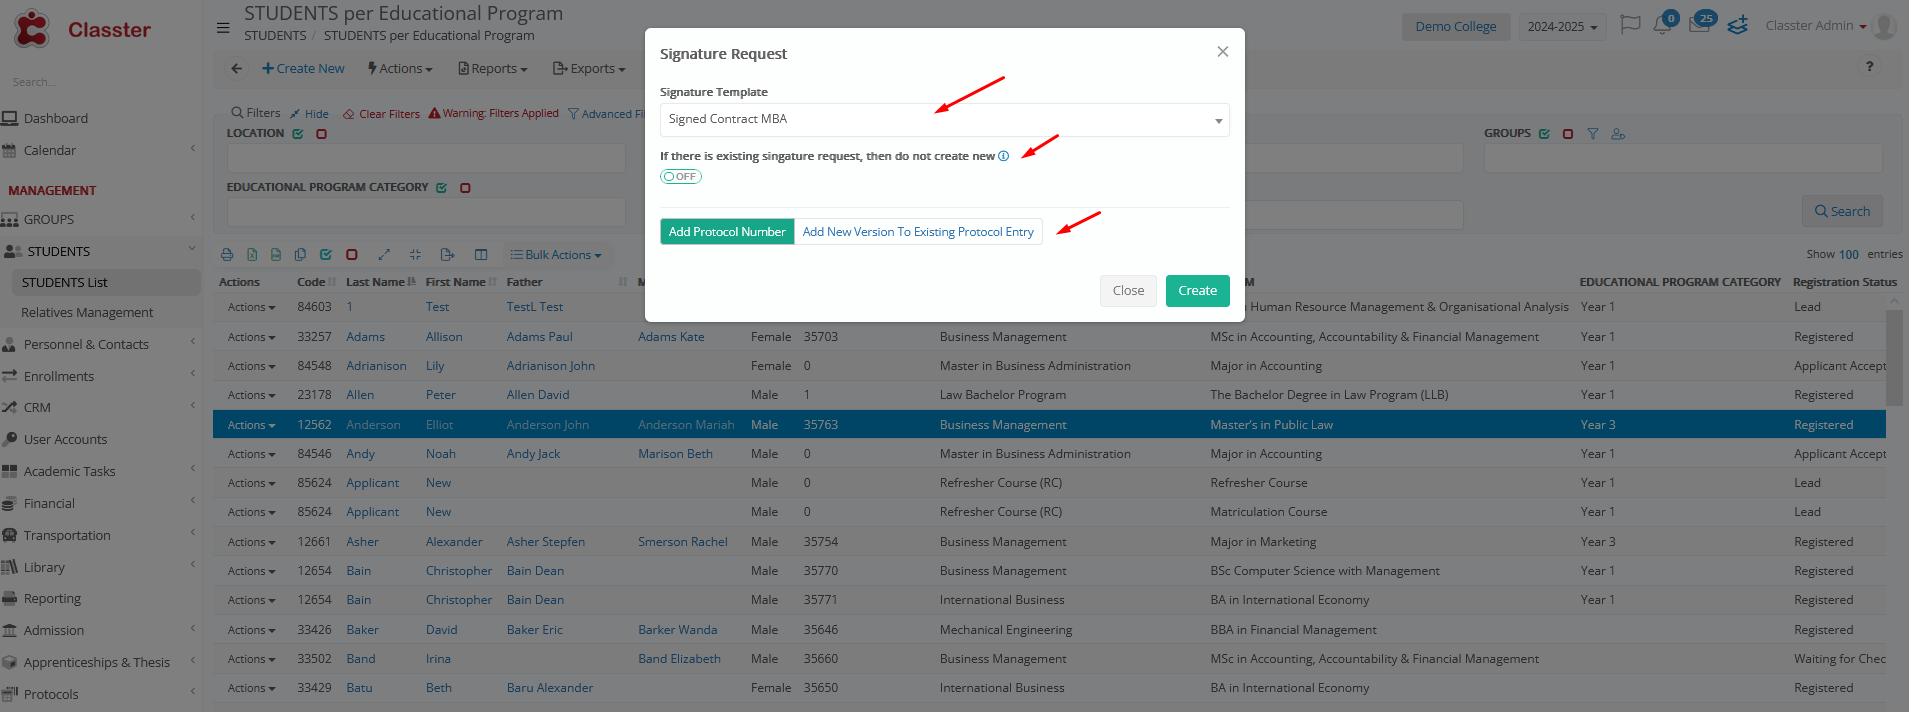
- Click Signature request
- Choose the Signature Template created earlier
- Toggle ON or OFF the option: “If there is an existing signature request, do not create a new one”
- This option is visible ONLY when a protocol is activated. If it is indeed linked to a protocol, select one of the following:
- Add protocol number
- Add new version to existing protocol entry
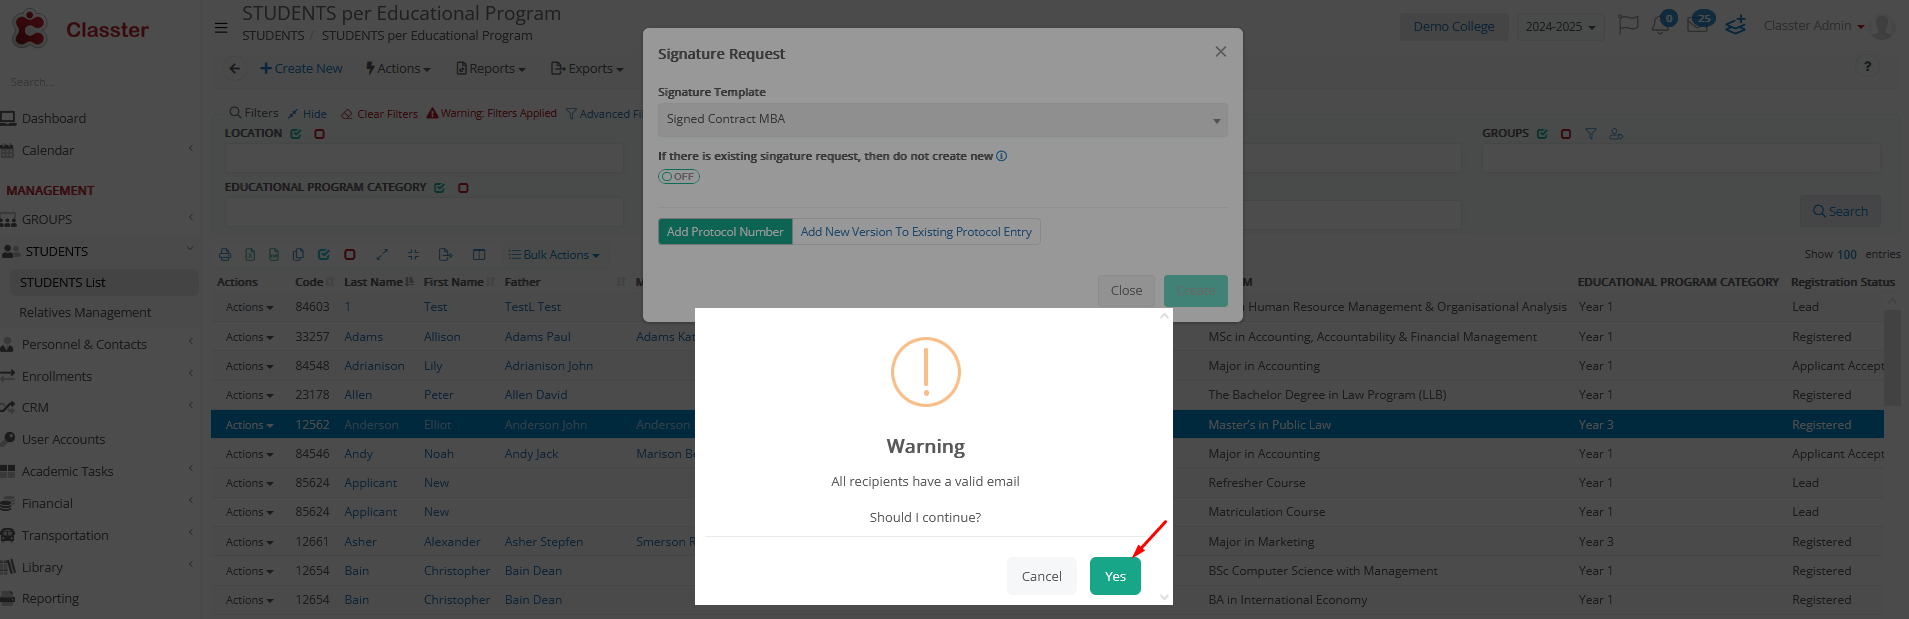
- Click Create
- Confirm by clicking Yes when prompted to verify the recipient has a valid email
Example below: This shows how the document appears when a student receives it for signing. It is sent directly to the signatory via email for review and action.
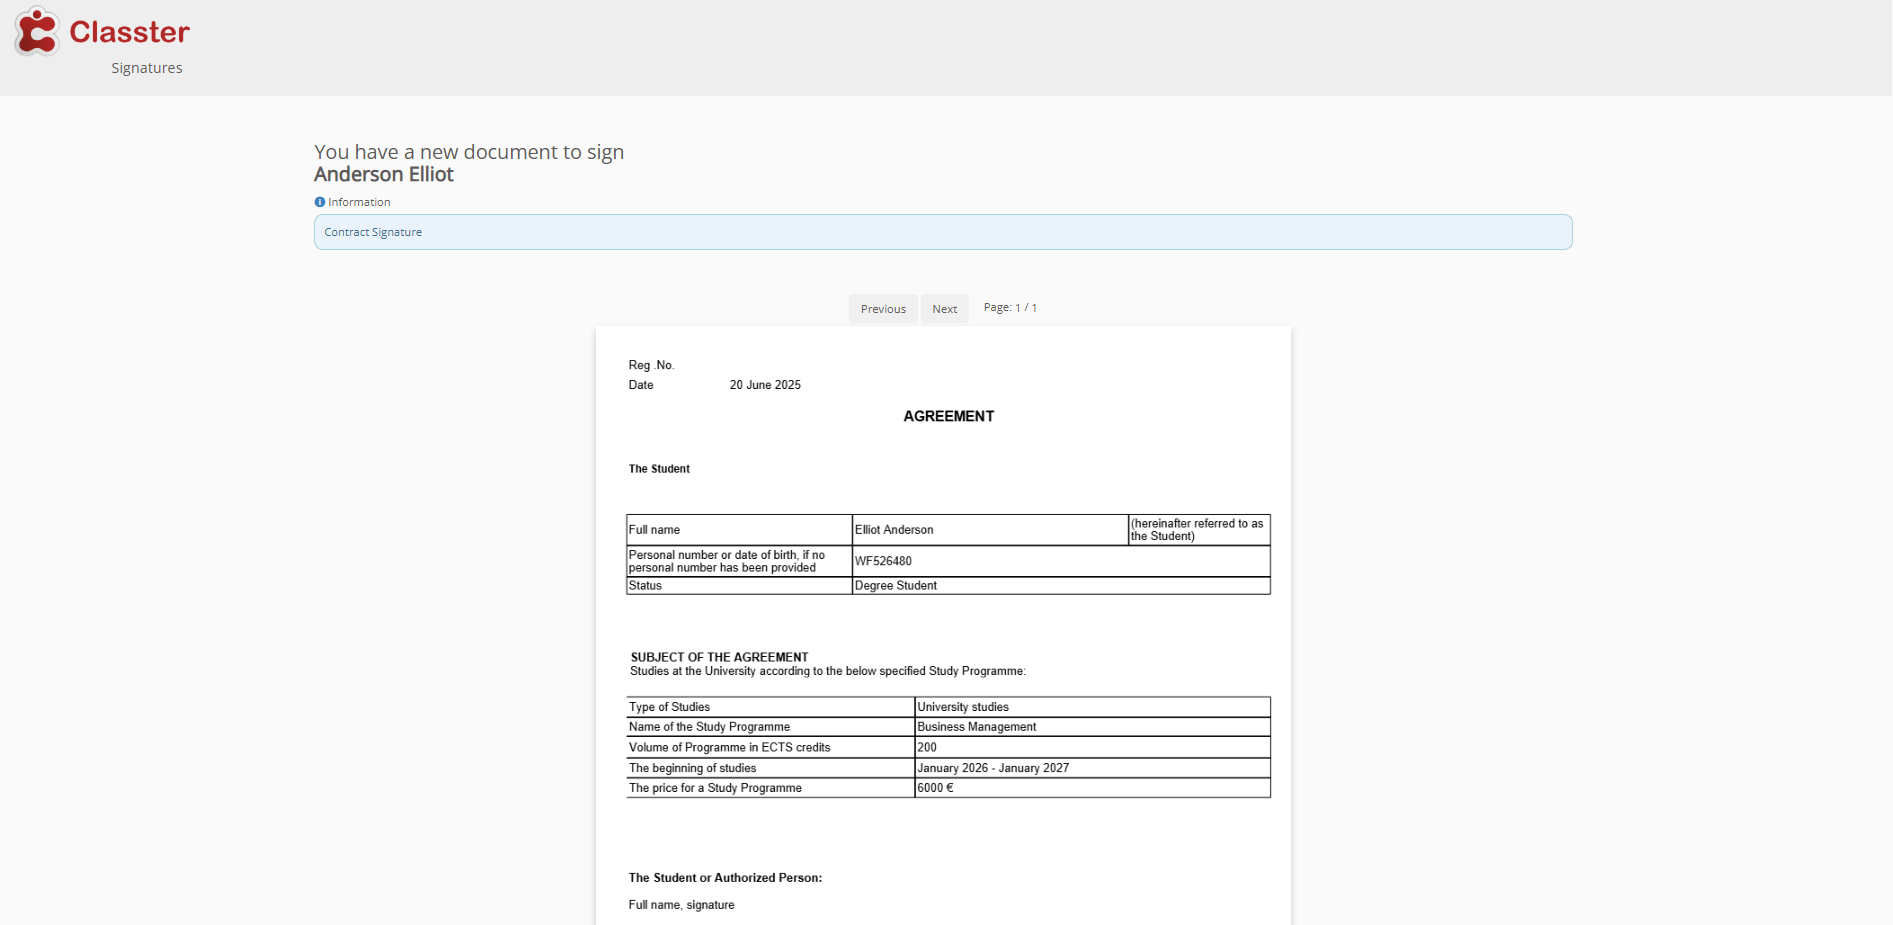
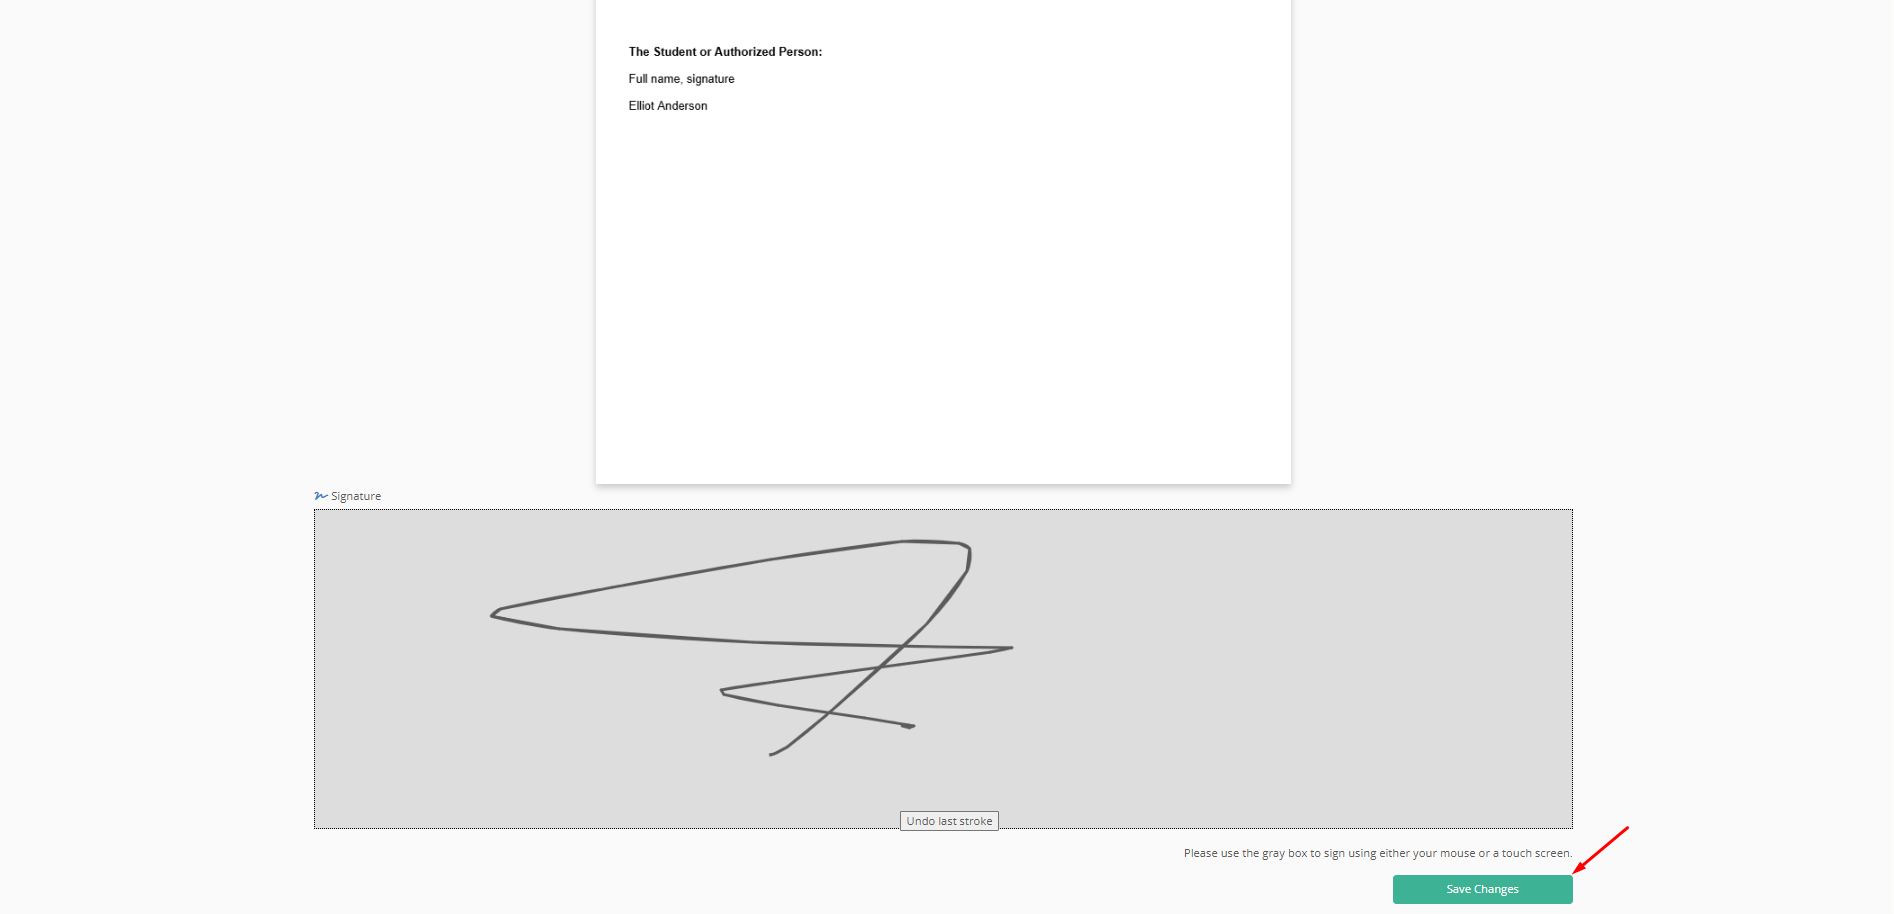
It will then be returned with the protocol number and the signature embedded.
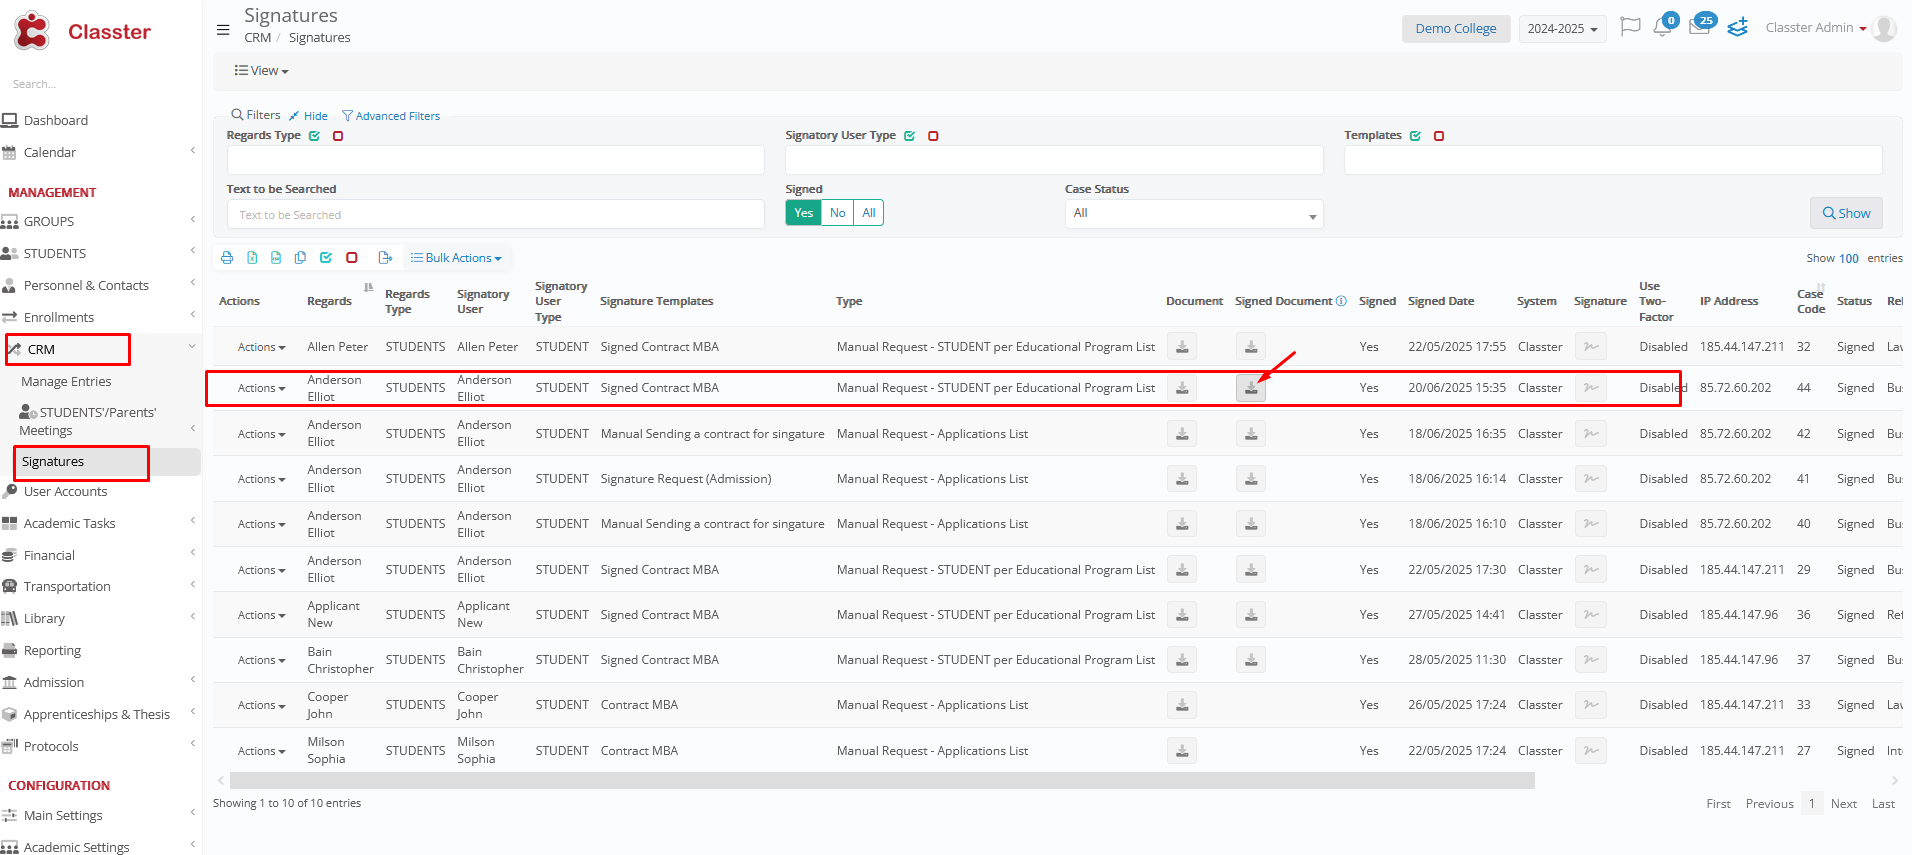
You can also download it from CRM > Signatures, select the signed document, and click to download.
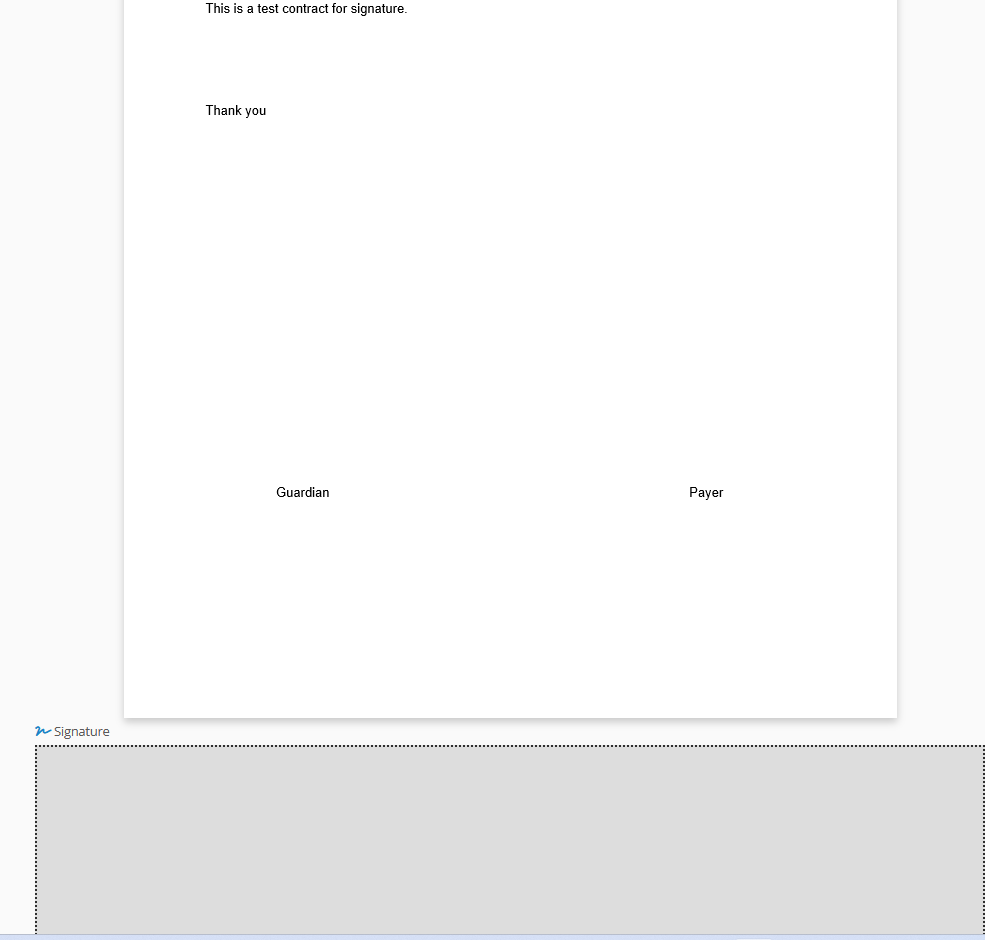
Example below: How the signing interface appears when two signatory persons are involved.
Document Notes
- Custom report must include designated signature space
- Multiple signatures merge in one PDF
- Each request has a unique Case Code
LegalSign (Certified UK System)
Follows the same signature logic as Classter, with all 4 configuration steps detailed above.
- LegalSign must be integrated with Classter. API setup is required.
- Supports dropdown lists, checkboxes, and free-text fields within the signature form
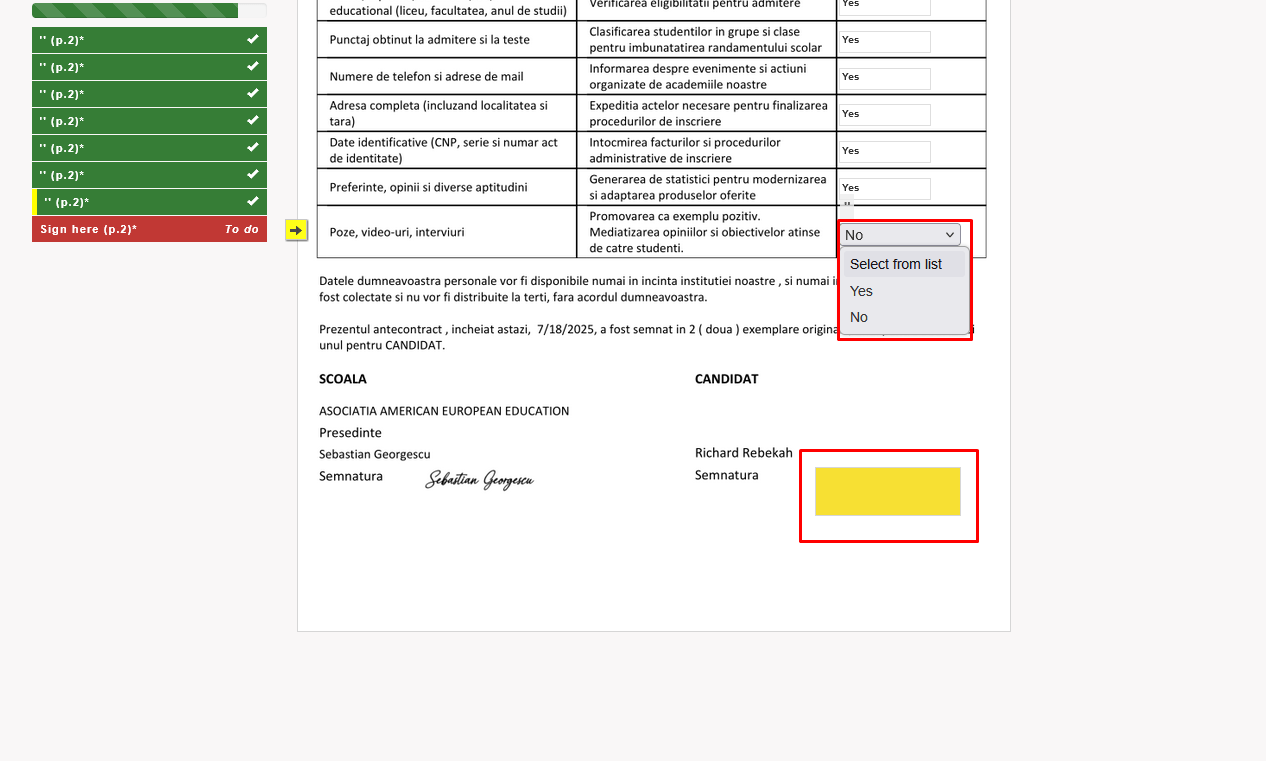
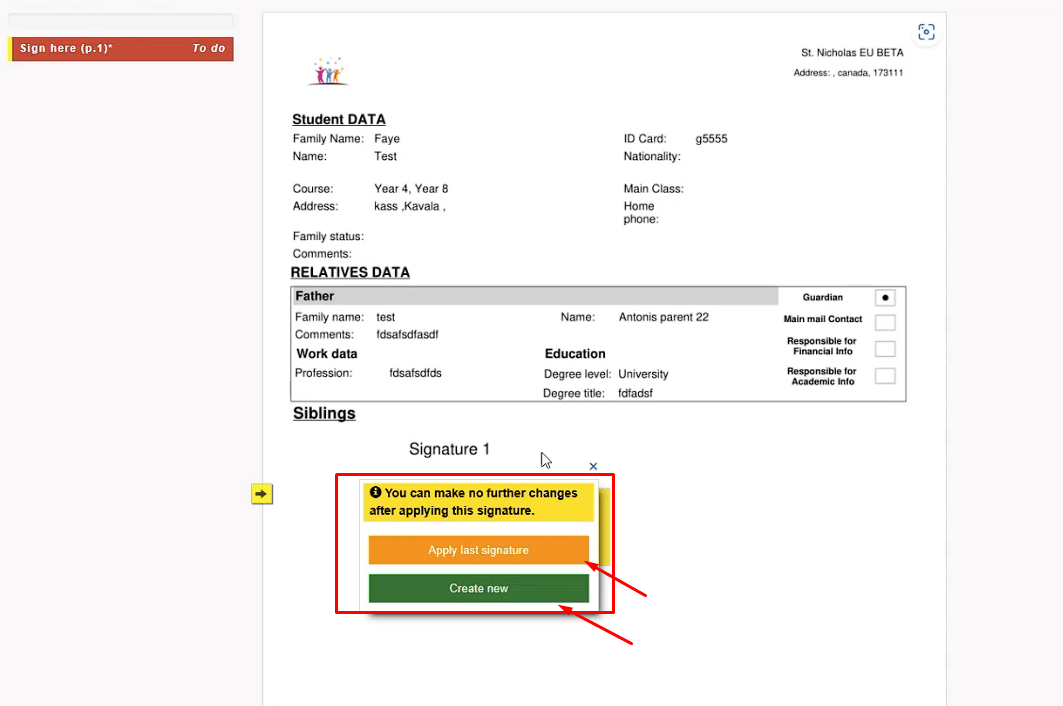
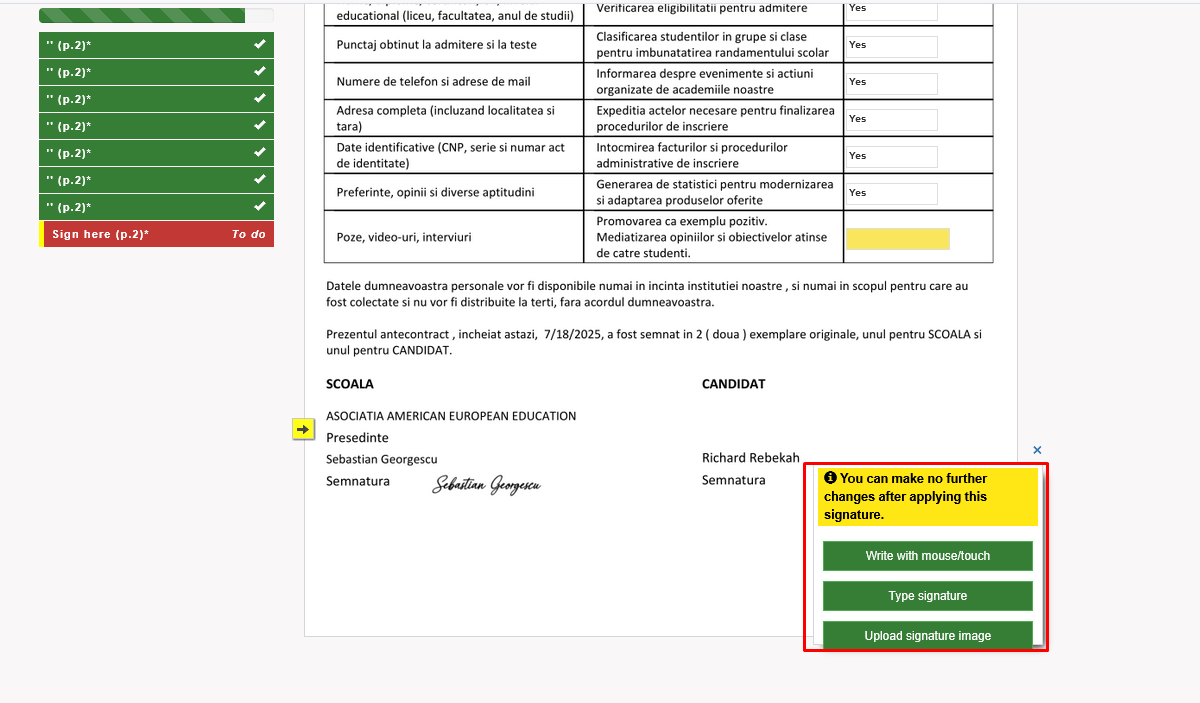
- Allows defining exact fields to sign, with options to reuse the last signature or create a new one
- After signing the document, you can download it directly.
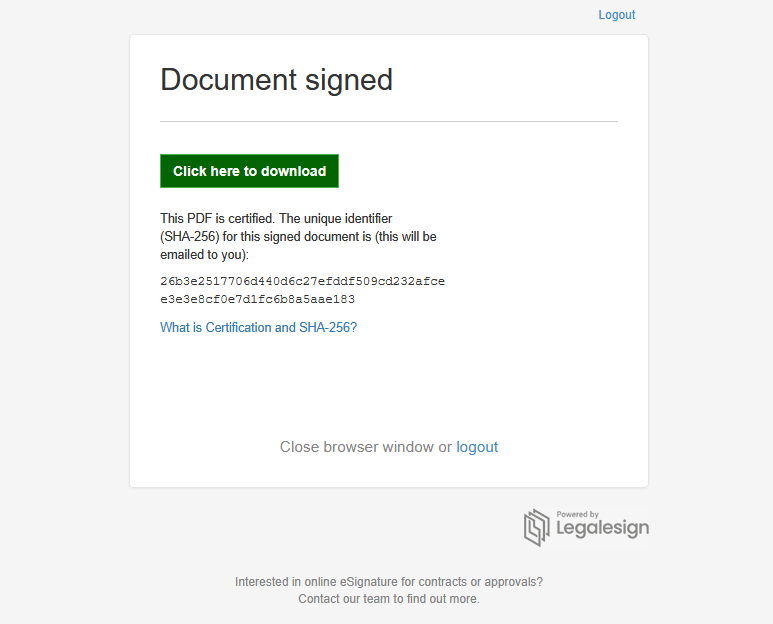
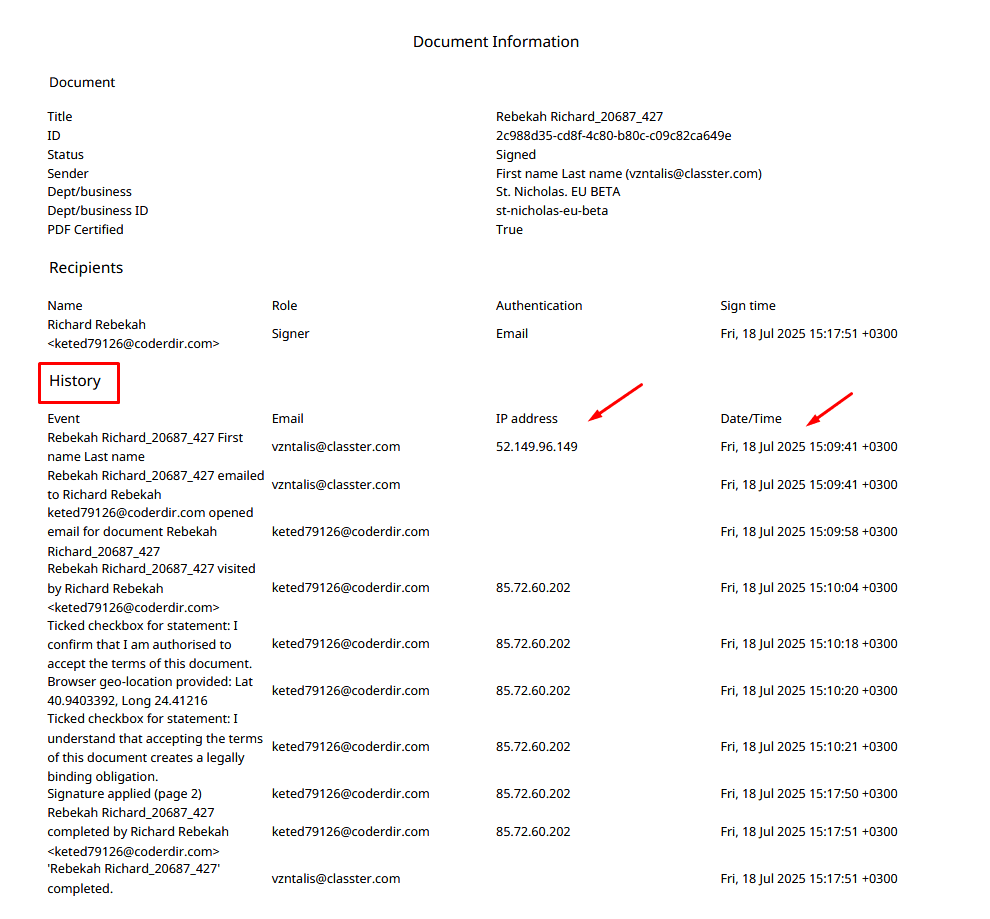
- The downloaded document maintains a complete, certified audit trail from the initial request to the final signature, including date and time stamps, signer identity, IP address, and a unique tracking number assigned to each signed document
- Supports two-factor authentication
- Classter reports used for LegalSign include special tag attributes, such as <<t=signature;s=1>>, that define signature placement. For multi-signer documents, increment s=1 to s=2, s=3, etc., to match the number of signers. LegalSign replaces these tags with signature containers. To make them invisible before sending, set the tag text color to match the background.
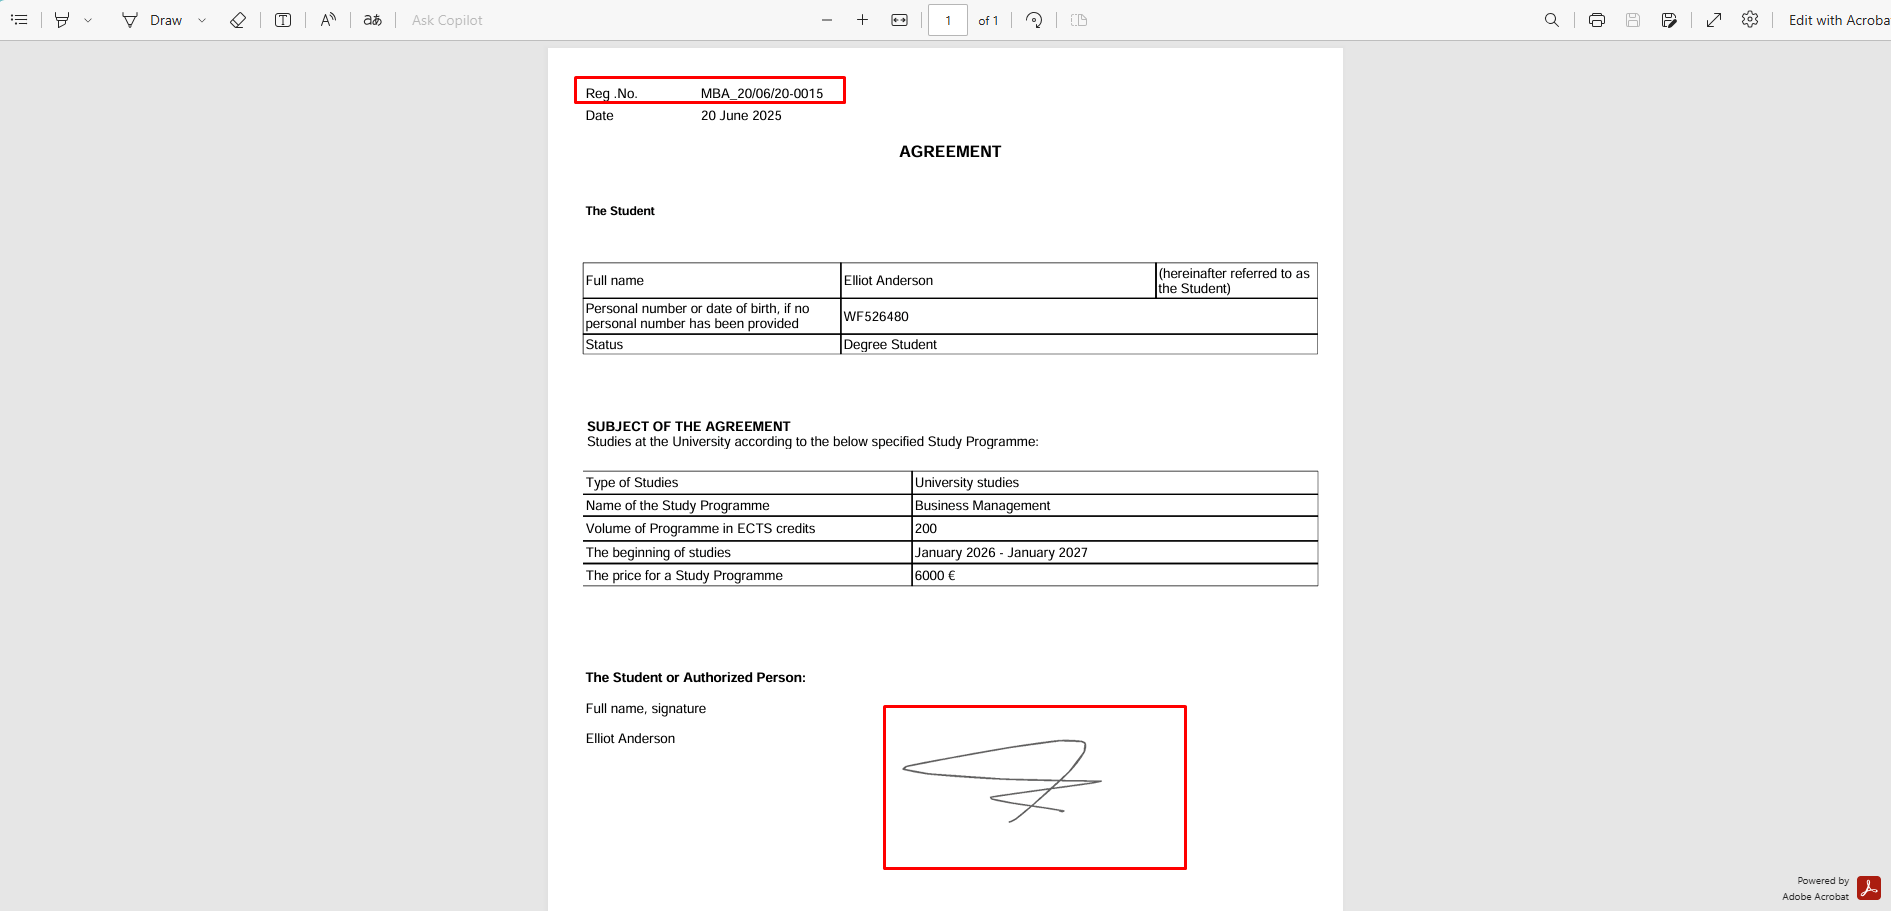
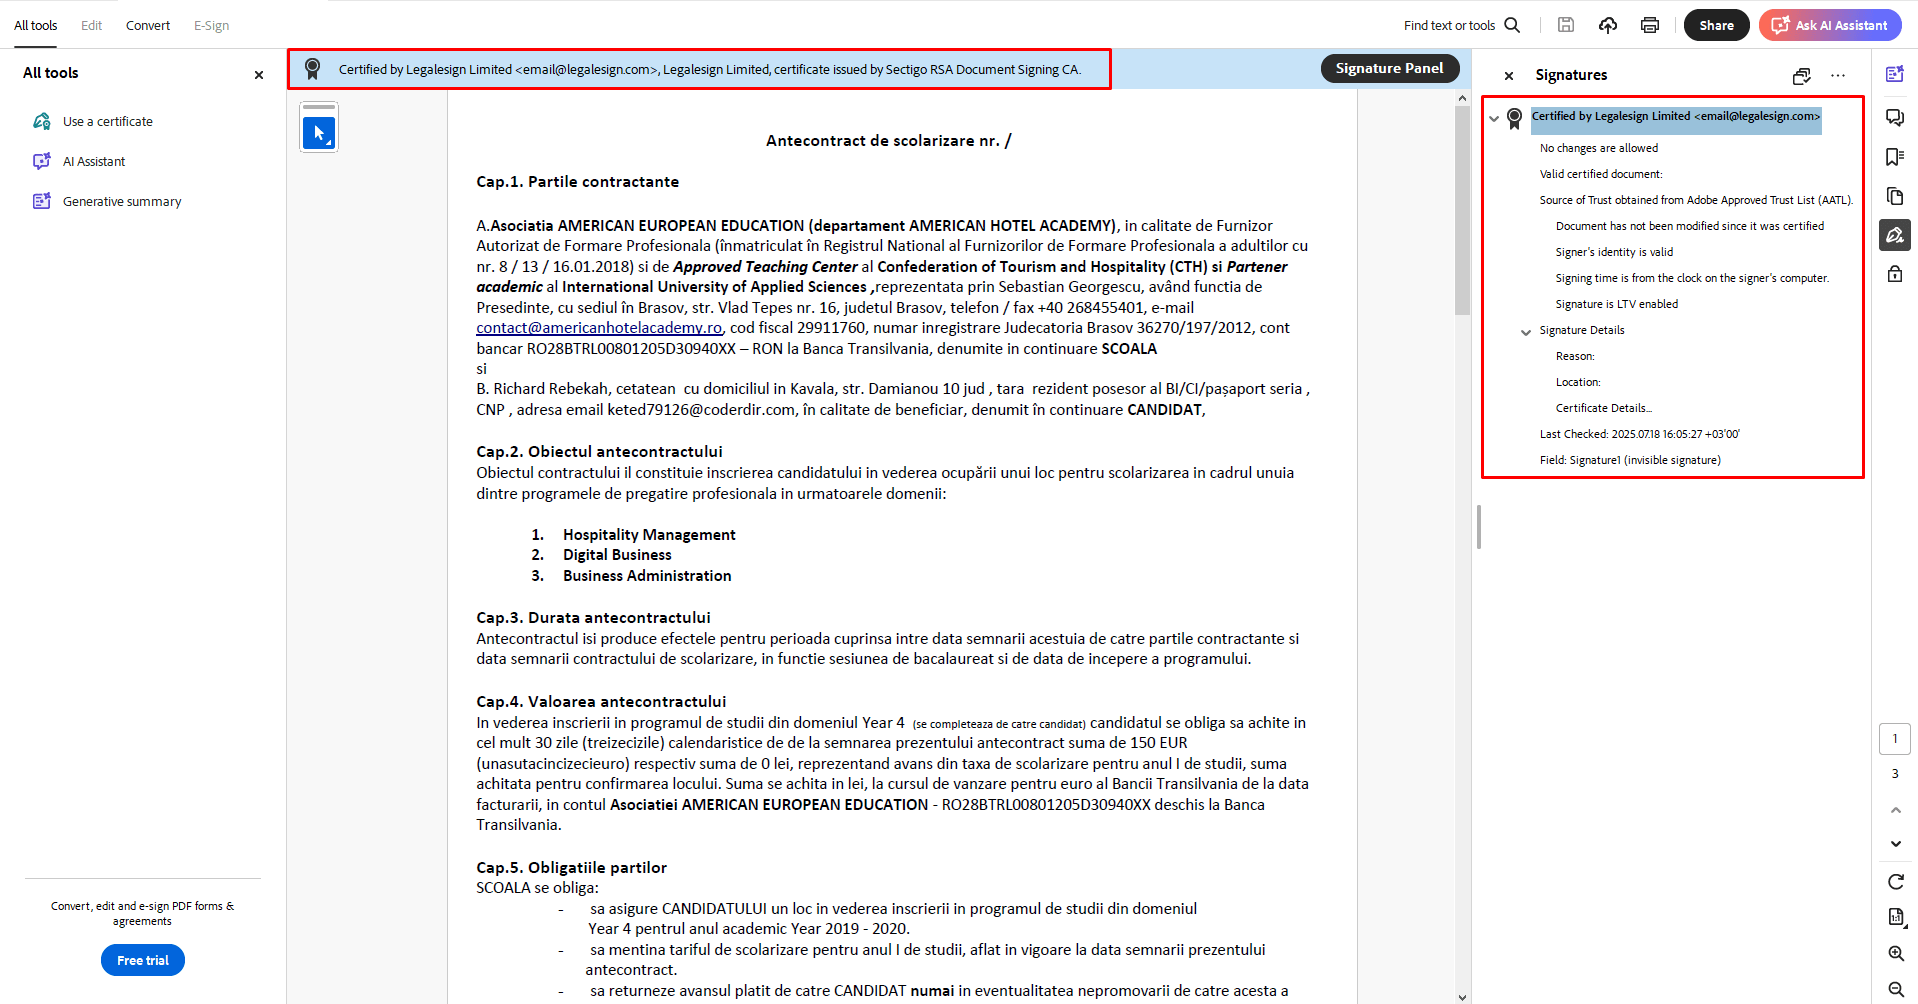
- Certified and compliant with international electronic signature standards (opened file below with Acrobat Reader)
DocuSign Integration
Integration Setup
Configuration > Advanced Configurations > Third-Party Integrations > DocuSign
- Fill in: Integration ID, API Username, Account ID, and Private Key
- Enable the integration toggle
- Use Sandbox mode if testing
When you click Activate, you may be redirected to DocuSign to grant permissions.
For more info click here.
Step 1: Template Setup
Follows the same signature logic as Classter.
Navigate to Advanced Configurations > Templates & Menus > Signature Templates.
Note: For a template to appear in the Signature Request dropdown list, you must link both Files and Private Agreements to it.
Files
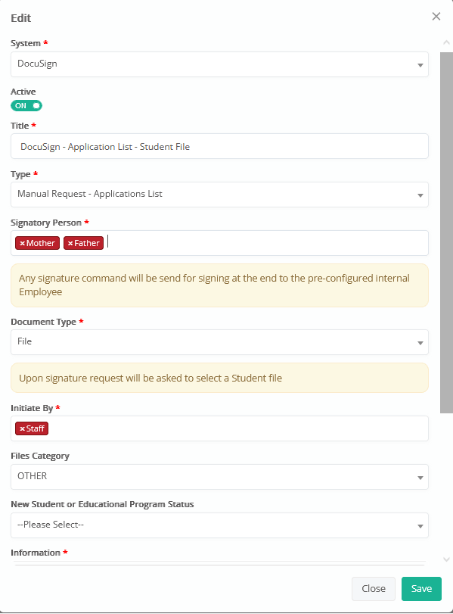
System: Select DocuSign.
Active: Turn ON when fully configured.
Title: Enter a suitable title.
Type: Choose if it is “Per arrangement” or not.
Signatory Person: Select the person (one or more) who will sign the document.
Document Type: For files, choose the File Document Type.
Initiate By: Select who can initiate this signature request.
File Category: Choose the category for the file.
New Student or Educational Program Status: Select the appropriate status.
Information: Use this field to provide clear instructions to the recipient, such as how to sign the file, complete required sections, or review specific content before submission.
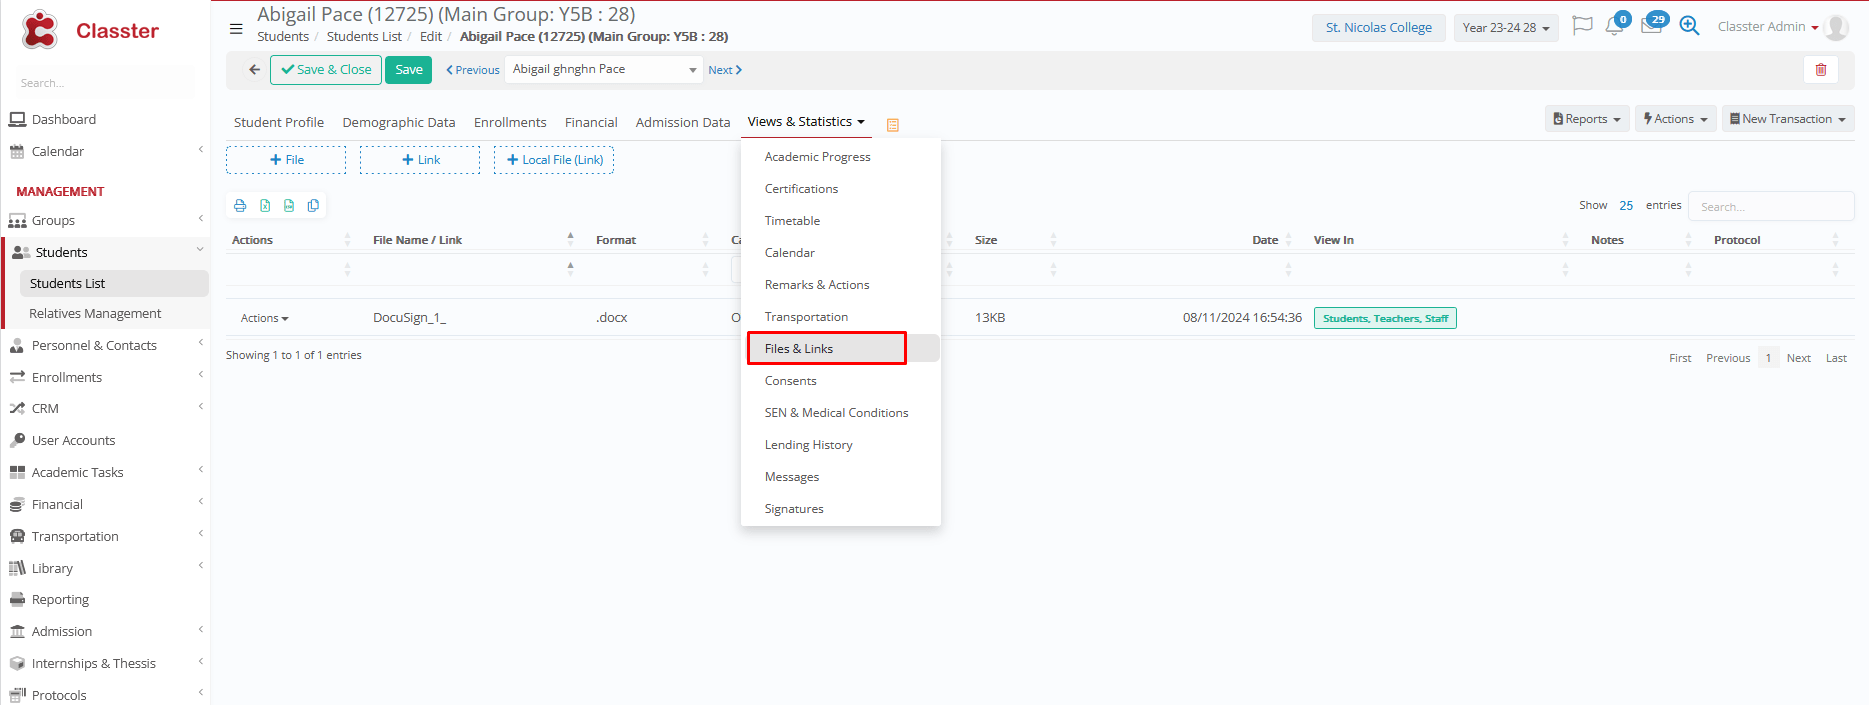
Do not forget to upload this kind of file in the Files & Links section in the Student Form.
Private Agreements
Selecting “Private Agreement” as a Document Type generates a report as a PDF, ready for signing.
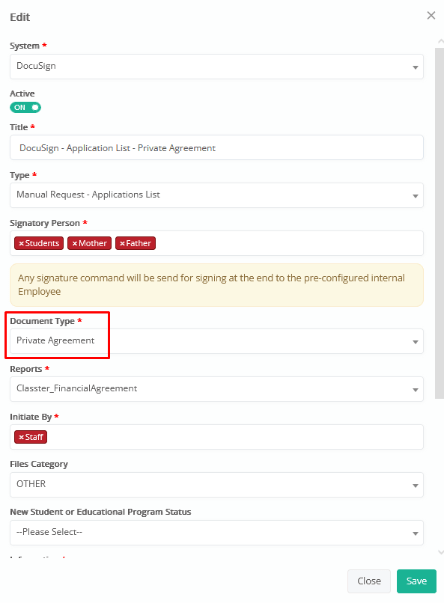
System: Select DocuSign.
Active: Turn ON when fully configured.
Title: Enter a suitable title.
Type: Choose if it is “Per arrangement” or not.
Signatory Person: Select the person (one or more) who will sign the document.
Document Type: For files, choose the Private Agreement Document Type.
Initiate By: Select who can initiate this signature request.
File Category: Choose the category for the file.
New Student or Educational Program Status: Select the appropriate status.
Information: Use this field to provide clear instructions to the recipient, such as how to sign the file, complete required sections, or review specific content before submission.
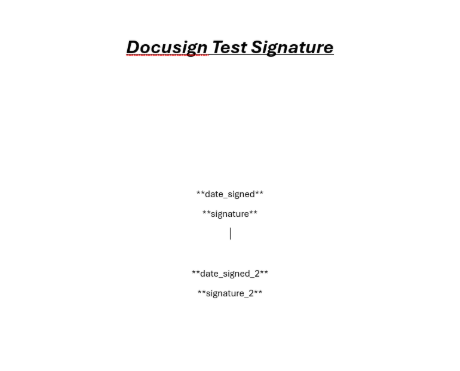
Step 2: Define signatory roles
- Placeholders in document:
- **signature**, **date_signed** (for first signer)
- **signature_2**, **date_signed_2** (for second signer)
- Initiated By: Define who can trigger the signature (e.g., employee, parent)
- File Category: Select where the signed document will be stored (must be pre-created)
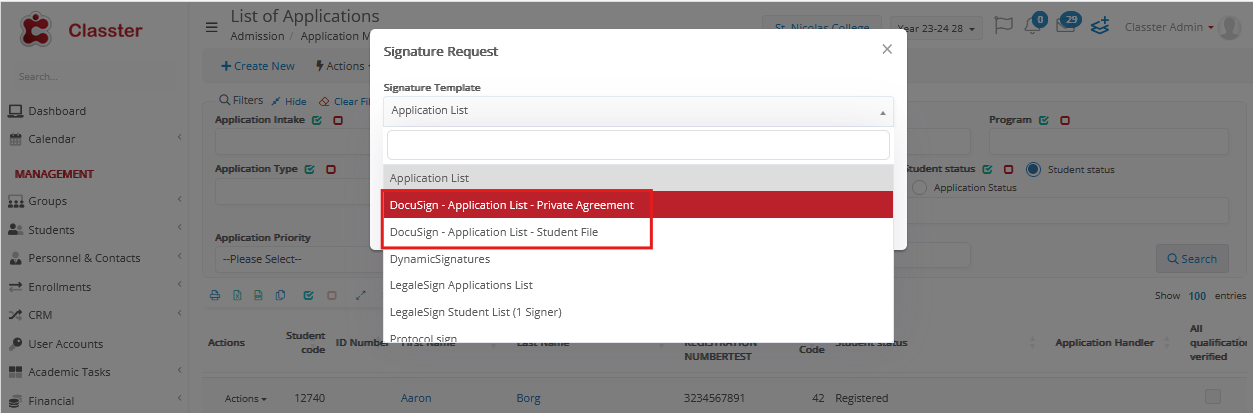
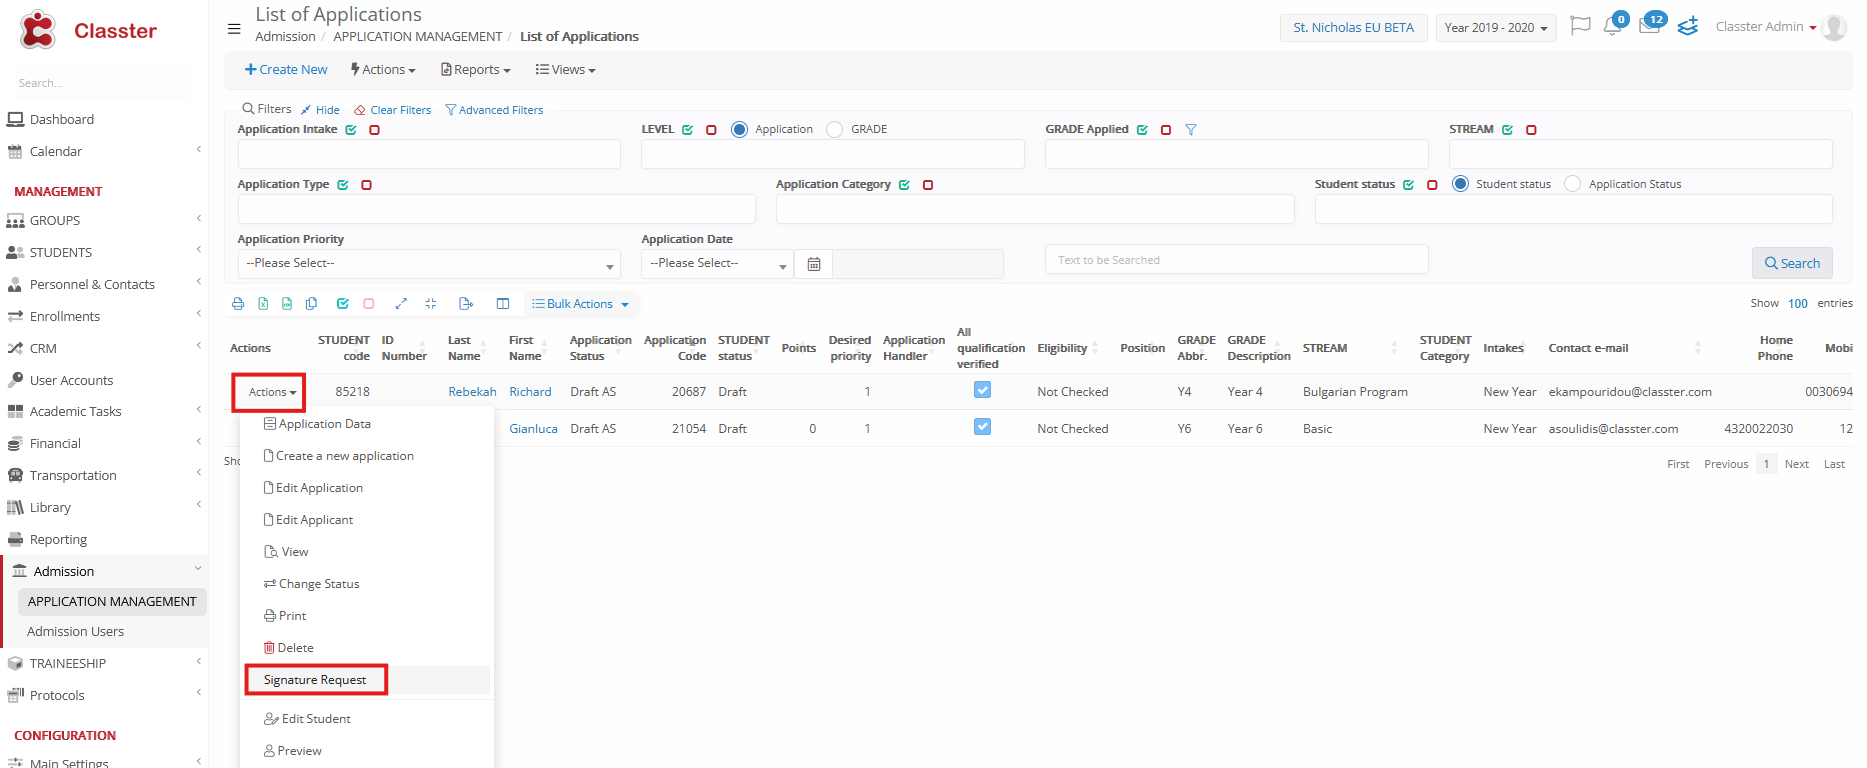
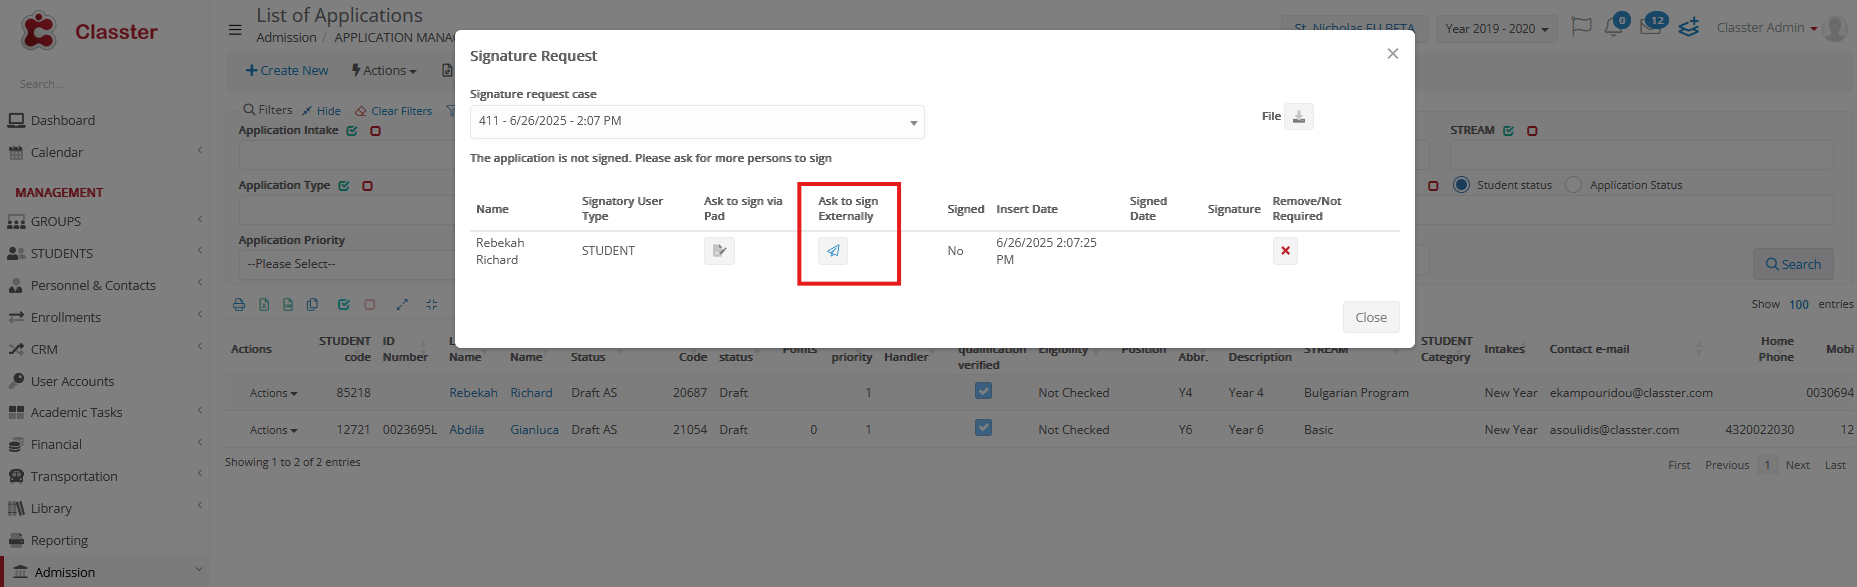
Step 3: Sending Signature Requests
Example: Admission > Application Management
- Go to the Actions or Bulk Actions menu and select Signature Request
- Select a Signature Template:
- If using a Private Agreement, choose the relevant template connected to a report. This will generate a Word or PDF document for signing.
- If sending an existing File, select a document that is already uploaded to the student’s file tab.
- Click Create
- A confirmation popup will appear. Ensure the recipient has a valid email and confirm by clicking Yes.
The recipient receives an email containing a signing link. In DocuSign, you can place signatures only where placeholders are defined in the document (e.g., **signature**). To hide these tags in the final version, color them white.
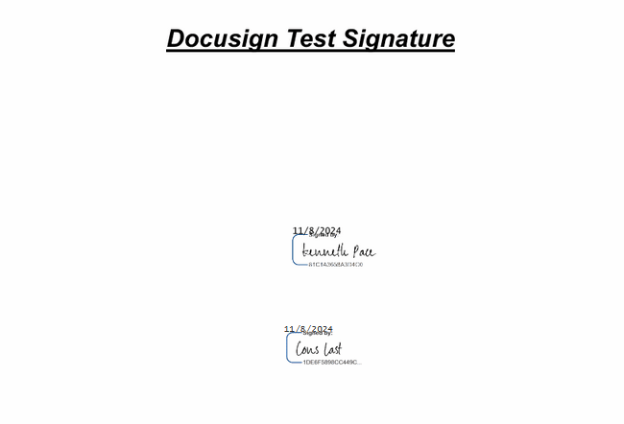
Step 4: Retrieving Signed Documents
Retrieved files are stored in the student’s Files & Links tab.
Signature Pad Integration
Classter integrates seamlessly with Signature Pads for in-person electronic signatures. This method is ideal for institutions requiring signed agreements in physical presence (e.g., walk-in enrollment).
Setting up Signature Pads in Classter follows a similar process to the Classter embedded signature system, with a few key differences:
Signature Template Setup
- Select Signature Pads as the System.
- Set the Notification Template to Classter system if any signatories are absent and need to sign electronically. This ensures the document can be sent via email for remote signing.
- Click the button to send the request, which will be responded to via email.

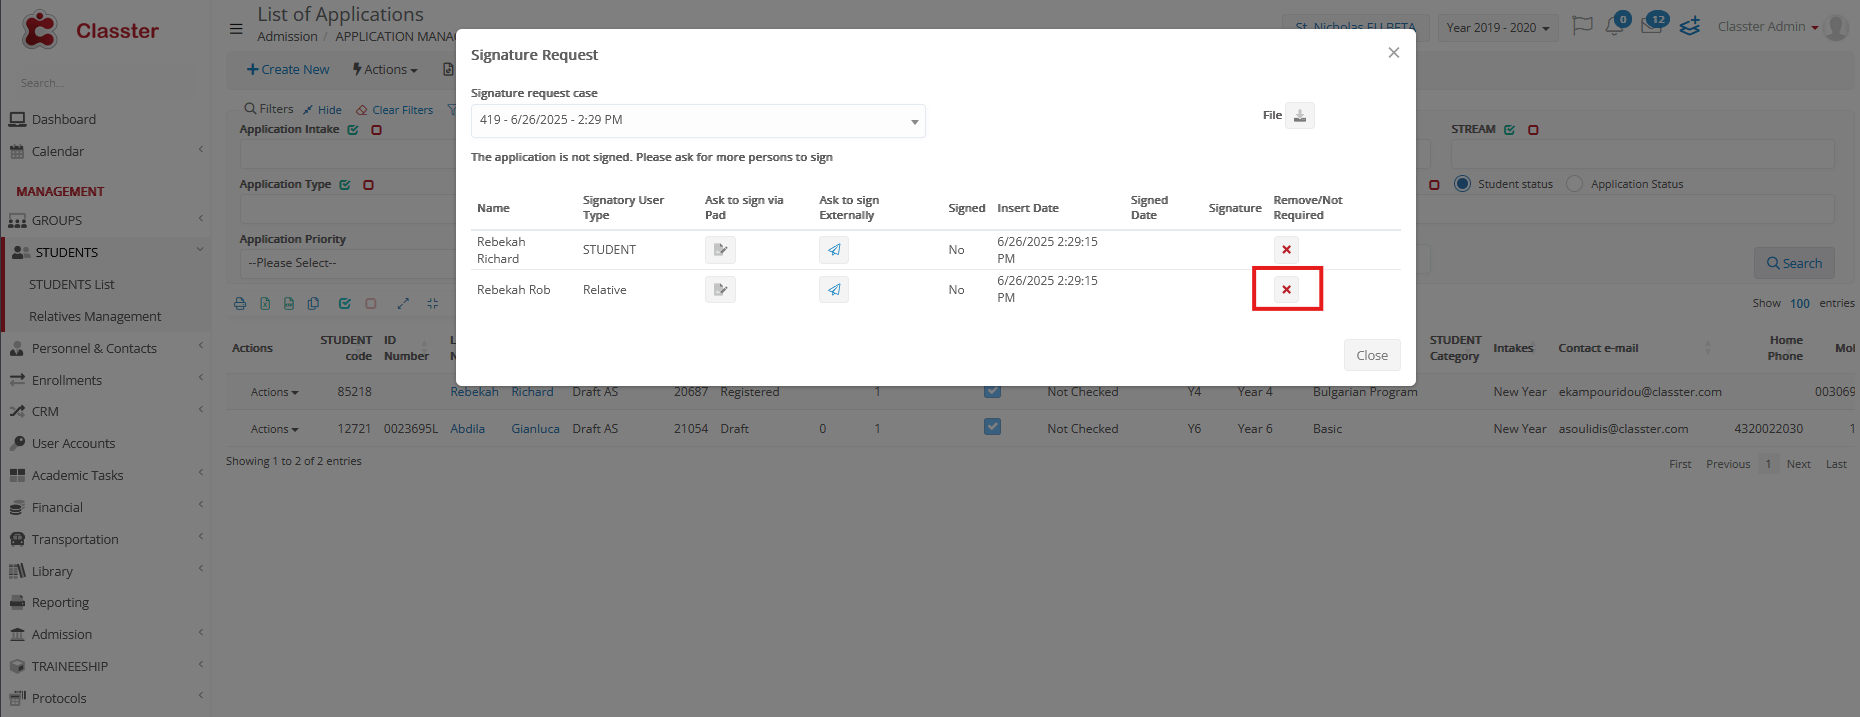
Additional Functionalities
Important: You cannot send a signature request for the Signature Pad through Bulk Actions. Use the Actions option instead for the specific signatories who need to sign in person.
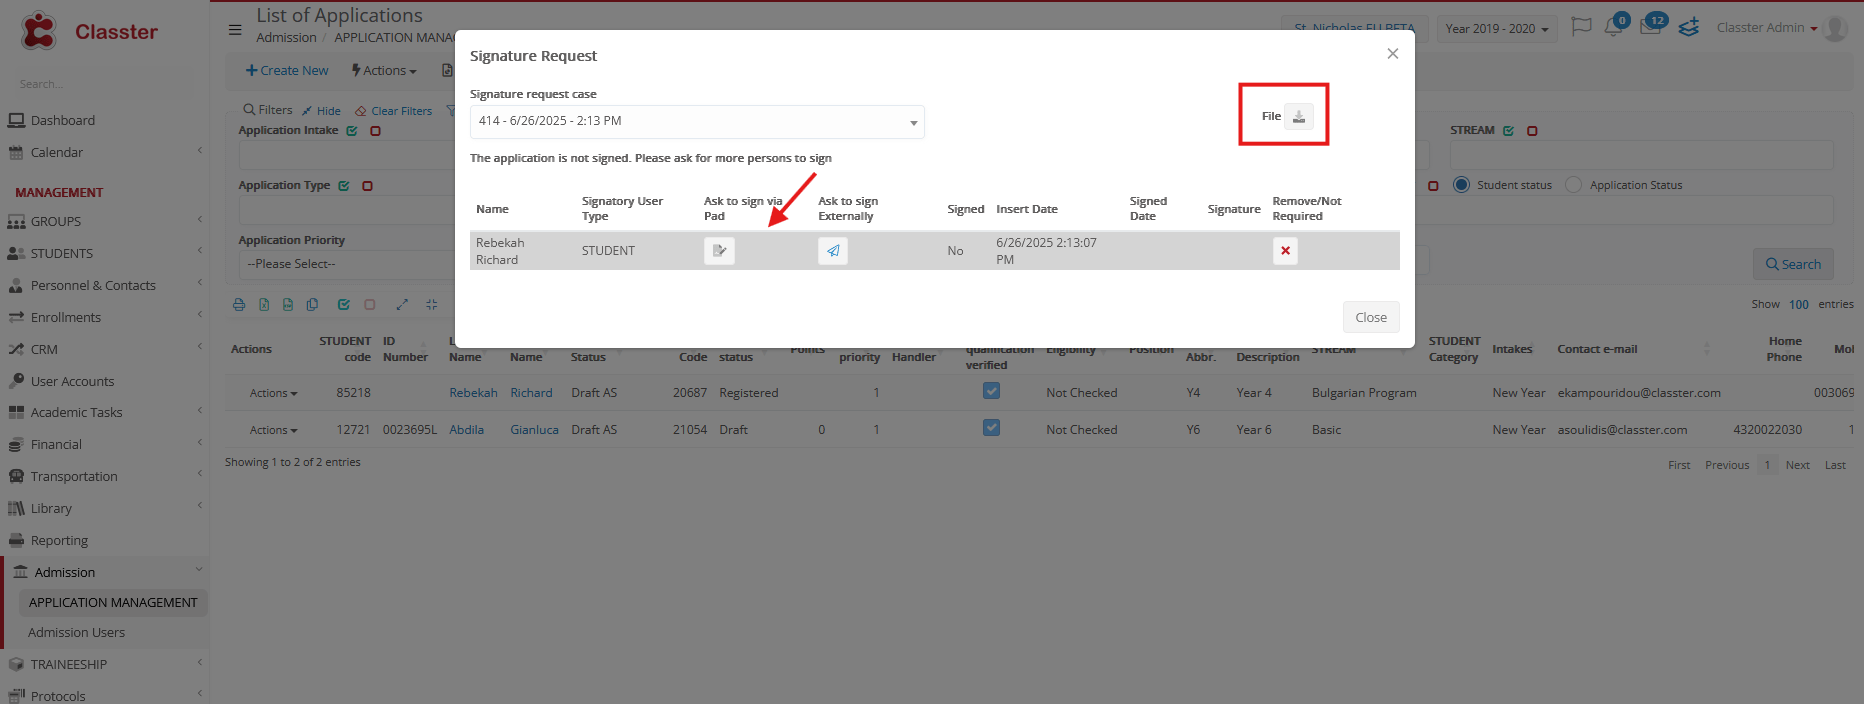
- The document can be automatically downloaded.
- As with other signature workflows, you can also send documents via email for electronic signing when the signatory is unavailable in person.
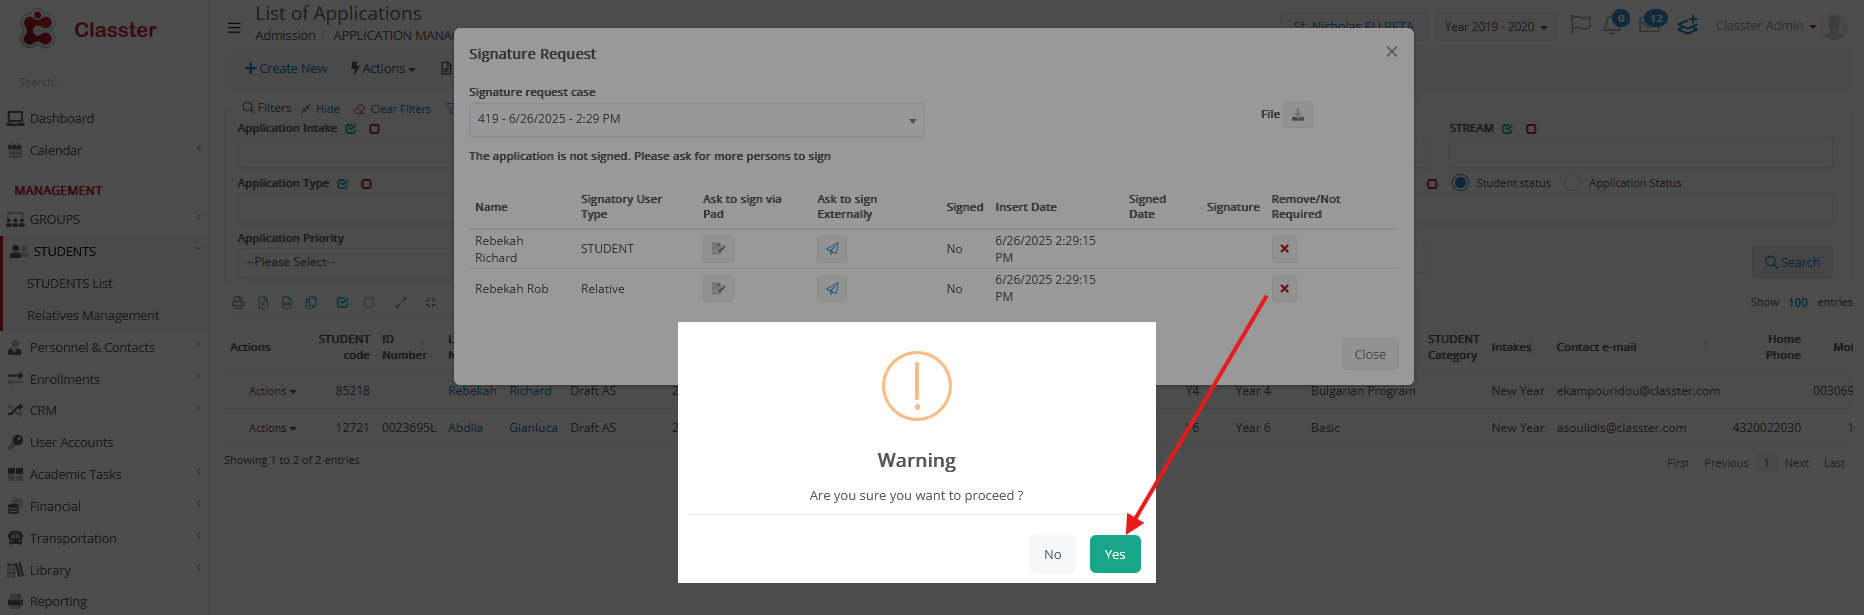
- You can remove a signatory if necessary.
Note: Before setting up Signature Pads in Classter, ensure the computer system has the necessary hardware installed to support physical signature collection.
Summary Table
| Feature | Embedded Classter | LegalSign | DocuSign |
| Certified | ❌ | ✅ | ✅ |
| Signature Field Placement | ❌ | ✅ | ✅ |
| Multi-signatory | ✅ | ✅ | ✅ |
| Auto File Save to Profile | ✅ | ✅ | ✅ |
| Conditional Status Updates | ✅ | ✅ | ❌ |
| Free Text / Form Inputs | ❌ | ✅ | ✅ |
| Two-Factor Authentication | ✅ | ✅ | ✅ |
You might also be interested in:
Can I invalidate signed documents in Classter? – Classter Knowledge Base
What happens when I invalidate a signed document? – Classter Knowledge Base
What happens if the price of a financial arrangement changes? – Classter Knowledge Base
How do I create documents for signing in Classter? – Classter Knowledge Base
What types of documents can be signed in Classter? – Classter Knowledge Base