

Session List
- Use the filters to show sessions for specific teachers, group, subject, view type and a range of dates (Figure 292).
- Use the ‘Bulk Actions’ dropdown button to delete, copy, lock/unlock the selected sessions.
Note: When you lock a session, the teacher will not be able to edit or delete it.

Figure 292
Actions
Using the ‘Actions’ button next to the session, you can:

Figure 293
- Edit the session
- Delete the session
- Change the dates of a session
- Preview the session
- Use New Session Notification to send messages to teachers, students, and/o parents after creating a new session.

Figure 294
- Click on Create Teams Meeting to create a new meeting linked to the session. This will redirect you to Microsoft Teams.
Note: MS Teams integration needs to be setup. If it is not this button will not be visible to you.
- Click on Lock or Unlock to lock sessions and prevent from editing or deleting the session.
Note: Admins may have removed this privilege from teacher roles anyway.
- Use Create a Copy to create copies of an existing session.
- Click on Classroom Management to manage the classroom arrangement for the session. This opens a new window with all the students in the group.

Figure 295
- Use the plus and minus beneath the thumbs up or thumbs down symbols to give points or remove points from a student (Figure 296).
Note: Thumbs up or down function needs to be enabled by the Admin.
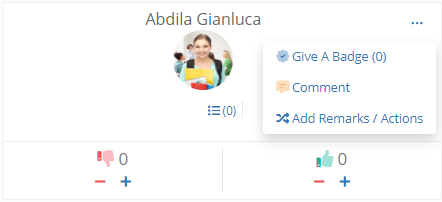
Figure 296
- Click on Give a Badge to award the student a badge. In the popup window, click on the Award this button to assign the student the badge (Figure 297).

Figure 297
- To take the badge back from the student, click on the Take back button (Figure 298).
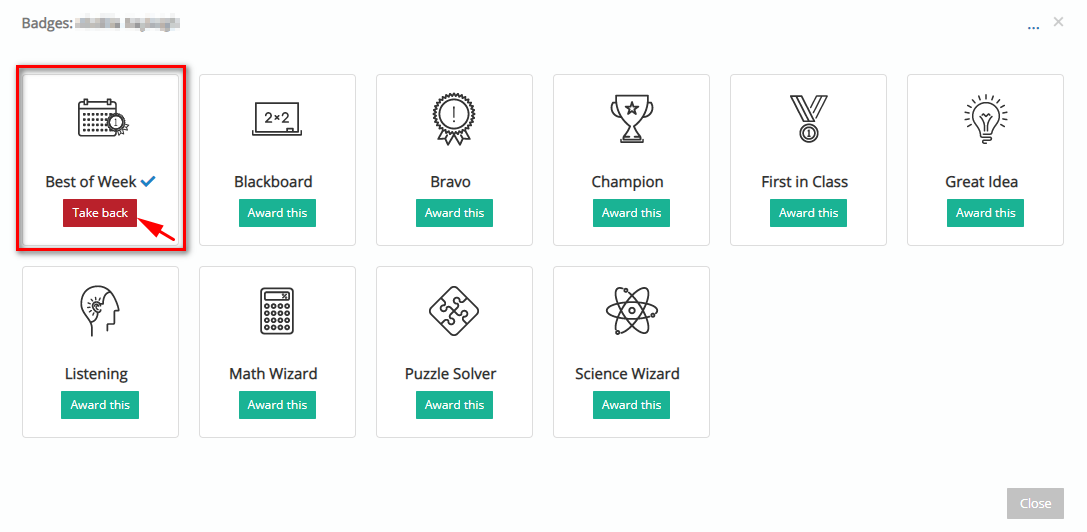
Figure 298
Note: Simply close the window once done as changes are automatically saved.
- Session Marking redirects you the session marking window where you can input marks for assessments for students of the grade (Figure 299).
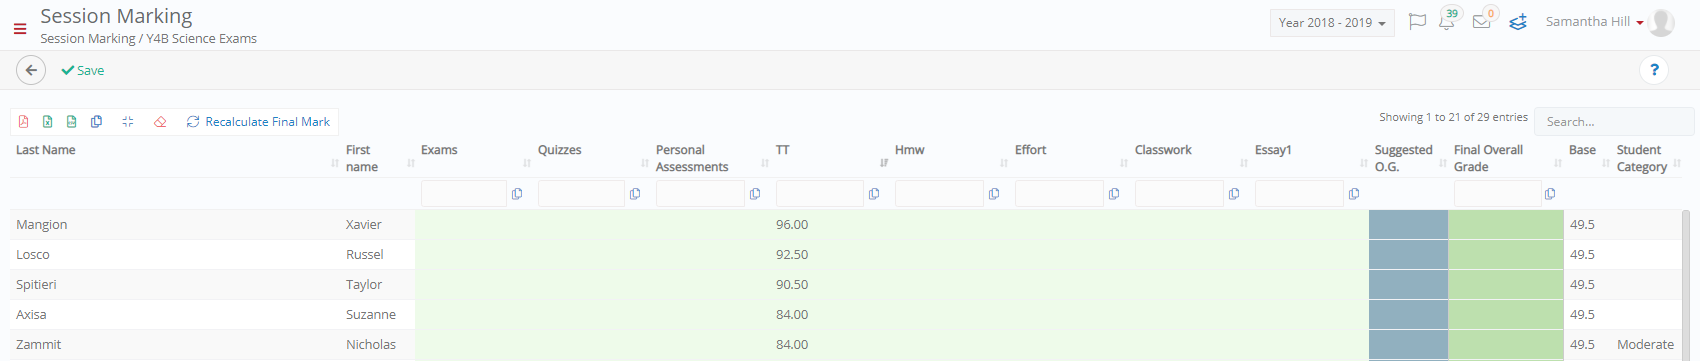
Figure 299
- Click on Homework to view the available homework for the session.
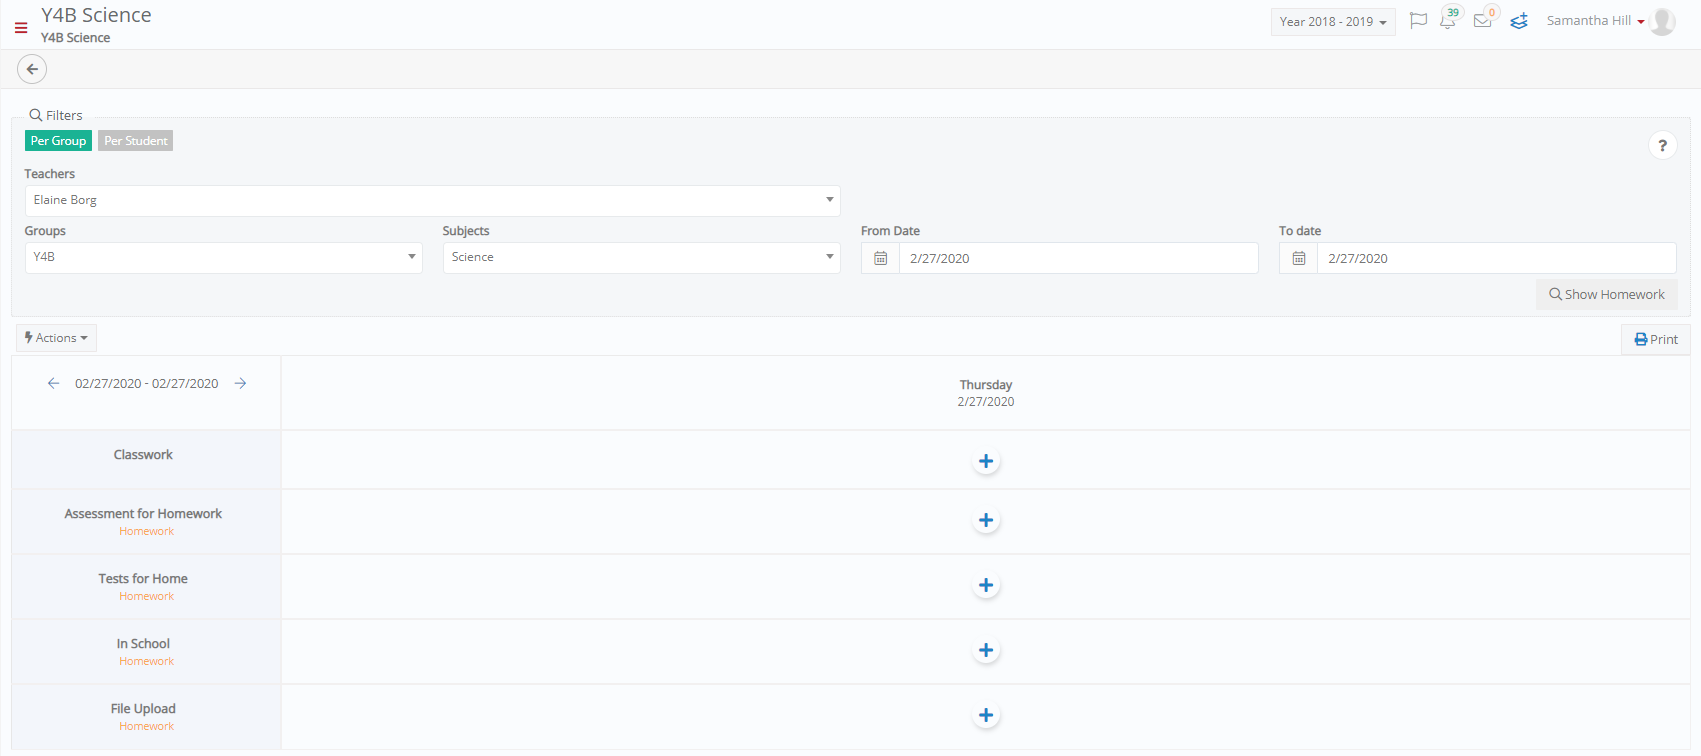
Figure 300
Create New
- Click on ‘Create’ to create a new session.
- Add session’s data (Figure 301).
- Select teacher, group, and subject
- Set session date, start, and end time
- Select a classroom. Tip: If you have an integration with WebEx or Zoom, one way of creating an online session is by selecting a Zoom or WebEx Configured Classroom.
- Write a title or click on the ‘Create session title’ button to automatically add a title
- Activate the ‘Is Public’ setting to add the session on the teacher’s/students’ calendar
- Select Lesson Planning
Note: The Lesson Planning drop down list is available only if lesson plans have been added to the subject.
- Add comments or click on the ‘copy comments from lesson plan’ to copy lesson plan’s comments
- Manage files and/or links.

Figure 301
- Optionally you can add assessments and assignments.
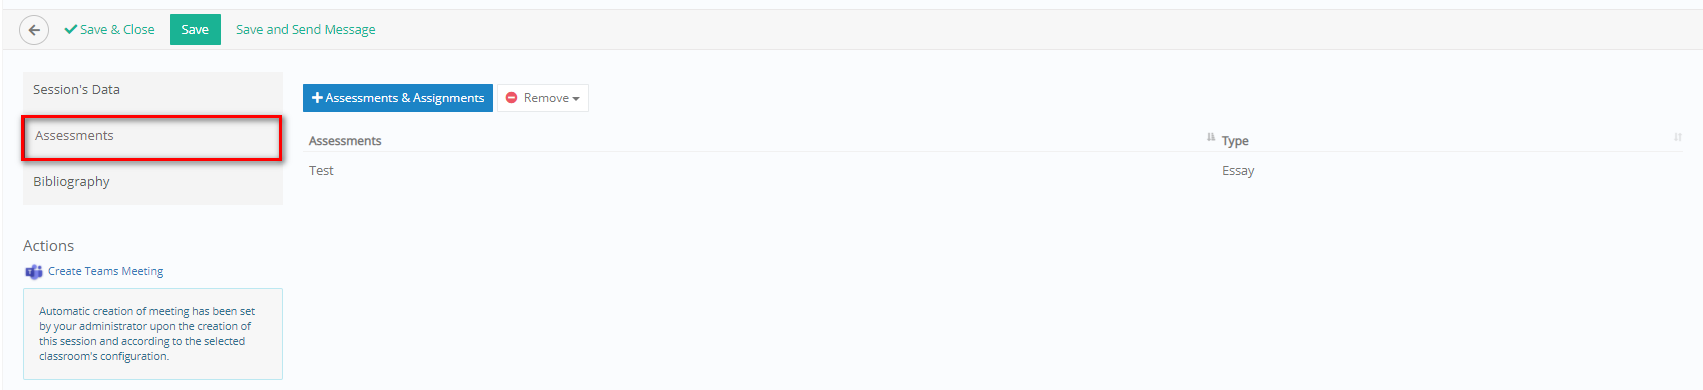
Figure 302
- Move to the bibliography tab to add books for the session.
Note: If a library book is set in the subject, then you can deactivate the ‘Bibliography’ setting so that it automatically shows the relevant book and pages (Figure 303).

Figure 303
- You can create Microsoft Team meetings for the session (Figure 304).
Note: MS Teams must be integrated with Classter for this button to be available. Other integrations may be available for online sessions, but Microsoft Teams is the only one currently with a create button like the one you see.

Figure 304
- Click on ‘Save’ to save and continue this page (used mostly by teachers who are filling in the session during the lesson, to avoid losing data due to page time out) or ‘Save & Close’.
Create from Timetable
Alternatively, you can create a session using timetable slots or auto create sessions using the timetable.
Note: This option is available only if activated by the administrator.

Figure 305
Create a session using timetable slots (Figure 305):
- Use the filters to show the timetable for a specific timetable range e.g., 28/01/2019 – 01/02/2019.
- Click on a timeslot at the specific group, day, and time e.g., Y4B, Monday, 8:30 you want to add a session.
- Use the filters to refresh the teachers and subjects drop down lists, so that it contains teacher and/or subjects using existing enrolments.
- Select the hours, groups, teachers, subjects, and classroom from the respective dropdown lists (Figure 306). Tip if you create a session from the timetable and create multiple sessions this is a good way to make multiple online sessions by selecting a Zoom or WebEx configured classroom (If applicable to your institution). Remember for this, auto create sessions option is preferred.

Figure 306
AUTO-CREATE SESSIONS USING THE TIMETABLE
Auto create sessions using the timetable (Figure 307):
Note: By using this option, the corresponding timetable plan will come to you as suggested sessions. Please note that you must click on the save button to save these sessions.
- Use the filters to show the timetable for a specific timetable range.
- Activate the setting ‘Auto create sessions using the timetable’ to show suggested sessions according to the corresponding timetable plan.
- Click on the ‘Save timetable suggested sessions’ to save suggested sessions.

Figure 307
Session’s Marking Analysis
- Use the group, subject and date range filters to show sessions’ marking (Figure 309).
- You can see results in a graph, presenting percentage of students that are excellent, very good, average or fail in the selected subject i.e., Very Good 61.1%. Next to the graph you can see the previous information in numbers i.e., 11 students are very good. Additionally, you can see the subject’s average i.e., 76.68.
- In the Marking List you can see analytically the students’ marks at each session.
Note: You can use the columns to filter or classify the results. The number in brackets next to Essay, Classwork, Exams and Personal Assessment column names is the category weight (Figure 308).

Figure 308


Figure 309
Homework
- Use the date range, course, group, and subject filters to show the homework you are looking for (Figure 310).

Figure 310
- Use the ‘Manage Columns’ button to show/hide information.
- Use the buttons bar to select/deselect all homework.
- Click on ‘Bulk Actions’ dropdown button to delete, approve, reject the selected homework.
Create Homework
Per Group
You can create Classwork, Assessments for Homework or Tests for Home, that will be assigned to the selected class (Figure 311).
- Select ‘Per Group’.
- Use teachers, groups, subjects, and date range filters to show the homework.
- Under the preferred day, click on the add button of either Classwork, Assessment for Homework or Tests for Home.
Note: Once you add the homework, you can copy it to another group of the teacher.
- From the ‘Actions’ dropdown button, select the class from the drop-down list.
- Click on copy

Figure 311
- In the pop-up window add the details of the Homework and click on save (Figure 312).

Figure 312
- The homework will be added (Figure 313).
- Click on relevant buttons to edit or delete it.
- Click on ‘Print’ button to print it.

Figure 313
Per Student
You can create Personal Work, that will be assigned to the selected student (Figure 314).
- Select ‘Per Student’.
- Use teachers, groups, subjects, and date range filters to show the selected week.
- At the preferred student, click on the add button.

Figure 314
- In the pop-up window, add the details of the Personal Work and click on save (Figure 315).

Figure 315
Note: Nutrition, Sleep and Hygiene fields concern kindergarten students.
- The personal work will be added and assigned to the student (Figure 316).
- Click on relevant buttons to edit or delete it.
- Click on ‘Print’ button to print it.

Figure 316
Academic Settings (menu) > Sessions & Homework > General Settings.
