

Overview
Classter provides a robust and secure framework for managing user accounts, forming the backbone of authentication, authorization, and access control across the platform.
Administrators are responsible for managing all aspects of user accounts within the platform.
Through the User Accounts section, we can:
- Assign roles and manage permissions
- Enable or disable user access
- Manage login credentials
- Send account invitations
- Sync with external providers (integrations)
- View user login activity
Creation Prerequisites
User accounts are created only after fulfilling specific prerequisites:
- An entity must exist in the appropriate list (Employee, _Student_, _Teacher_, etc.)
- The entity must be Active
-
- _Students_ require a ‘Registered’ Type status.
- Other user types (_Teachers_, Guardians, Employees etc.) must have the Active status enabled.
- Administrators must first be created as Employees and then converted into type Admin and assigned a relevant role.
Let’s take a closer look at how each of these responsibilities is handled within Classter.
Filters
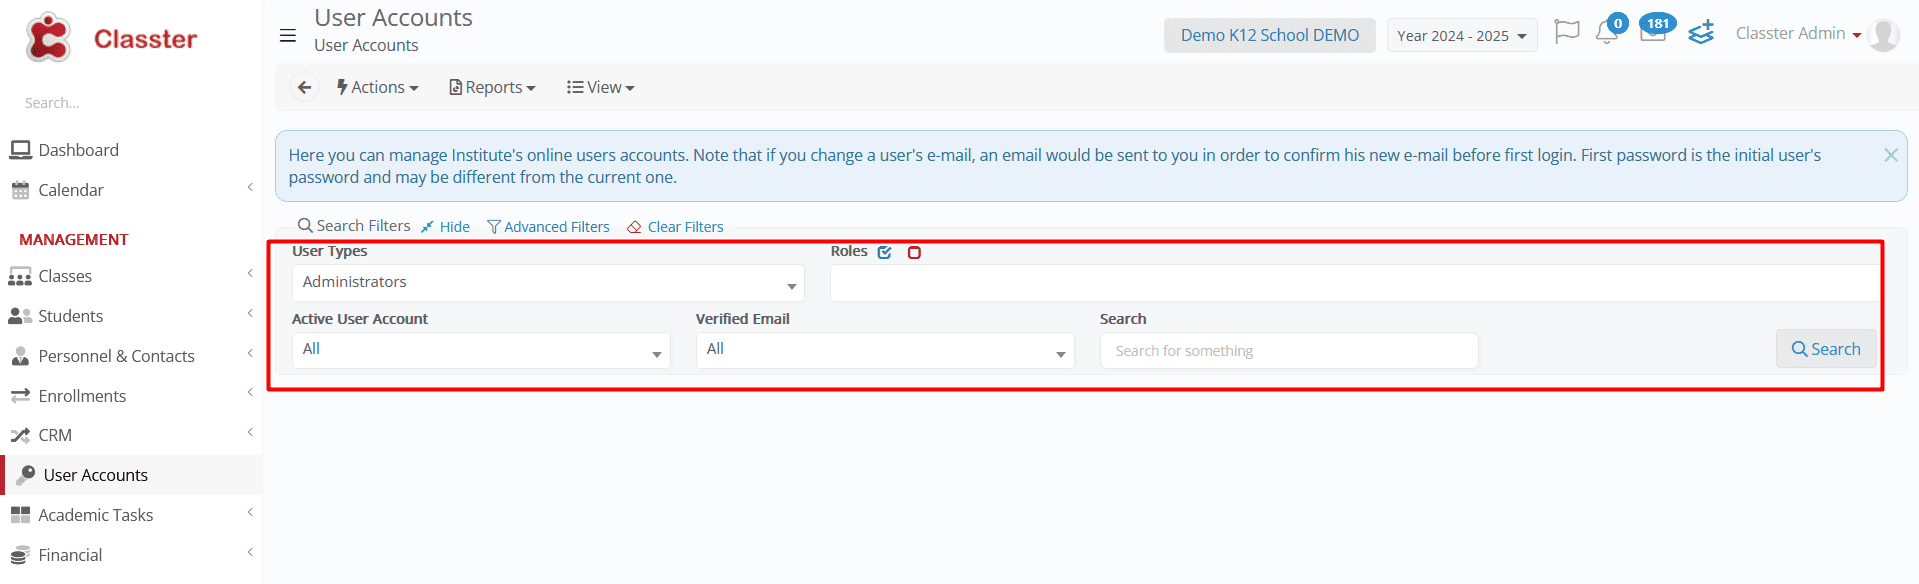
User Types
Classter supports a wide range of user categories, each with role-specific settings:
- Administrators
- _Students_
- _Teachers_
- Partners/Employers
- Staff/Employees
- Parents/Guardians
- Alumni
- Agents
Roles
Filters out users by their assigned role. Options may include:
- None
- The list of your custom Roles for the selected Type (e.g. Main Admin Role, Limited Access etc.)
Active User Account
Filter users based on account status:
- All
- Yes (active)
- No (inactive)
Verified Email
Show users by email verification status:
- All
- Yes (verified)
- No (not verified)
Search
A free-text search to quickly locate users by name, email, or other identifiers.
Advanced Filters
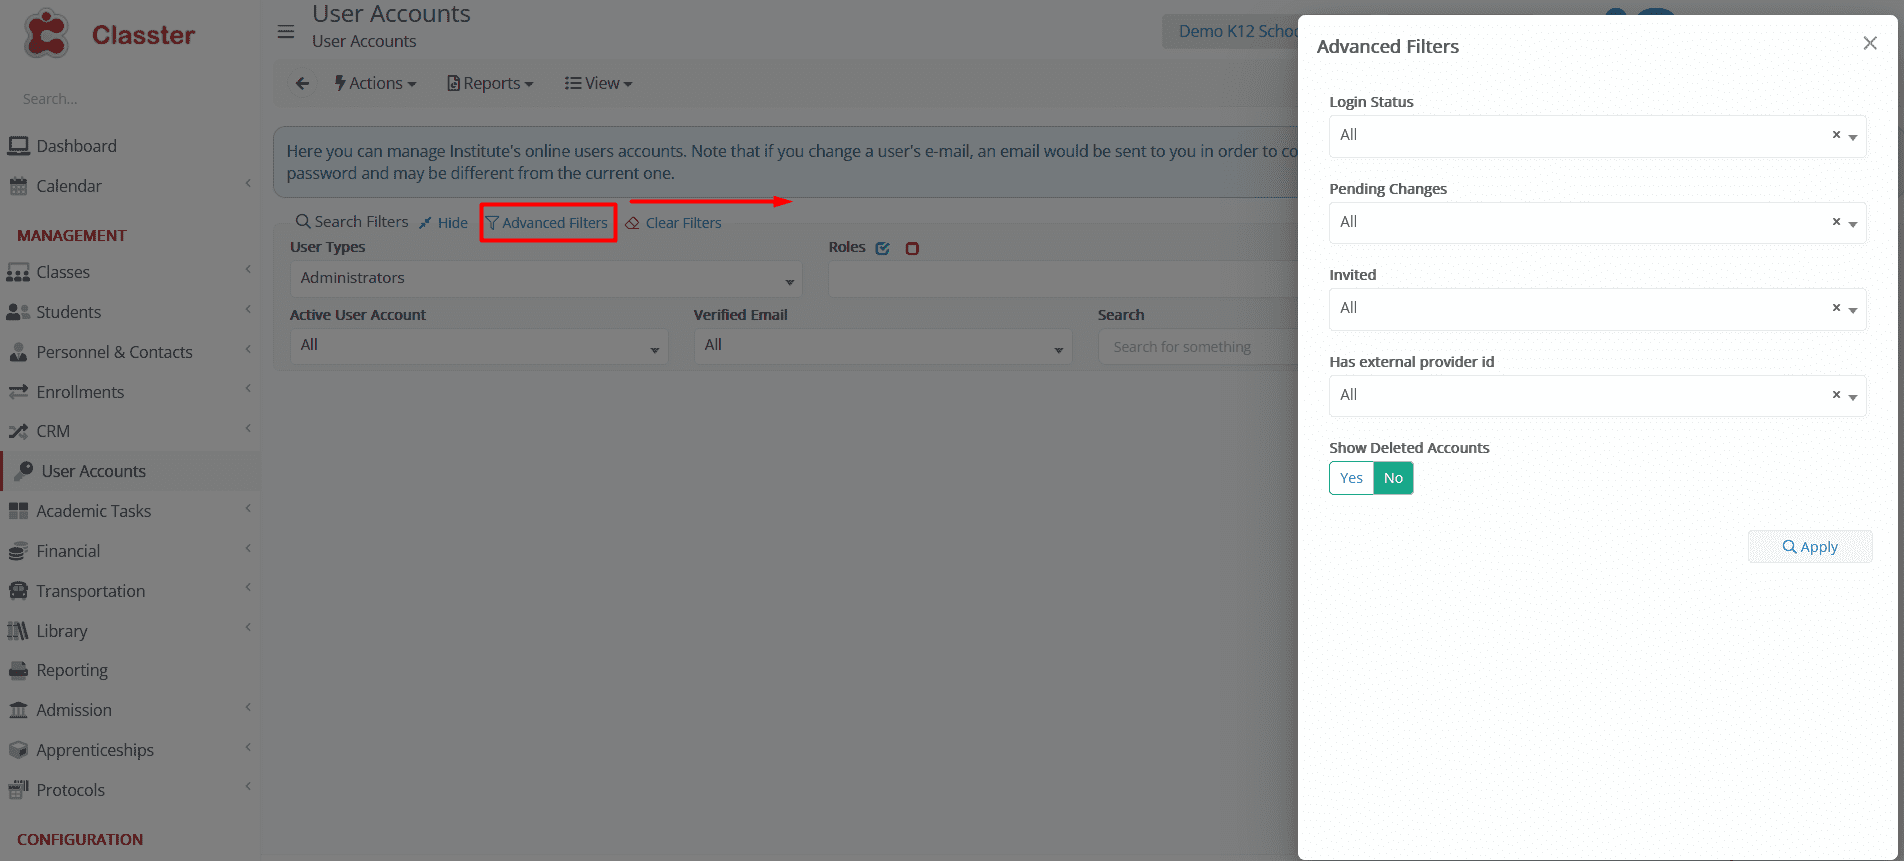
Login Status
Identify users based on login activity:
- All
- Has Logged On
- Never Logged On
Pending Changes
Show accounts with pending updates or unsaved changes:
Pending changes refer to the creation of users or the synchronizations with external systems (institute emails, integrations).
- All
- Yes (there are still pending changes, the sync is not finished yet)
- No (no pending sync)
Invited
Filter users by invitation status, checking the invitations sent by Classter:
- All
- Yes (invited)
- No (not invited)
Has External Provider ID
Displays users linked to external login providers (e.g., Microsoft, Google):
- All
- Yes
- No
Show Deleted Accounts
Toggle to display previously deleted accounts:
- Yes
- No
User Account Actions
Filter users to display a group or find a specific individual. Click the Actions button to open the drop-down menu, for options like role management, password changes, and more.

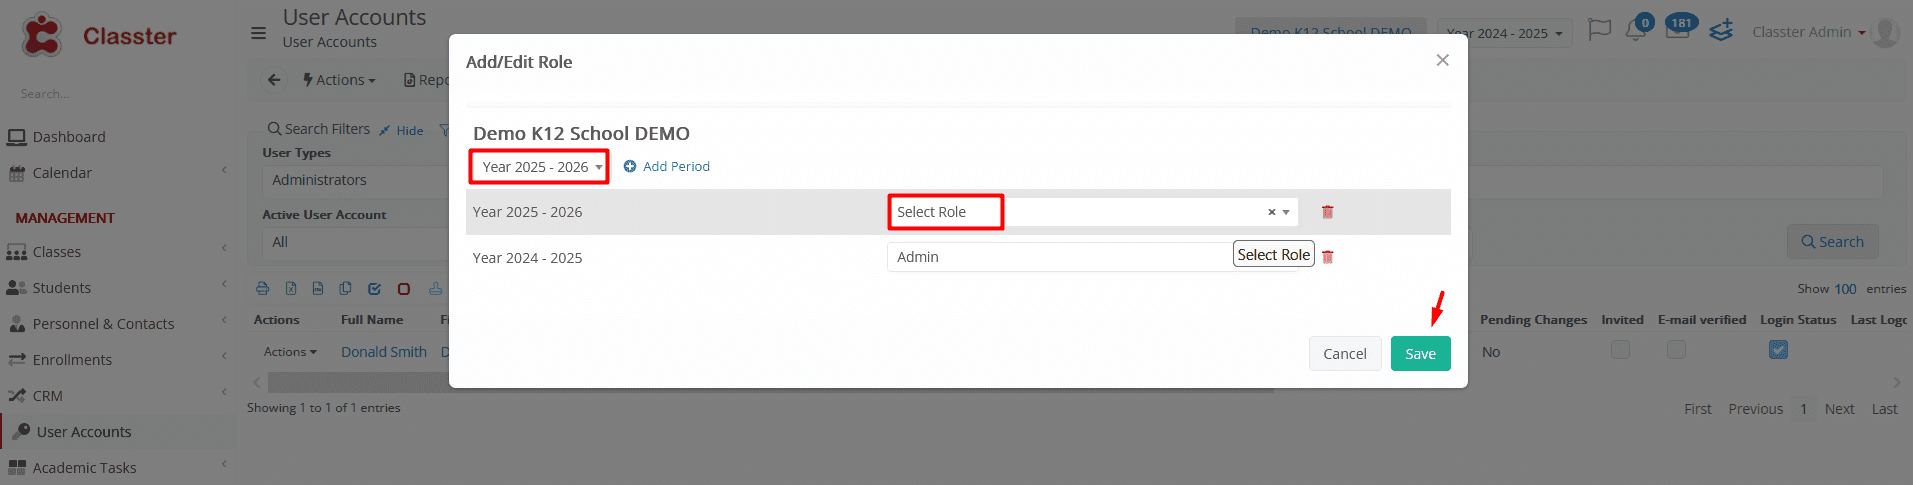
Manage Roles/Periods
This option allows you to assign or modify user roles for specific academic periods. Ensure users have assigned roles for all periods they need access to.
- To add a period: Select it from the dropdown, click Add Period, and assign the role.
- To remove a period: Use the delete button next to the entry.
- Save changes: Confirm updates by clicking Save.
Important Note:
User Accounts and Role Management are tightly connected. While User Accounts determine who can access the system, Role Management governs what each user can see and do. Administrators must ensure that roles are correctly assigned and configured. This includes:
- Enabling or disabling menus
- Setting specific permissions
- Controlling access based on the responsibilities of each role
Additionally, the system allows administrators to define a default role per user type, which is automatically assigned upon account creation. This setting can be found under:
Main Settings > General Settings > Security Rights > Accounts & Roles
For comprehensive configuration guidelines, please consult the Role Management Manual.
Change Passwords
To change a user’s password, click “Change Password”, then enter and confirm the new password.
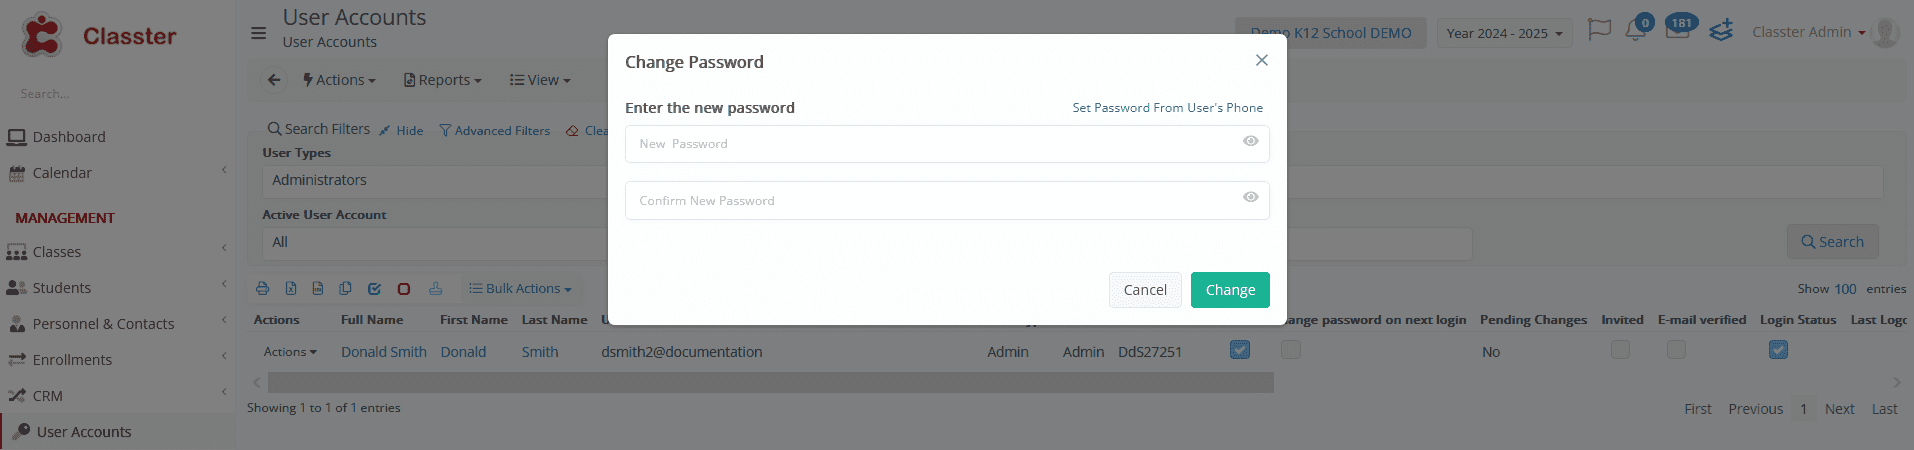
Important:
If the user signs in using Single Sign-On (SSO) (e.g., Office 365, Gmail), you cannot change their password from within the Classter system. In this case, the password must be managed through the external provider (e.g., Microsoft or Google), as they handle security independently and do not allow internal password changes.
Tip:
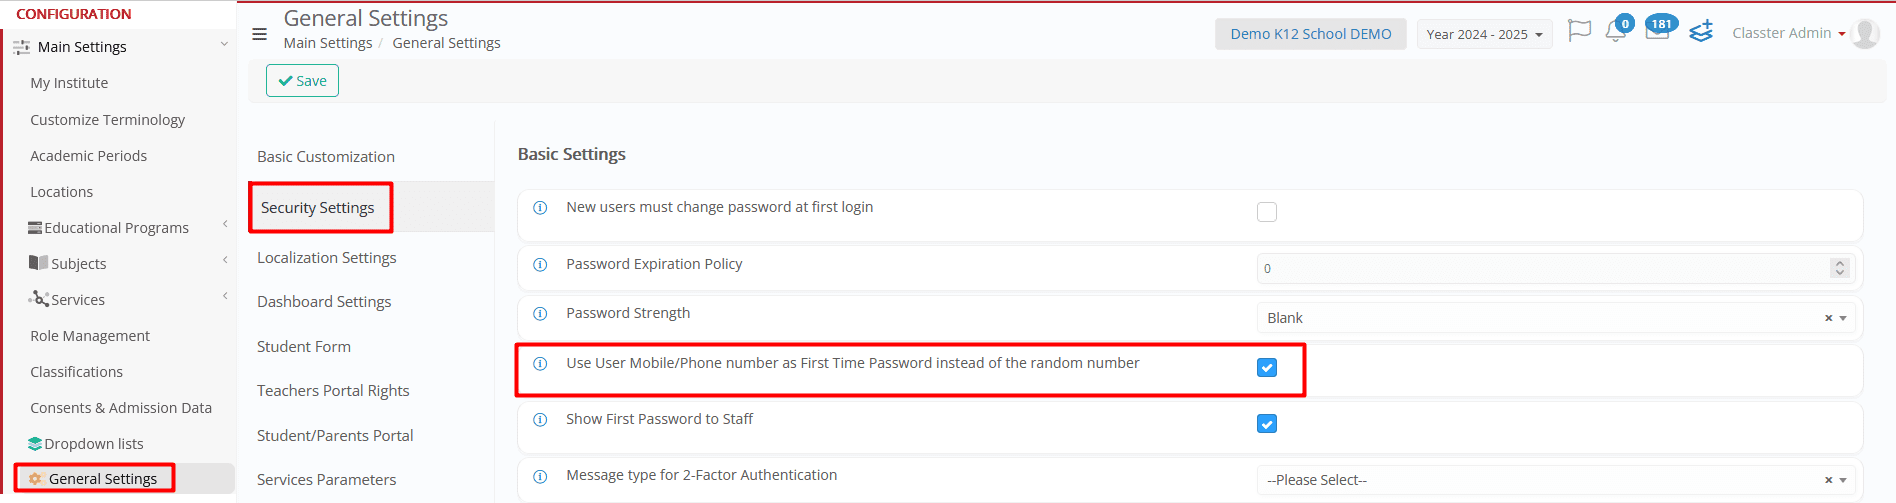
If the setting “Use User Mobile/Phone Number as First-Time Password” is enabled (under Security Settings), you can also choose “Set Password from User’s Phone” to automatically use their phone number as the password.
Change password in next logon
This function prompts the user to change their password when they log into the Classter platform for their next session.
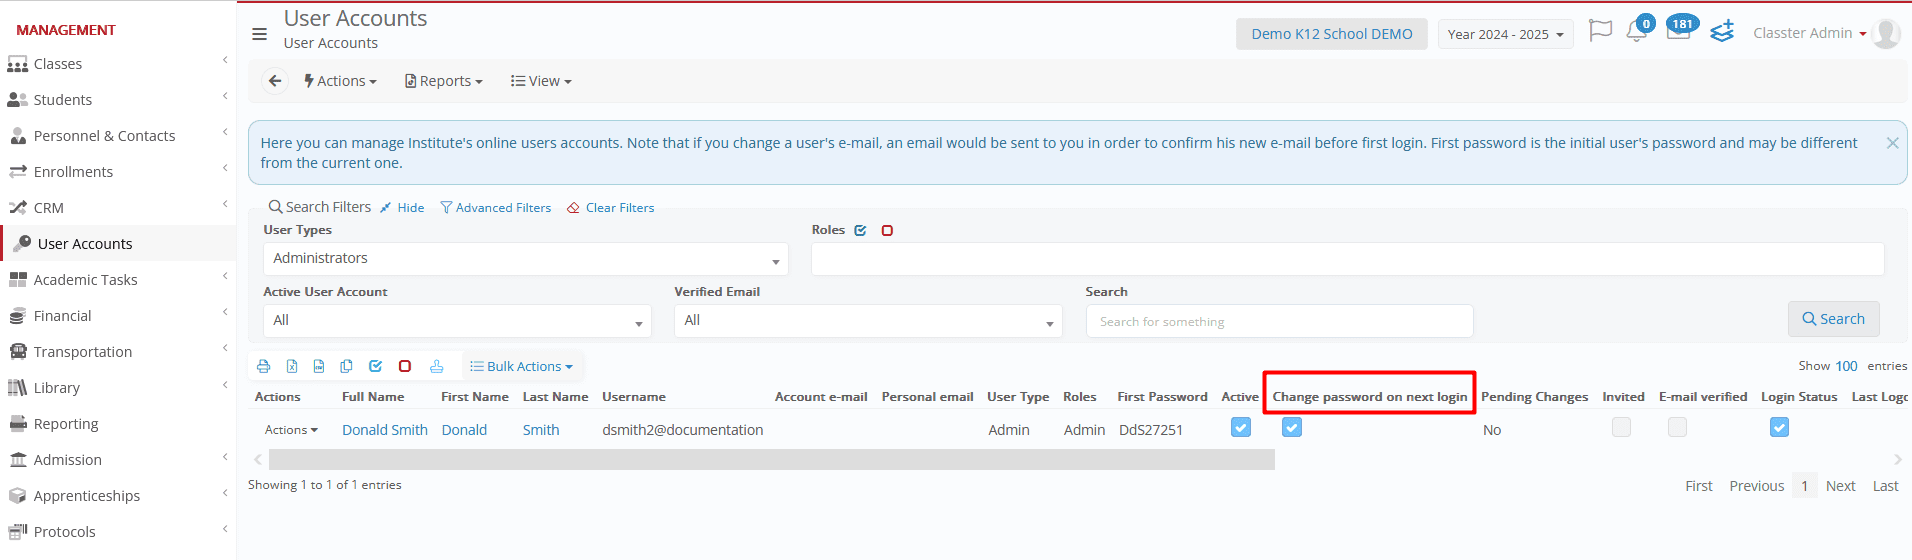
See check mark (image above) under “Change password on next login.”
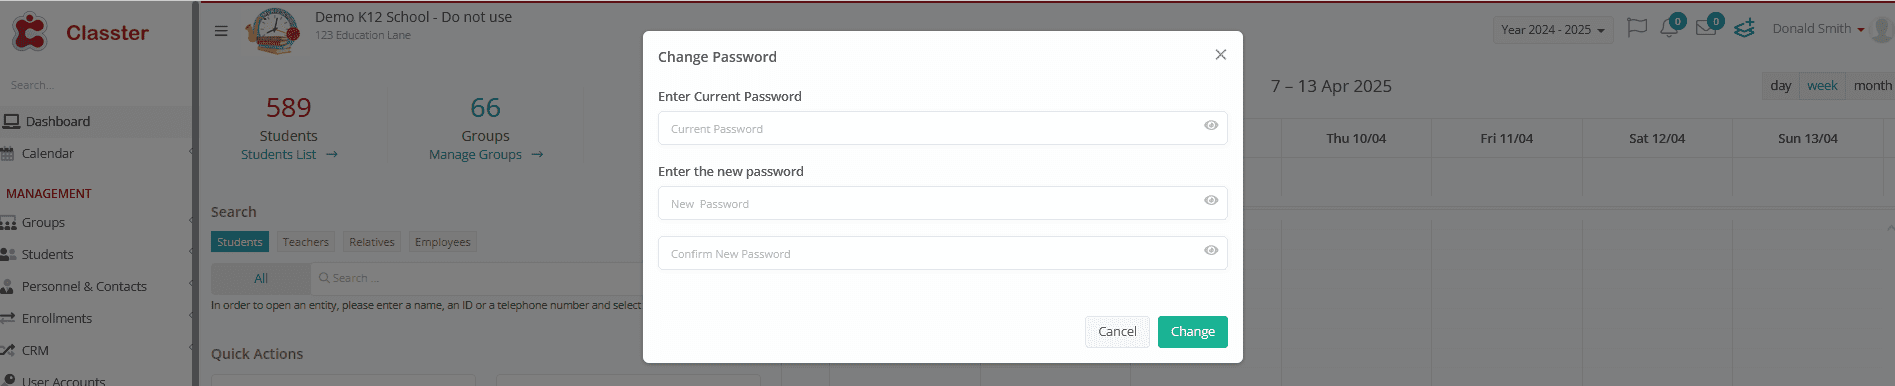
After selecting this action, the user will see the following screen appear the next time they log in.
You can define the default status of this property going to Main Settings > General Settings > Security Rights > New users must change password at first login (Yes/No).
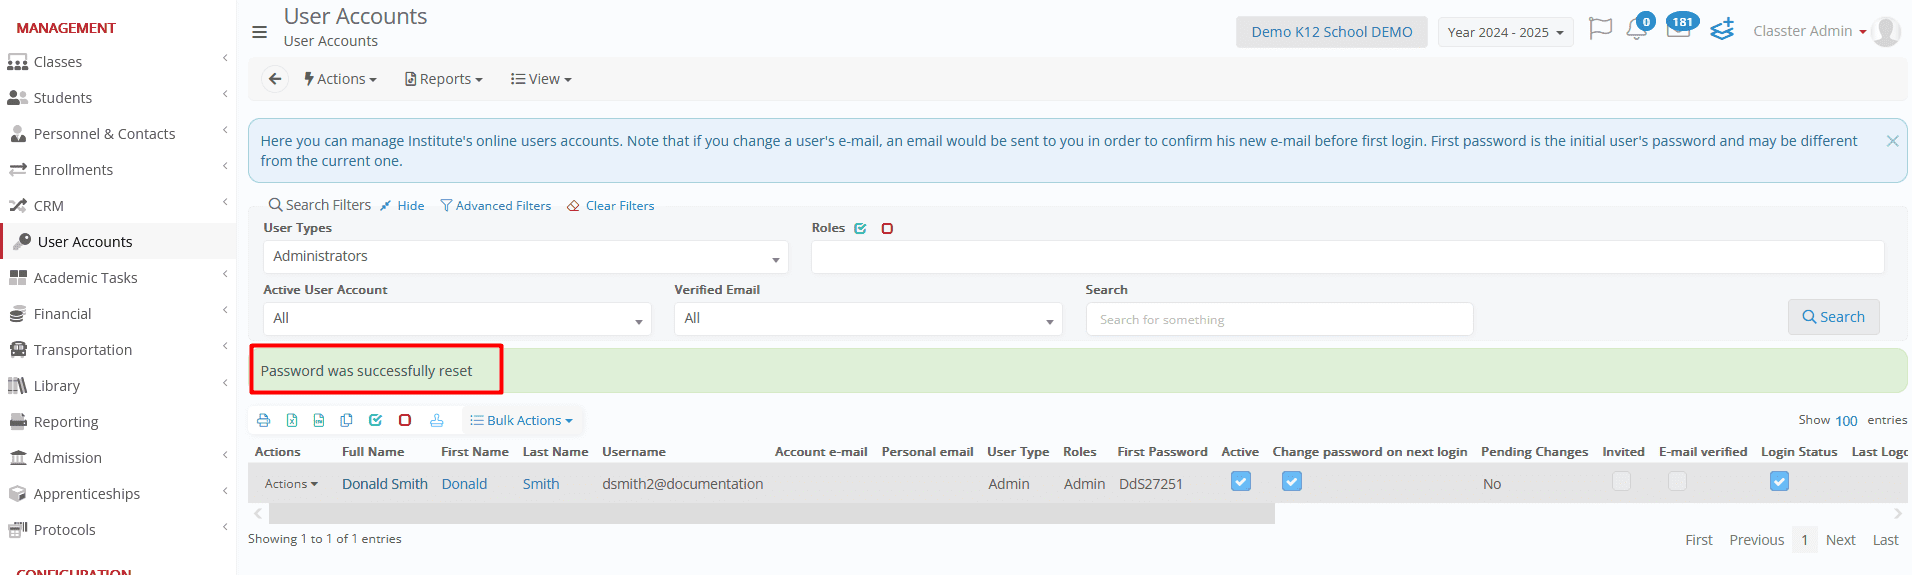
Reset Password
Select Reset Password to generate a new password.
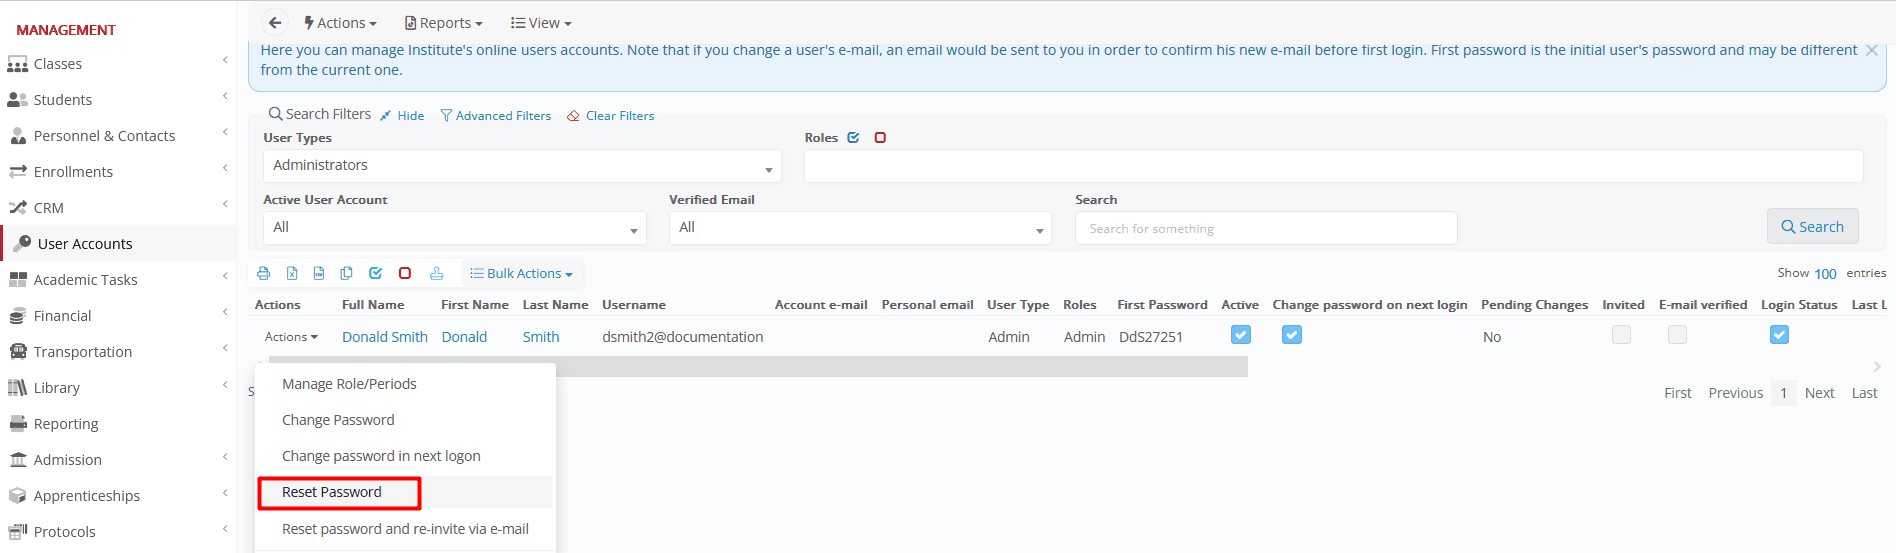
A message will appear in the User Accounts section, signally that the password has been reset.
Important:
If the user signs in using Single Sign-On (SSO) (e.g., Office 365, Gmail), you cannot change their password from within the system. In this case, the password must be managed through the external provider (e.g., Microsoft or Google), as they handle security independently and do not allow internal password changes.
Reset password and re-invite via e-mail
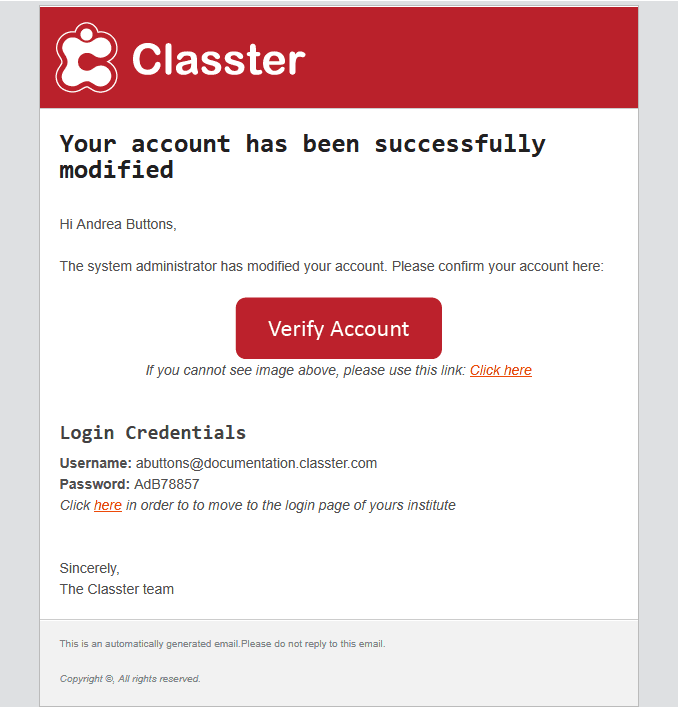
Clicking this action will reset the user’s password to their original first-time password and resend the initial invitation email.
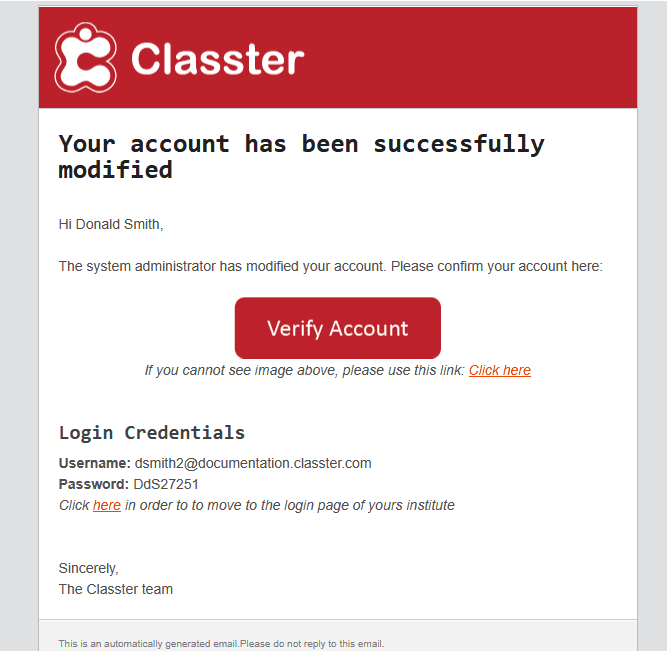
*You can design/customize the email templates from the Advanced Settings > Templates Editing.
Activate/Deactivate Account
Enable or disable user accounts. Active accounts grant access to the platform, while deactivated accounts restrict access without losing data.
Add/Edit Username
Change a user’s username through Add/Edit Username. Ensure the new username is unique, as duplicates won’t save.
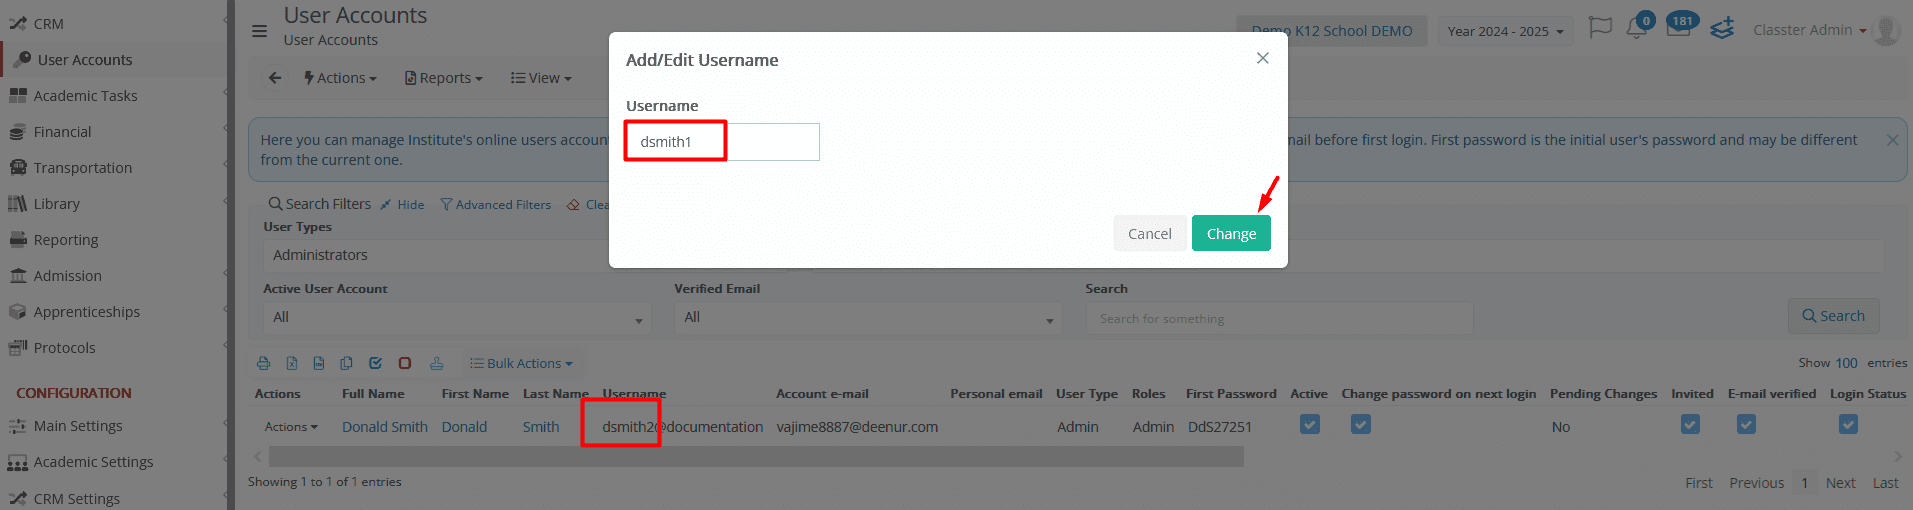
The default username format can be configured under:
Main Settings > General Settings > Security Settings > Accounts & Roles
Add/Edit e-mail
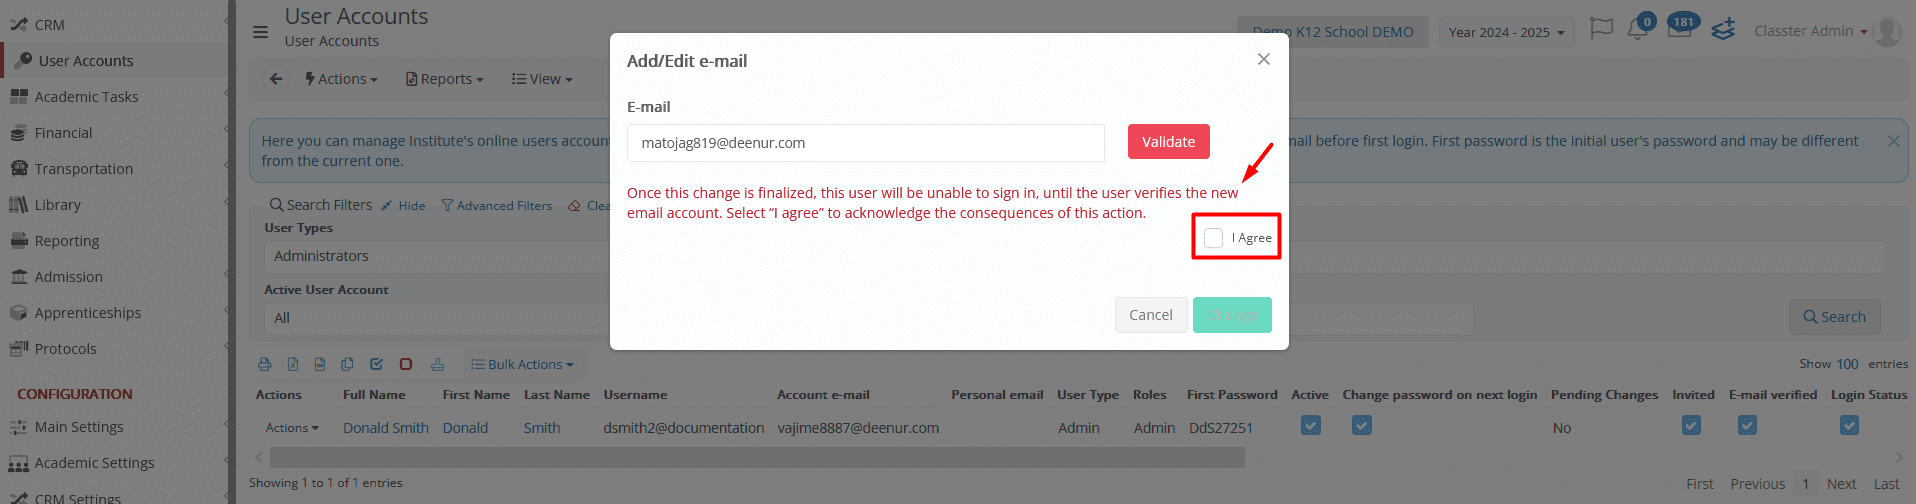
Update or add an email address via Add/Edit Email. Validate the new email by clicking the red Validate button. Confirm the change and acknowledge potential login issues until the user verifies the new email.
Important Notes:
- If SSO integration is enabled (e.g., Office 365, Gmail):
- The new email will replace the login username, and the user must log in using their email credentials via the SSO provider.
- If SSO is not enabled and this is the user’s personal email:
- The email can replace the username for login purposes,
- But the user can still log in using either their original username or personal email as a username.
- This action updates the user account email
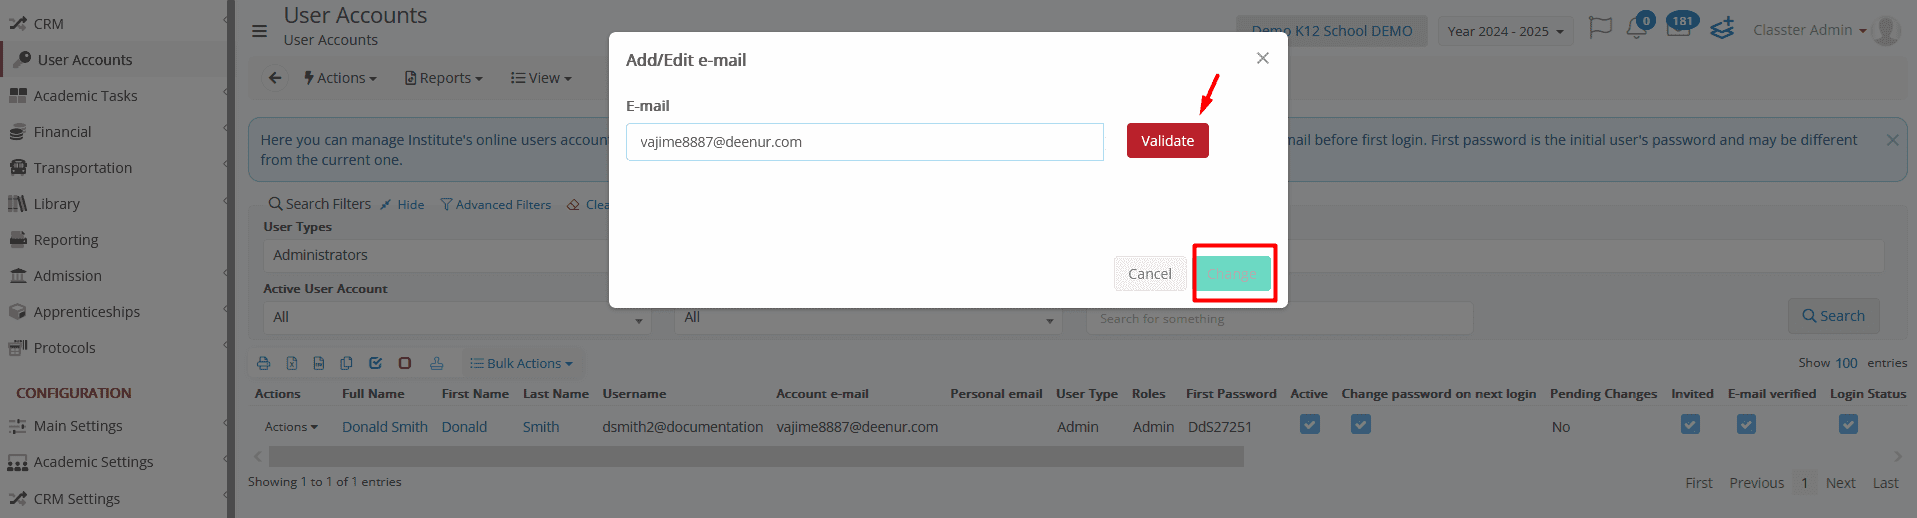
Note: If you add a new e-mail and click on the “validate” button you will see a warning message: “Once this change is finalized, this user will be unable to sign in, until the user verifies the new email account. Select “I agree” to acknowledge the consequences of this action.”. Click on the “I Agree” checkbox and then you will be able to click on “Change.”
Convert to External Provider email Account
Convert the user email to an external provider (e.g., Google, Microsoft 365) by selecting Convert to External Provider Email Account. The system processes the request, and a notification confirms completion.
Important Note:
Default settings for creating external provider accounts are configured in:
- Advanced > Integration Settings
- User Status
These settings are automatically applied when a user is created or when their status is updated.
When to Use This Option:
- If users were imported without email accounts and you now want to create external provider email accounts.
- If the integration was enabled after user creation, you need to generate new email accounts.
Clicking this action will automatically create external email accounts for the selected users, based on the configured settings.
Sync Status – “Pending Changes”:
After initiating this action, the user’s “Pending Changes” status will be set to “Yes” until the sync with the external provider is completed. Once the process finishes successfully, it will automatically revert to “No.”
Sync External Provider/Users
To synchronize users with external providers, click “Sync External Providers/Users.” This action will trigger a sync with all active integrations, such as Office 365, Gmail, Moodle, Canvas, Brightspace, and others.
Refer to the MS Teams Integration Manual and Synchronizing your Classter Data with Moodle manuals for detailed guidance.
Sync Status – “Pending Changes”
When this action is initiated, the user’s “Pending Changes” status is automatically set to “Yes”. This indicates that changes are being processed.
Once the synchronization is successfully completed, the status will return to “No”.
Configure Sender Email
Choose an institutional email address as the sender instead of a personal account. Select the email from the dropdown and save changes.

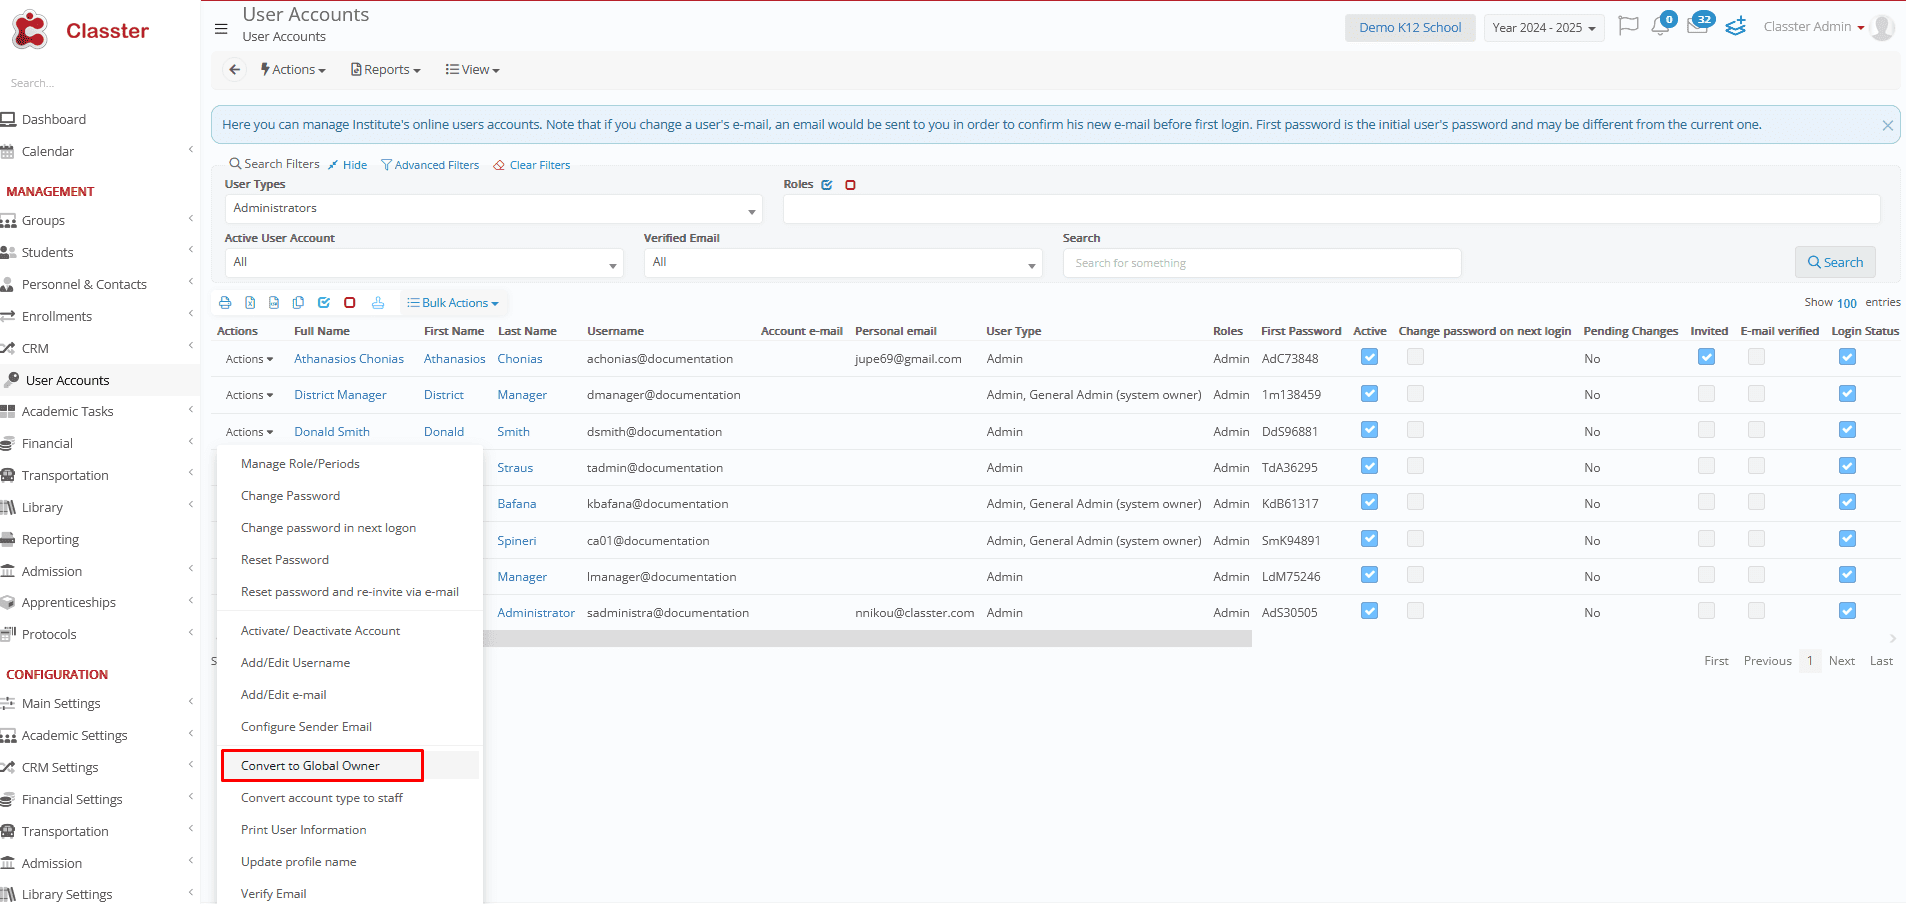
Convert to Global Owner
This option is visible only to users with the ‘Administrator’ type.
Assign an Administrator the Global Owner role to provide full system access, including the ability to manage all portals and log in as any user. Limit to one Global Owner per institution for security and clarity.
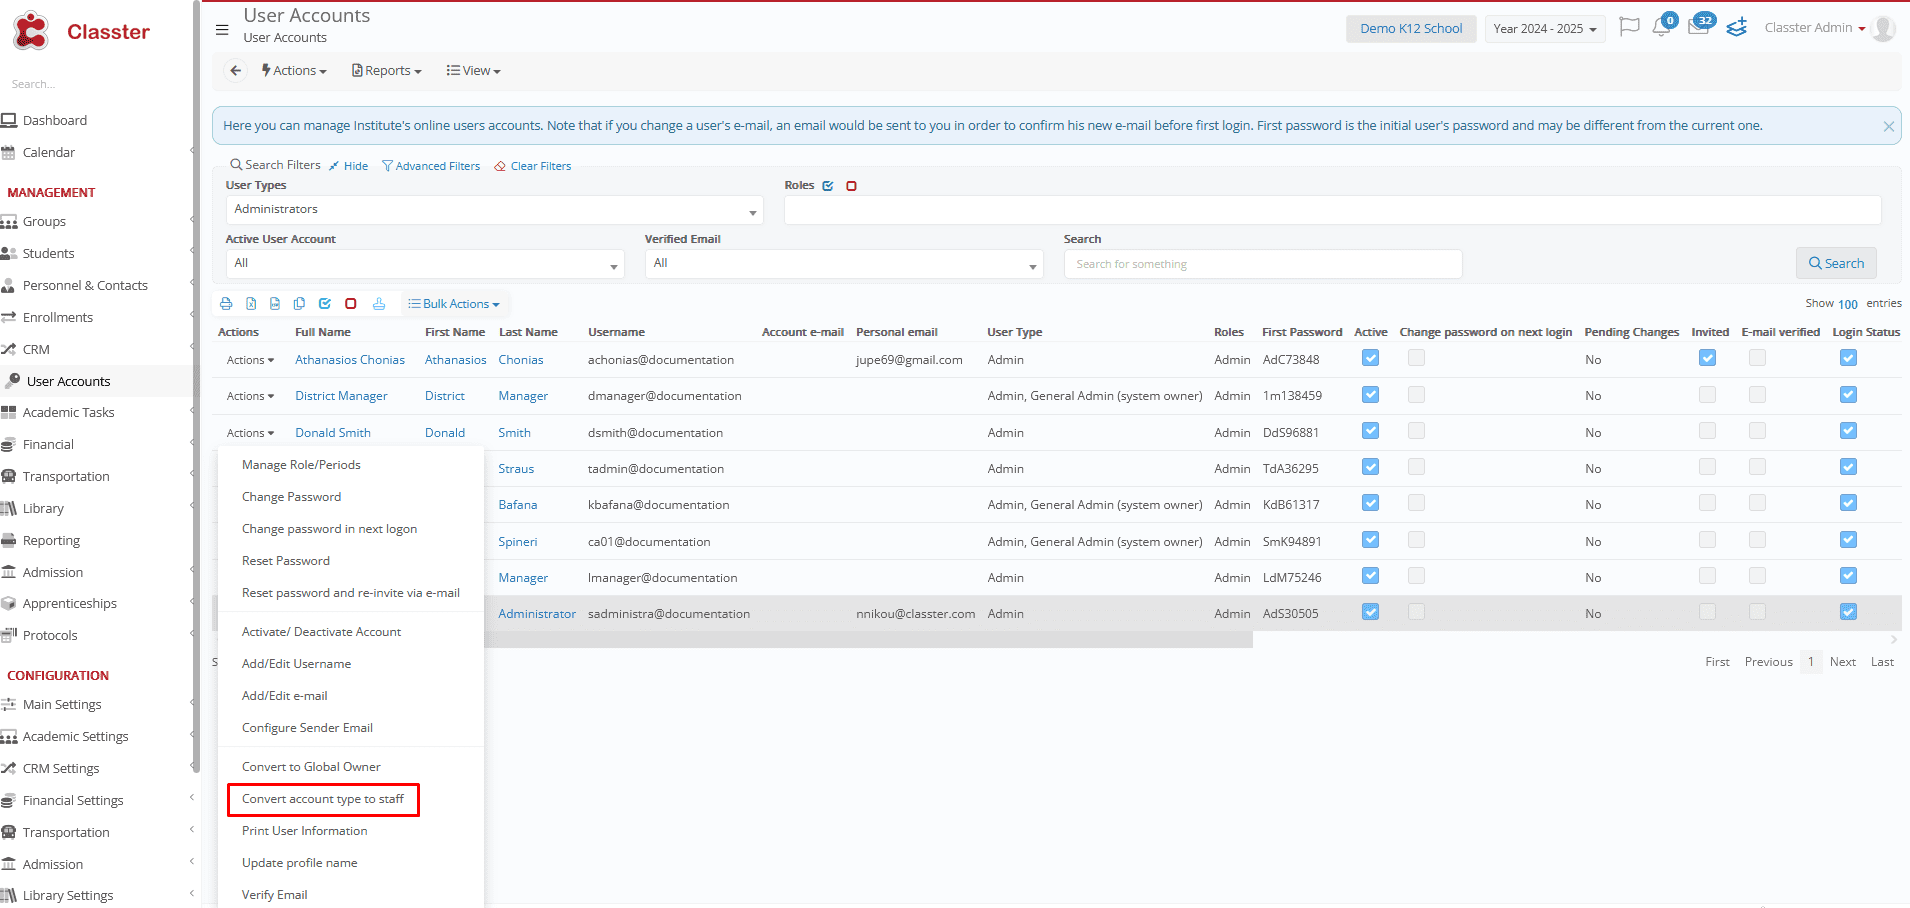
Convert A User to Admin/ Staff
- To Admin: This option appears under the Staff/Employees user type and is used to convert a user into an Administrator. After conversion, you must search for the user under Administrators and assign them an appropriate Admin Role.
- To Staff: This option appears under the Administrators user type and allows you to convert the account back to Staff/Employee.
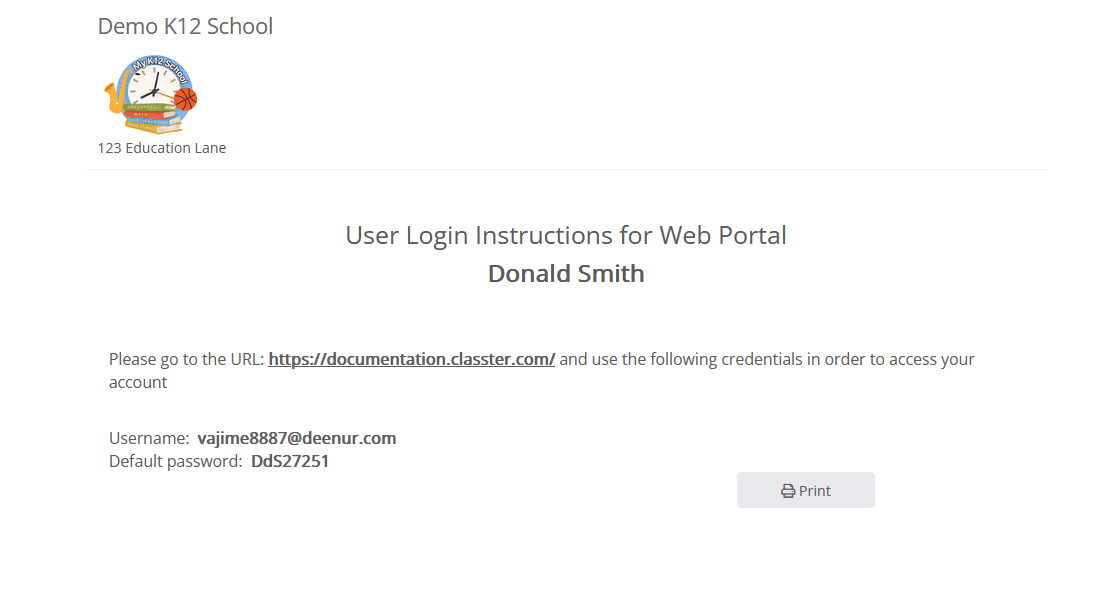
Print User Information
P To print a user’s login details, including username and password, click “Print User Information.” This will open a new tab, allowing you to print or download the information.
Use this option if you prefer not to or cannot send an invitation email through Classter. It’s a quick way to share login credentials manually.
Update profile name
Change a user’s name by selecting Update Profile Name. Enter the first and last name in the respective fields and save the changes. These changes will only apply to the user’s portal and not to the Institute’s main records.

Verify Email
This option allows manual verification of a user’s account email. The Recommended Method is to send invitation emails so users can verify their email addresses themselves.
Note: Users cannot log in with their email until it has been verified.
User Account Bulk Actions
Bulk tools streamline operations across large user groups:
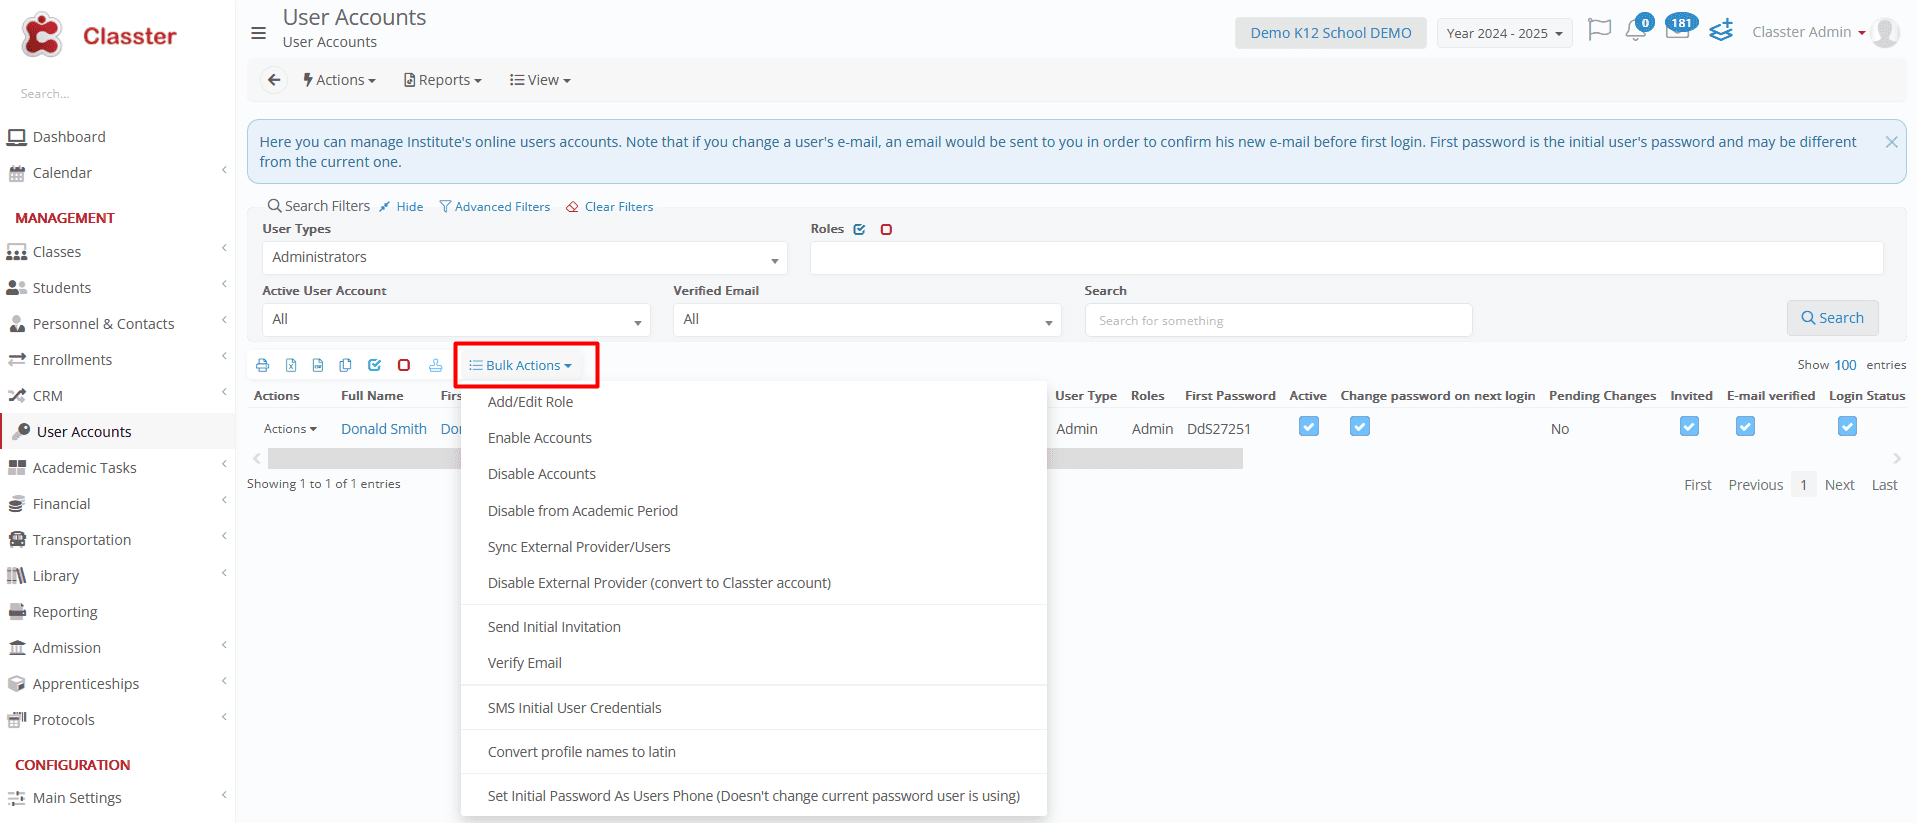
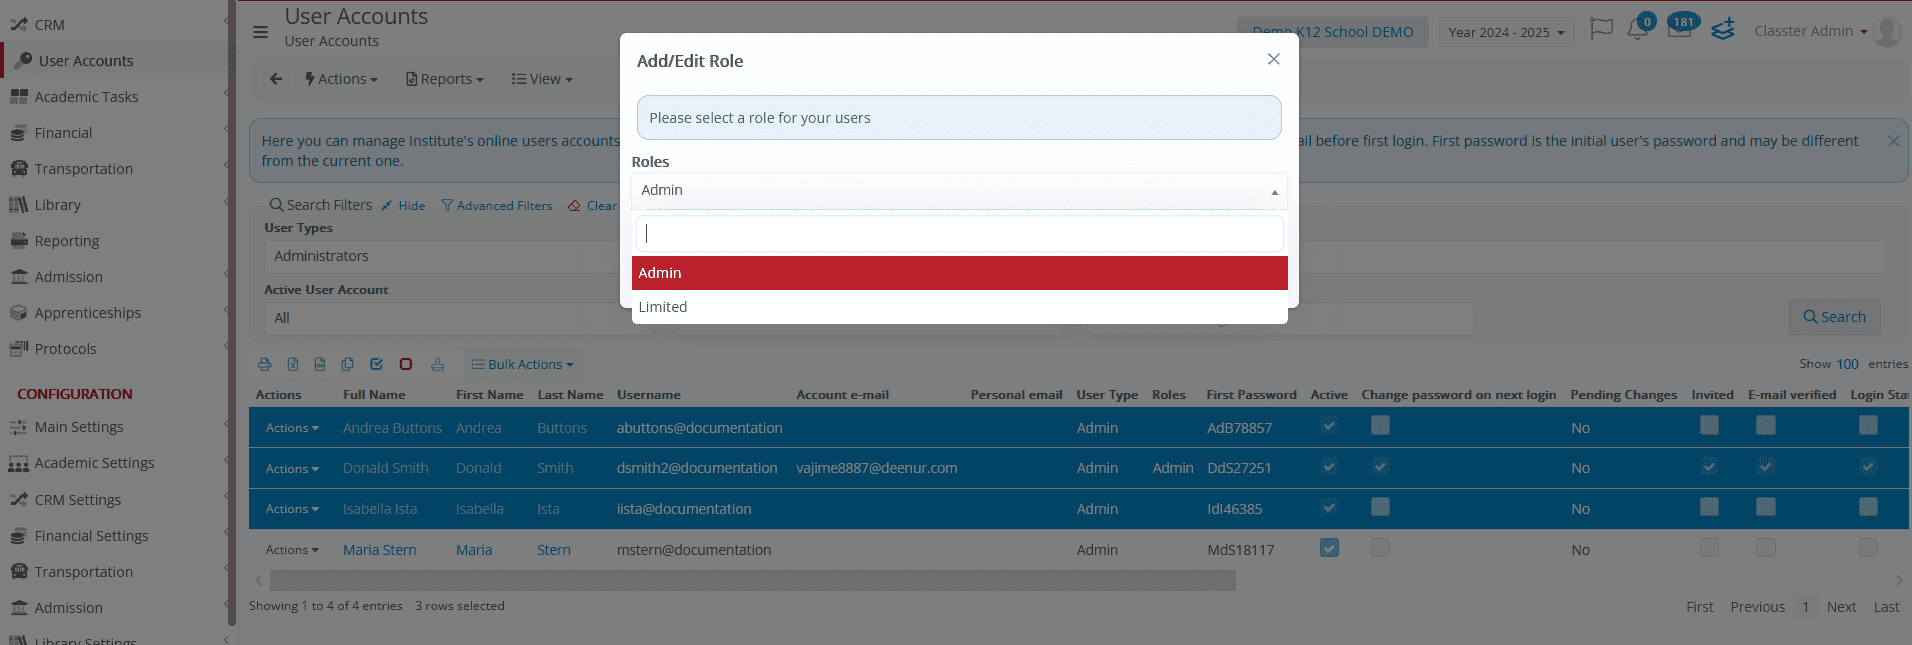
Add/Edit Roles
Assign or adjust roles for selected users across periods. Follow the same process as described in the individual user actions section.
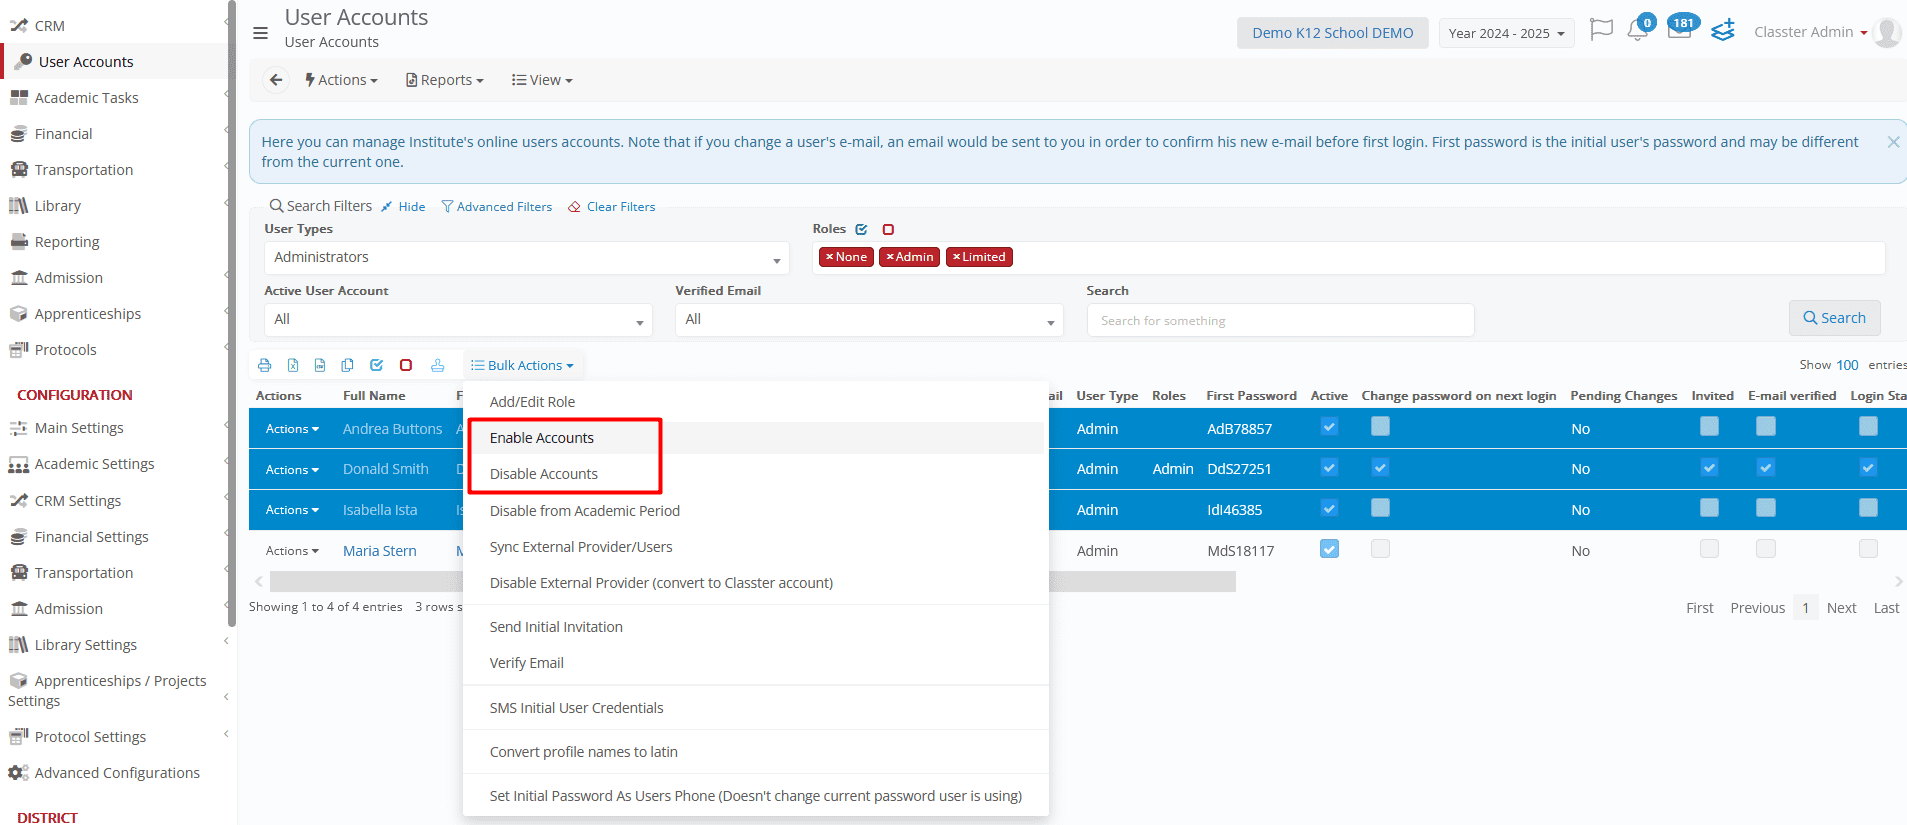
Enable/Disable Accounts
Quickly activate or deactivate multiple accounts in one step. Active accounts grant access to the platform, while deactivated accounts restrict access without losing data.
Disable from Academic Period
Remove access to specific academic periods for selected users:
- Click Disable from Academic Period.
- To restore access, select the users again and click Enable Account.
Sync External Providers/Users
To synchronize external providers with users, press Sync External Providers/Users. This will sync data with all active integrations, such as O365, Gmail, Moodle, Canvas, Brightspace, and others.
Refer also to the Integrations manuals for detailed guidance.
Note: When the sync process starts, the “Pending Changes” status on affected users will be set to “Yes.” Once the sync is completed, it will automatically revert to “No.”
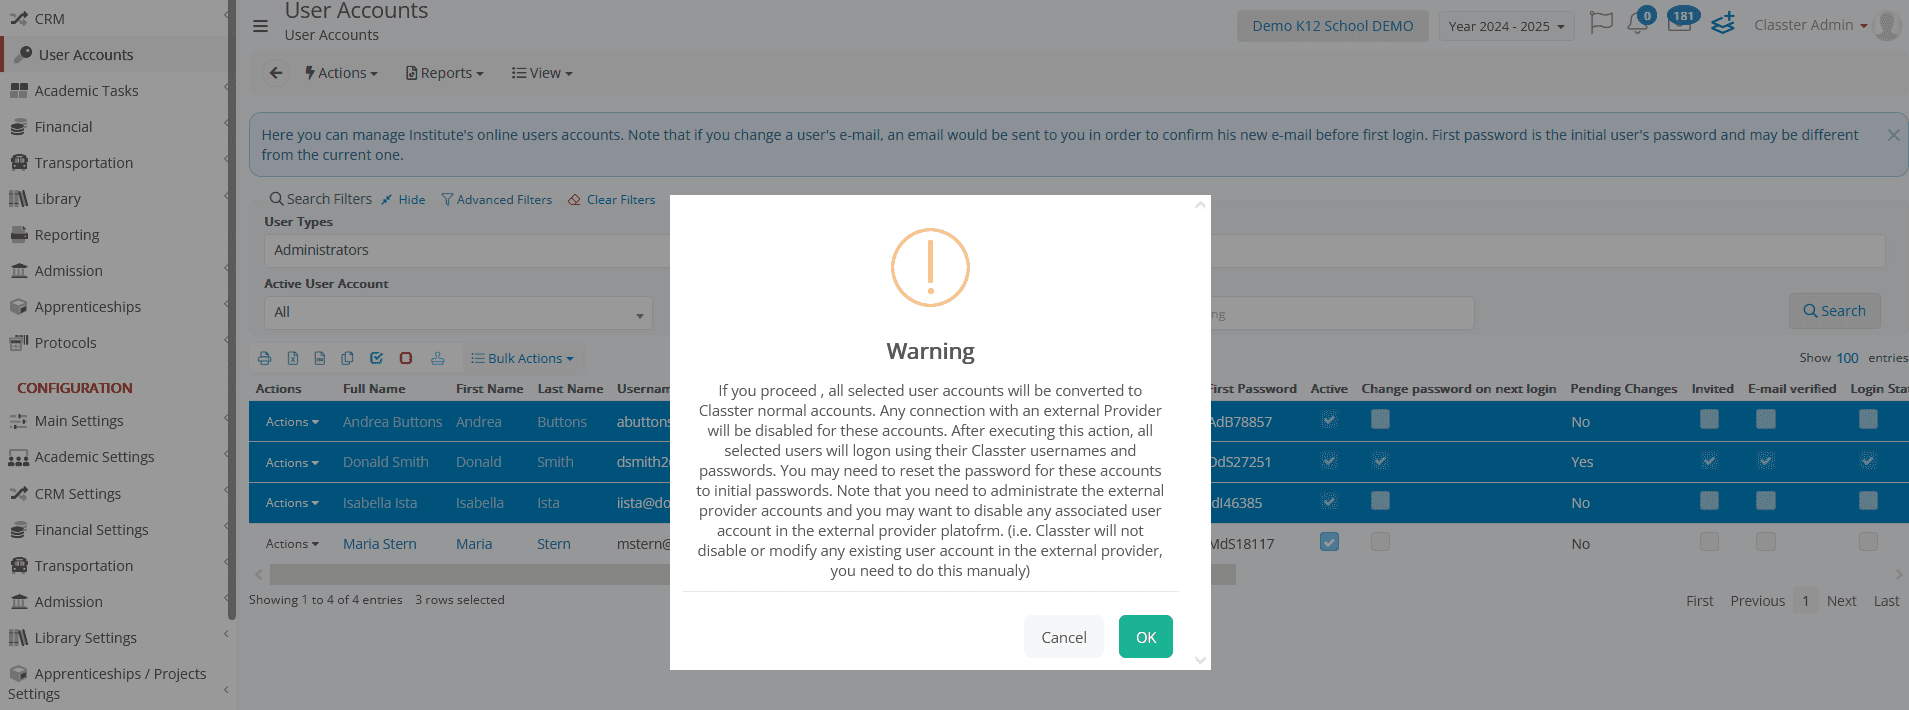
Disable External Provider (convert to Classter account)
If you proceed with this action, the system warns that all selected user accounts will be converted to standard Classter-managed accounts, and any existing connection with an external authentication provider will be removed. After this action is completed, users will log in using their Classter username and password. You may need to reset their passwords to initial values to ensure successful login.
Please note: Classter does not disable or modify accounts on external identity provider platforms. If needed, you must manually manage and disable those accounts directly through the external provider (e.g., Microsoft, Google).
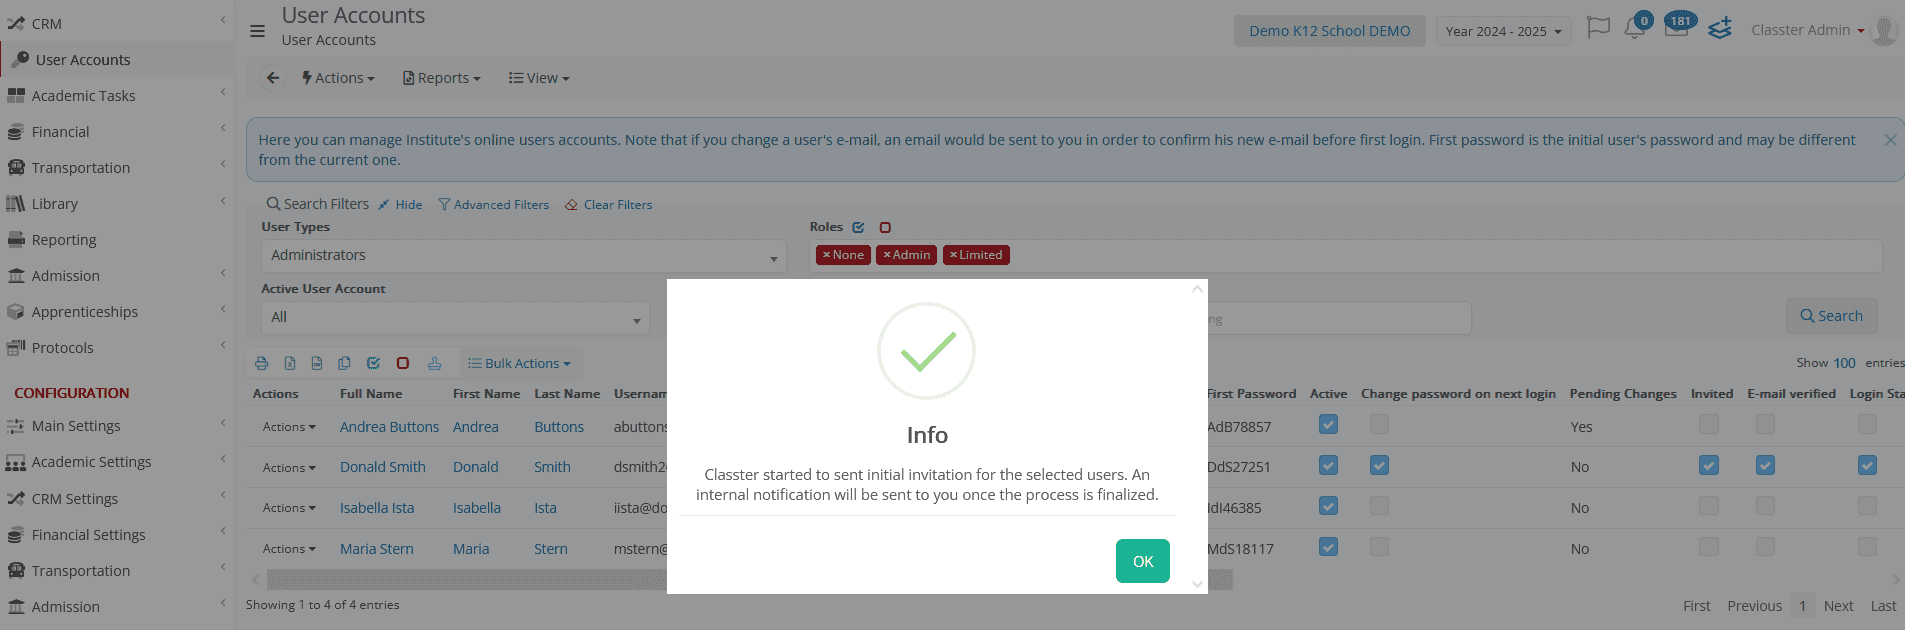
Send Initial Invitation
To send initial invitation emails with login credentials (username and password) to multiple users, click “Send Initial Invitation.”
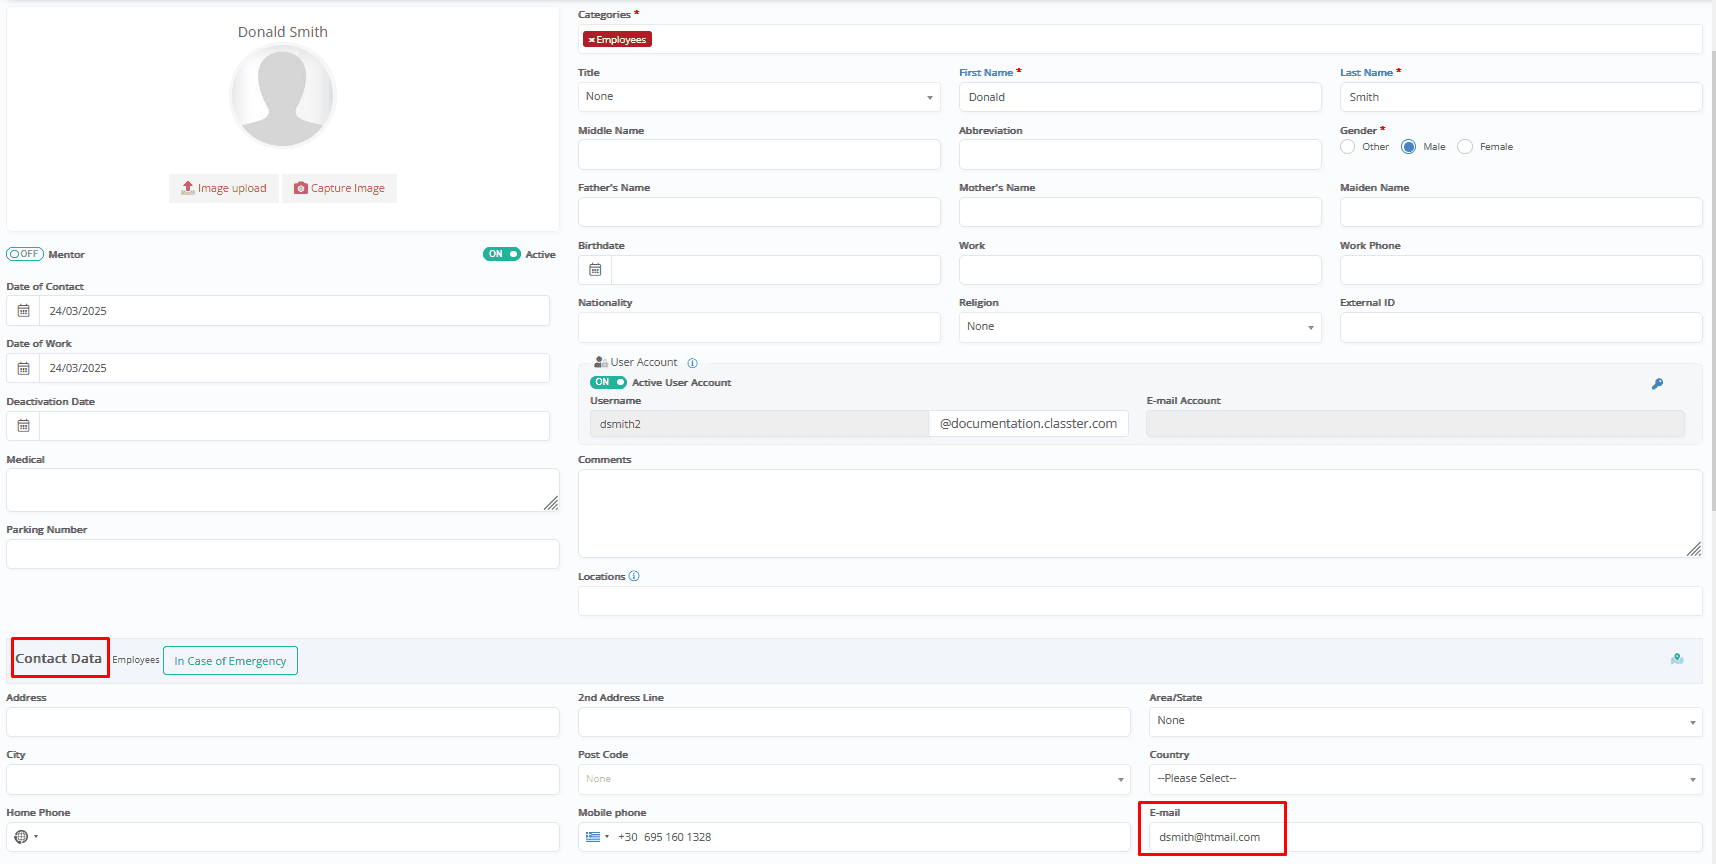
- The user must have a personal email in order to receive the invitation.
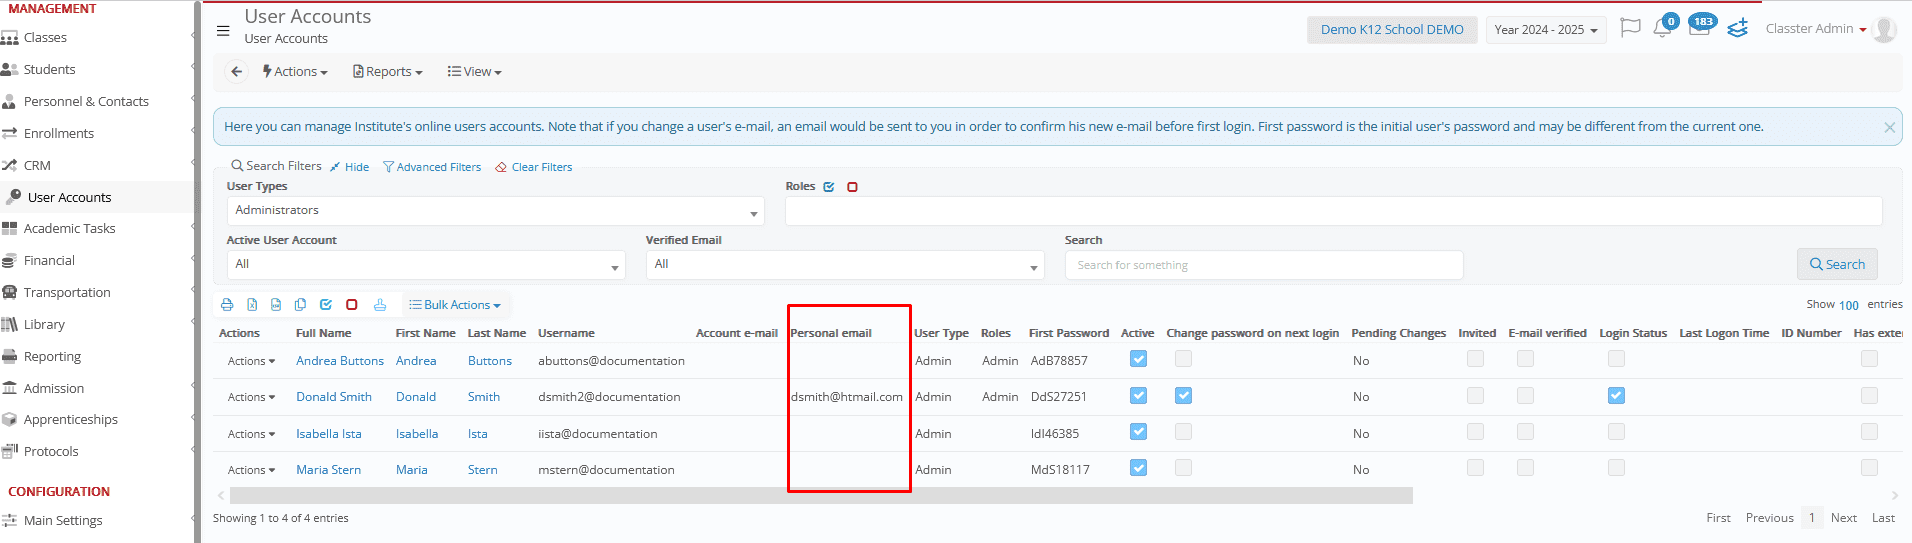
- Personal emails are added through the relevant entity card (e.g., _Student_, _Teacher_, Employee, etc.).
💡 Use Advanced Filters to easily find users who haven’t yet received invitations — this helps avoid sending duplicates.
Verify Email
This option allows for manual verification of a user’s email address. However, the recommended approach is to send invitation emails, so users can verify their addresses themselves.
Please note: Users cannot log in using their email until it has been successfully verified.
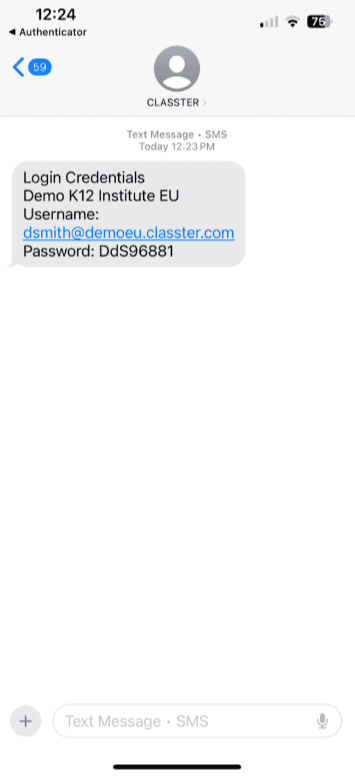
SMS Initial User Credentials
Send login credentials to users via SMS:
- Select SMS Initial User Credentials.
- Ensure your institution has SMS integration and sufficient credits. Just like email invitations, this function delivers credentials—except it uses mobile devices instead.
Convert Profile Names to Latin
Convert profile names to Latin characters for non-English user profiles:
- Select the users and click Convert Profile Names to Latin.
- This action will only affect the users’ profile/portal data and not the main Institution’s records.
Set Initial Password As Users Phone (Doesn’t change current password user is using)
When this setting is enabled in Security Settings, the user’s phone number can then be used as their password.