In Classter you can send automatic notifications, for different reasons that have been occurred, like payment delay, absence limit warning, and more.
To enable the ‘Automatic Notification Service‘, you have to go from the menu ‘CONFIGURATION > Main Settings > General Settings > Messaging and Notifications’. (Figure1)
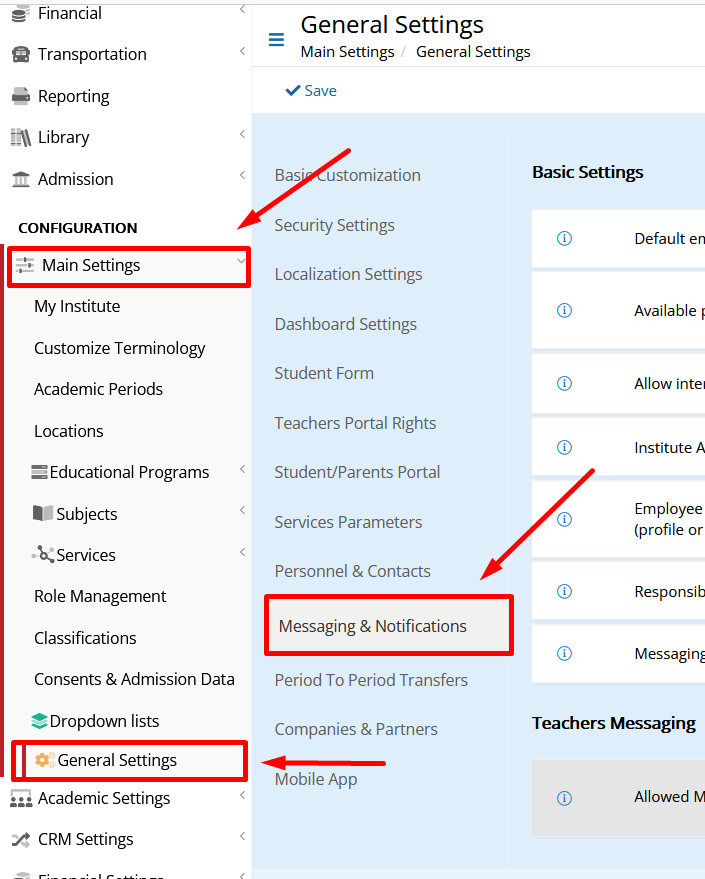
(Figure 1)
Then you go to ‘Notification Service’ section and check if the ‘Enable Notification Service‘ checkbox is enabled, for the automatic notification service to work.
- The ‘Notification Service Run Time’ determines what time the automatic notification service will be activated, in our case we set the time for the service to run at 15:30 o’clock.
- The ‘Notification Service Message Type‘ determines the type of message that is going to be sent to the recipient, it can be an E-mail or Internal Message, or SMS.
- The ‘Overwrite comparison/trace hold number per Pupil based on this custom field’. Because of notification services, processes use a trace hold or comparison number when they are executed. Here, we define which field may be used in our configuration for storing this comparison number.
Note: Sometimes, this comparison number may be different per Pupil. In that case, we can use a custom Pupil field to store the comparison number in each Pupil card. - ‘Configure Notification Services here’ if you click on ‘Open’ option it redirects you to the ‘Notification Service Configuration’ but there is also another way to get there. (Figure 2)

(Figure 2)
The other way to get to the ‘Notification Service Configuration’ is by going from the menu ‘CONFIGURATION > Advanced Configuration > Templates & Menus > Notification Service Configuration’. (Figure 3)
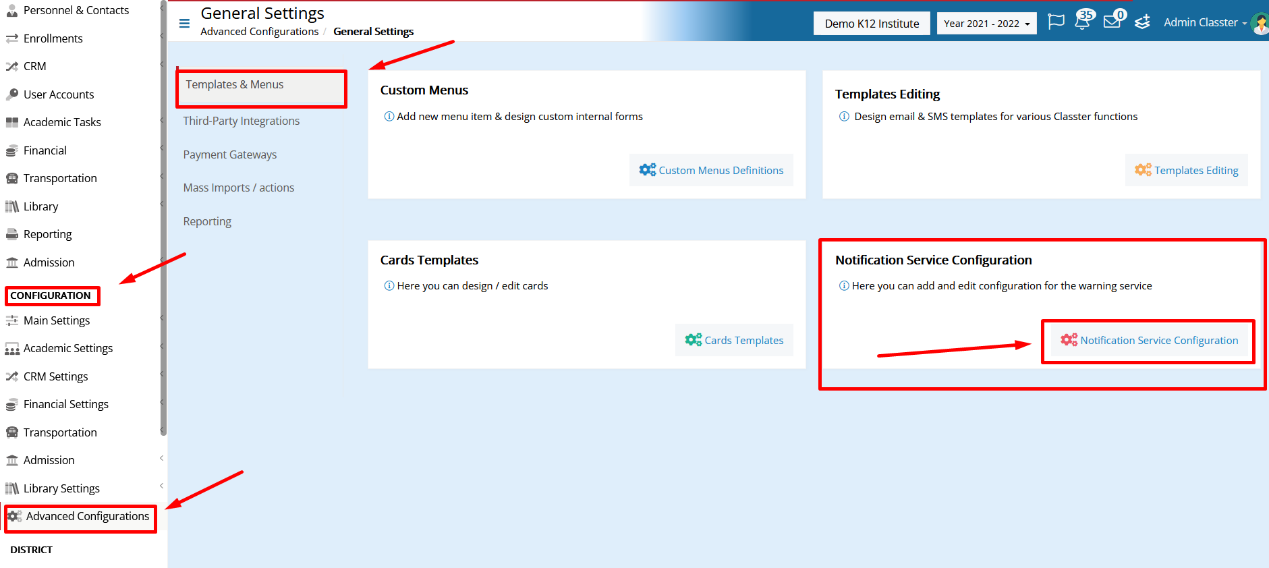
(Figure 3)
Now we are in the ‘Notification Service Configuration‘ section, from here you can create, edit or delete the notifications you want or had set up, for the automated action of notification.
Let’s create a new notification by clicking the ‘Add New‘ button. (Figure 4)

(Figure 4)
When you press the ‘Add New‘ window with some options will pop up. (Figure 5)
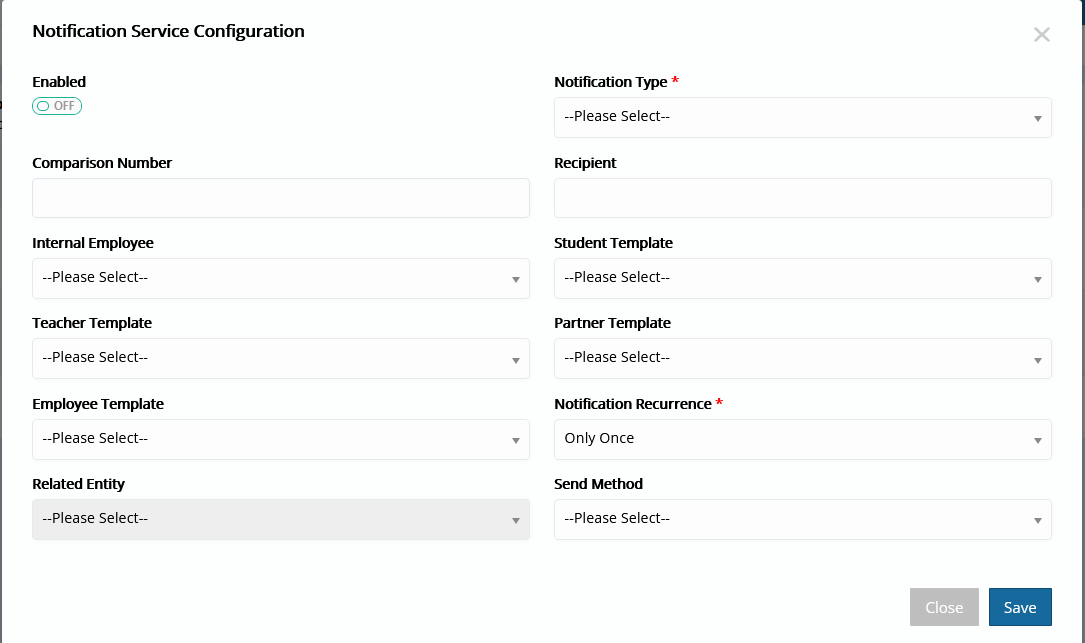
(Figure 5)
For our notification, that we are going to create, to work we have to check the Enabled checkbox to ‘On’. (Figure 6)
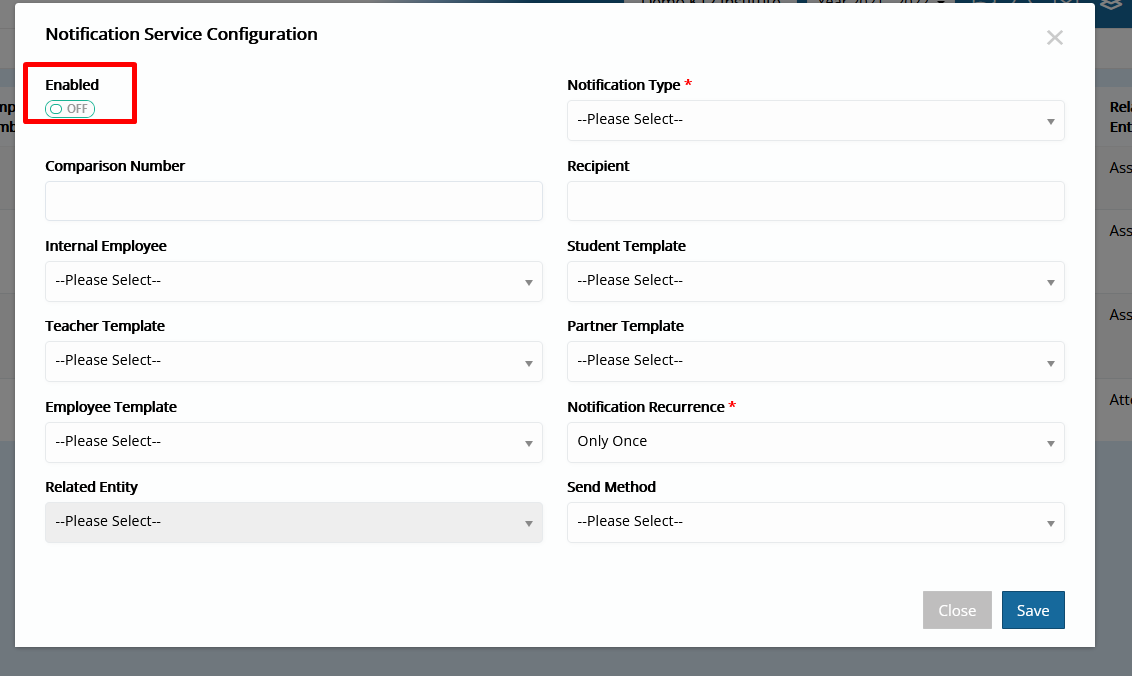
(Figure 6)
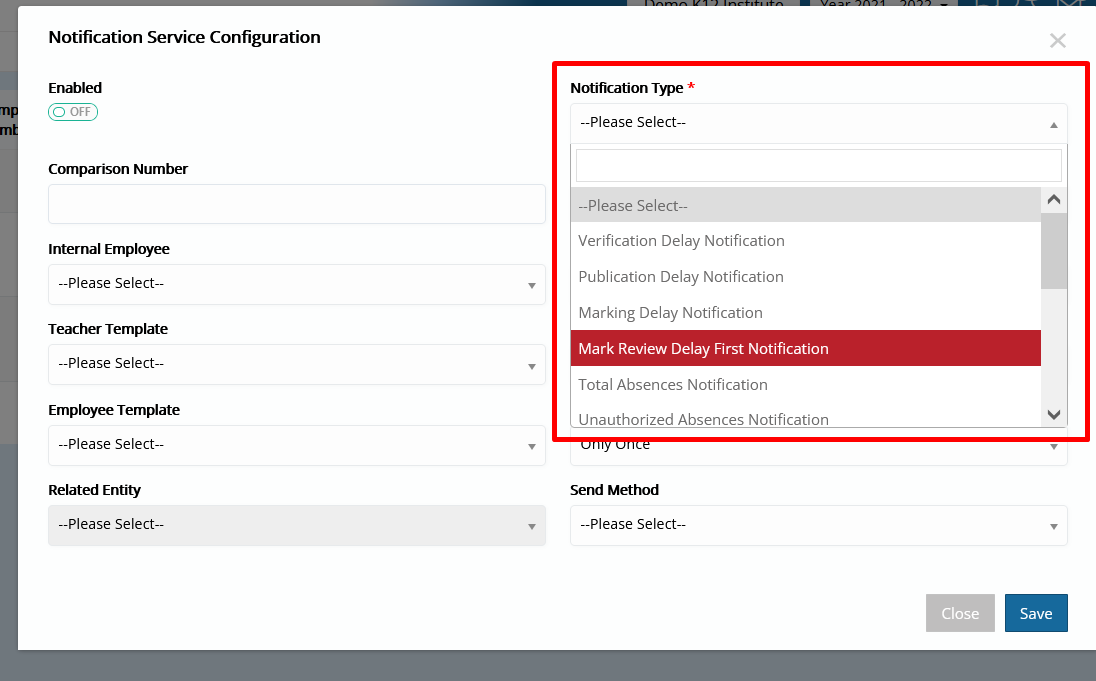
Then you need to choose from ‘Notification Type’, what is your notification about.
Note: The options in ‘Notification Type’ are fixed, and can not be dynamically created by the Administrator. (Figure 7)
(Figure 7)
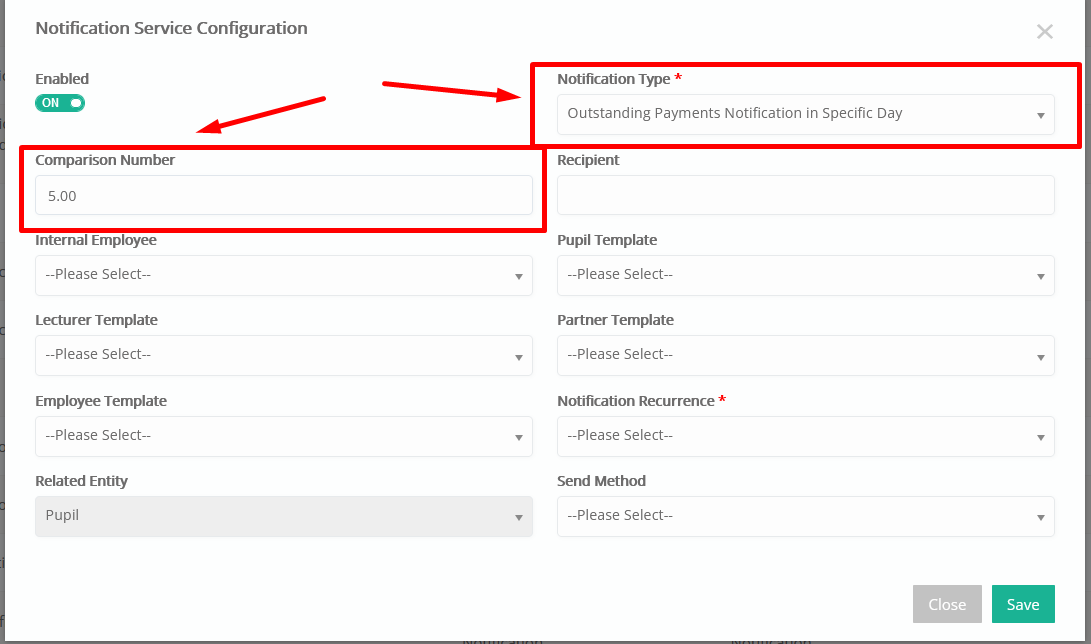
In the ‘Comparison Number,’ we enter the numeric value that is going to check if it is equal with the value that we selected in ‘Notification Type‘.
For example, we selected ‘Outstanding Payments Notification in Specific Day’ from the ‘Notification Type’, so ‘Comparison Number’ refers to ‘Specific Day’ in our case the number ‘5’ which means, if a student’s payment due date had passed 5 days, then on the fifth day send a notification. (Figure 8)
(Figure 8)
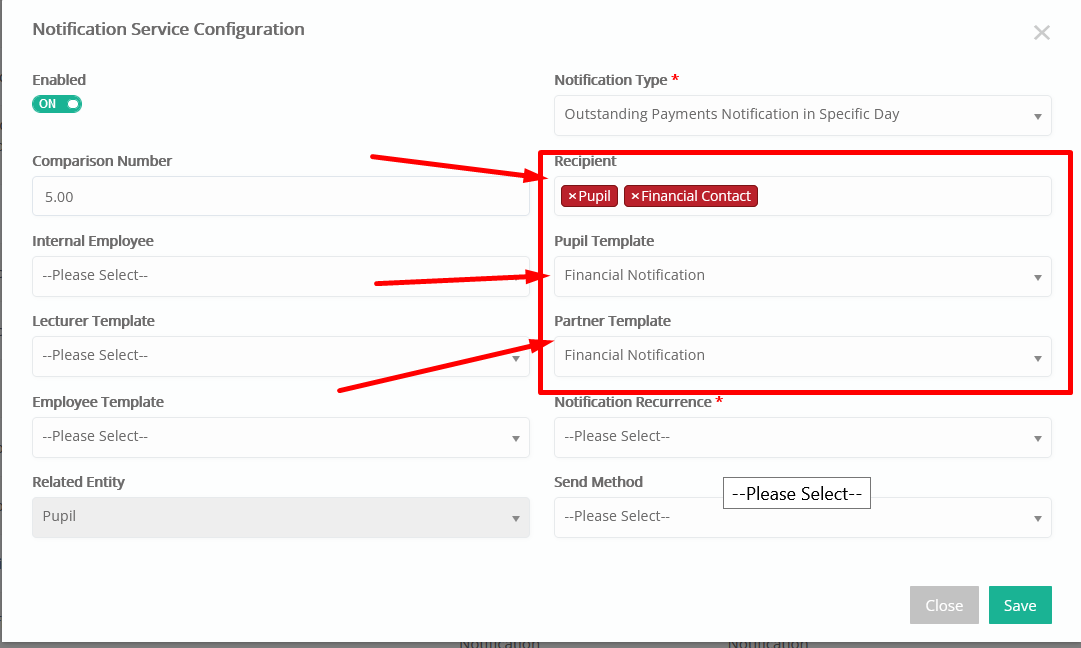
From the ‘Recipient’ option we select to whom we need to send the notification message, here we selected the ‘Pupil’ and ‘Financial Contact’ of the pupil.
After that, we can determine what message is going to be sent to the recipients, in our case because as ‘Recipients’ we declared the ‘Pupil’ and ‘Financial Contact’ which is their ‘Parent’ we go to ‘Pupil Template’ and ‘Partner Template’ and select the template we want to send to them.
These templates have been created for this case from ‘CONFIGURATION > Advanced Configuration > Templates & Menus > Templates Editing’. (Figure 9)
(Figure 9)
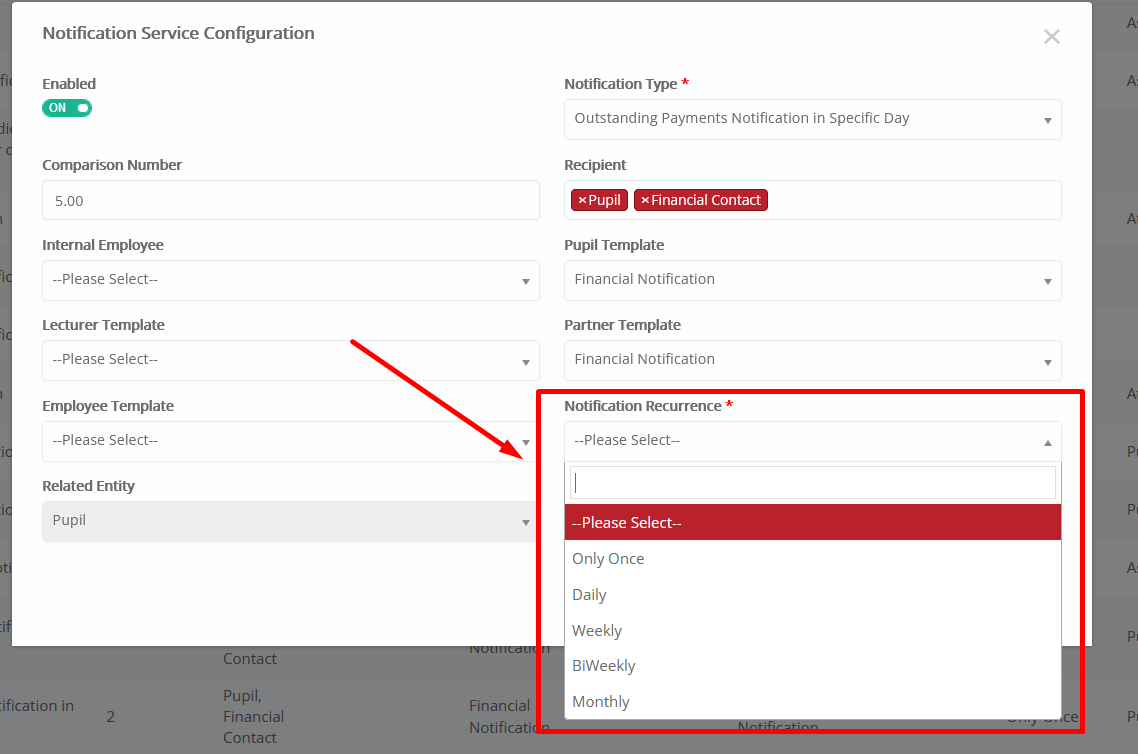
‘Notification Recurrence’ determines how often the notification will be sent to the ‘Recipient’. (Figure 10)
(Figure 10)
We can also add an ‘Internal Employee’ to send the notification we are creating, we have this option to not only send a notification for an occurred event to those who are referred to,
but also, to those who are responsible for this area, in our case ‘Farrugia Marthese’ is responsible in Financial department, so she also gets a notification about the delay of pupils payment. (Figure 11)
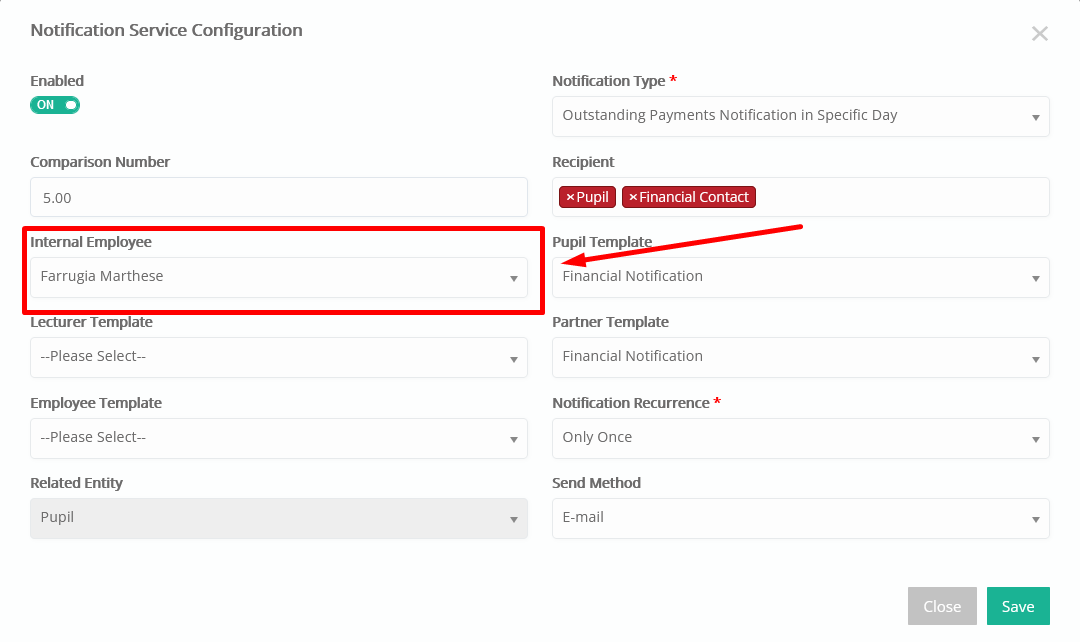
(Figure 11)
The ‘Send Method’ option is about what method we are going to send our notification, it could be via E-mail, Internal Message, or SMS. (Figure 12)
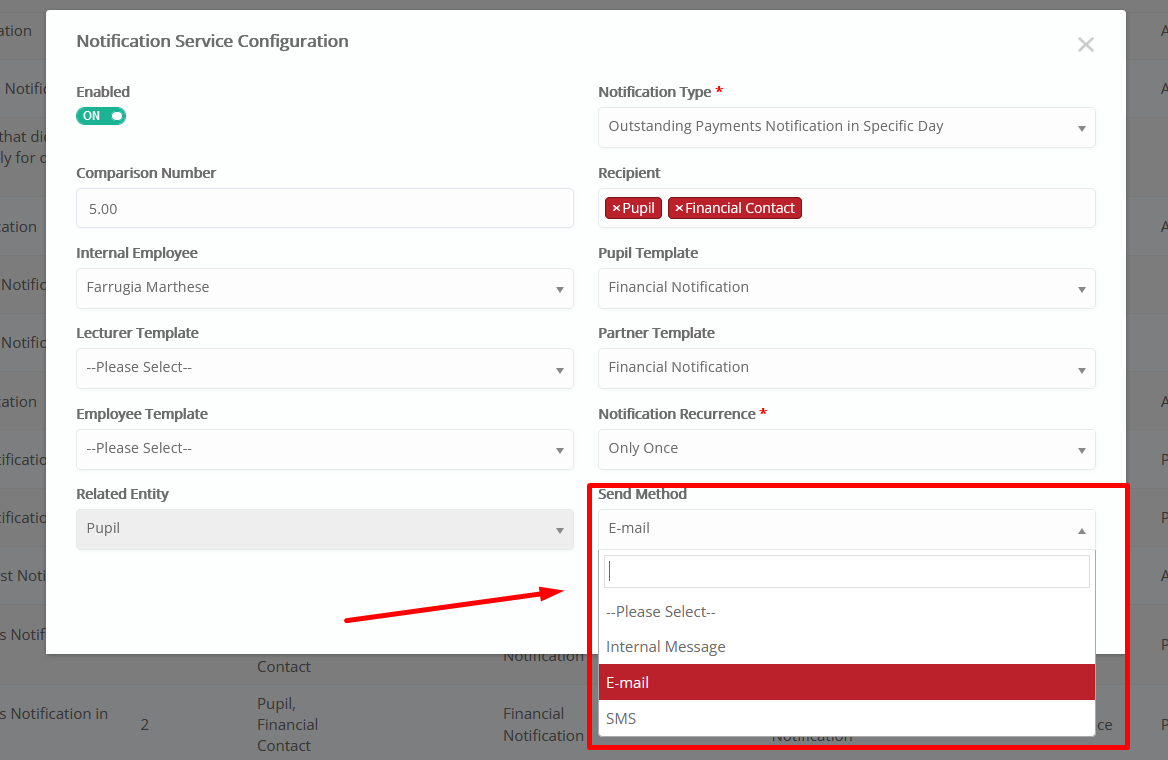
(Figure 12)
After we set all our options, we hit the ‘Save’ button in order, our notification, to be saved. (Figure 13)
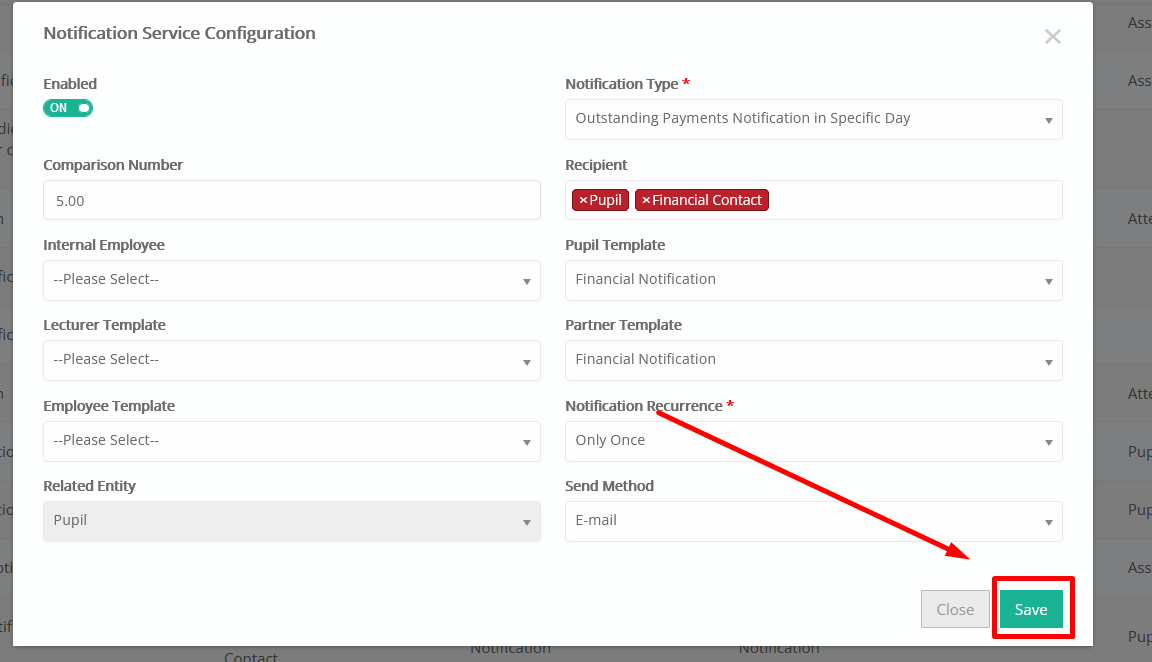
(Figure 13)
So now we have set up our notification. (Figure 14)

(Figure 14)
As you can see our notification service is working and the notification, we created has been sent at the time we had set it up (Figure 2), keep in mind that it might be a 1-3 minutes delay for the e-mail to be delivered. (Figure 15)(Figure 16)
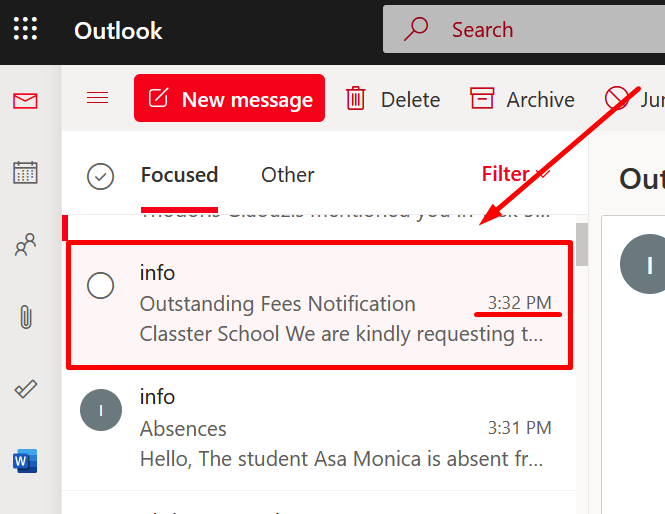
(Figure 15)

(Figure 16)
For your information, in order for the ‘Automatic Notification’ to work, all the steps we did before must be done at least 2 hours before the time we had set in the ‘Notification Service Run Time’, which can be found at ‘CONFIGURATION > Main Settings > General Settings > Messaging and Notifications’.


