

Classter enables you to create events in your calendar. To do so, you first need to configure the Event Categories so that the events on the calendar are shown with different colors, have different functionalities and send different kinds of notifications depending on what they are about.
To create a new event category go to CONFIGURATION > CRM Setting > Dropdown lists.
There select the Calendar Categories list on the Dropdown lists bar and click on the +Add New button. (Figure 1)
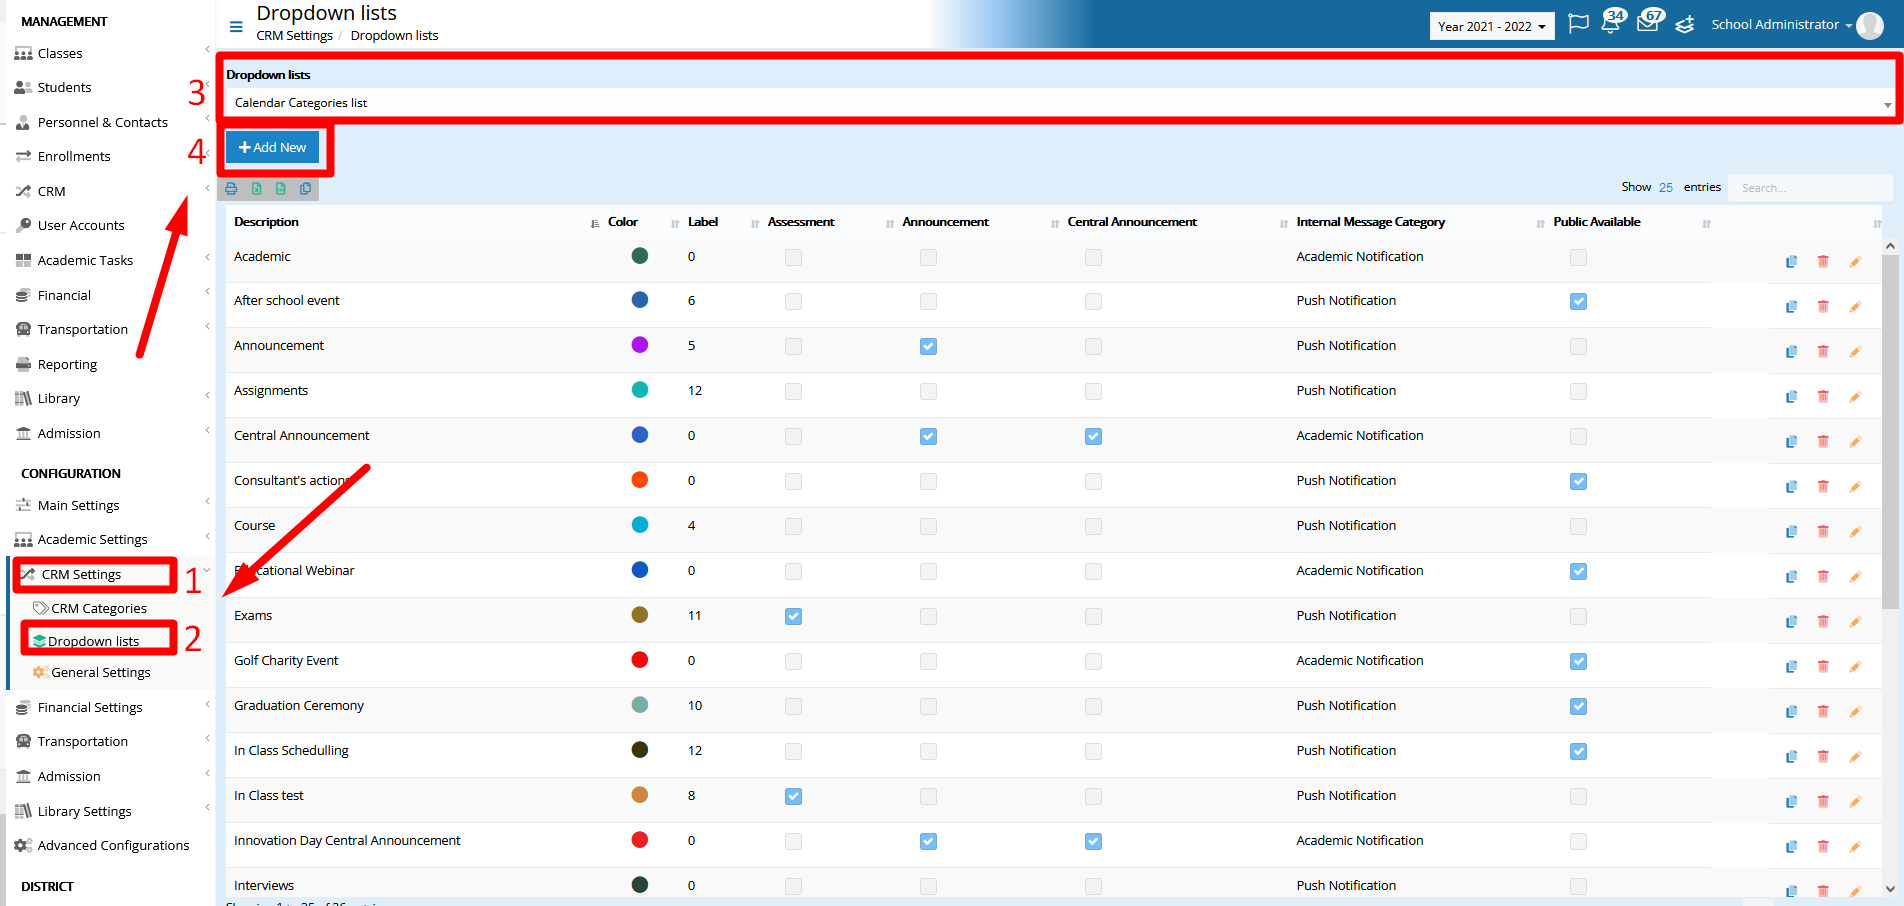
Figure 1
When you do the following window will pop up where you can configure the category.
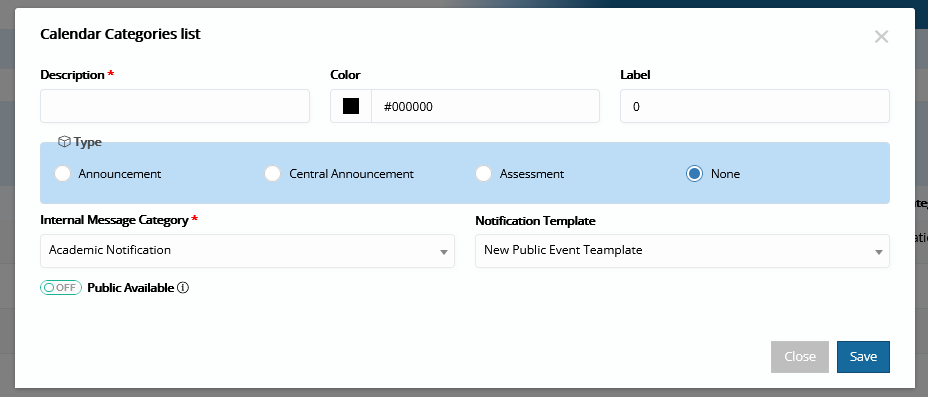
Figure 2
The Description field is mandatory. The default color with which this category’s events will be portrayed in the calendar is black. To change that click on the Color bar and select the color of your preference. (Figure 3)

Figure 3
Then you select the Type. Keep in mind that we are creating here a Calendar category which means that the type will specify what Calendar category this is. If it is an Announcement, a Central announcement, or an Assessment you can check the specific box. Otherwise, use the None option as a default which is the option we use for events. (Figure 4a)
The Public Available radio button defines whether the events of this category will be visible to everyone’s Calendar or only to the ones that got invited.
Note that public events can be viewed on everyone’s Calendar while private events are only visible to the people related to them. (Figure 4b)
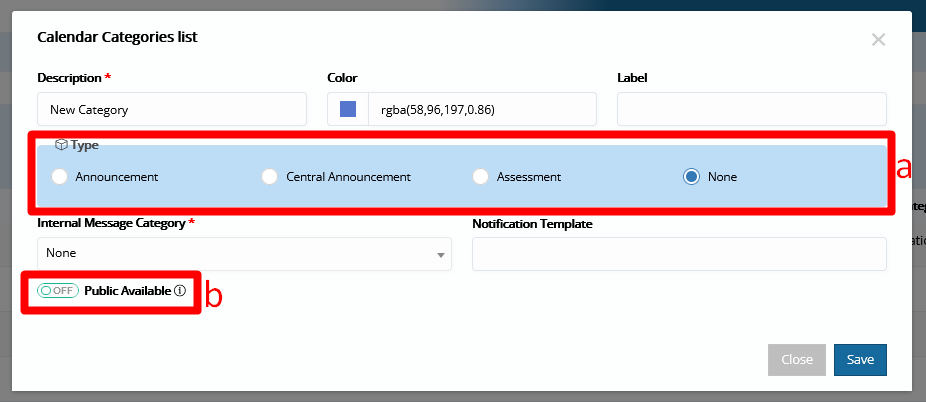
Figure 4
Finally, in the Internal Message Category, you select the type of Message you want the recipients to receive whenever you decide to invite them by message in the event you are creating. (Figure 5)
Both the Internal Message Category list and the Notification Template list are configurable.
To learn how to configure the internal message categories, visit the Dropdown Lists | Core Module manual.
For more on how to configure Notification Templates, go to Templates & Menus | Advanced Configurations Manual.
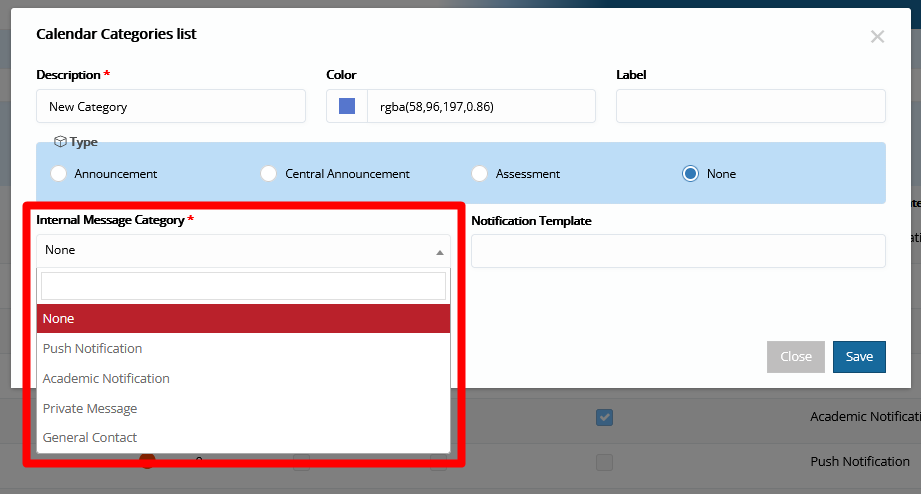
Figure 5
Now, when you create a new event, the category you created will be available for selection in the Event Category field.
For more information on the events, take a look at How to configure create and view events.
For more information on how to set up the Calendar categories take a look at the Dropdown Lists | CRM Module manual.