

To create siblings, you must have both _Students_ already created and added to the student lists. If both have not been created, you need to create new _Student_ and then follow the instructions to connect them as siblings. In both cases you need to follow the path to the _Student_ Lists page.
Management > Students > Student Lists
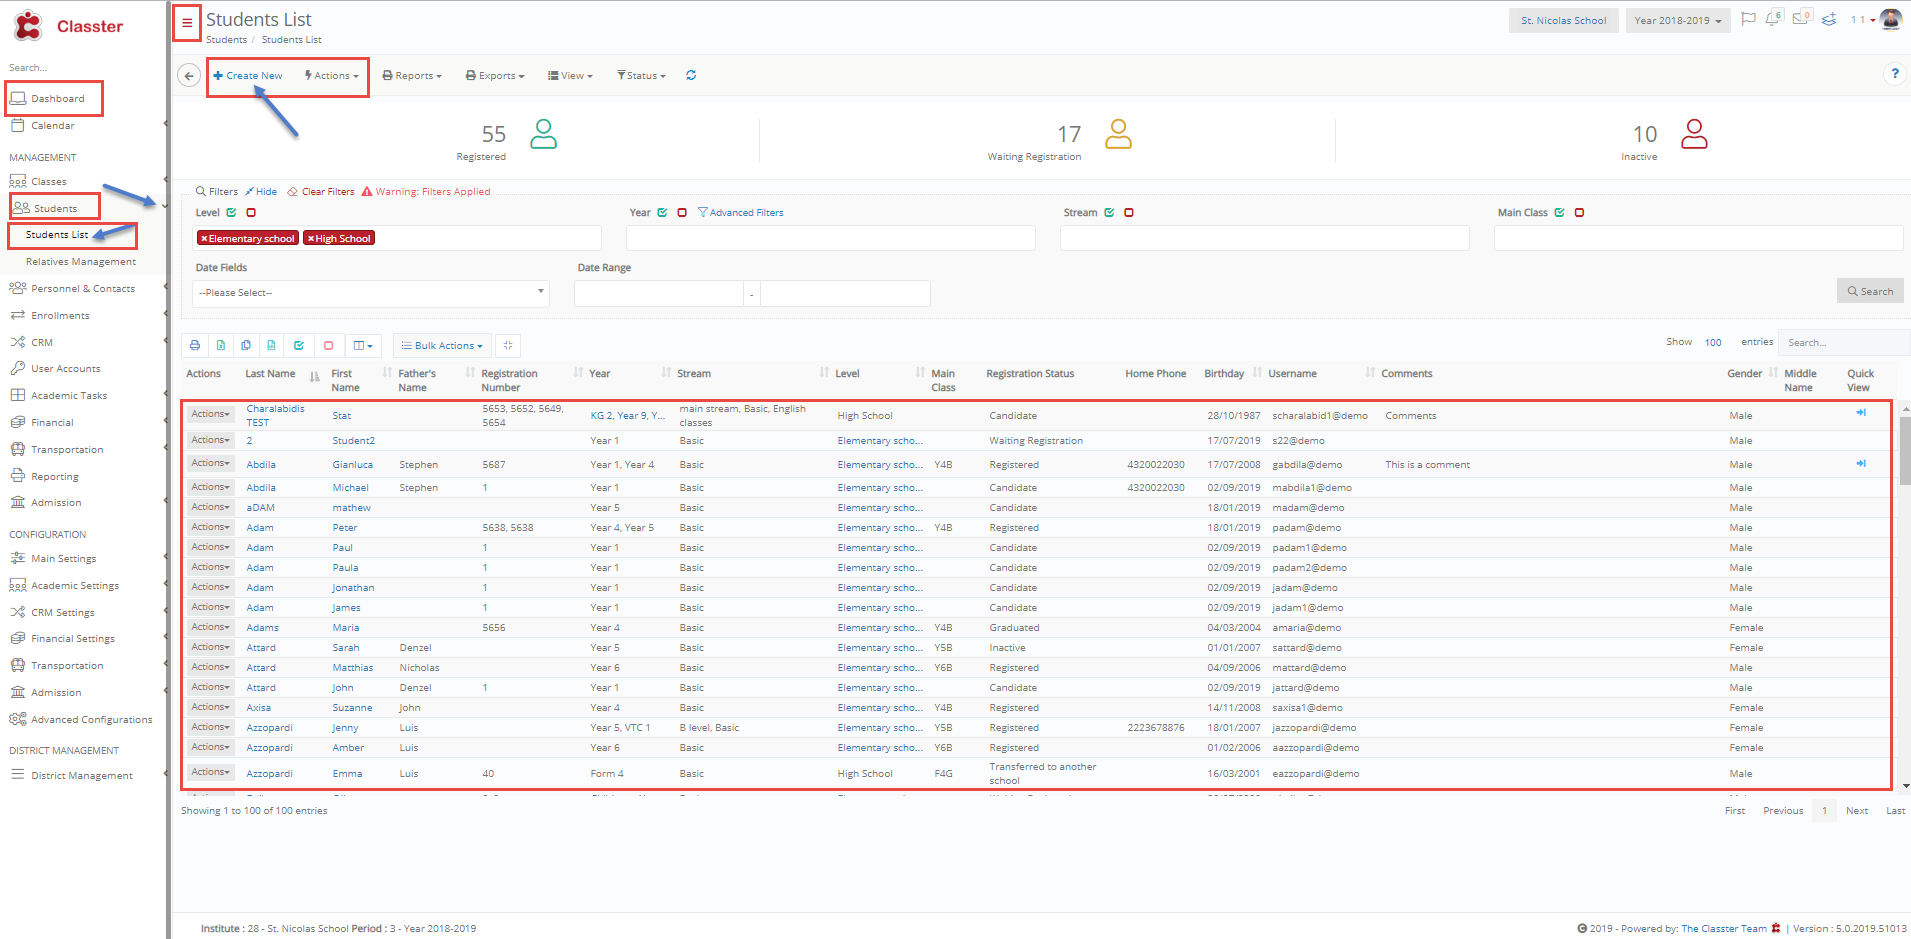 Figure 17
- Click on the + Create New button to create a new _Student_.
- Fill in the fields with the New _Students_ information and click on save.
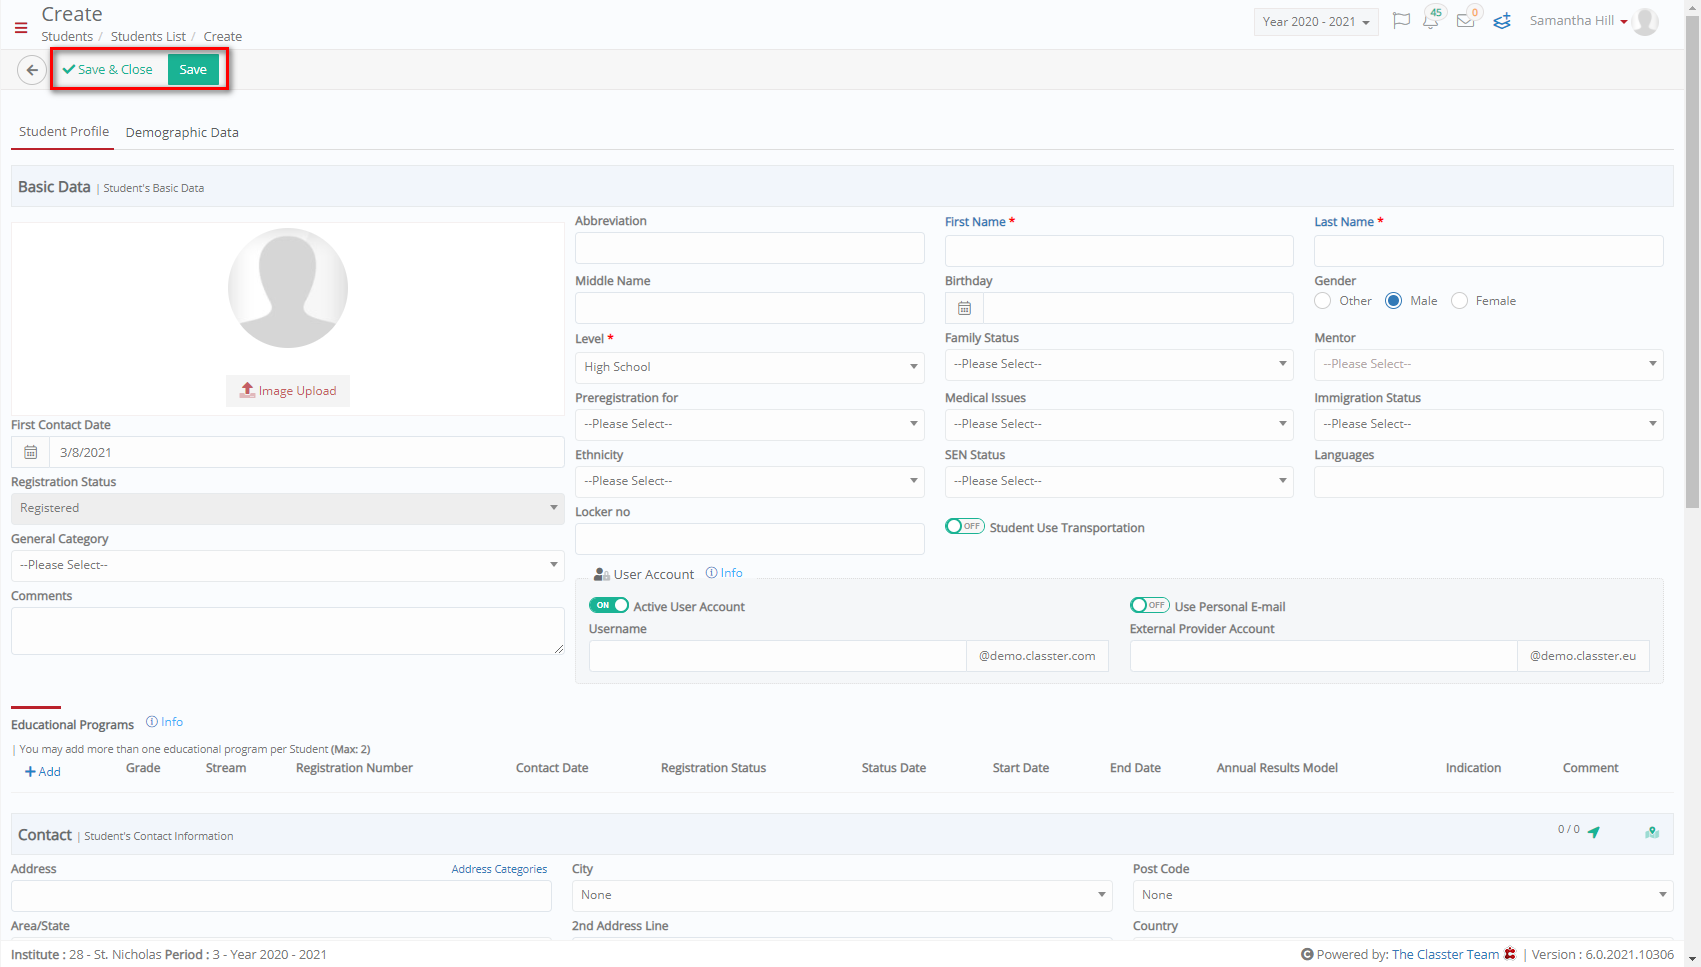 Figure 18
Now that you have created a student’s sibling you need to make it official by connecting the new _Student_ with his existing sibling. This can be done by going to the Student Lists page (Figure 17) and choosing the two _Students_ we want to connect as siblings.
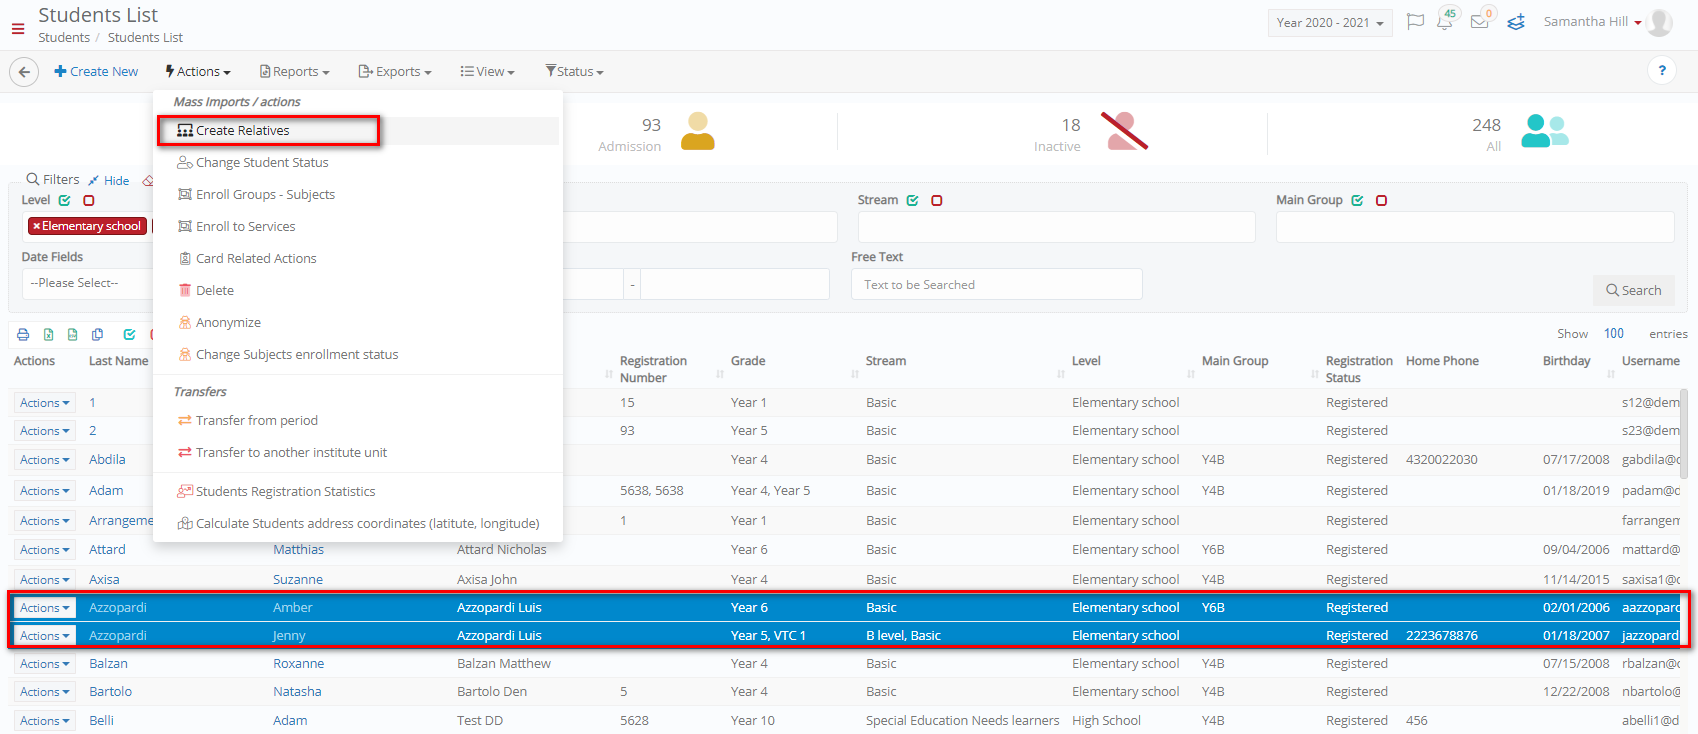 Figure 19
- First, select two or more _Students_.
- Click on the Actions dropdown list and then click on Create Relative.
Once you have clicked on the Create Relatives button the following popup window will appear (Figure 20).
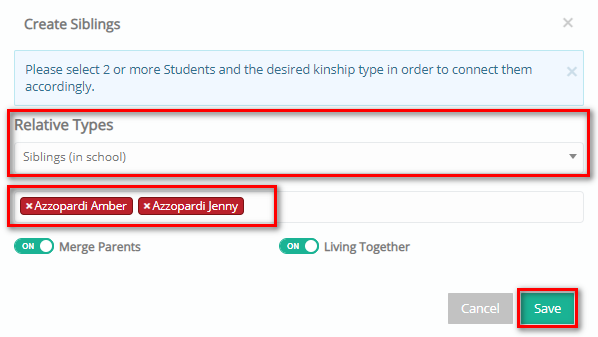
Figure 20
- Choose Relative type e.g., Siblings in School.
- See that both _Students_ are selected.
- Switch on the Merge Parents switch to transfer the parents from one _Student_ to the next.
- Switch on the Living Together Switch is these siblings live together.
Note: Another way to connect _Students_ and create a relative relationship is to use the Actions menu within one of the student’s profile. Select one of the students from the student list and through the action button create an exact copy of the _Student_ (Including the students’ relations) as seen in Figure 21.
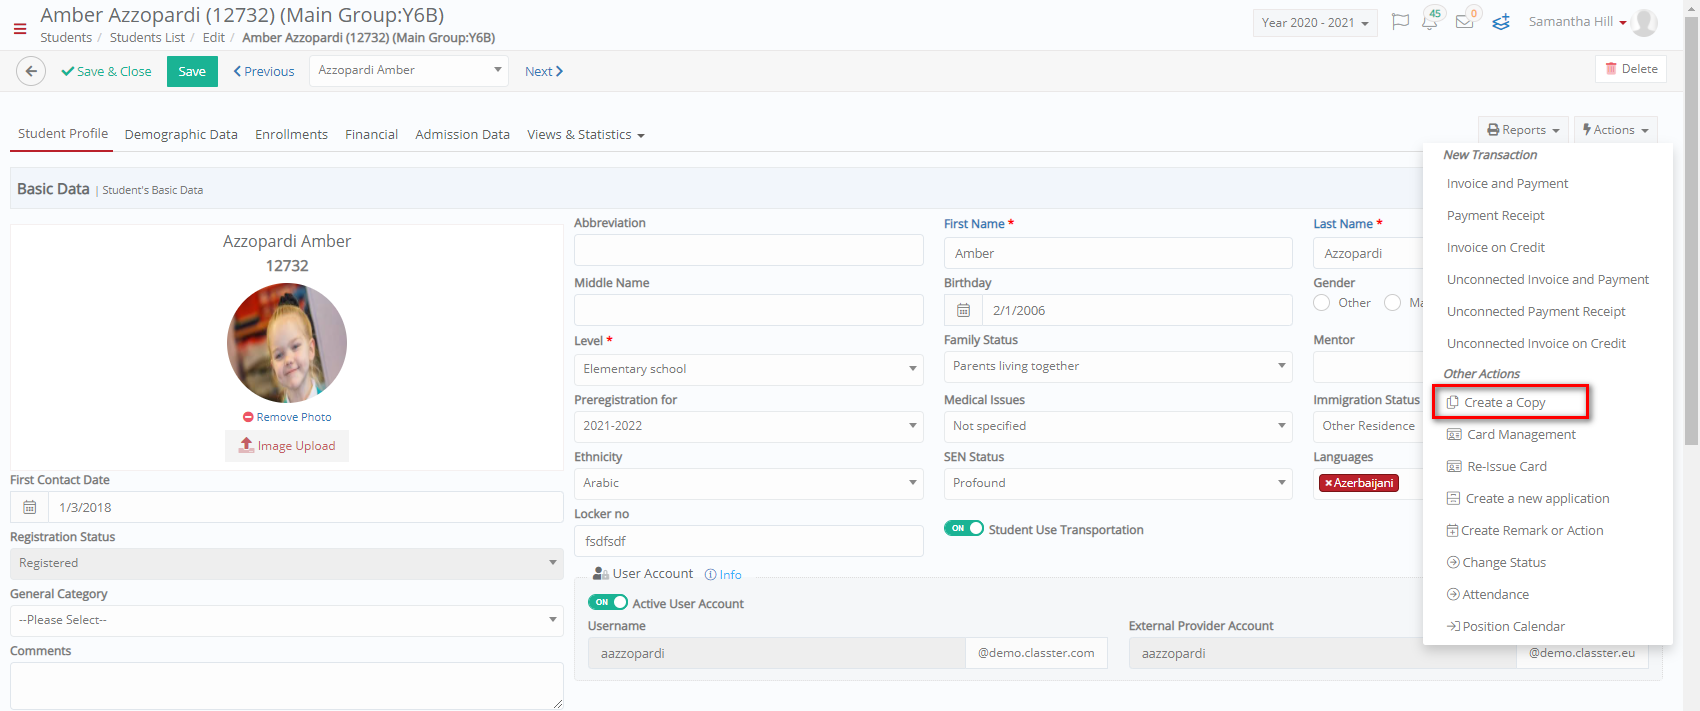 Figure 21
- Once you click on create copy, this opens a create window where you will view the copy of this _Student_ with all relevant information. Just change the name, surname, and educational program so they can correspond to the new sibling.
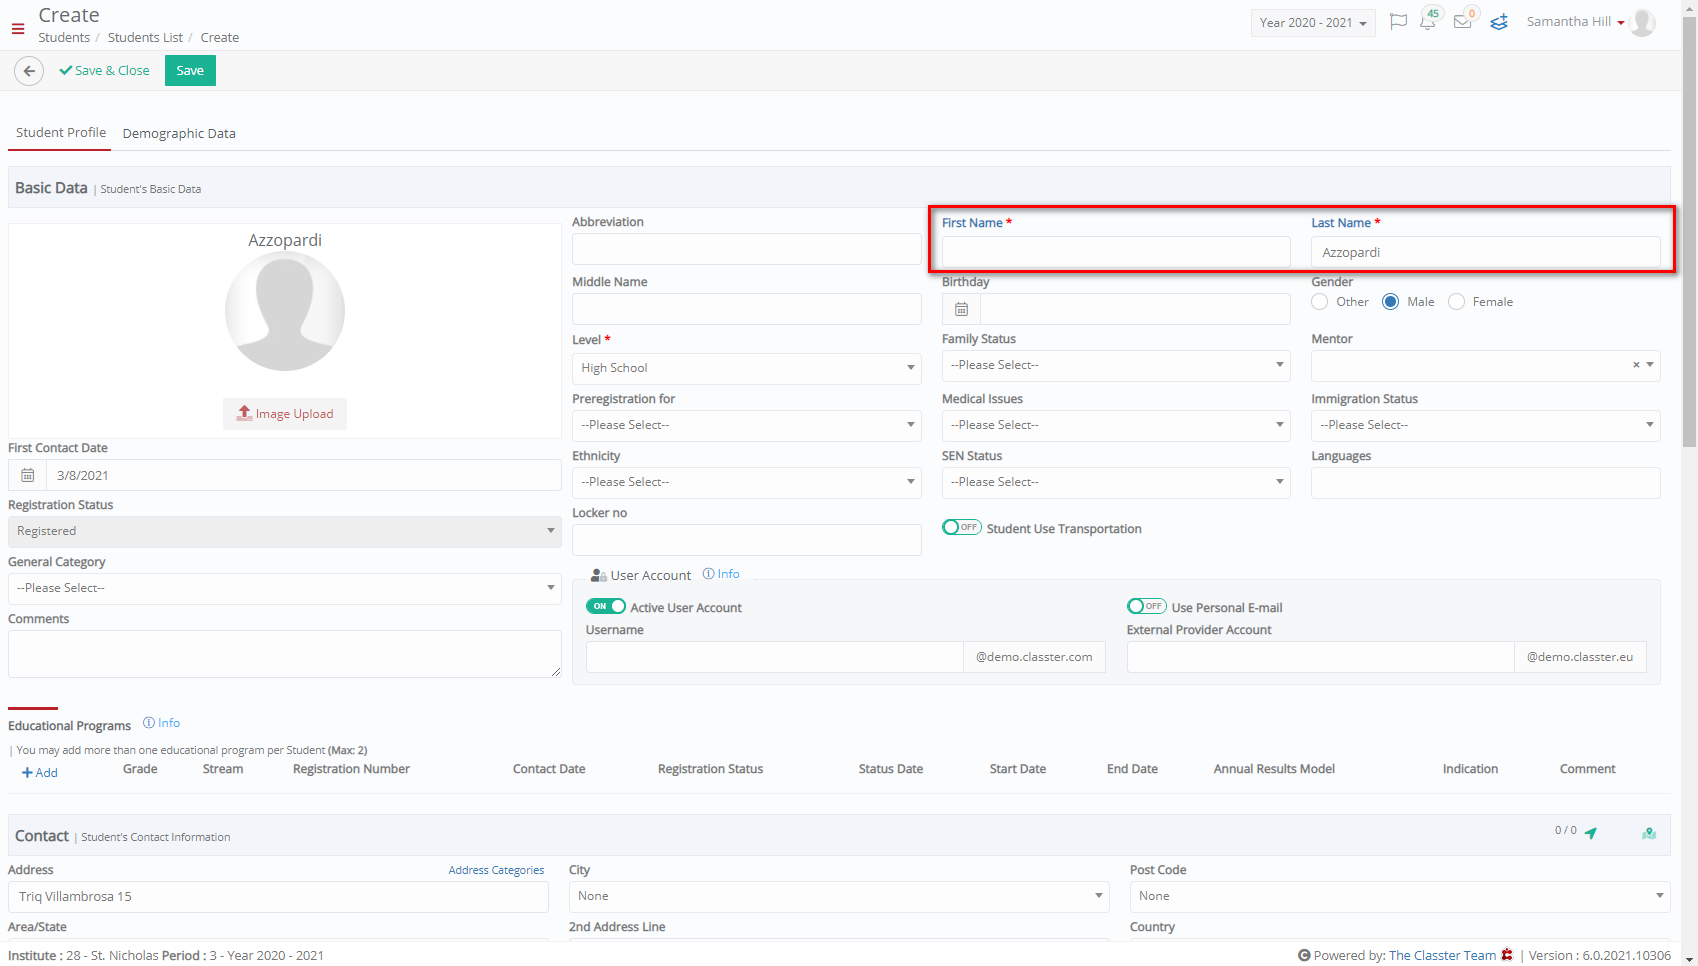 Figure 22
- Then Click on Save and you are done.