

Classter integrates seamlessly with Xero Accounting Software, allowing institutions to streamline their financial management processes and maintain accurate financial records. The integration enables you to export financial documents (e.g., invoices and payments) from Classter to Xero, either automatically or manually, based on your preferences.
Step-by-Step Guide for Xero Integration
Activate Xero Integration
To activate the integration:
- Go to:
Advanced Configurations → Official Financial Exports → Xero
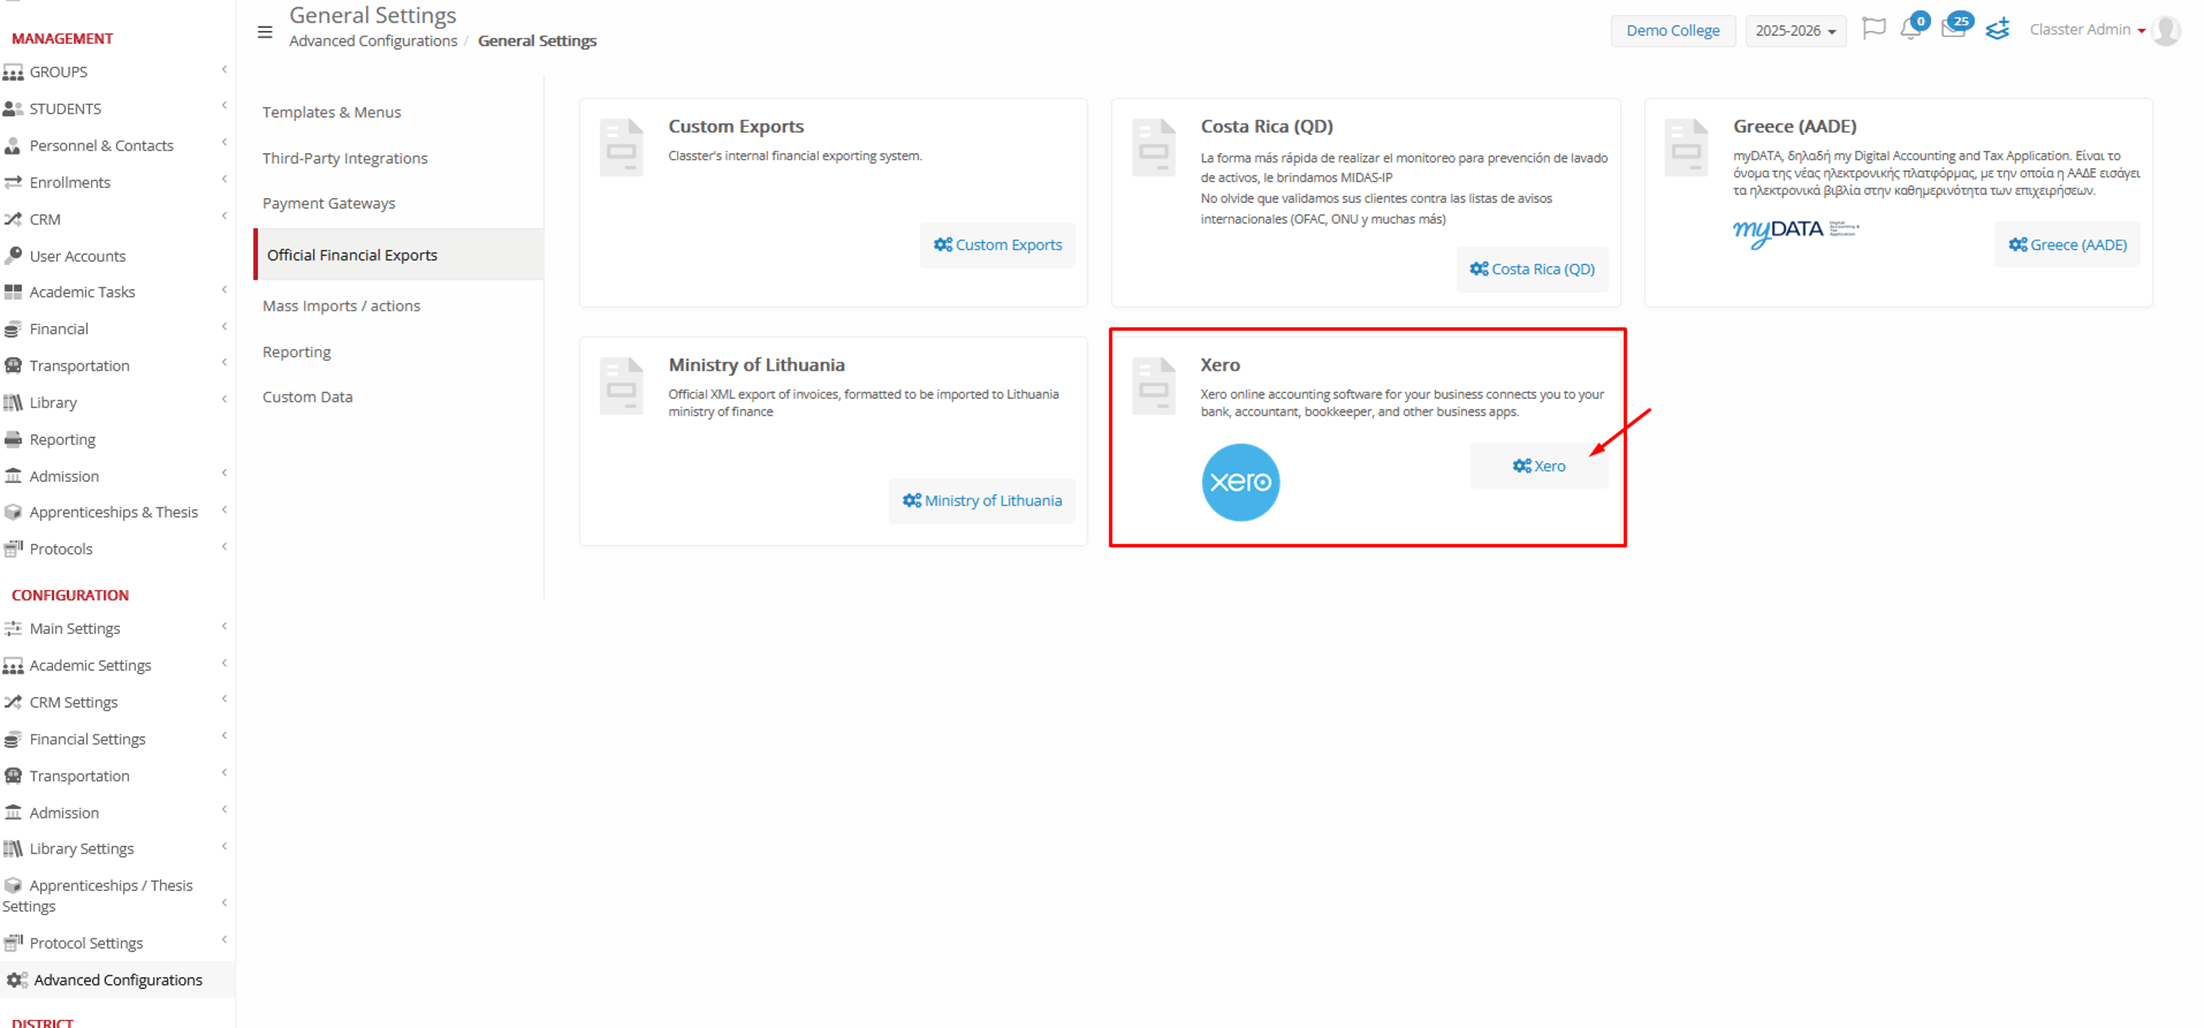
- Click the Activate button. Xero will display a page requesting your consent to allow the Classter application to access certain information. You will be prompted to either approve or decline the request by selecting Yes or No.
- Once you approve, you will be redirected back to Classter, where the integration will be enabled, and all relevant fields will be populated with settings from Xero, which can be modified based on your preferences.
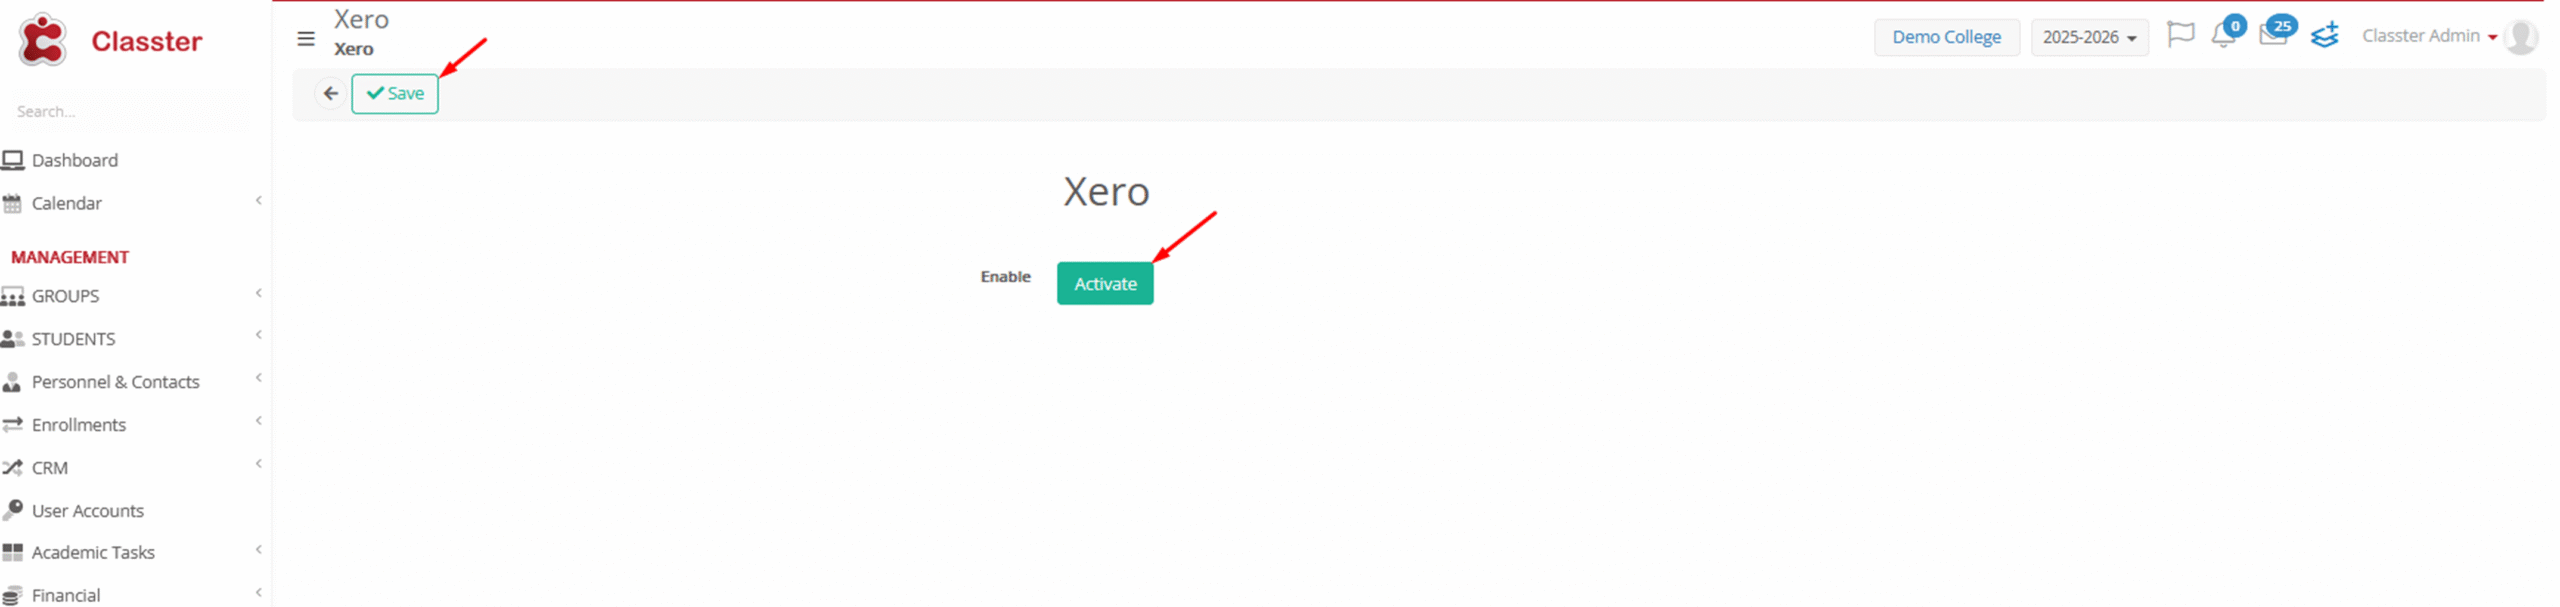
- Save the settings.
📌 Note: The Xero integration works the same way as other Financial Exports (e.g., AADE, QD).
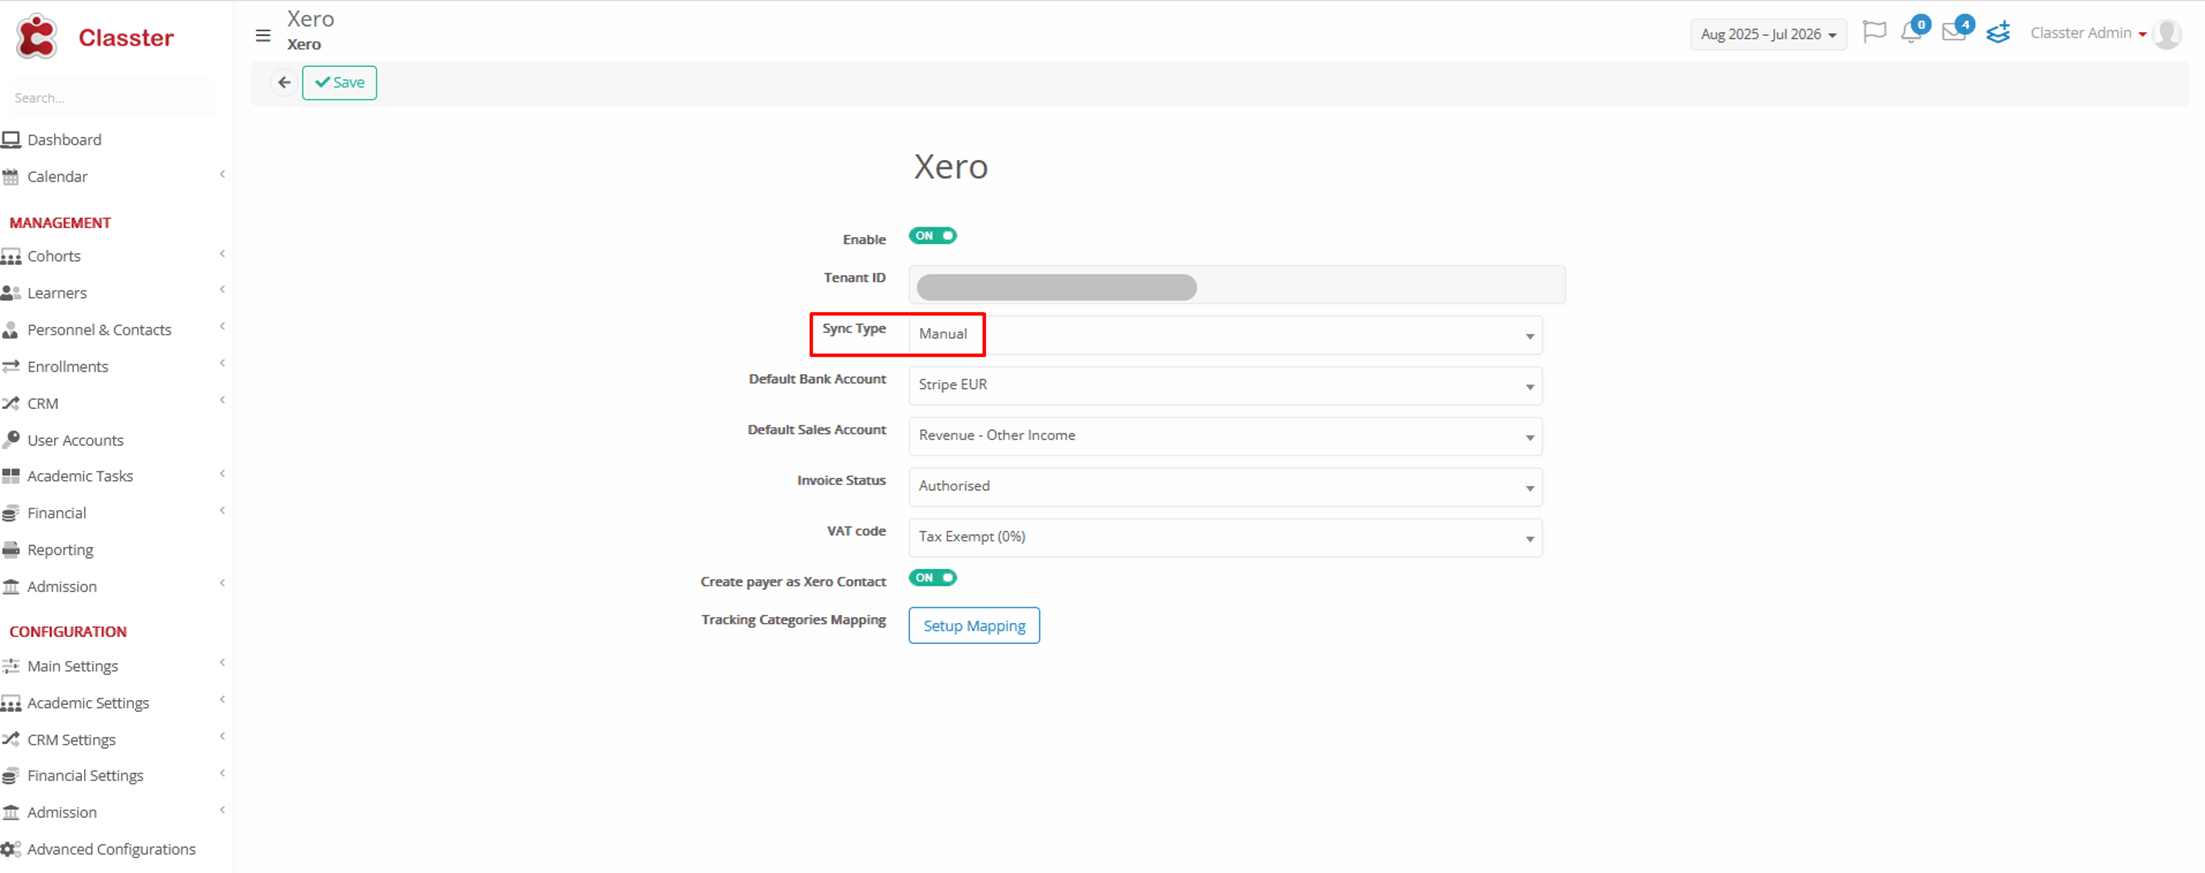
Select Sync Type
Choose the sync method for exporting documents to Xero:
- Manual Sync: Select and send documents manually.
- Auto Sync: Automatically send documents to Xero upon creation.
Configure Transaction Types/Series
Each financial document in Classter belongs to a Transaction Type/Series, which defines its category and settings.
To configure the Transaction Type/Series for Xero export:
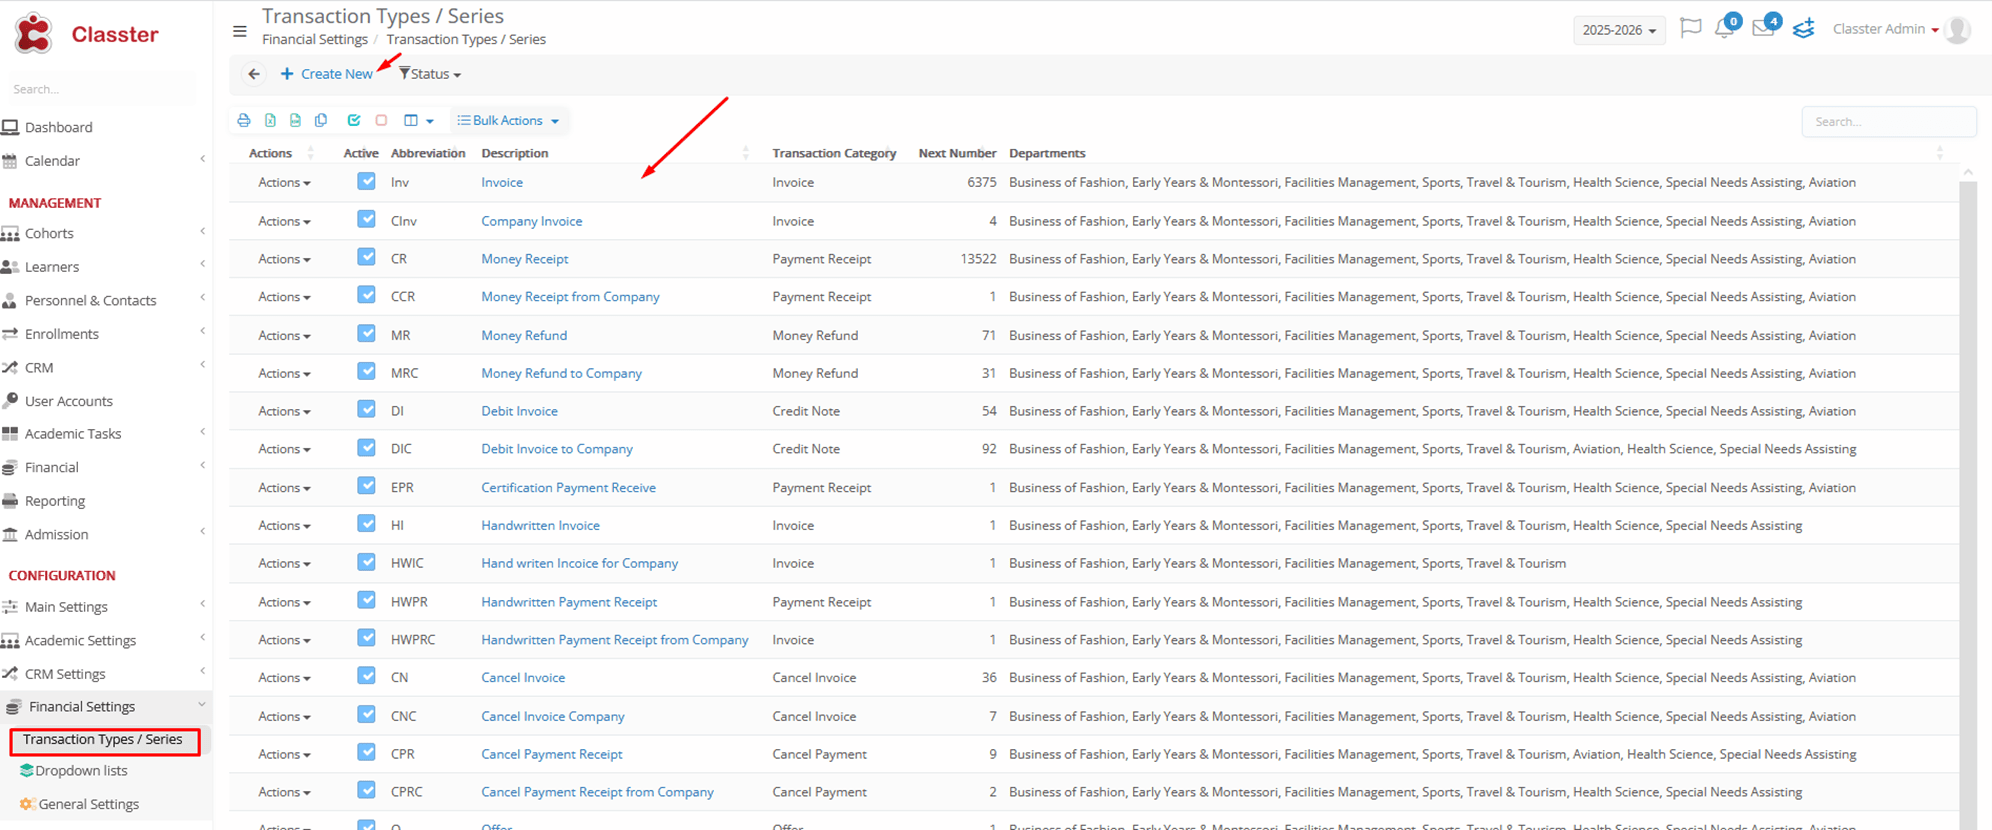
- Select a transaction type/series that matches the documents you want to export to Xero, or create a new one.
- In the Export Type field, select Xero.
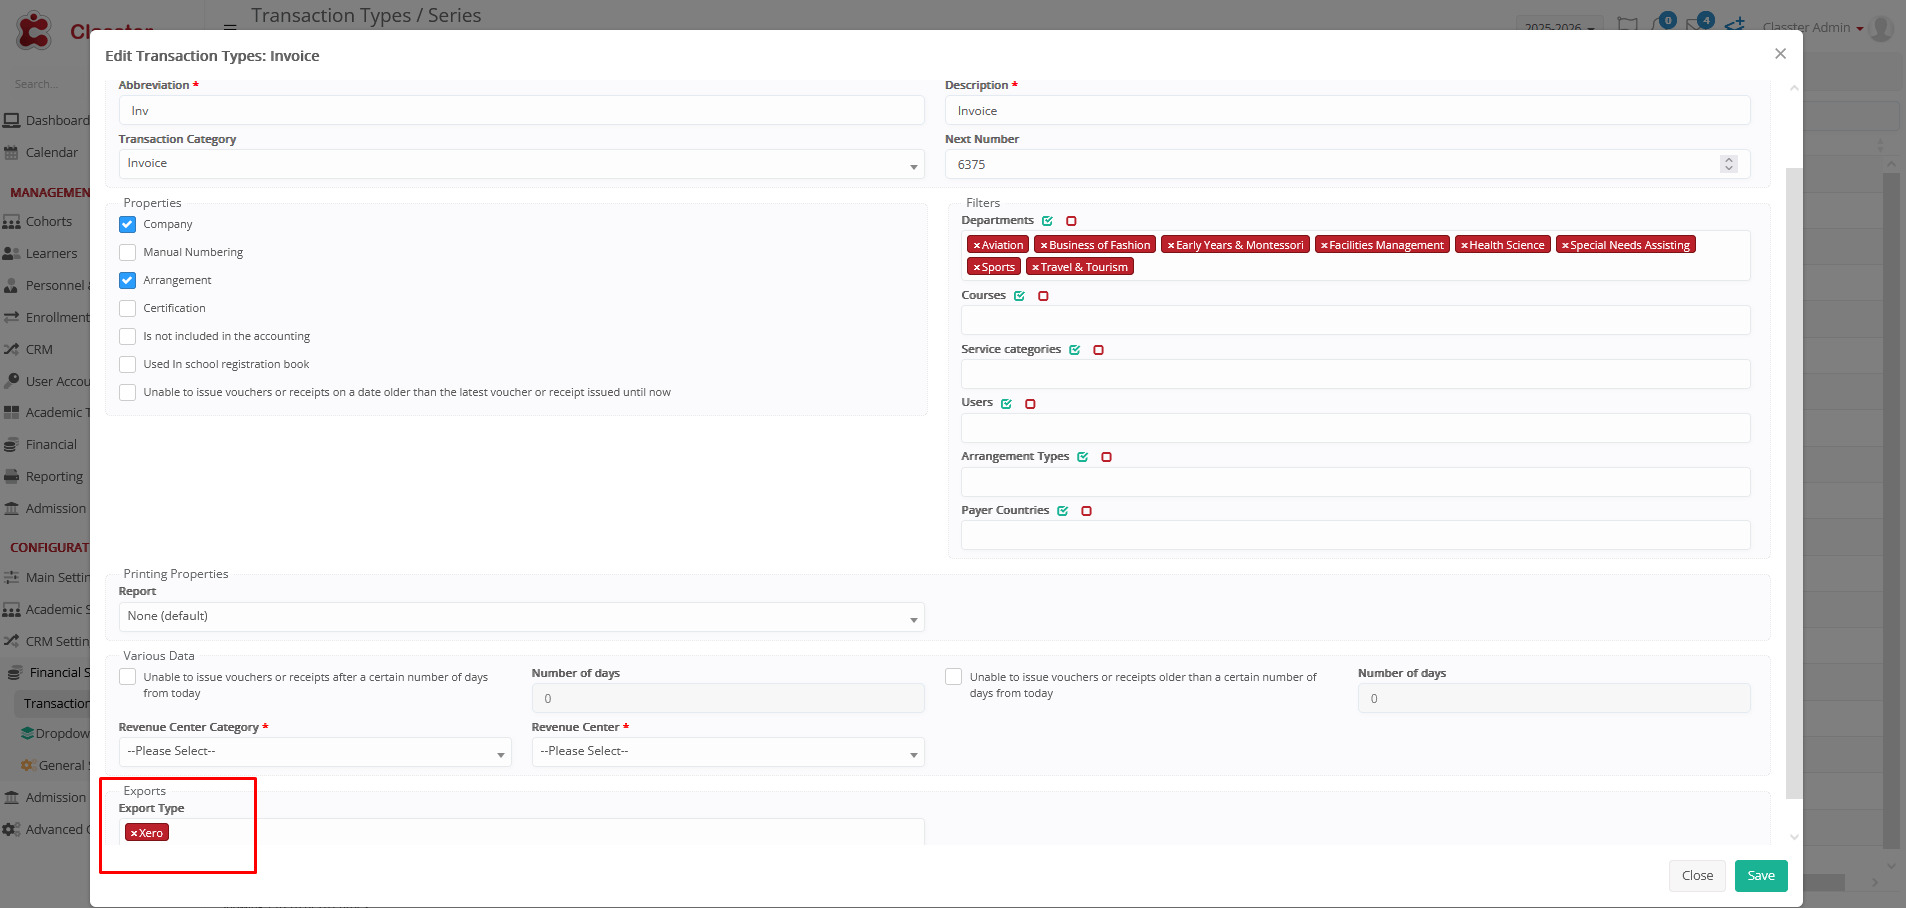
❗ Important: If the Document Series is not marked as exportable to Xero, the documents within that series will not be sent.
Set Accounts
The Default Bank Account and Default Sales Account are sourced from Xero:
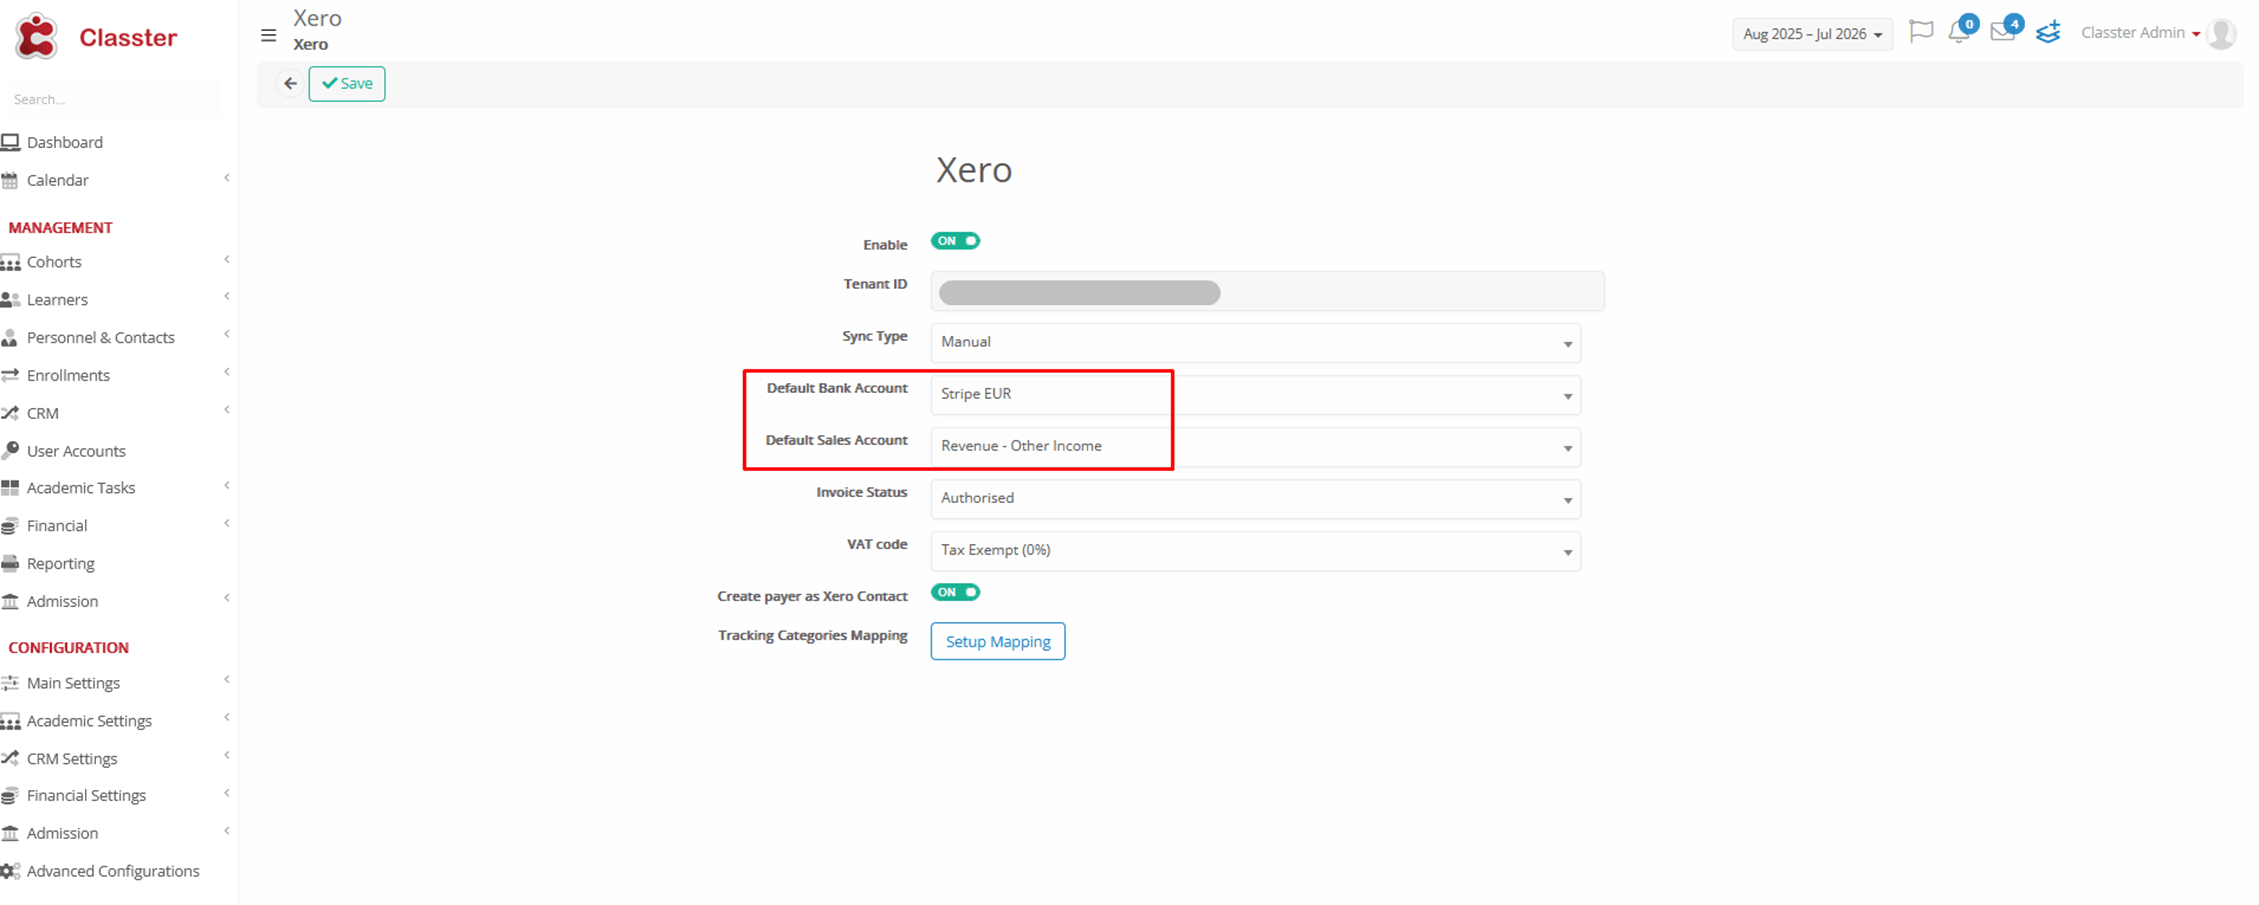
- Default Bank Account: Used for creating invoices.
- Default Sales Account: Used for creating payments.
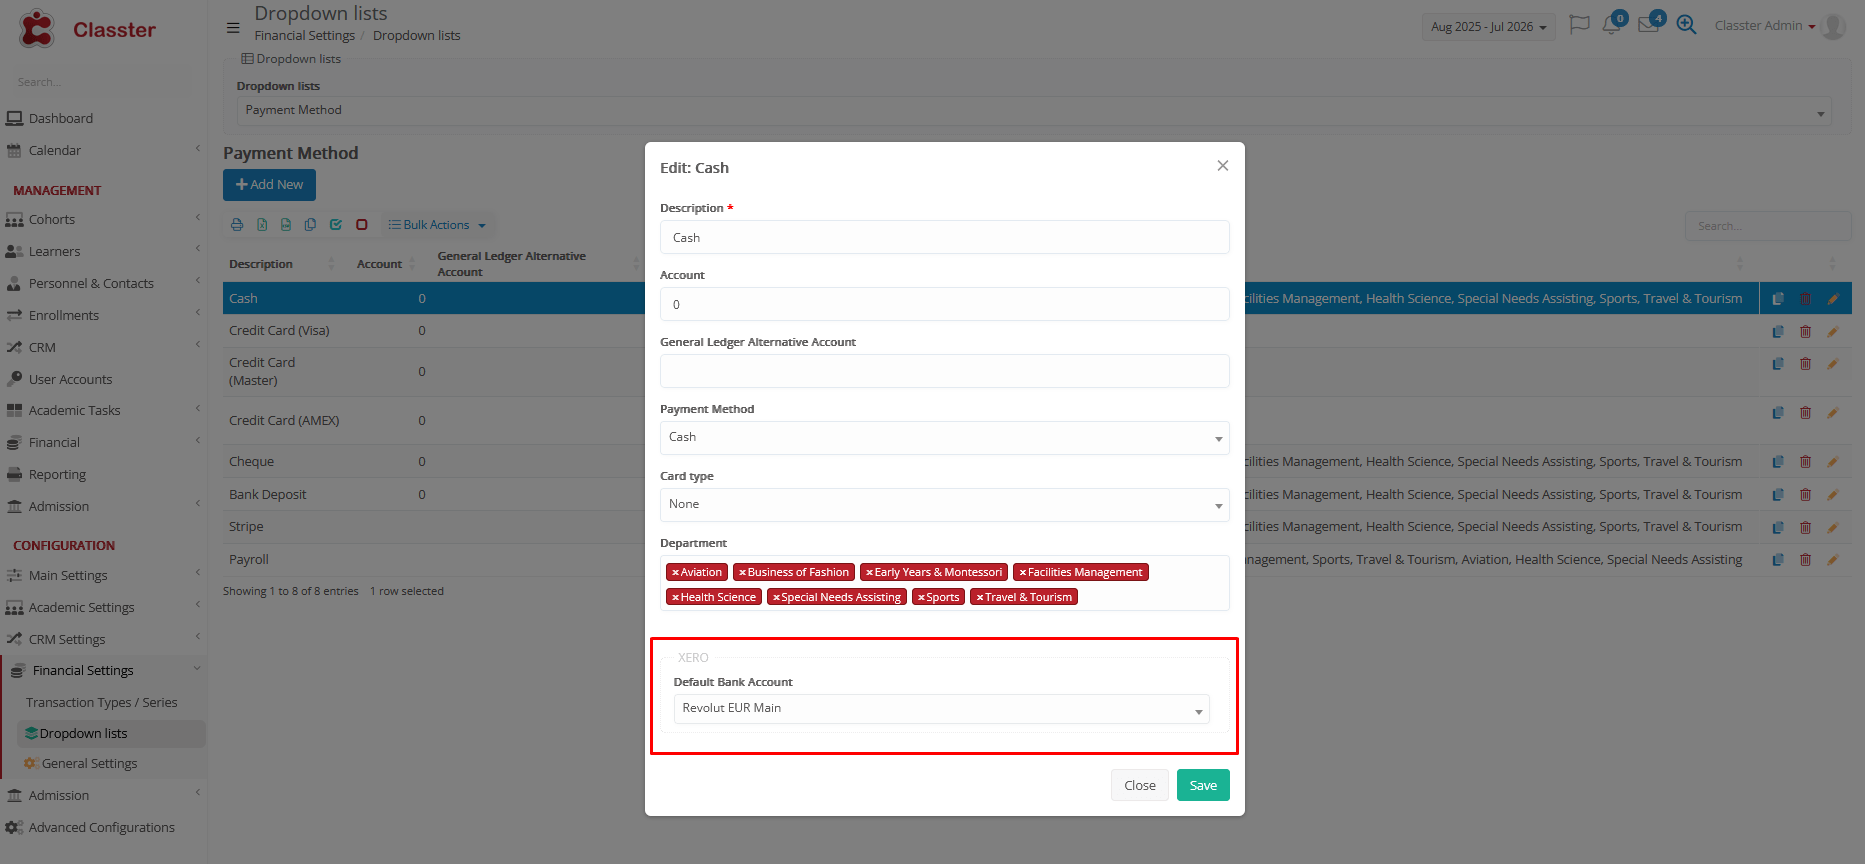
Important: If no default bank account is set per payment method, Classter will fall back to using the default bank account configured in the integration settings.
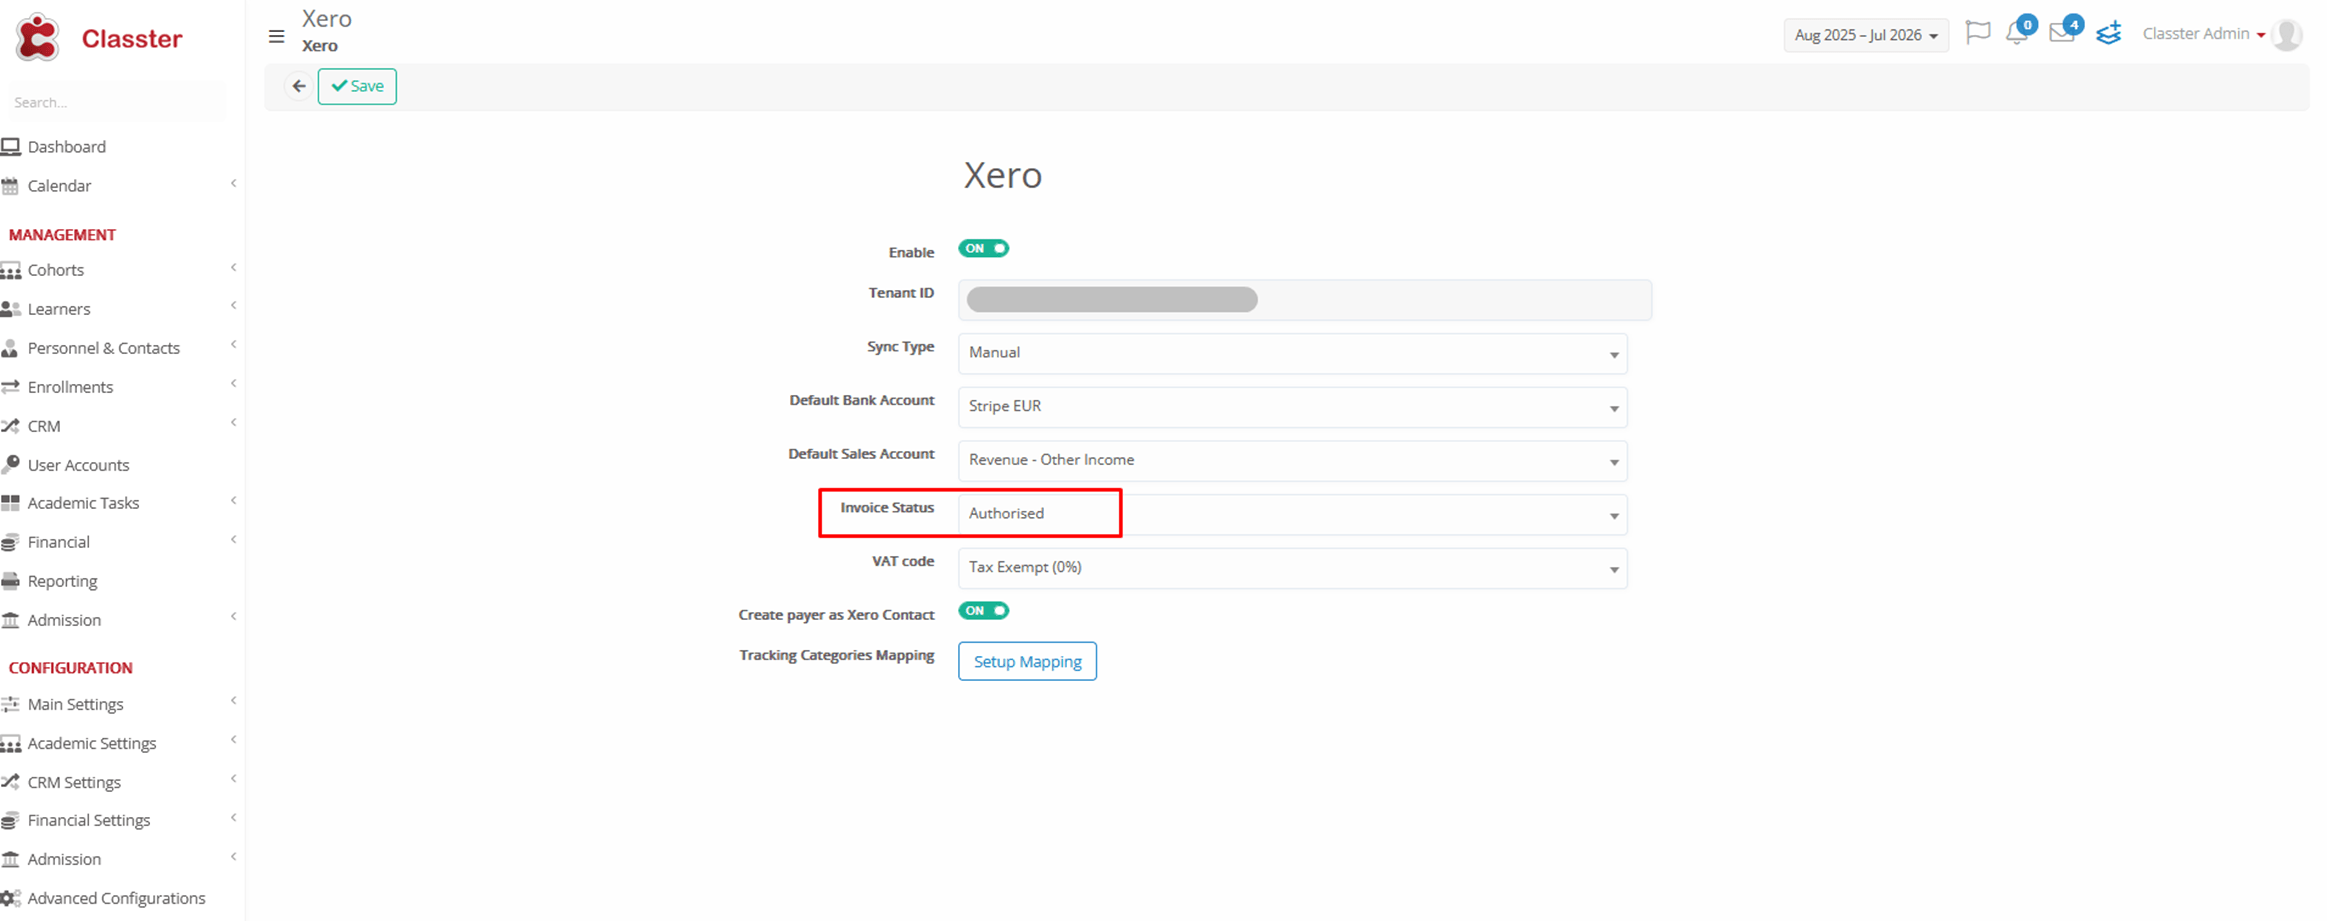
Configure Invoice Settings
Set up the following for exporting invoices:
- Invoice Status: Select the status (Draft, Submitted, Authorized) with which invoices will be created in Xero.
IMPORTANT: If the transaction is an Invoice on Credit, it must be authorized before it can be exported to Xero, as it handles both payment and receipt.
Configuring VAT Code
- VAT Code: Select the appropriate VAT code for your institution’s transactions.
The available choices will be imported from Xero, ensuring consistency across both platforms.
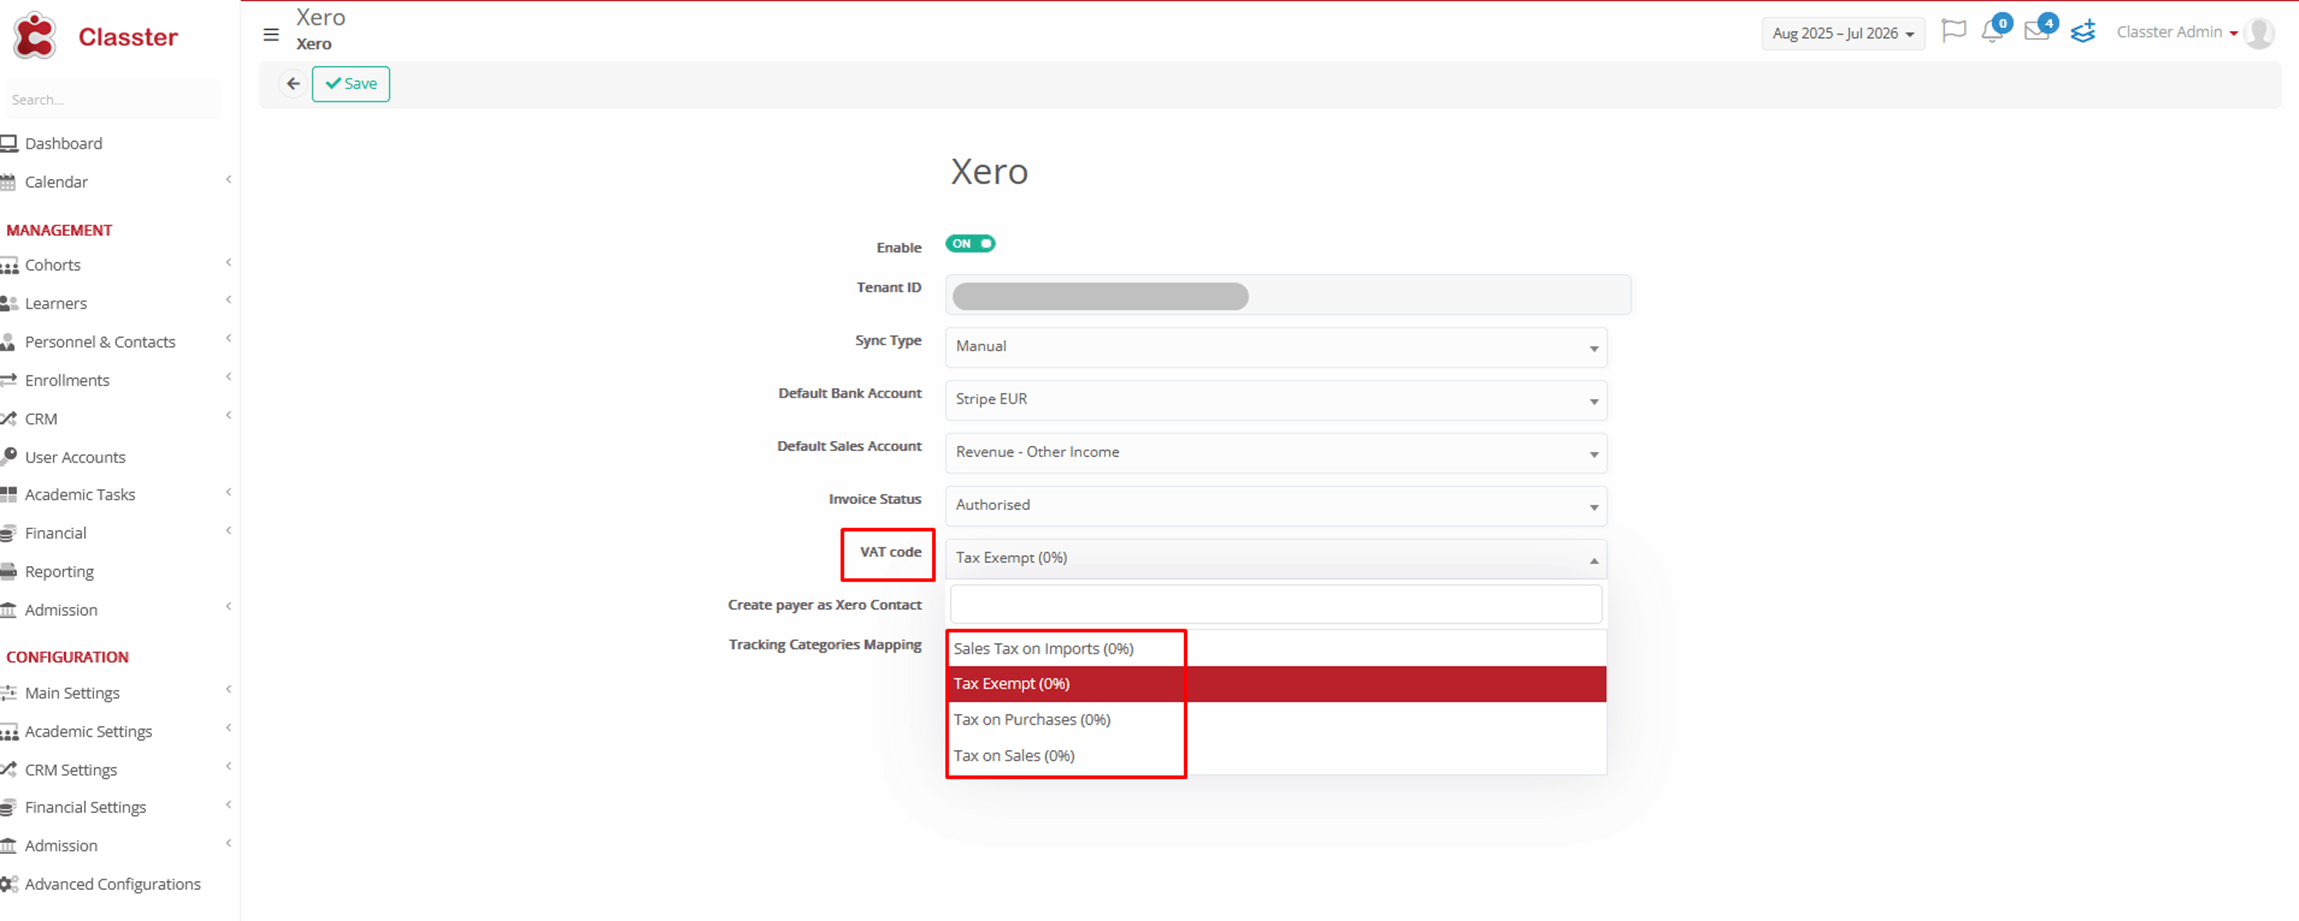
📌 Note: If there is a special need for someone to receive a different VAT percentage, you can configure it by creating a Tax Category, a Tax Code, and a new Tax Percentage to be used in specific cases.

To enable this:
- Go to: Financial Settings > General Settings > Price Lists, Fees & Taxes > Fees & Taxes. Enable the Use Tax setting.
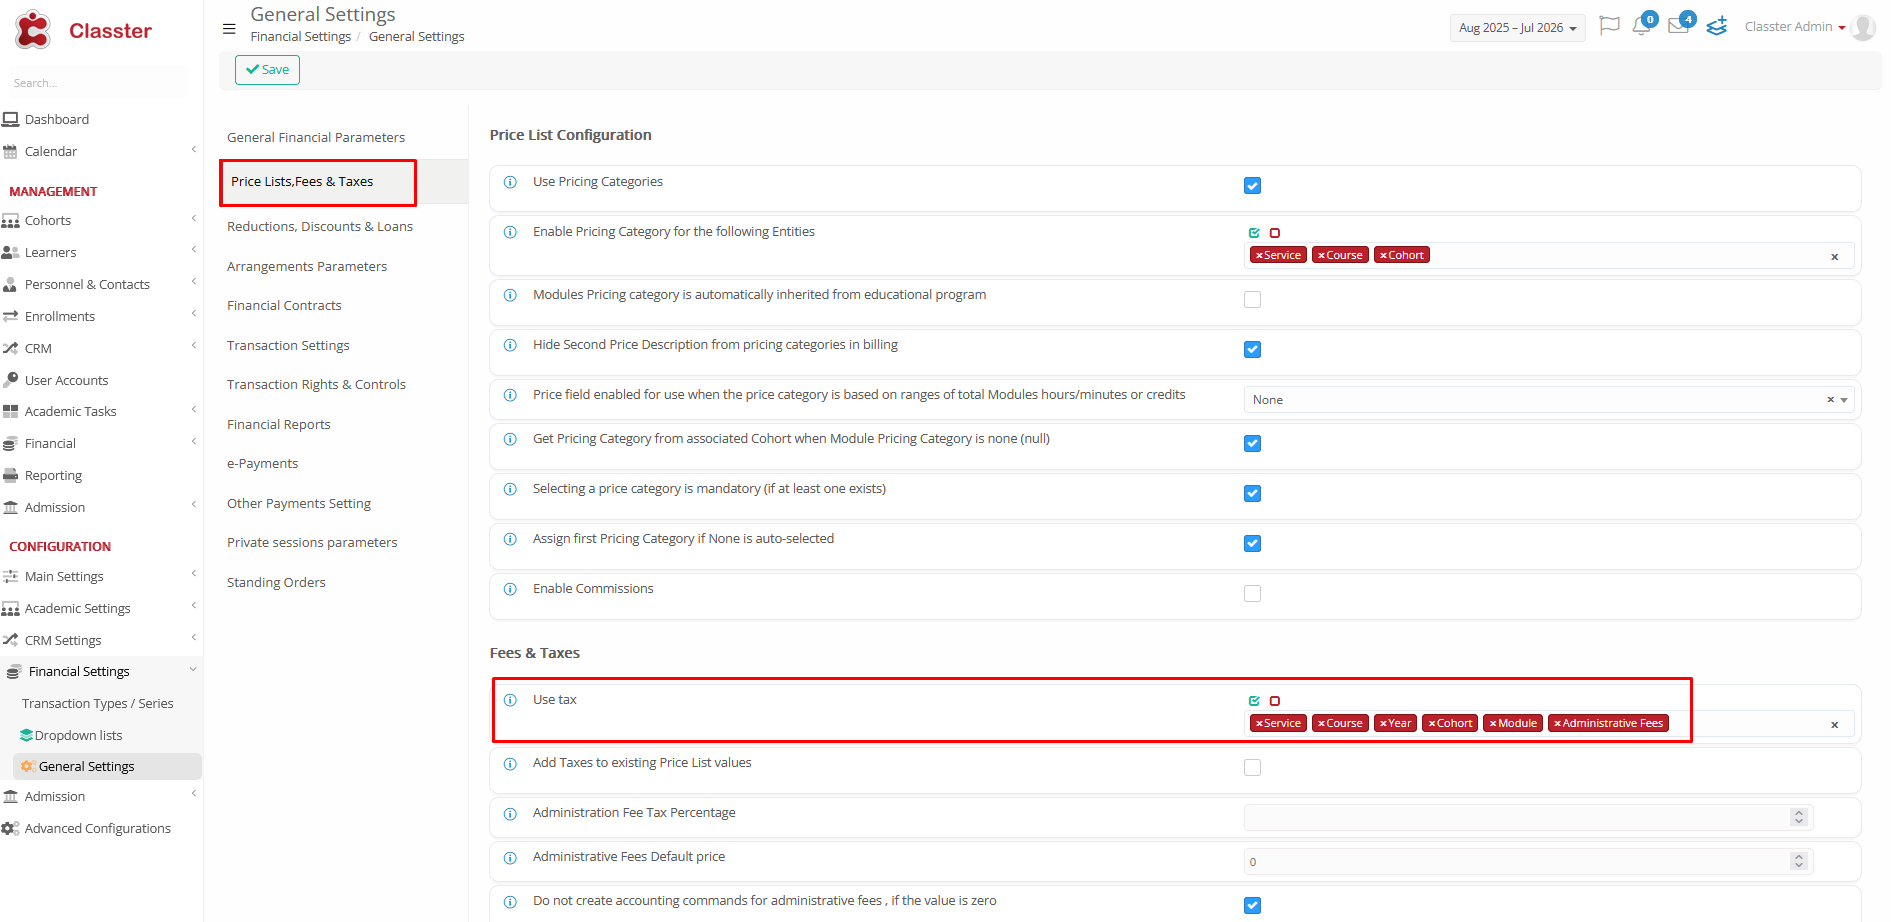
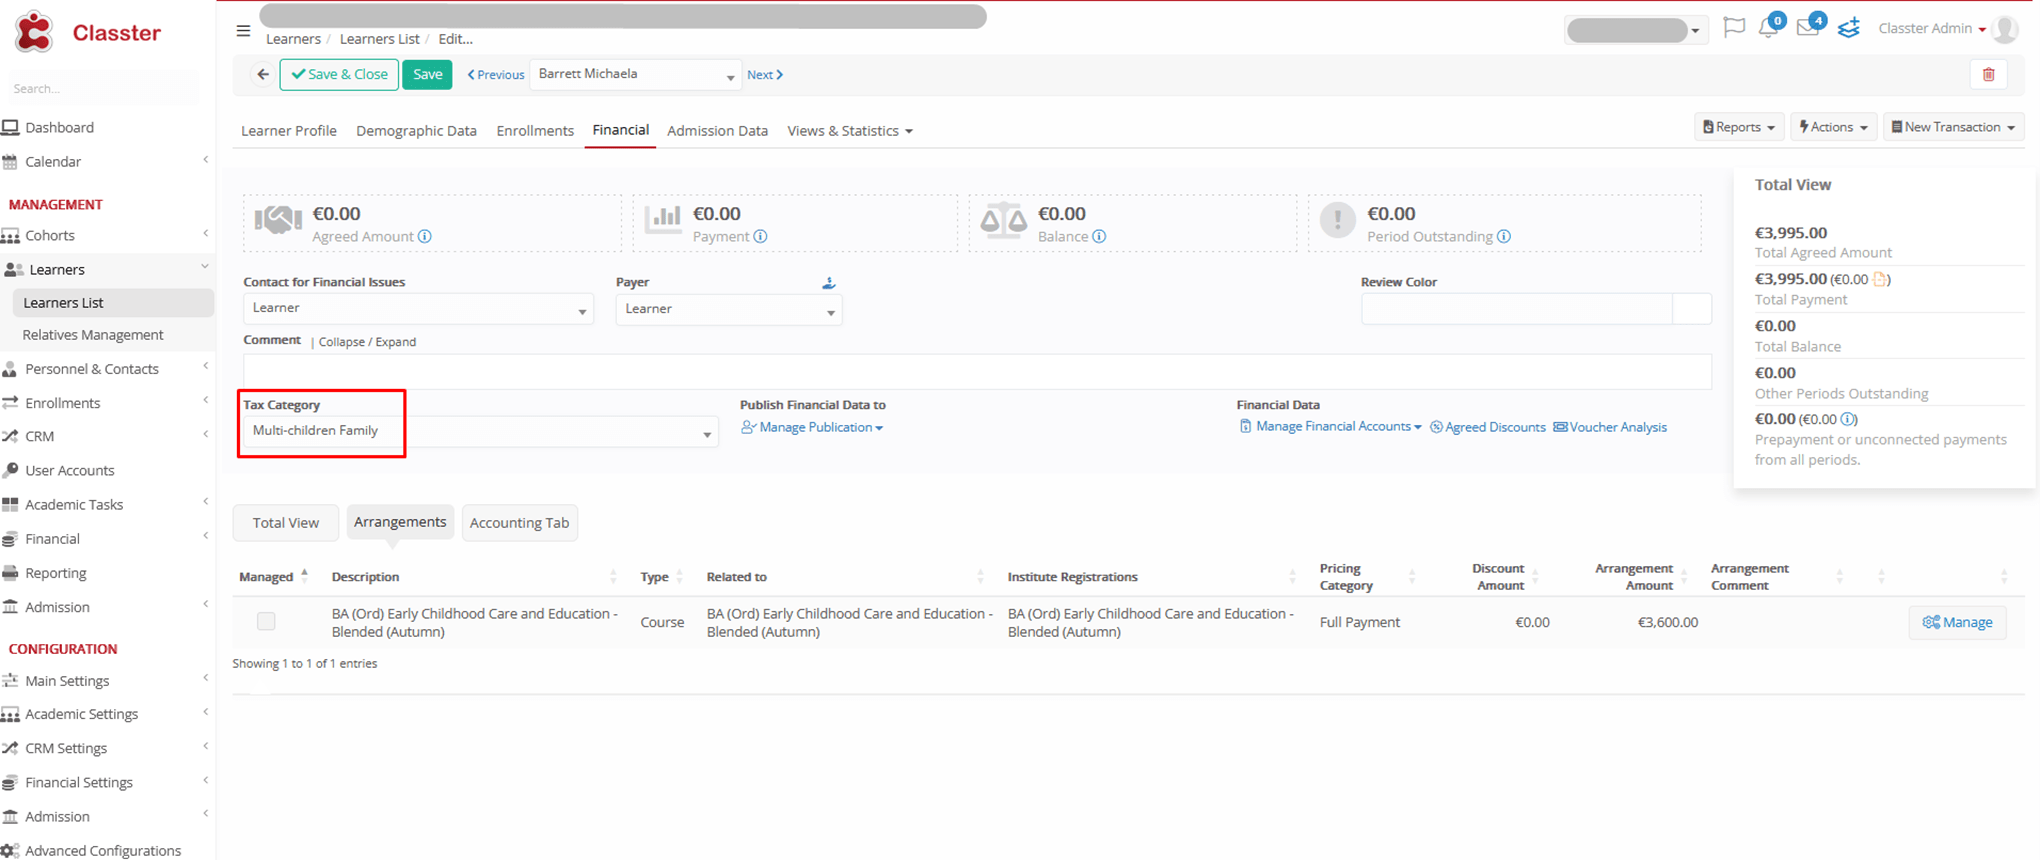
- This will allow you to select the custom VAT rate for specific students under their Financial Tab.
Xero Contacts (Optional)
Activate the option to automatically create and link payers as Xero Contacts:
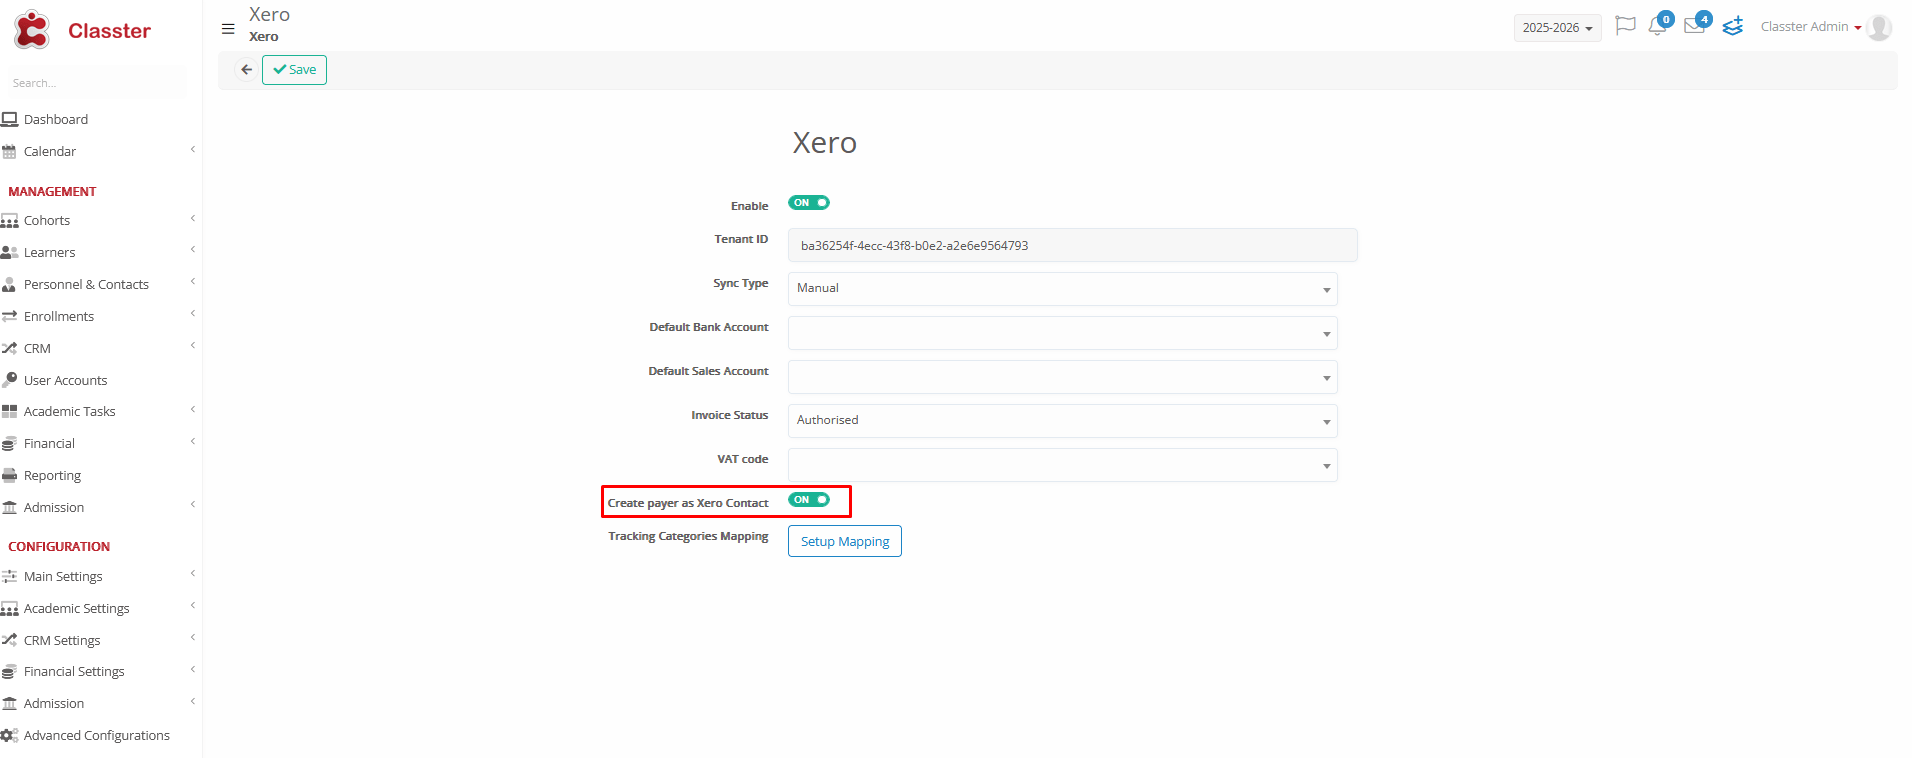
- Create Payer as Xero Contact: The payer contacts in Classter (parents, students, agents) are automatically synced with Xero. If a payer (parent, student, or agent) does not already exist in Xero, they will be created as a new Xero contact during the export process.
Tracking Categories Monitoring
If using Tracking Categories in Xero, enable detailed reporting by mapping them from Classter:
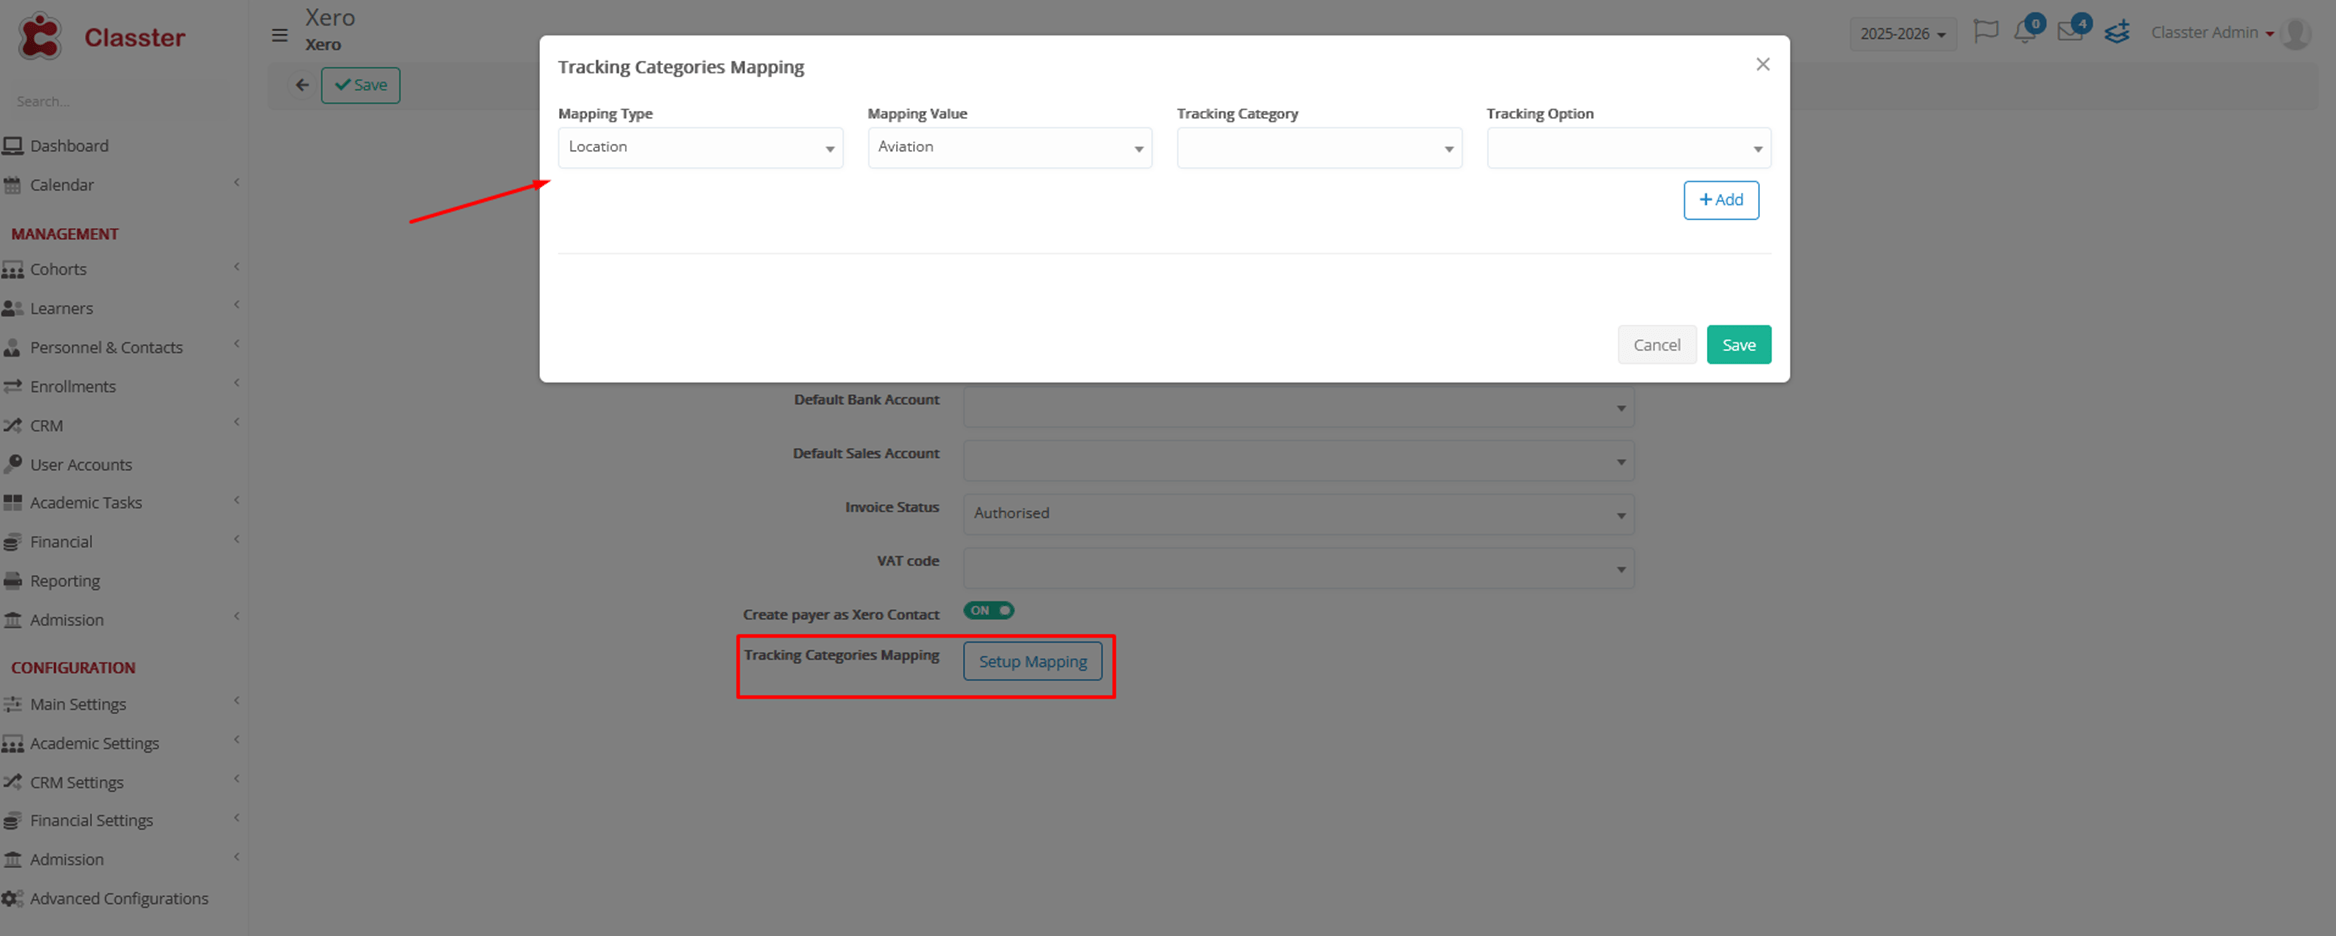
Tracking Category Mapping:
For example, set the mapping as follows > Location in Classter → Region in Xero
Product Mapping via External ID
This is a critical step to ensure that products are correctly linked to Xero items.
For each product/service (e.g., tuition fees, fees):
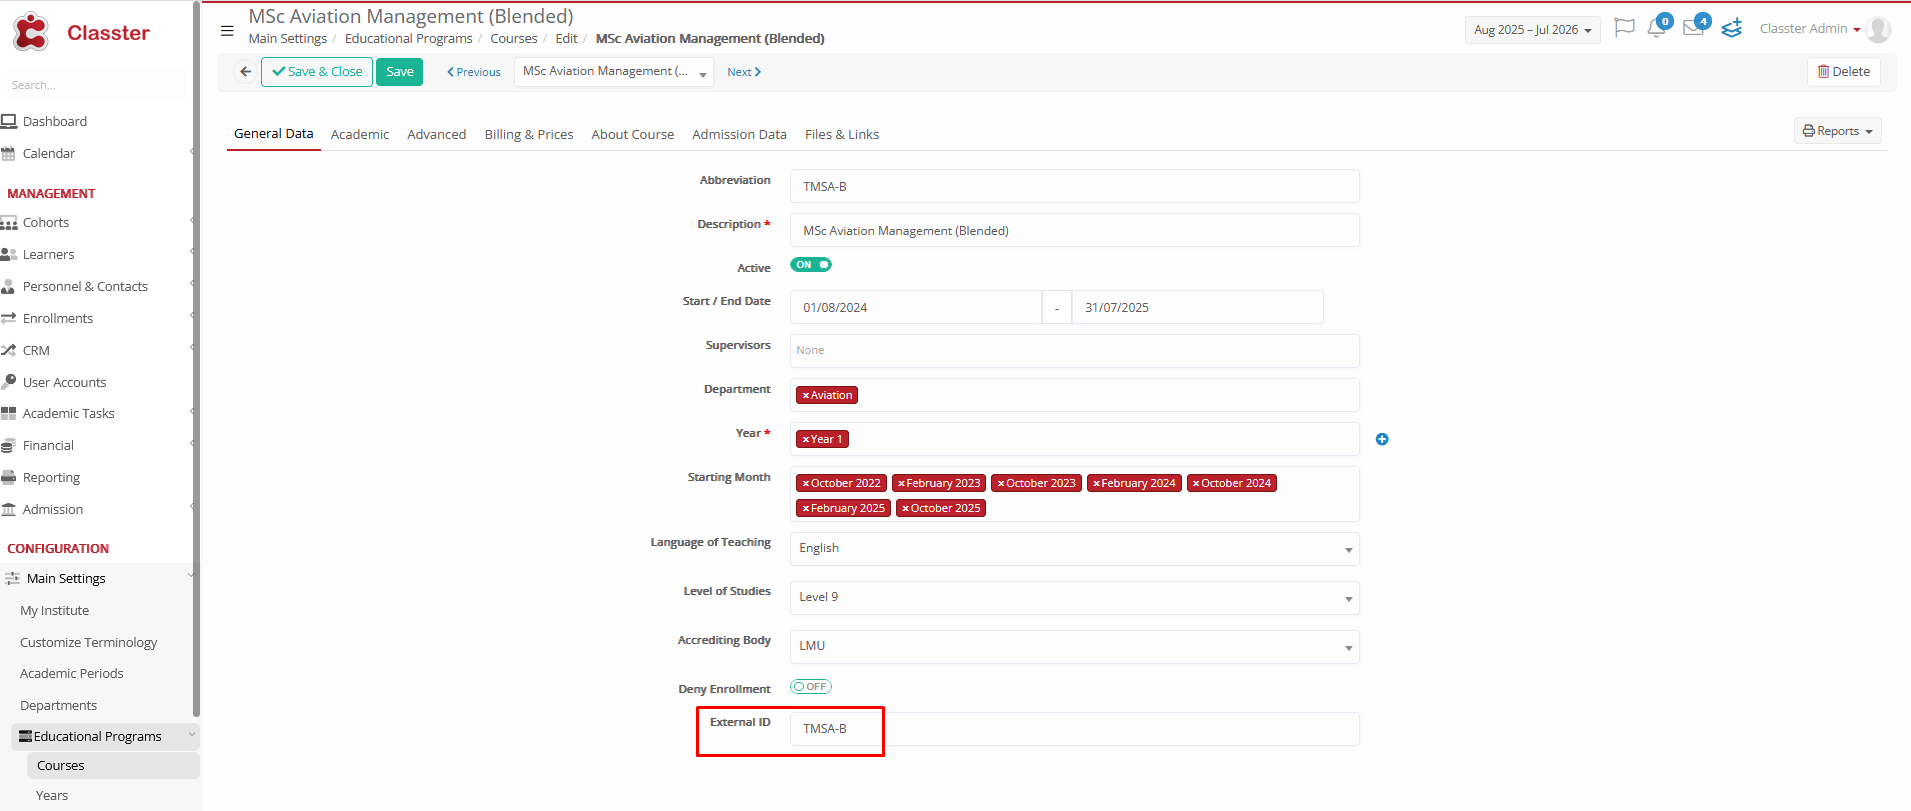
- Go to the corresponding entity in Classter (e.g., Grade, Stream, etc.).
- In the External ID field, enter the Item Code from Xero.
🔄 Note: If this step is skipped, the export will still occur, but the products will not be linked to Xero items. The invoice will only include amounts without corresponding items.
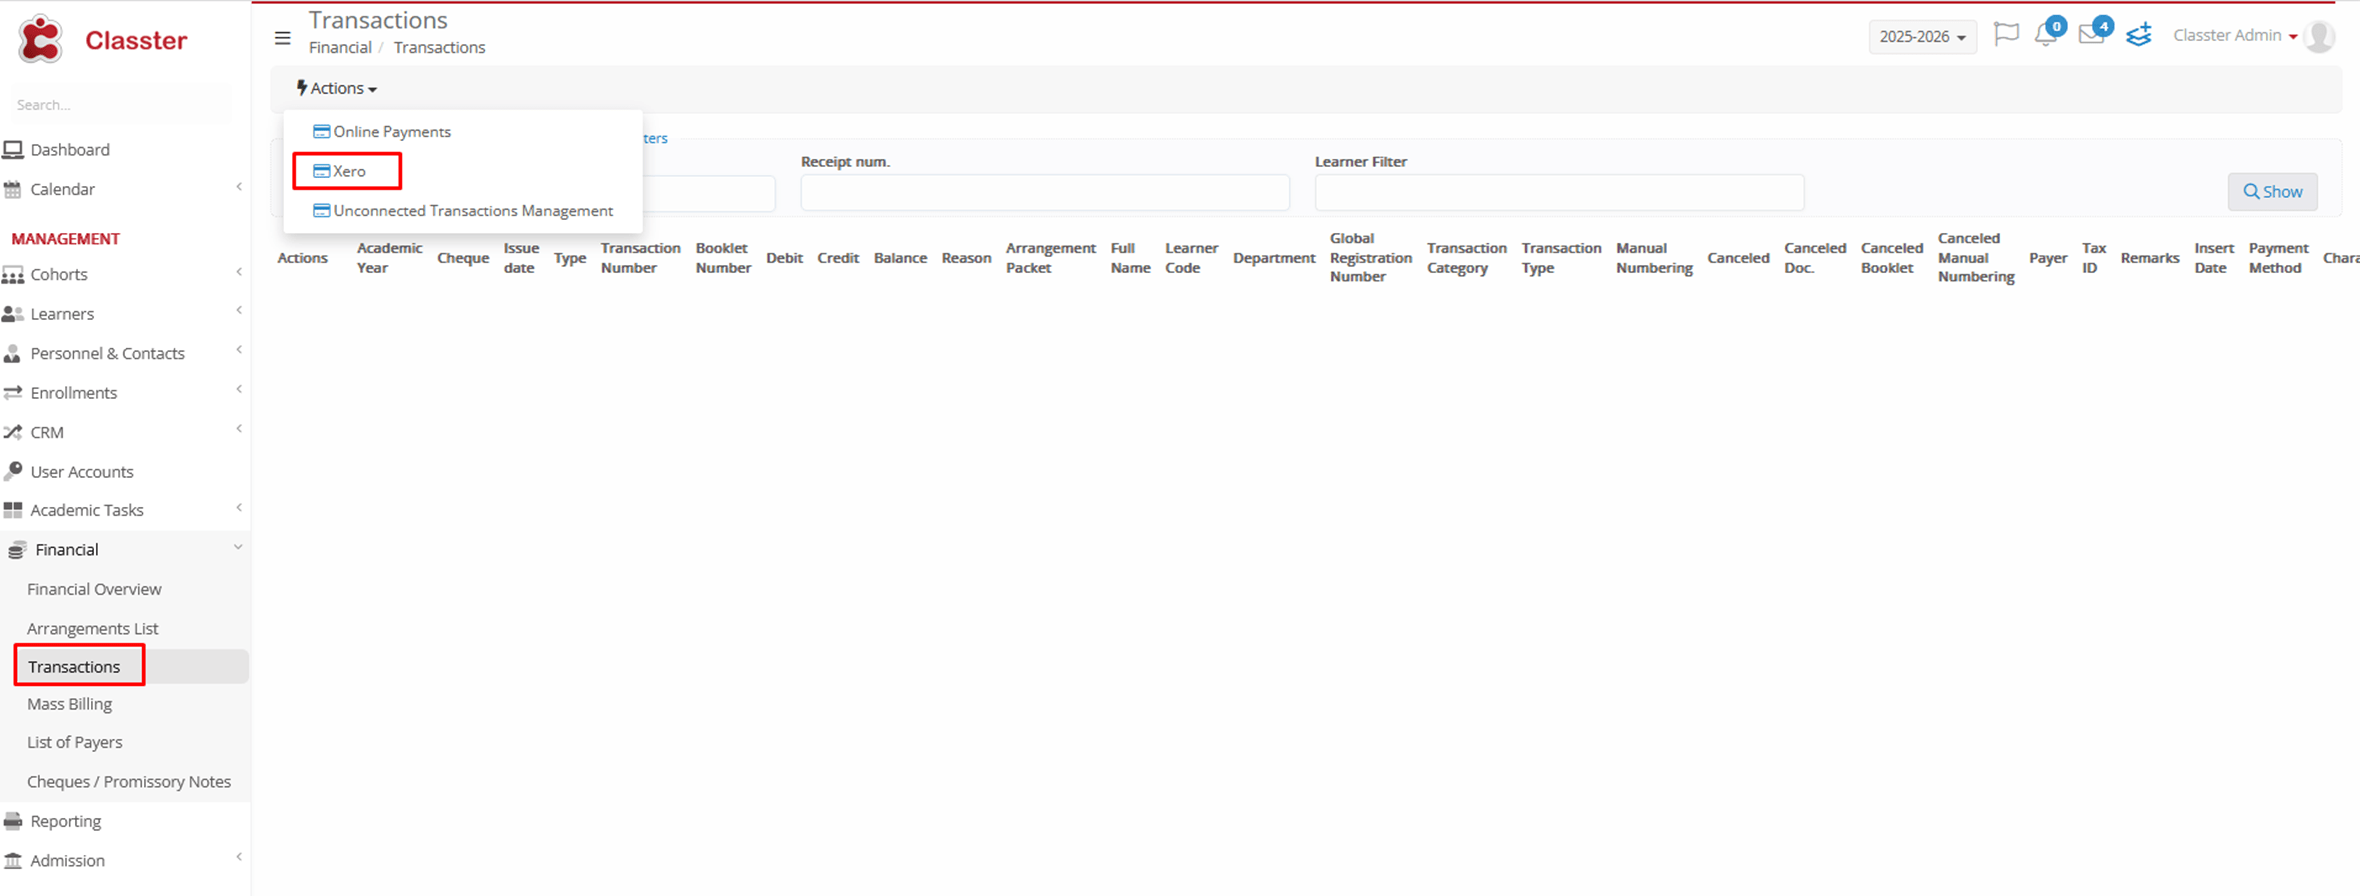
Back Office User Actions for Transactions
A back office user can manage transactions and interact with the Xero integration by performing the following actions:
- Navigate to Financial Transactions:
Go to Financial > Transactions in Classter.
- Select Actions
Under the Actions dropdown, select Xero to view and manage transactions related to Xero.
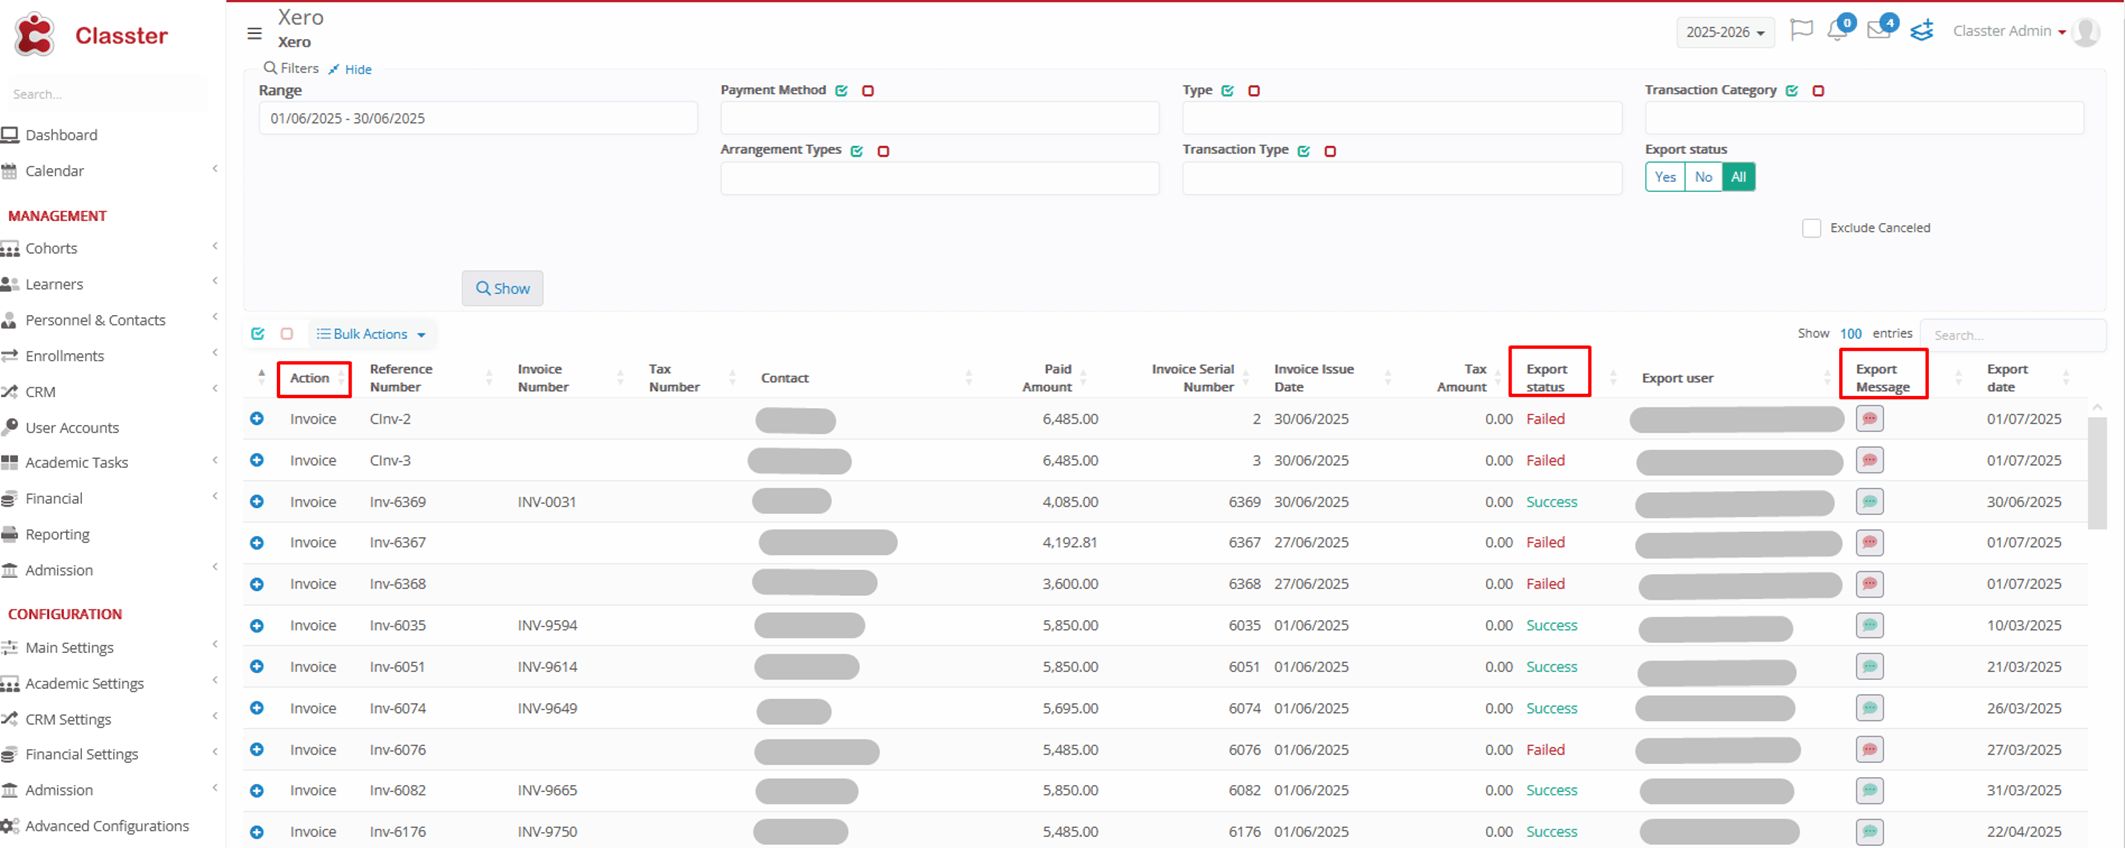
- Apply Filters:
Apply filters to narrow down the list of transactions to view only those related to Xero.
- View All Related Transactions:
After applying the filters, the system will display all transactions synced or ready to be synced with Xero.
- Transaction Details:
For each transaction, you can view:
- Transaction Type (e.g., Invoice, Payment Receipt, etc.)
- Status (e.g., Successful, Failed)
- Export Message: If the transaction fails to export, an error message will appear to help you understand the issue. Example:
- “A validation exception occurred – Account code or ID must be specified.”
Xero Integration Summary
Classter’s integration with Xero reduces manual data entry, enhances financial accuracy, and optimizes accounting workflows. By connecting Classter with Xero:
- Financial transactions (invoices, payments) are synchronized efficiently.
- Administrators have granular control over which documents are exported.
- Payers are automatically created as Xero contacts, ensuring proper data linkage.
This integration simplifies the financial management process, providing a seamless way to synchronize financial data between Classter and Xero.