With Classter’s Admission module, there are more than one ways to ask the applicant’s specific information. When it comes to previous education or work experience, though, there is often the need of allowing the applicant to insert multiple answers for the same question and not all applicants will submit the same number of answers. For example, we might have an applicant speaking two languages, another speaking five and so on. In these cases, there are two ways we can handle it in Classter; either by using admission data documents or by the qualifications tab during the admission process.
Admission Data
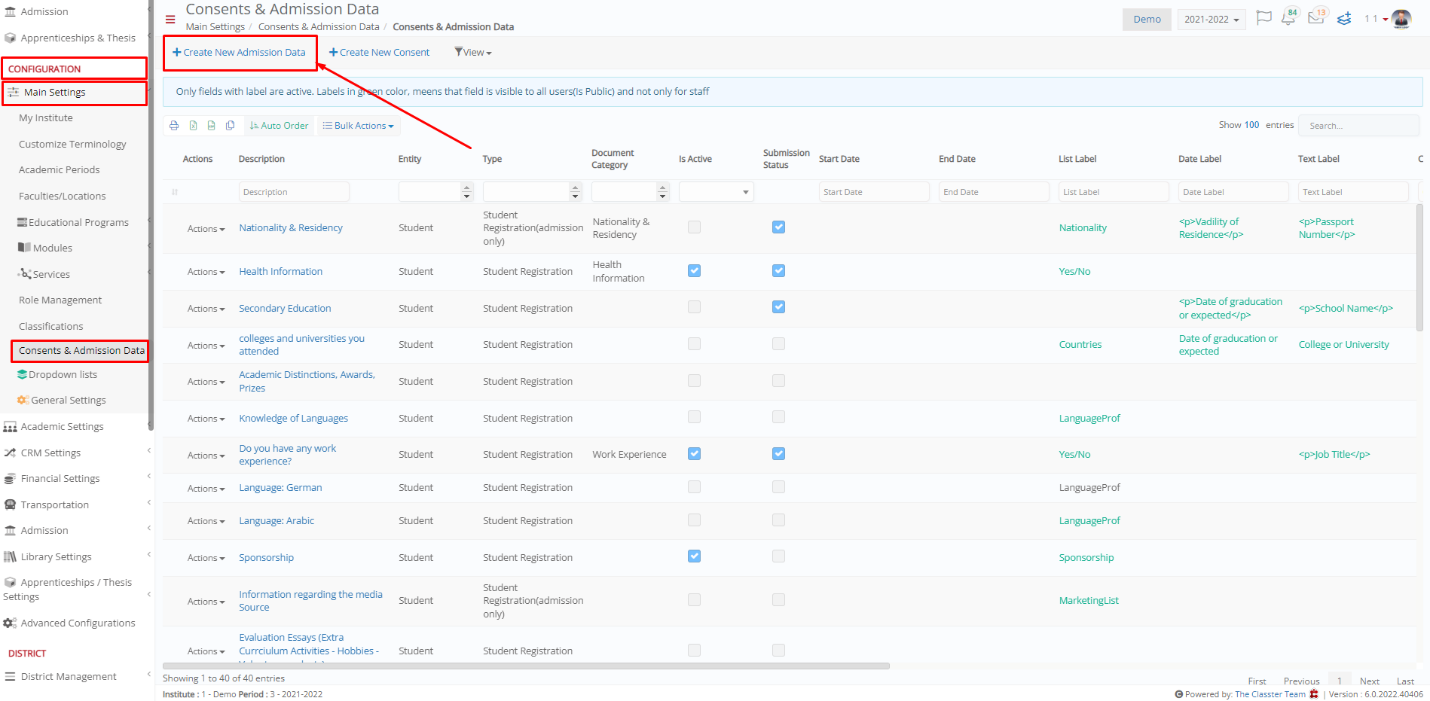
Admission data is a custom way to ask from the end user information based on your questions. You can find the admission data in the CONFIGURATION > Main Settings > Consents and Admission Data menu. (Figure 1)
 Figure 1
Note: Find out more on how to configure the admission data documents in How Can I Add Admissions Data (Files & Info) in the Application Process?.
What is important to note here though is that when creating/editing an admission data document, you can enable the Allow Multiple Entries radio button. (Figure 2)
 Figure 2
The applicants will then have the option to click on the Add New button and add as many entries as it suits them. (Figure 3 & 4)
 Figure 3
 Figure 4
So, with the button  the user can add multiple language fields. The same can be repeated with the work experience or with similar admission data.
2. Qualifications
The qualifications tab of the admission process provides the functionality of allowing the applicant to insert multiple entries into the system, either by choosing from a predefined list, or by free entries. (Figure 5)
 Figure 5
Qualifications can be configured in a few different ways, some more complex than others, but can be used in this instance, offering a different work process, especially for back-office employees.
Note: For more information on how to configure and use qualifications in the admission process, take a look at our How can I configure the qualification data tab for the admission process? Manual.
To enable the specific tab in the admission process, go to the menu CONFIGURATION > Admission > Admission Settings and select the second tab “Signup & Applicants Portal”. (Figure 6)

Figure 6
In the Personal Data Tabs to be visible in Admissions Portal setting, select the Qualifications tab to be visible in Admissions Portal (Figure 7)
 Figure 7
Pros of using Admission Data Documents: Admission Data Documents are much more customizable and easy to use. The combination of different types of fields allows the institute to get the exact information required from the applicant in any format.
Pros of using Qualifications: Qualifications, although a bit harder to configure, provide additional functionalities into the system for checking the validity of the information submitted by the applicants. The entries format is strict and can protect the institute from false or irrelevant entries from the applicants.
Find more or post your questions on our Facebook Community Page. Also, watch our how-to videos on our YouTube channel.


