

Introduction
This manual’s purpose is to help you set up a connection between your Classter platform and the Moodle LMS, with the goal of integrating the two systems for greater functionality for your system.
How to & Pre-requirements for Classter – Moodle Integration (Full Sync)
It is important to recognize and consider what works best and what are the prerequisites for integration between Classter and Moodle.
Things to know and remember.
- Since Classter doesn’t necessitate an email for a student’s profile while Moodle does, synchronization between the two platforms requires a workaround. If a student on Classter doesn’t have an email, Moodle will automatically generate one for that student to ensure proper synchronization.
- For the sync to work properly, every Student and Teacher on Classter must have the same email as the corresponding one at Moodle.
- For a student to be synced or created on Moodle, the student must first be enrolled at least in one Subject and the corresponding Subject Status must have the Online Courses field enabled. (See Figure 1,2,3).
- If you want to synchronize an already set up Moodle with Classter, you must absolutely contact our support team (support@classter.com).
- Classter recommends using empty Moodle Pages, so you can sync with no duplicate or wrong entities.
- To sync or create Subjects from Classter to Moodle, just assign a Subject to a Teacher and enroll the corresponding Students to it, everything else is automatically handled by Classter.
- Choosing Full Moodle Integration will automatically sync your Classter data with Moodle every time you make changes (for example changing Student Enrollments), if you choose Enable Moodle Manual Links, you will have to do it manually for each Subject. (See Figure 4)
- The correct order of syncing is Teachers first, and then Students.
- If for any reason you synced Students first, contact our support team to help you clear out! (support@classter.com)
- Tip: Remember to include your Moodle Domain name and your Classter Domain name if you contact our support team for a quicker service!
- Currently, there is no feedback when syncing Students or Teachers. To see if the system has synced students or teachers successfully or not, the only way to know for sure is looking at your Moodle Page and determine if everything went correctly!
- Tip: A way of knowing that the data you tried to sync is being synced is when the Pending Changes field changes to Yes and after a set time has changed back to No (more details below). (See Figure 5).
Path: Dashboard –> Management –> Students –> Student List –> Edit Student –> Enrollments tab (Figure 1).

Figure 1
Path: Dashboard –> Configuration –> Main Settings –> Dropdown lists –> Students (Type) – Student Status (List). (Figure 2).
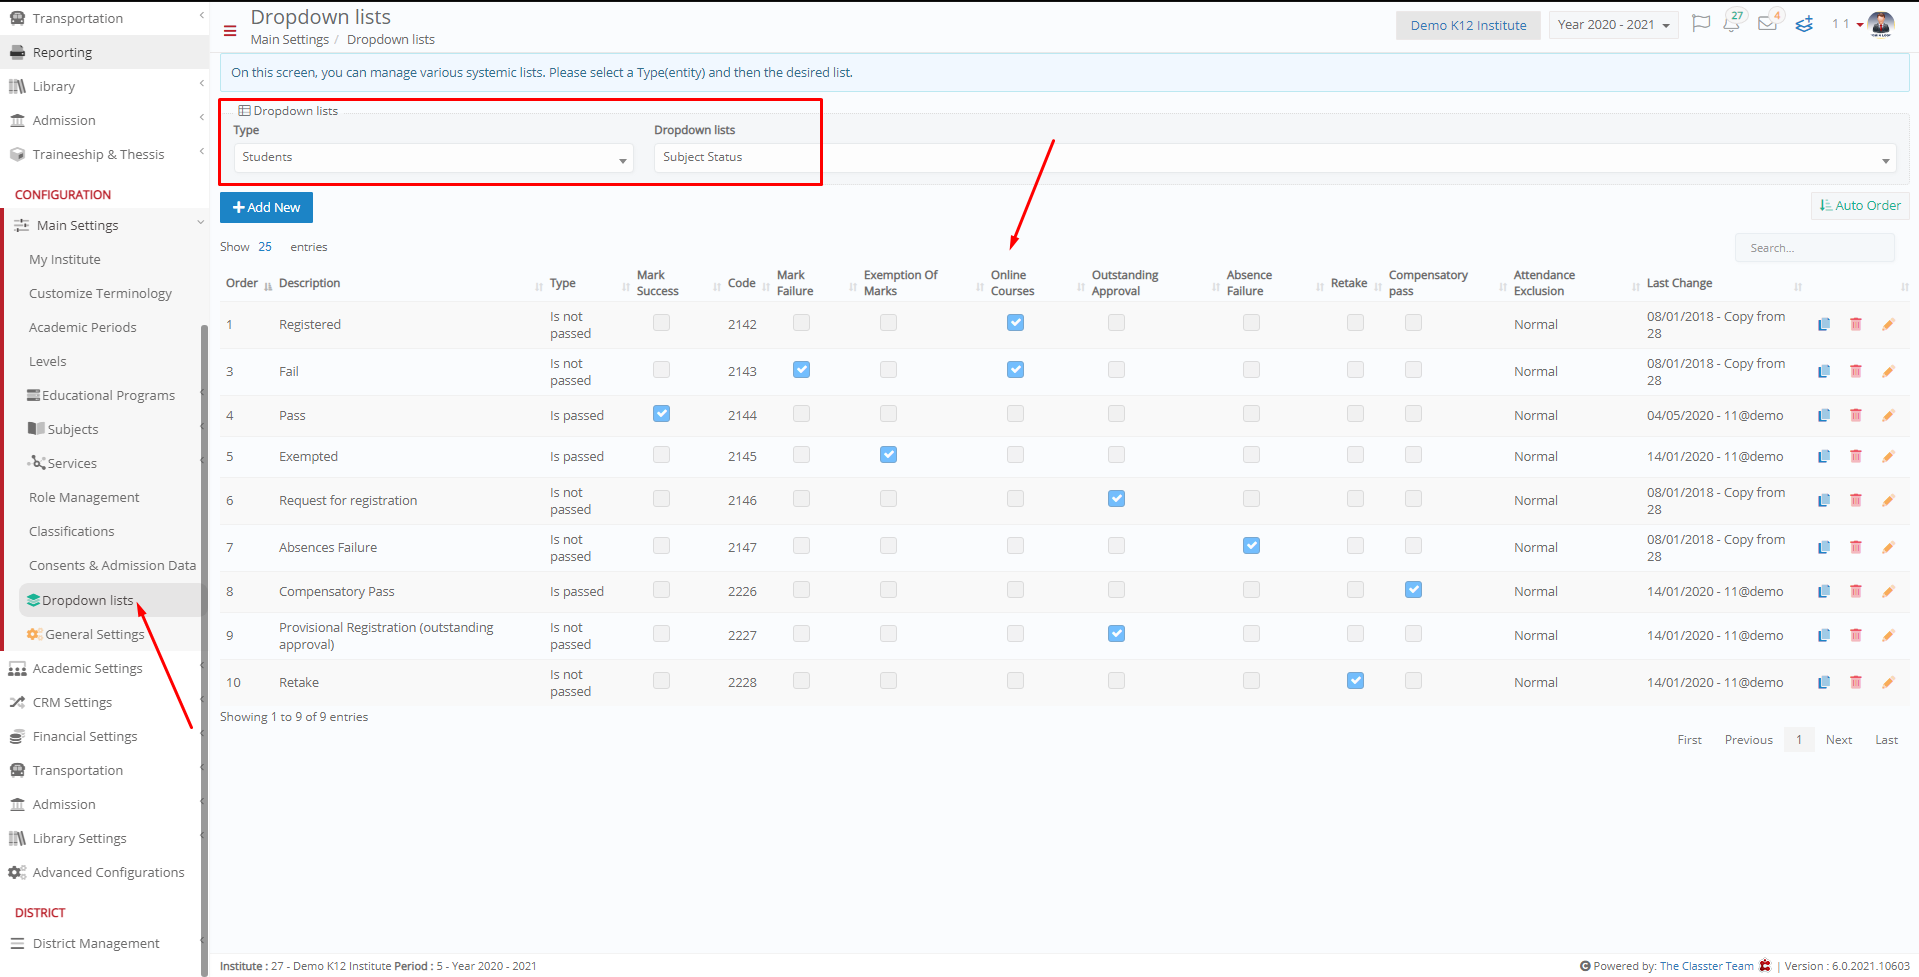
Figure 2
Path: Dashboard –> Configuration –> Main Settings –> Dropdown lists –> Students (Type) – Status (List). (Figure 3).
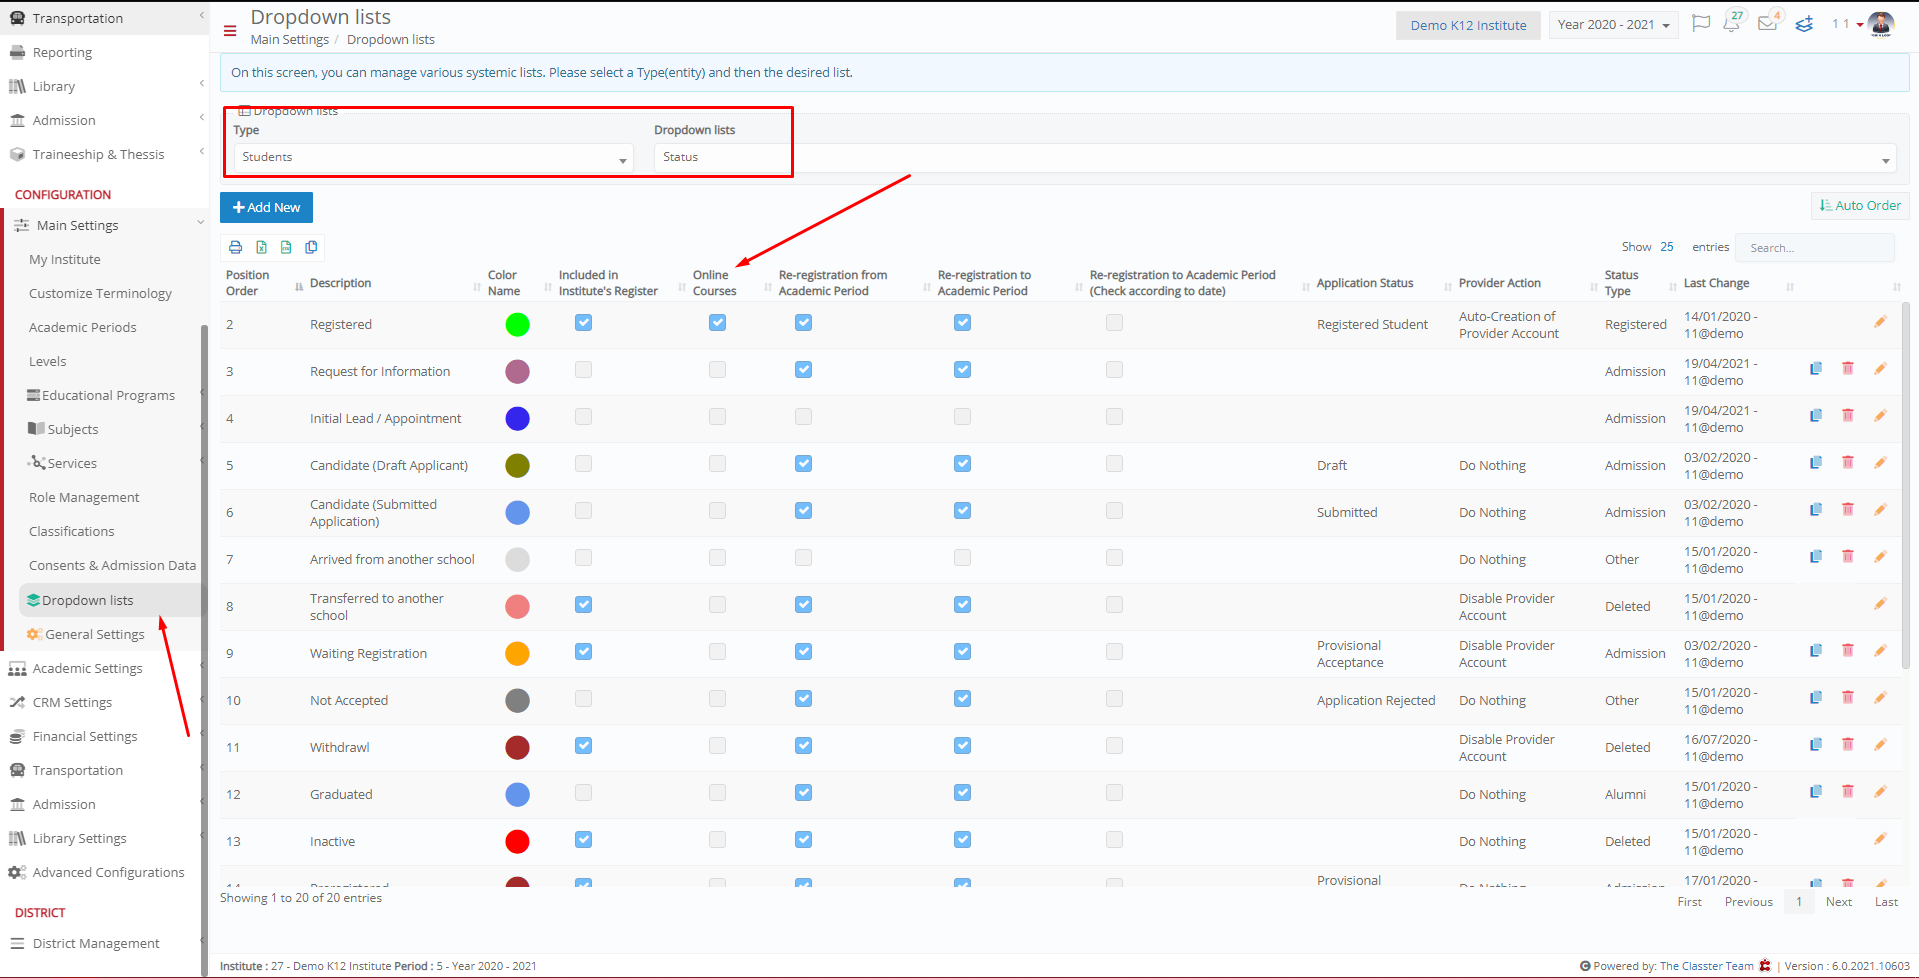
Figure 3
Path: Dashboard –> Configuration –> Advanced Configuration –> Third Party Integration tab –> Moodle (Figure 4).
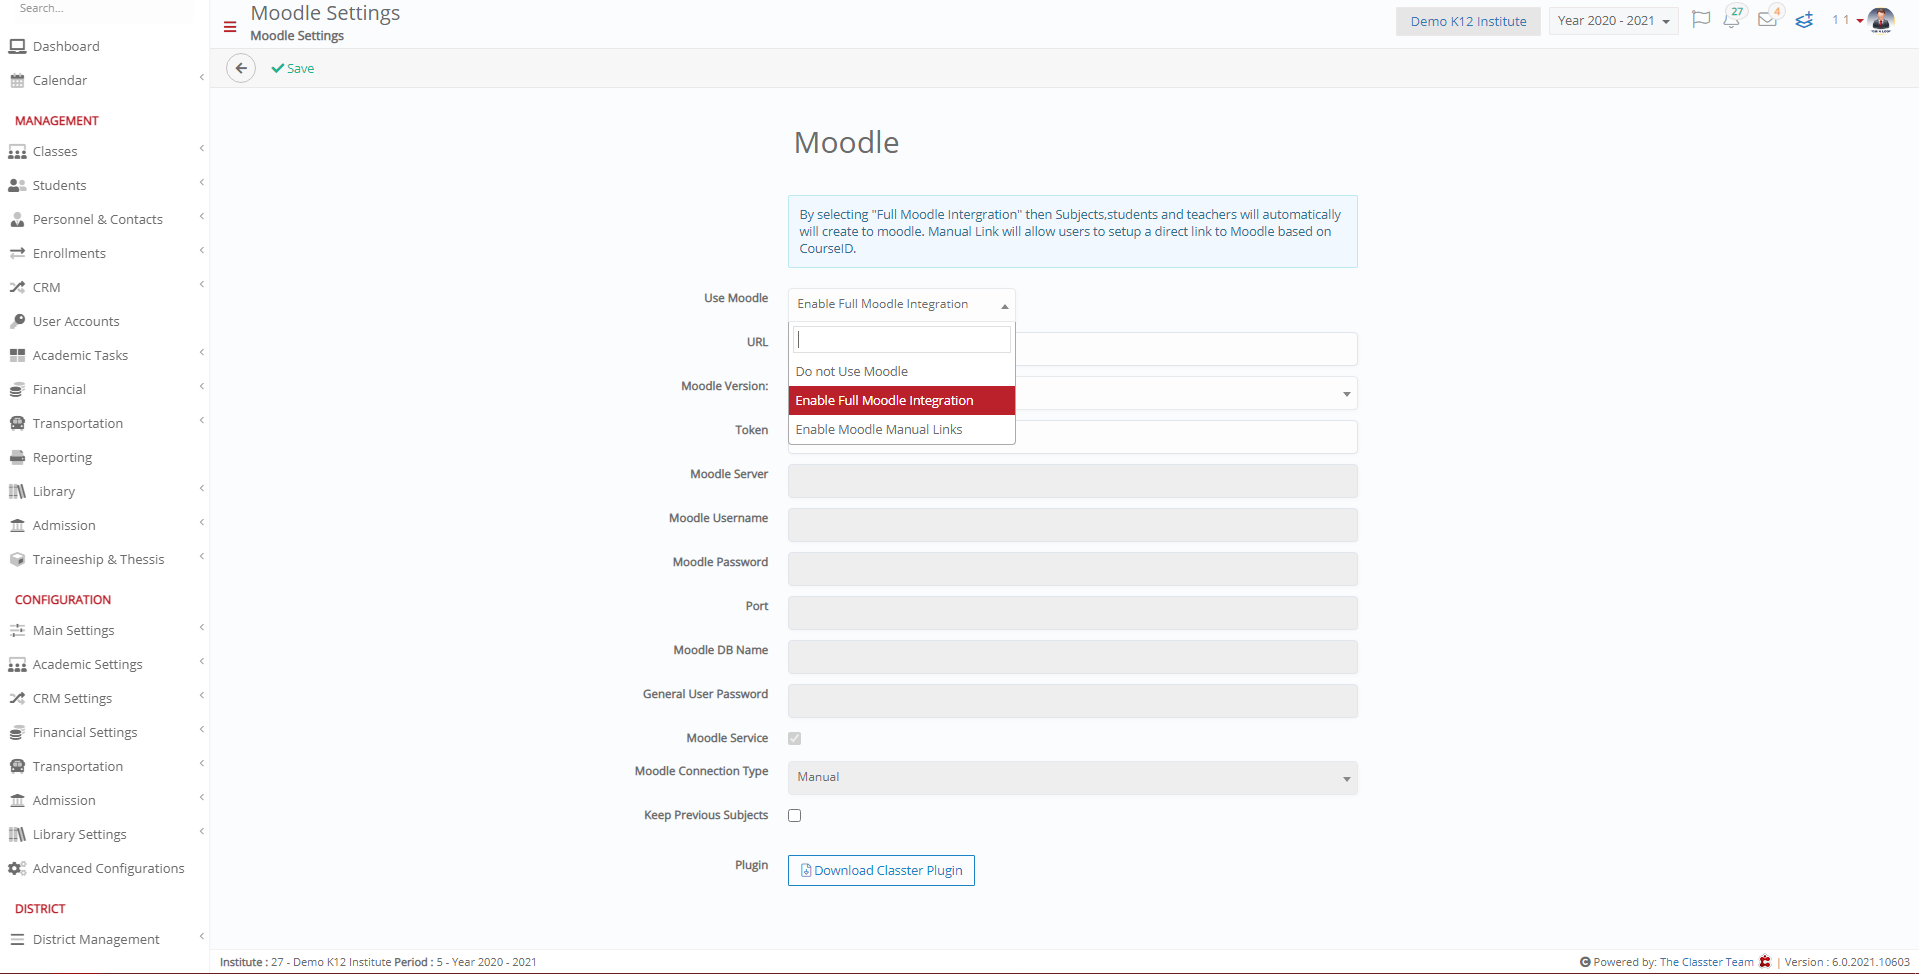
Figure 4
Path: Dashboard –> Management –> User Accounts (Figure 5).
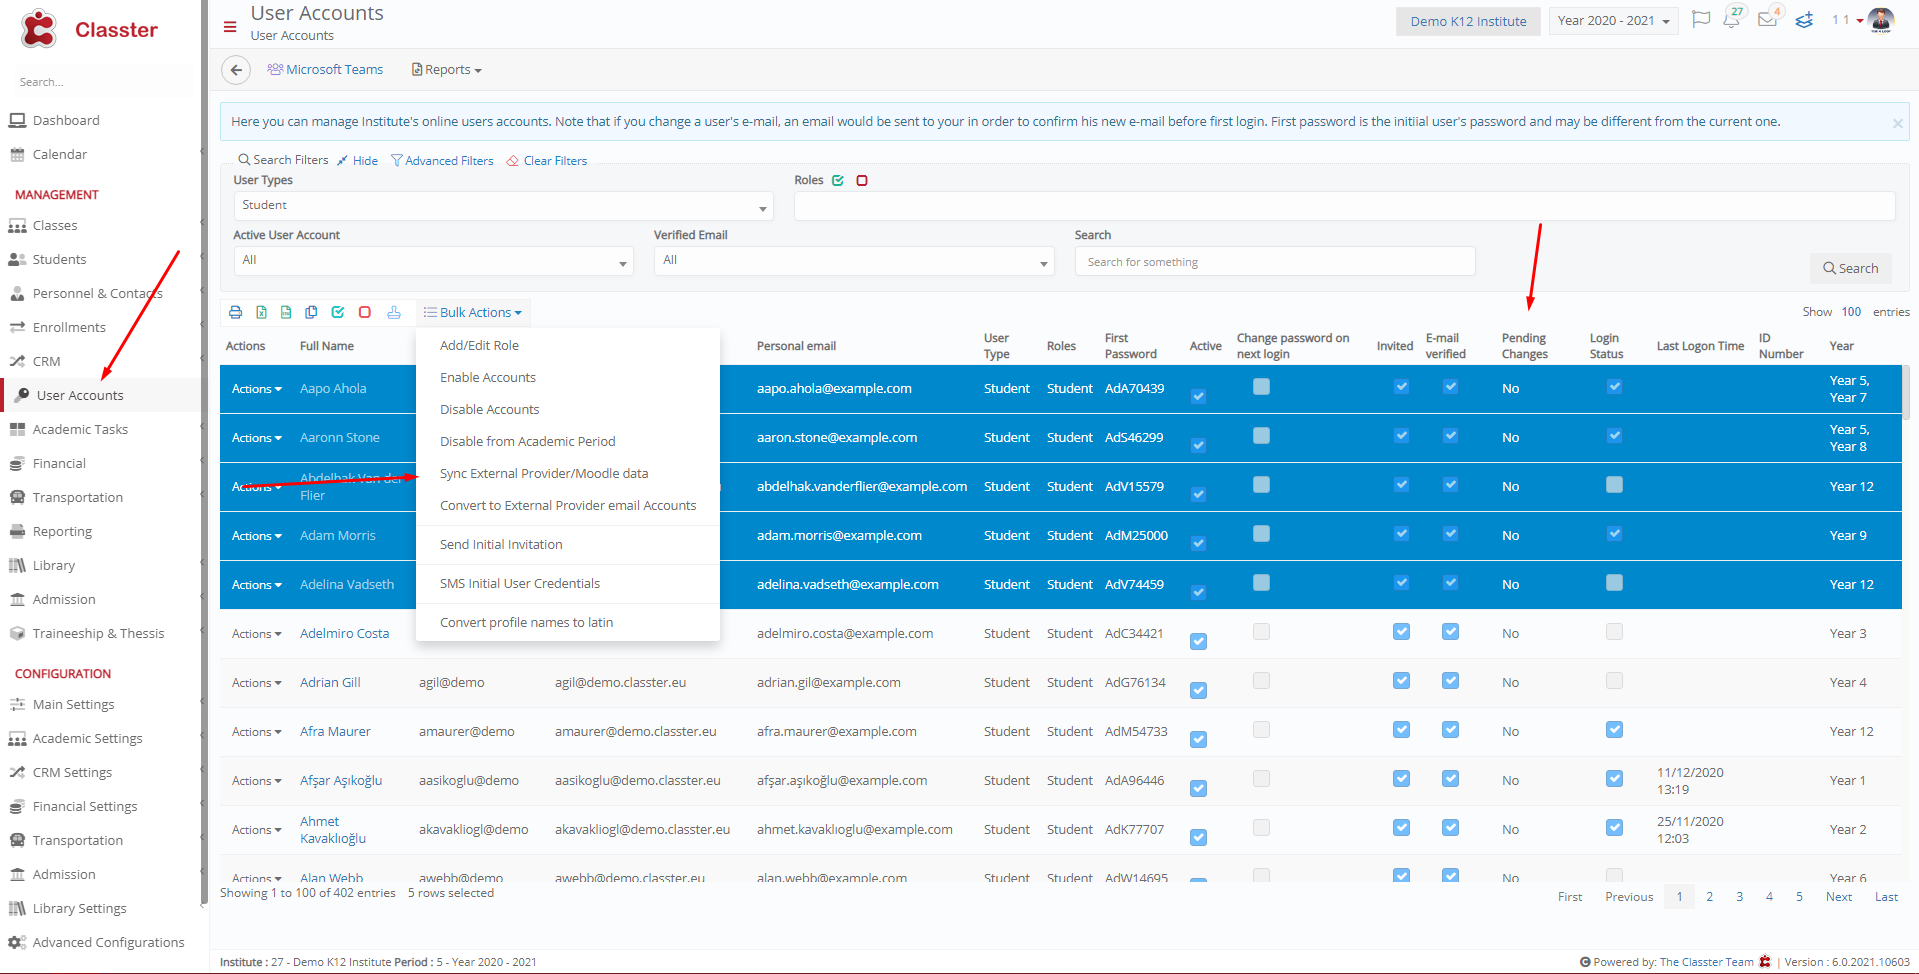
Figure 5