Overview
The {Sublocation} entity (default name: _Building_) is an optional feature in Classter. Find more about all entities in the [Core documentation section].
This feature allows educational institutions to organize their infrastructure more precisely. It enables you to divide each Location into one or more _Buildings_. This is useful for large campuses or institutions with multiple areas or departments.
Terminology
You can rename _Building_ to better fit your terminology, such as Campus, City, Level, School, or Department.
You can do this via: Main Settings > Customize Terminology > General Tab > _Building_

Settings
To enable _Buildings_, go to: Main Settings > General Settings > Basic Customization > _Building_ Settings, and activate the following:
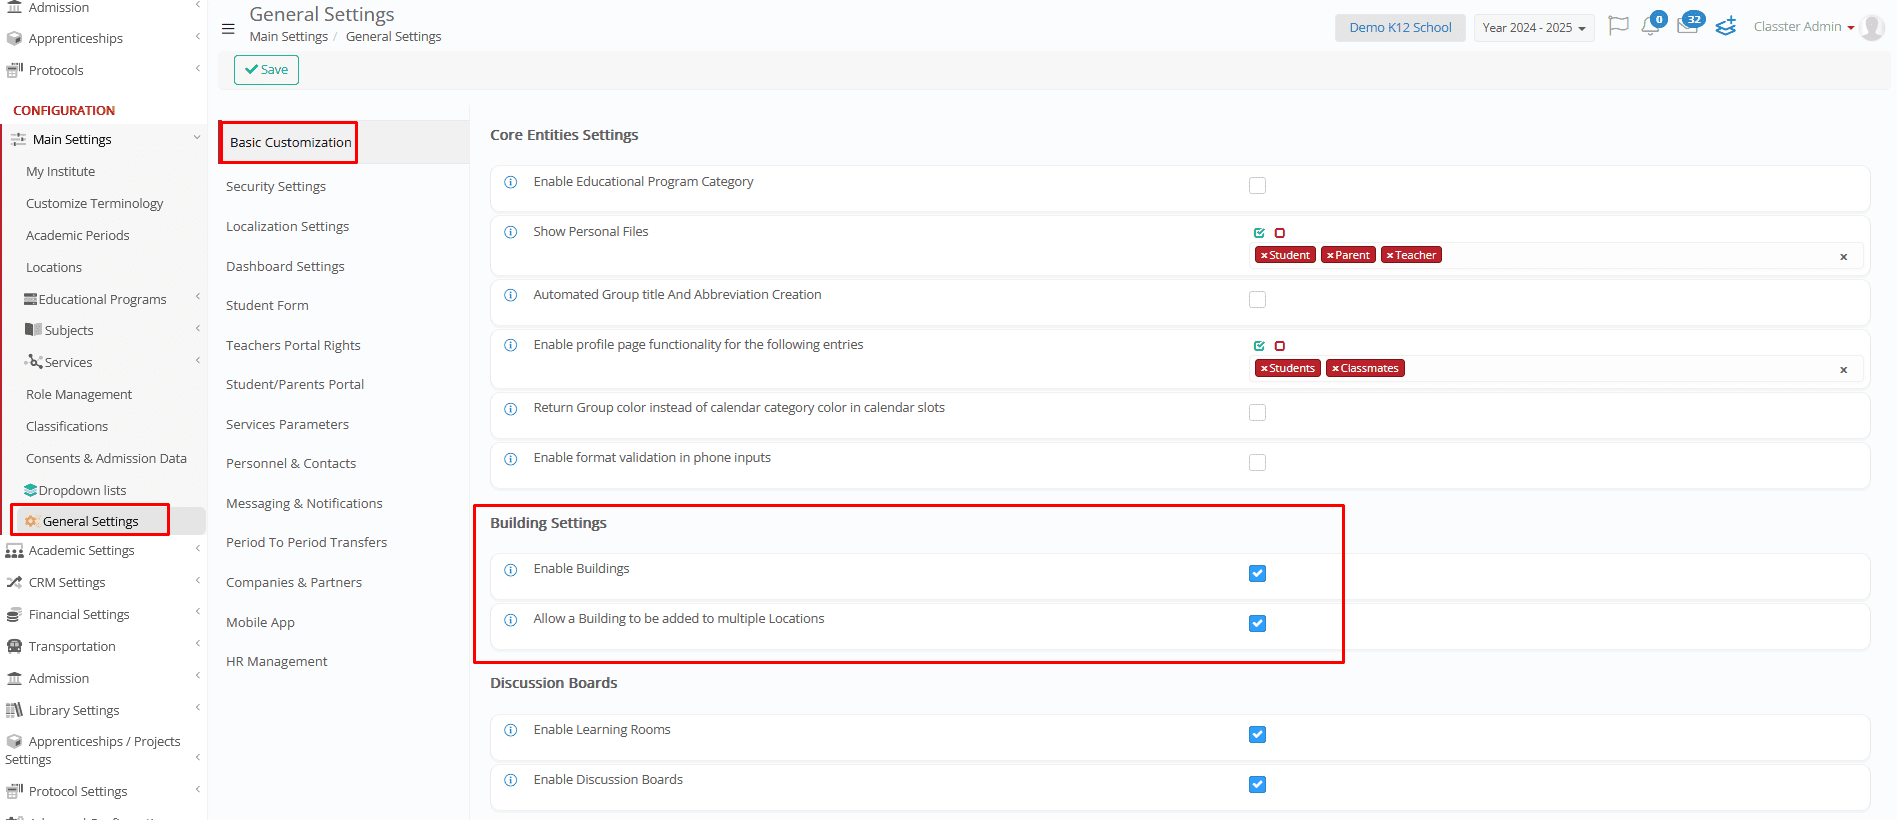
- Enable _Buildings_: Turns on the _Building_ functionality across the system. Once enabled, _Building_ options will appear in forms such as _Locations_, _Grades_, _Grade Levels_, Classrooms, _Teachers_, Inventory, and more.
- Allow a _Building_ to be added to multiple _Locations_:
- If set to No: Each _Building_ can only belong to one _Location_. When assigning _Buildings_ to a _Location_, only unused _Buildings_ will appear in the list.
- If set to Yes: A _Building_ can be assigned to more than one _Location_. This is helpful for shared facilities or administrative structures.
Note: These settings control both the availability and behavior of _Buildings_ throughout the system.
_Buildings_ List
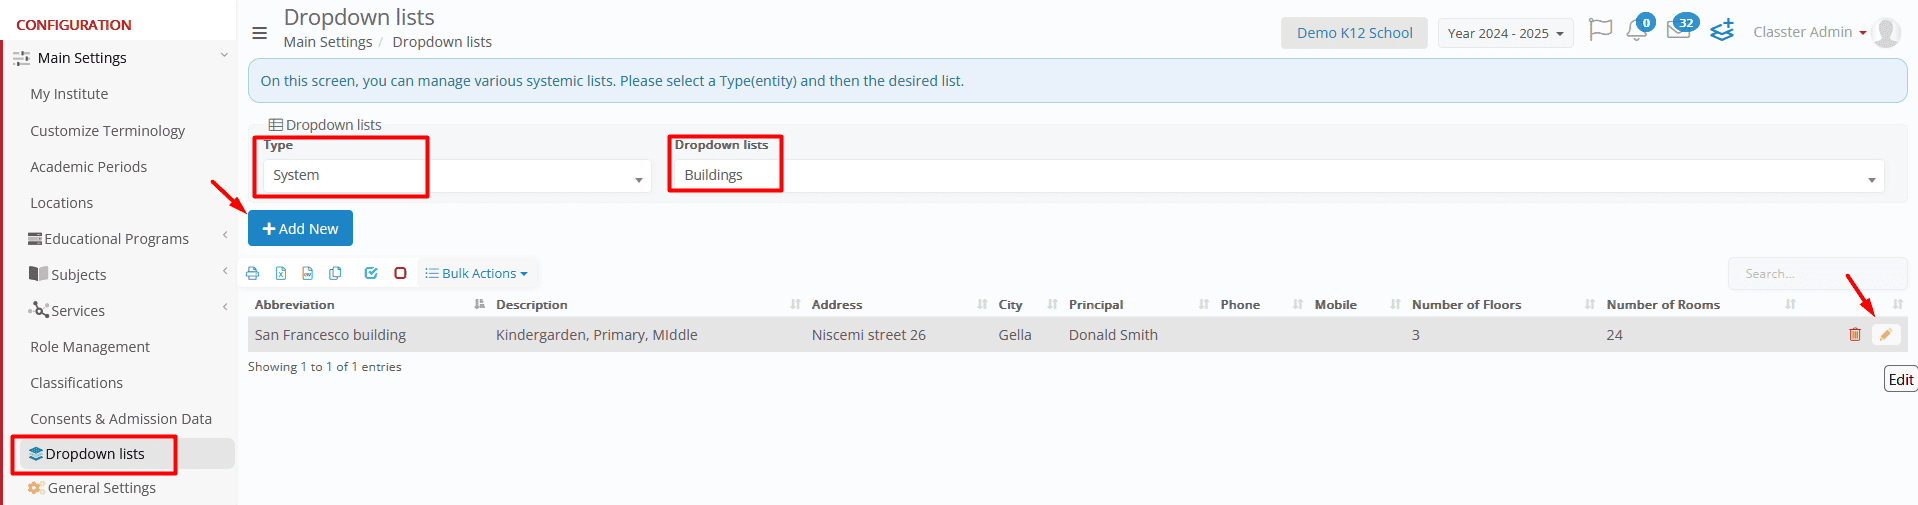
You can manage _Buildings_ through: Main Settings > Dropdown Lists > select System & _Buildings_
From here, you can:
- Create a new _Building_
- Edit an existing _Building_
_Building_ Card
This form allows you to input the basic and structural details of a _Building_, (e.g. Campus, or Department).
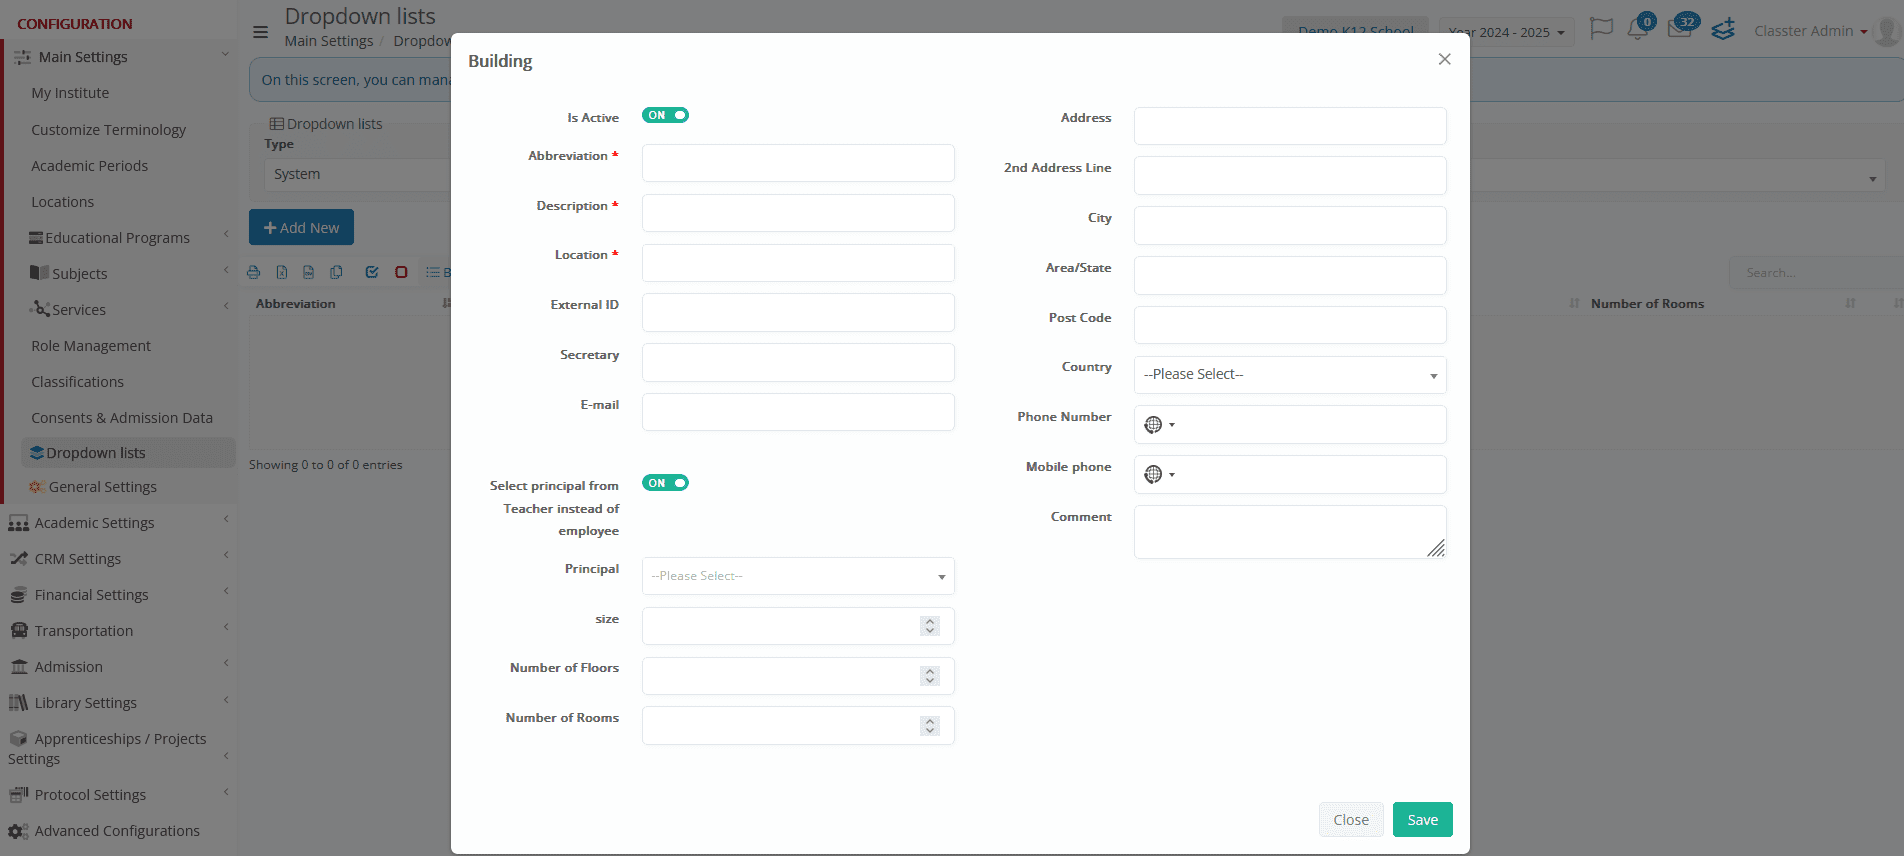
An asterisk (*) marks all required fields:
- Is Active (On/Off): Enables or disables the _Building_ throughout the system. If you turn it off, the system hides the _Building_ from dropdowns and assignment lists but keeps it in records.
- Abbreviation*: A short code or label for the {Sublocation}.
- Description*: The full descriptive name.
- External ID: Identifier used for external system integrations/migrations.
- Secretary: Name (and title if necessary) of the administrative person. Used mainly in custom reports.
- Email: General-purpose contact email.
- Address: Main address field.
- Address Line 2: Secondary address line.
- City: City or municipality.
- Area/State: Region or state.
- Post Code: Postal or ZIP code.
- Country: Dropdown selection of the country.
- Phone Number: Primary phone line.
- Mobile Number: Mobile contact number.
- Comment: Additional notes or remarks. Can be used for any custom purpose and custom reports.
Management and Structure
- Select Principal from Teacher instead of Employee (On/Off): Changes the Principal dropdown list/search, from Employees into Teachers.
- Principal: The _Building_ principal, selected from list of Employees or Teachers.
- Size (in square meters): Total _Building_ area.
- Number of Floors: How many floors the _Building_ has.
- Number of Rooms: Total number of rooms.
Bulk Actions
Administrators have access to the following bulk options when managing _Buildings_:

- Transfer to another institute: Useful for migrating structural elements between entities.
- Delete: Automatically removes valid links and updates any associated Classroom references. All associated connections must be removed before a _Building_ can be deleted:
- _Locations_
- _Grade Levels_ or _Grades_
- Classrooms
- Inventory Items
- _Teachers_ or Employees
Connections
Classter allows you to model your organizational structure with flexibility by linking Locations and Sublocations (default: _Building_) in two ways:
- A single _Location_ can be divided into multiple _Buildings_ (e.g., different buildings, or departments).
- A single _Building_ can be assigned to multiple _Locations_ (e.g., shared facilities or common campuses).
This enables institutions to reflect complex physical or operational layouts accurately.
The _Building_ entity plays a central role across multiple areas of Classter. For example:
- _Buildings_ are connected to _Grades_ using a triple connection: _Location_ – _Building_ – _Grade_.
- Classrooms are tied to _Buildings_, which enables Timetable and Calendar integration.
Here’s how they are typically used in day-to-day operations:
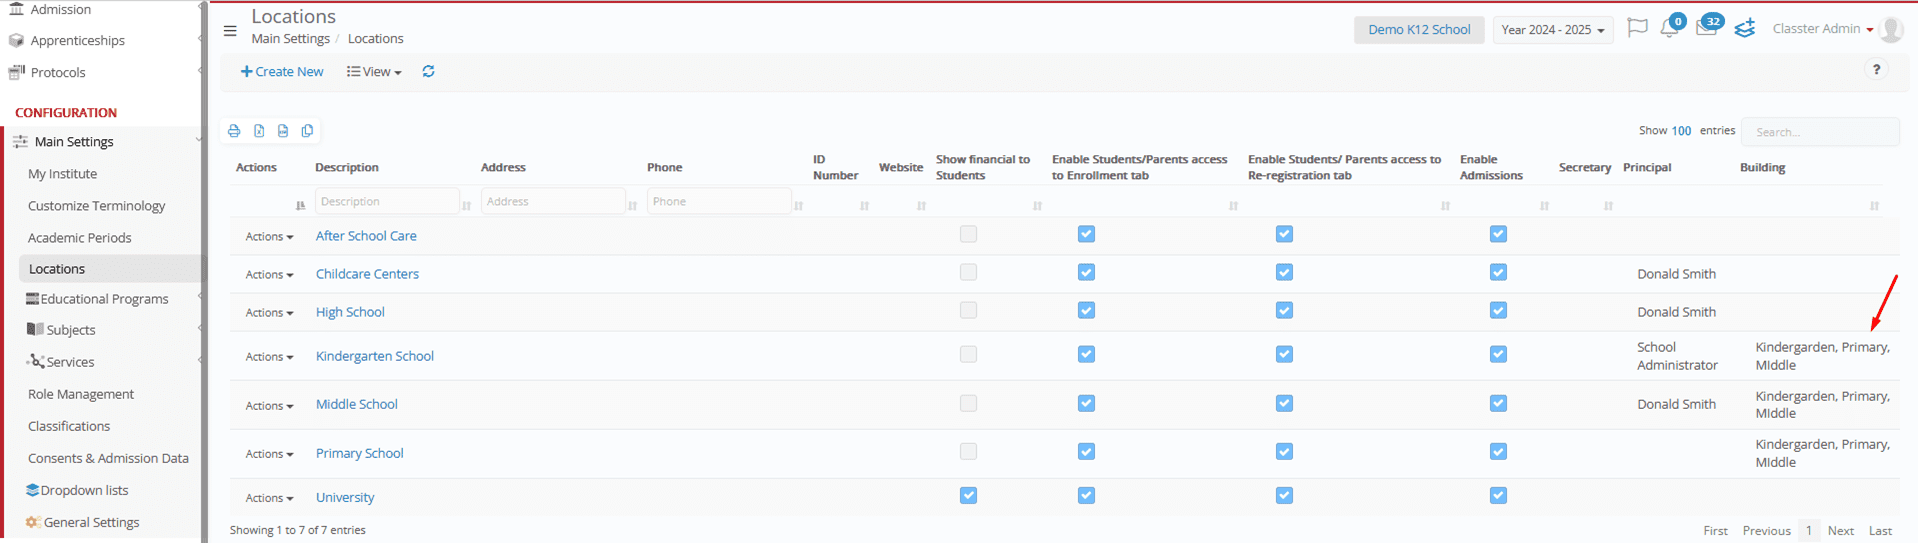
- Within each _Location_, you can assign one or more _Buildings_.
- You can also create a new _Building_ directly from the _Location_ form.

- In the overview grid, all assigned _Buildings_ appear in a comma-separated list.
- _Grade Levels_ can be linked to multiple _Buildings_.
- These links indicate where teaching for each level is conducted.
- The system connects _Grades_ using a triple connection: _Location_ – _Building_ – _Grade_. This ensures that grades are contextually tied to both a physical location and a substructure within it.

- If a _Location_ is removed from the _Grade_, its _Location_ mapping is also removed.
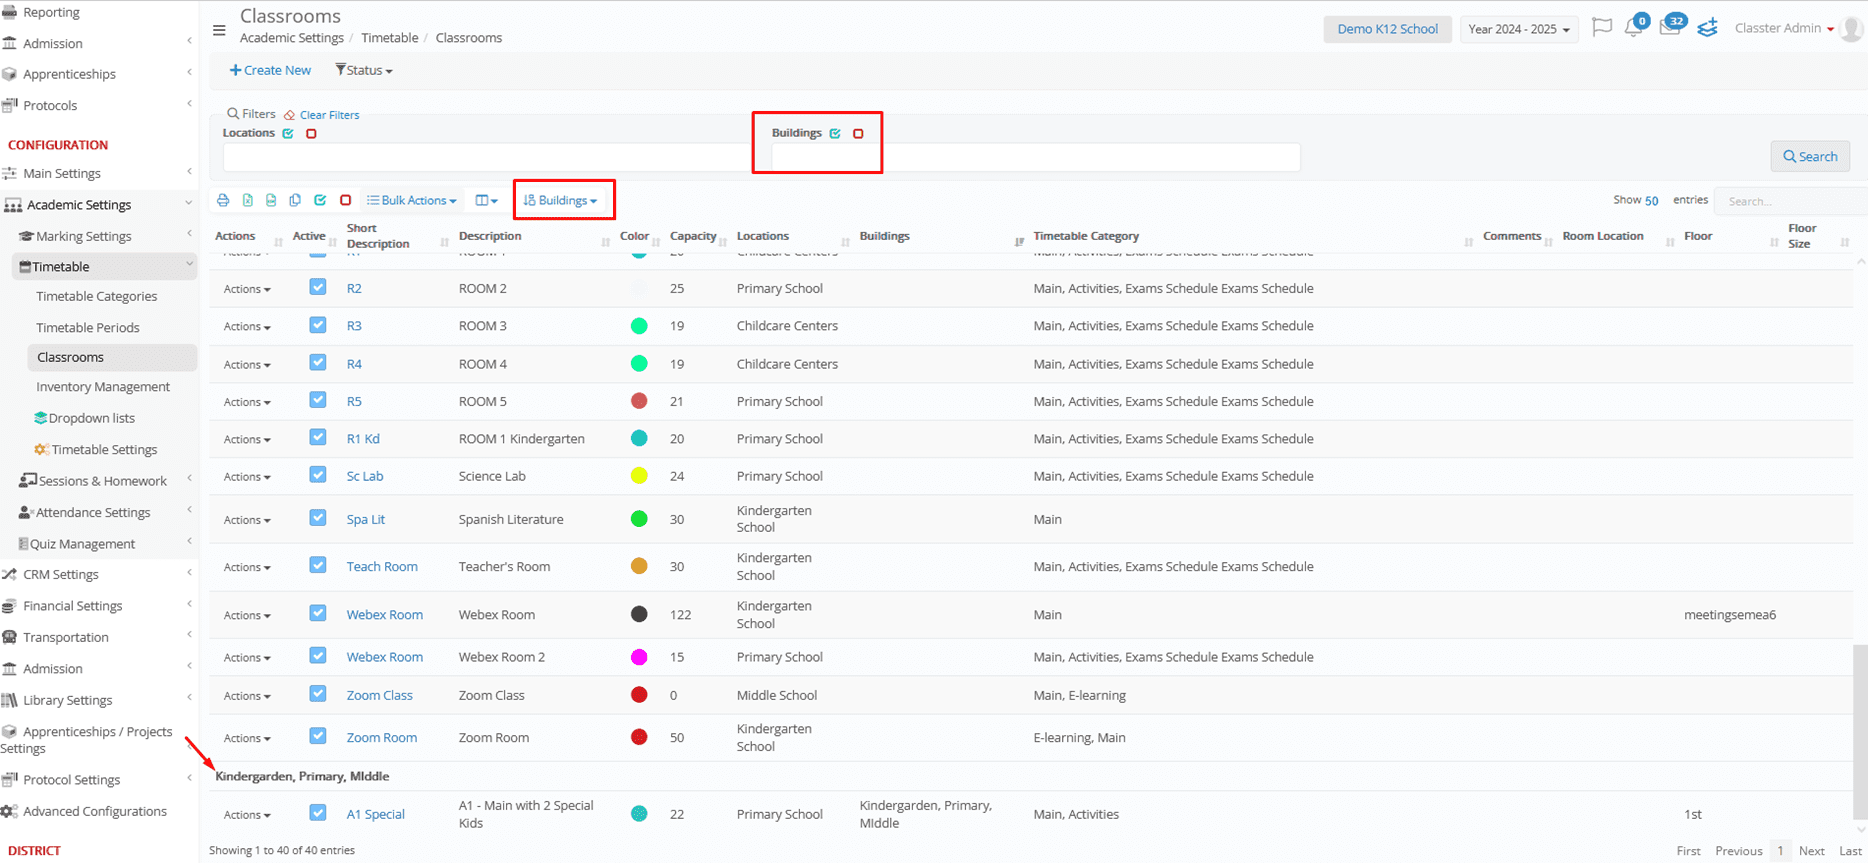
Classrooms
- Every Classroom must be assigned to a single _Building_.

- The list of available _Buildings_ depends on the selected _Location_.

- Filters and grouping allow users to browse Classrooms by _Location_ or _Building_.
Inventory Items
- Administrators can assign inventory items to multiple _Buildings_. Filters and views help you track items per _Building_.

- This is useful for assets shared across _Buildings_, floors, campuses etc.

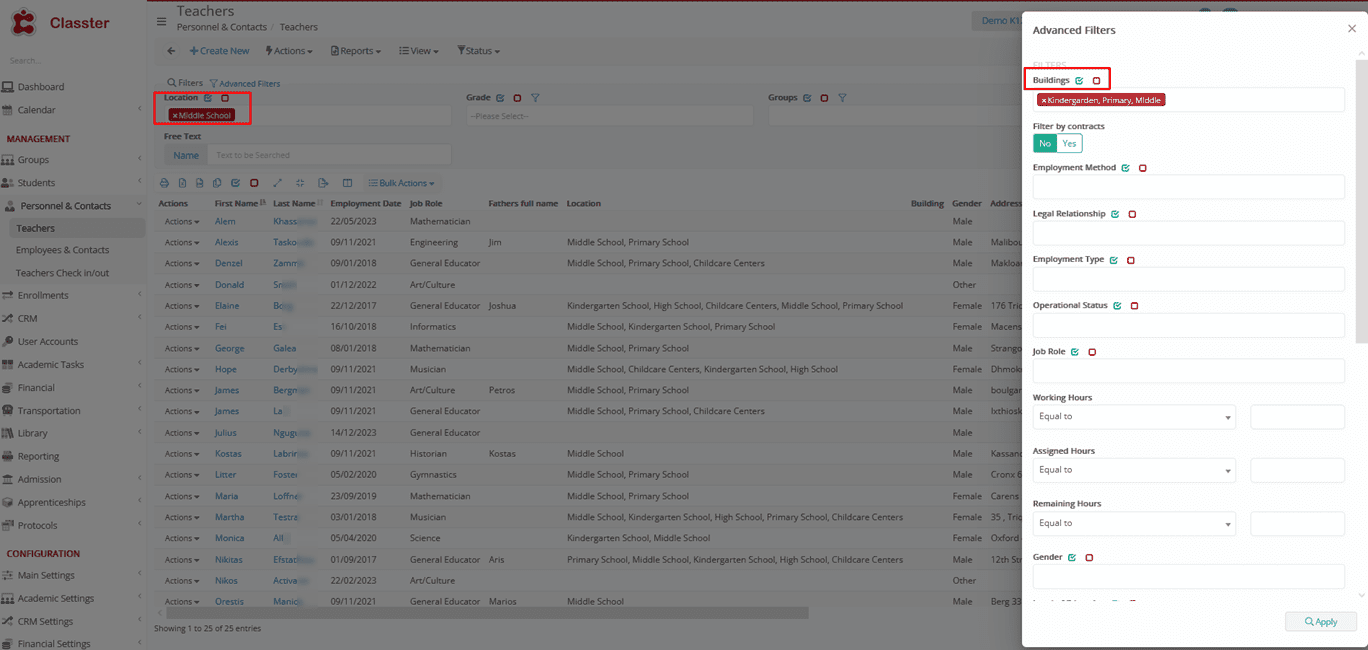
_Teachers_ and Employees
- _Buildings_ help define where _Teachers_ or Employees are primarily based or active.
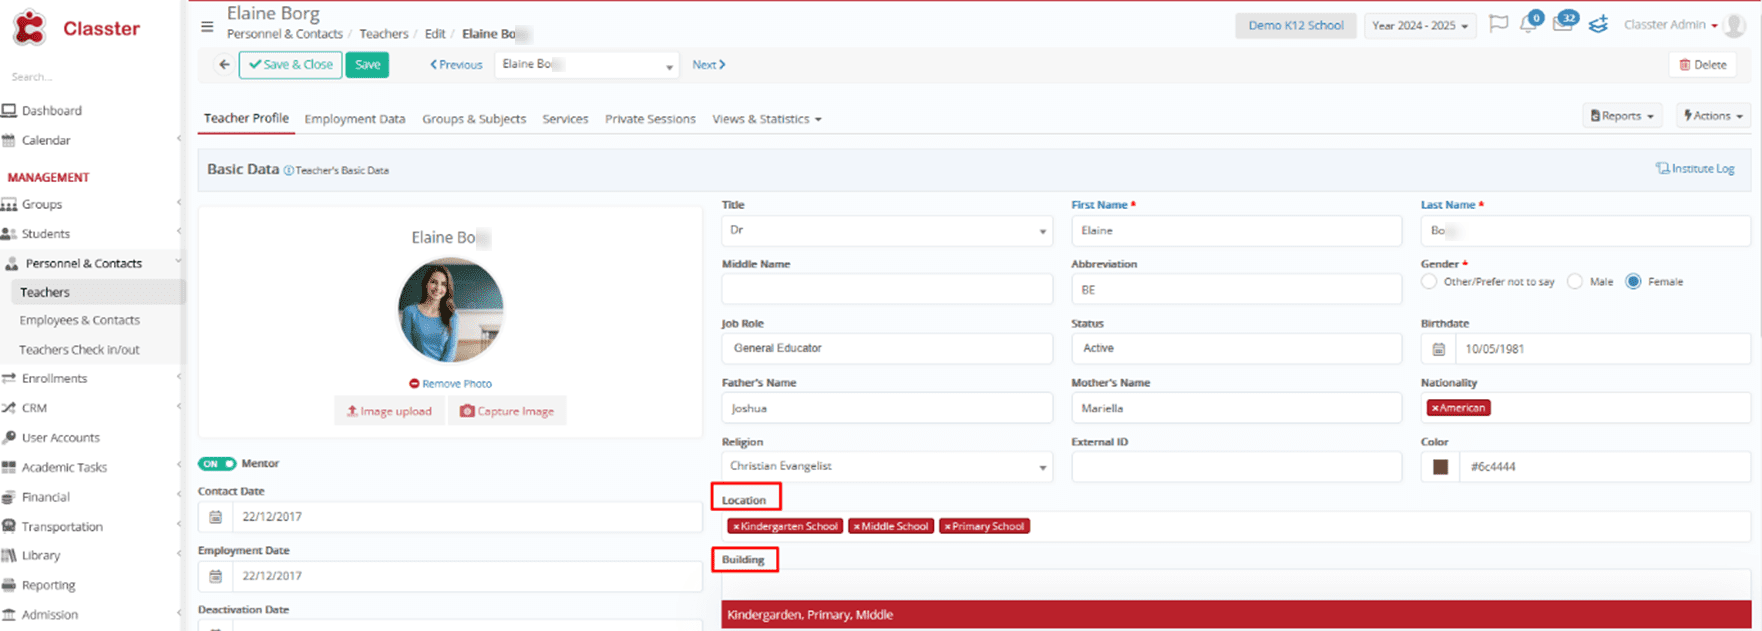
- Forms support multiple _Building_ assignments, filtered by their associated _Locations_. Filters and list views display these associations clearly.