

Introduction
Classter allows institutions to customize system terminology to better suit their specific operational needs. This manual explains how to modify terminology, manage entity names, enable or disable fields, and work with different field types.
Classter allows you to customize not only the terminology for main system entities but also various other configurable fields. This ensures that institutions can tailor the platform to match their specific operational and academic structures.
Based on the Understanding Main Entities & Institutional Structure guide, you can customize your institution’s terminology as shown below.
Accessing Terminology
To customize terminology:
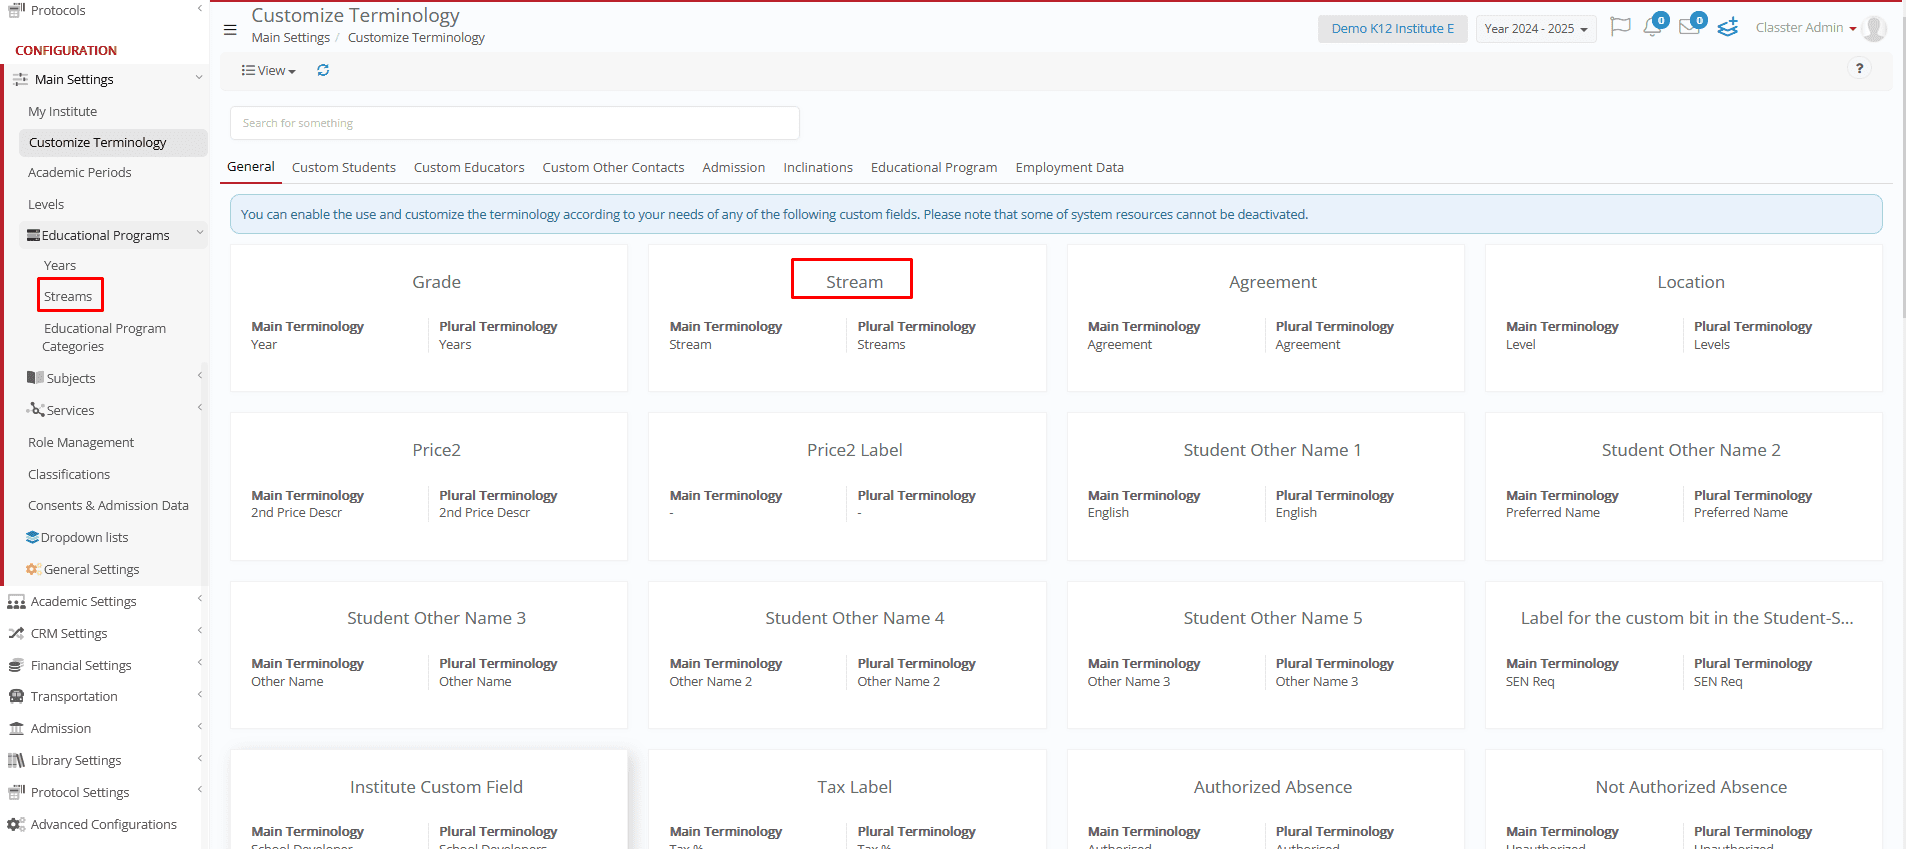
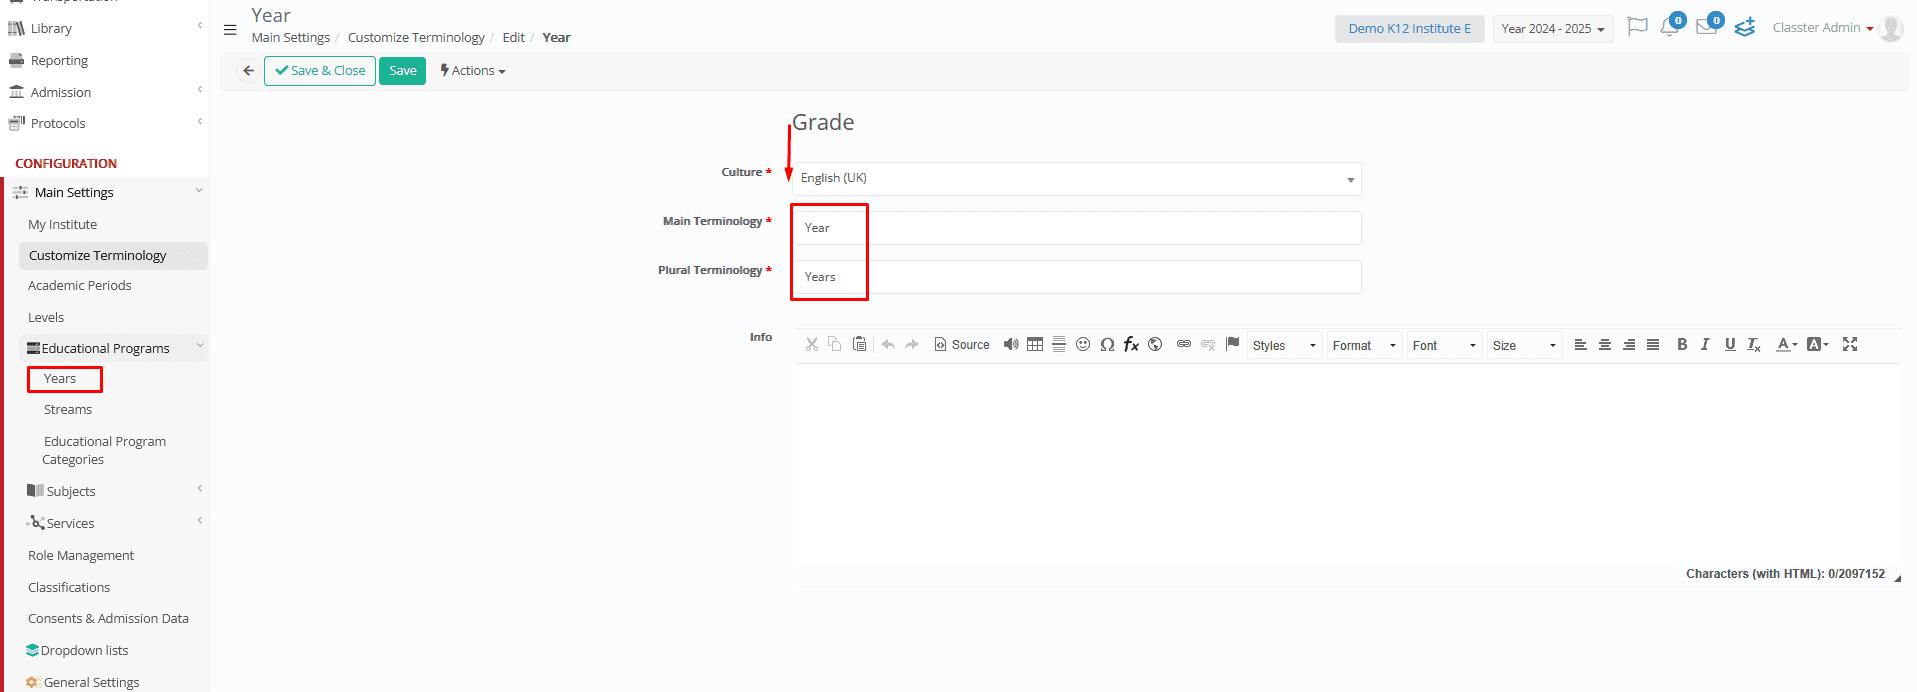
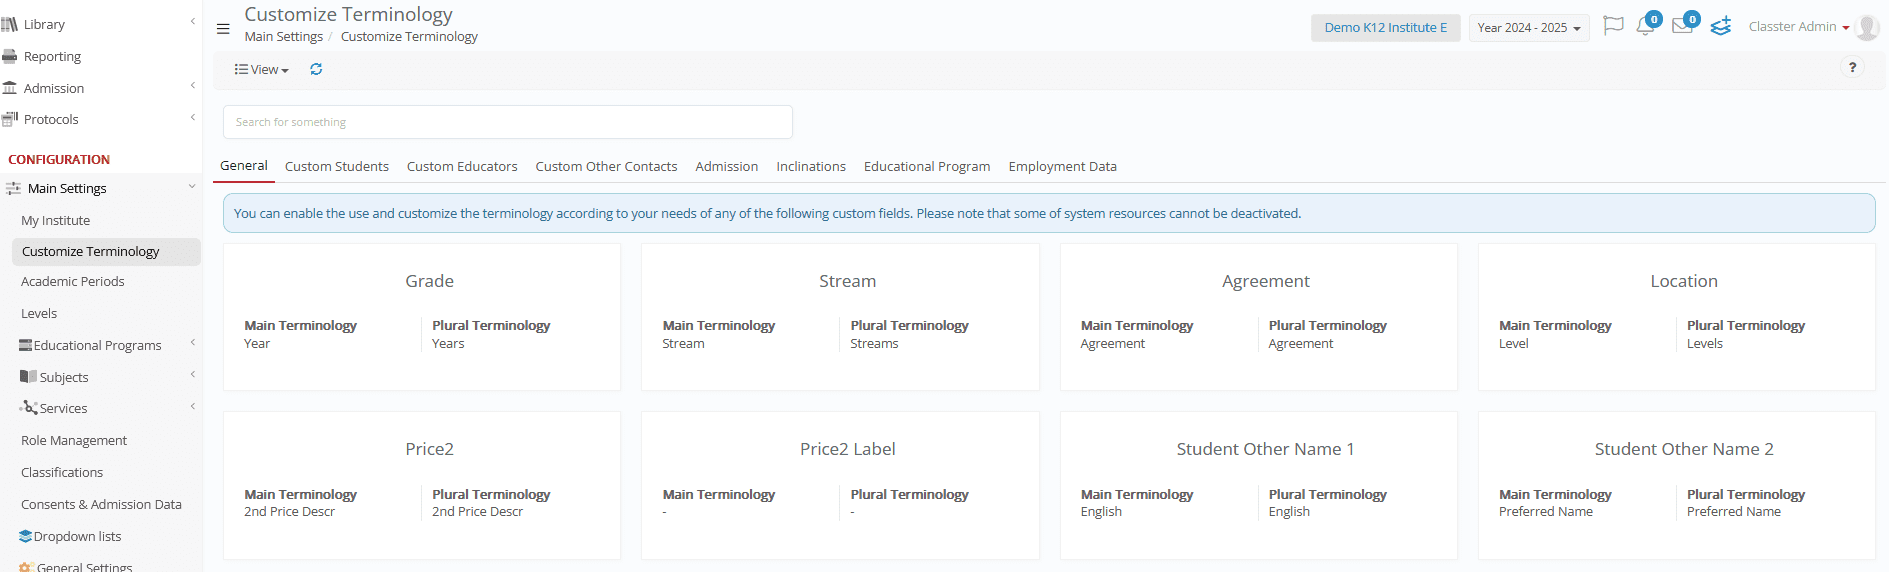
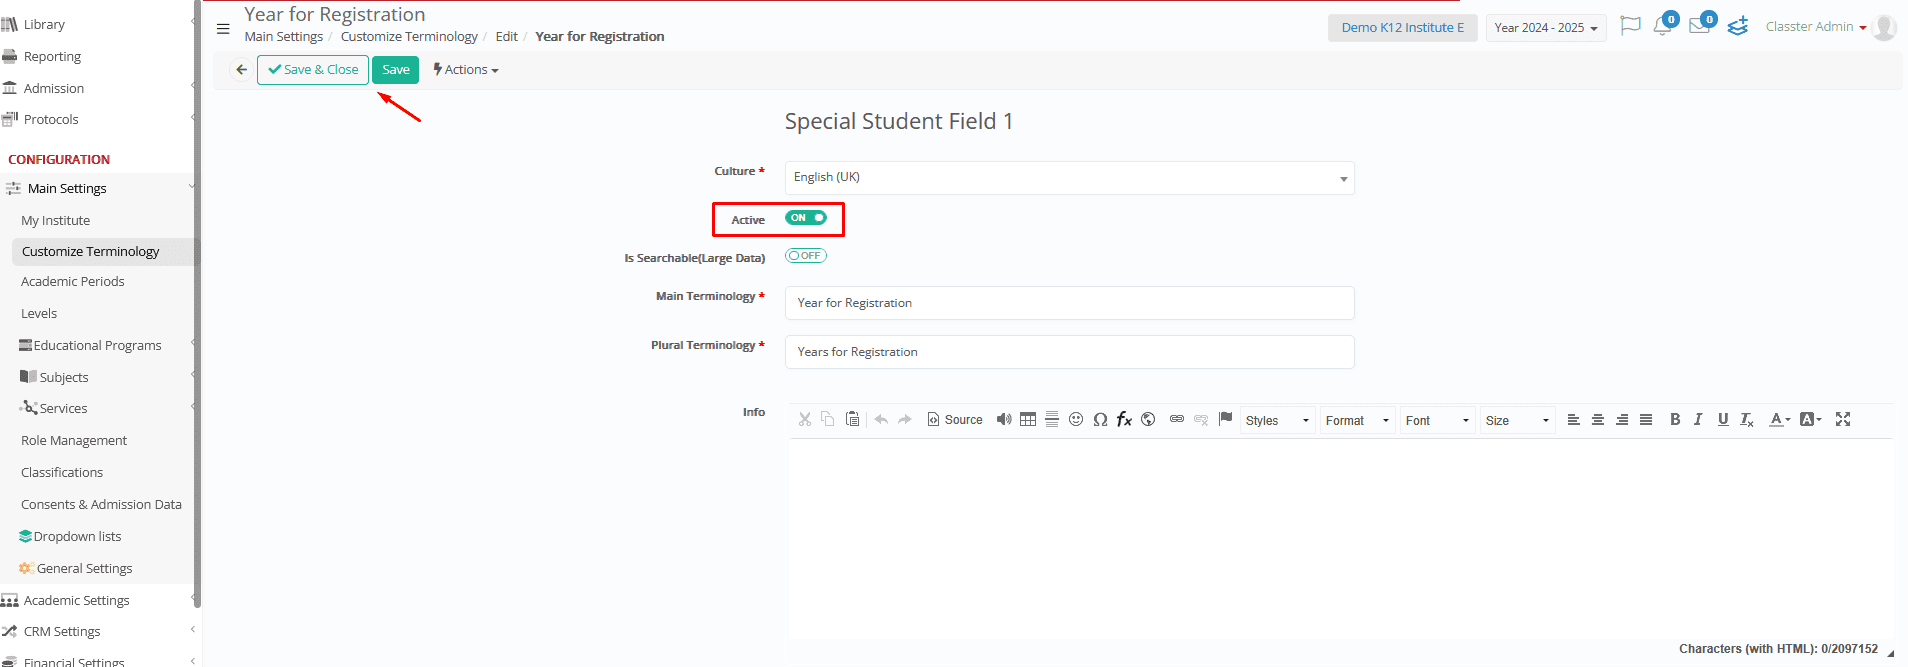
- Access Settings: From the Classter Dashboard, navigate to Configuration > Main Settings > Customize Terminology. This section lets you modify standard terms and define institution-specific terminology.
- Edit Terminology: Select a term, first specify the language (culture), then update the preferred name and define the plural form. If you edit the term in the Global Culture, the changes will apply to all languages that do not have a custom term saved. However, if you are using multiple system languages you can edit/translate the term per language.
- Save & Apply Changes: Save your modifications, then refresh your session by logging out and back in to see the updates.
Default vs. Custom Terminology
The default terminology is used across all modules in the Classter platform, including reports, dashboards, menus, student records, and configuration fields.
Once customized, the new terminology replaces the default terms throughout the system, including user interfaces, student records, reports, drop-down selections, field names, and system-generated documents.
Refreshing Changes
After modifying terminology, users must refresh the academic period or log out/log in to see the changes applied across the system.
Understanding Tabs
Classter’s terminology settings are organized into different tabs, each serving a specific purpose:
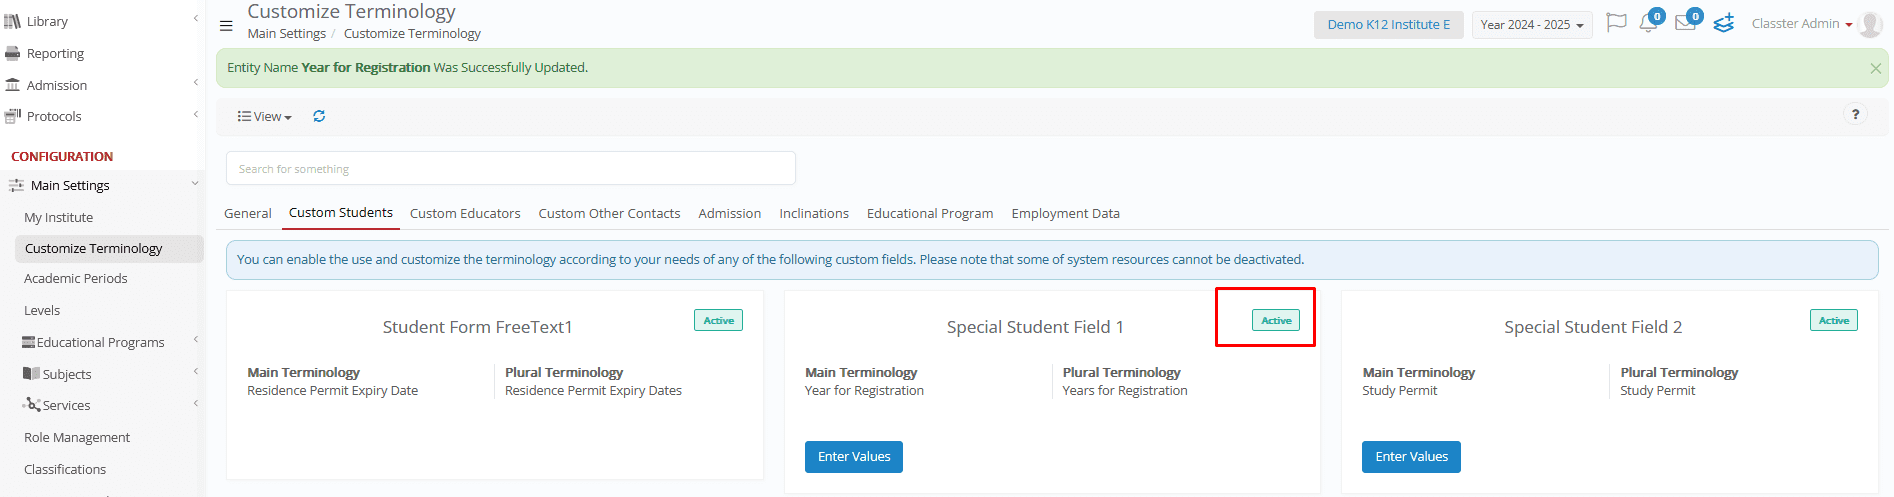
- General: Global entities and fields (such as _Location_, _Grade_, additional Grade fields, _Stream_, _Subject_, _Group_, _Thesis_, _Internship_)
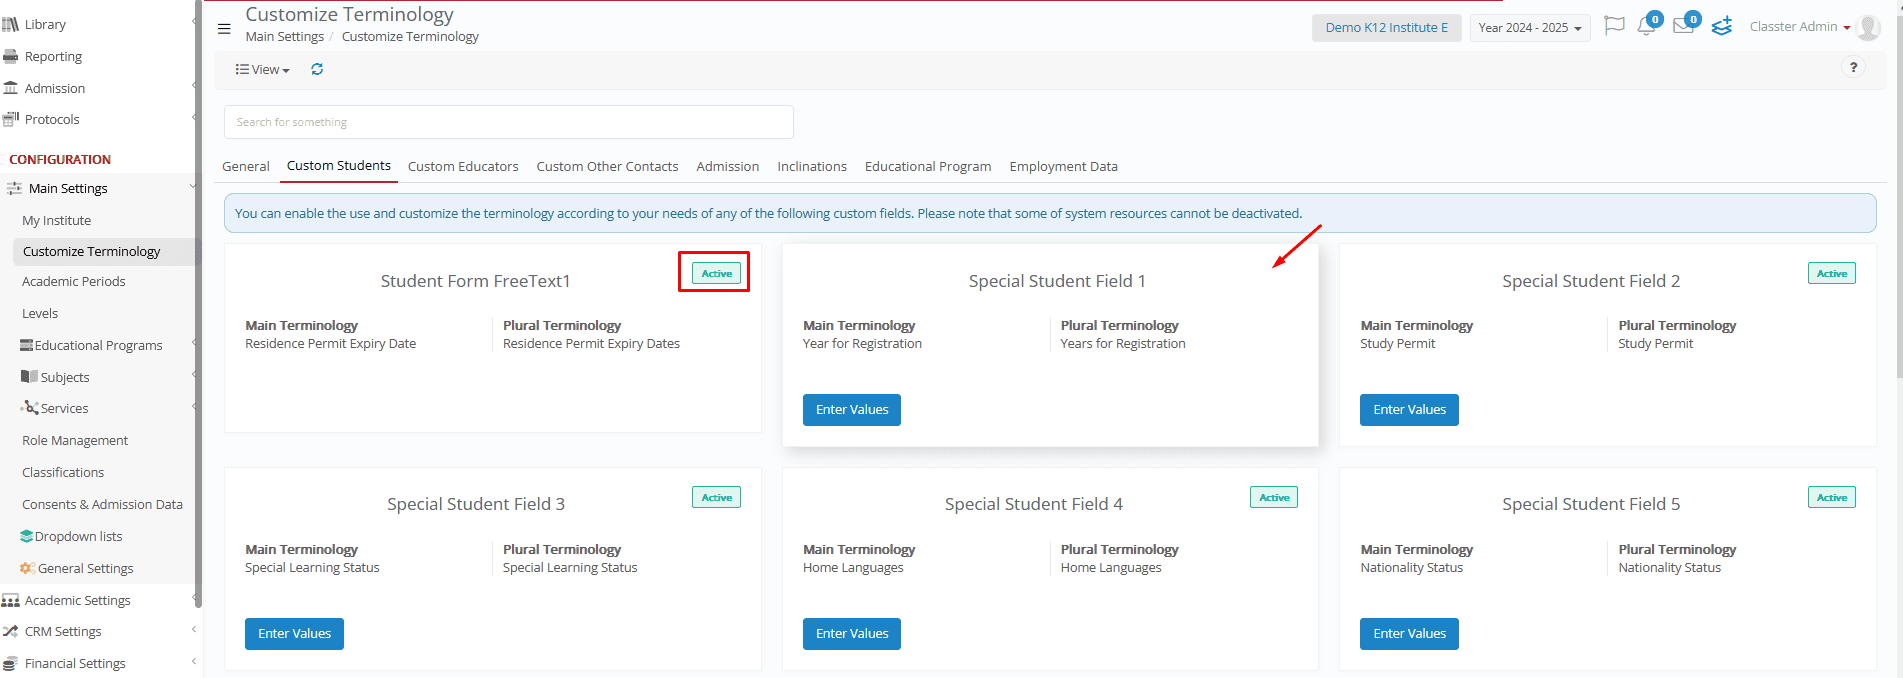
- Custom Student Fields: Custom _Student_ fields in types: text, dropdown, checkbox, date. (e.g. study difficulties, native language or other custom needs)
- Custom Teacher Fields: Custom _Teacher_ fields in types: text, dropdown, checkbox, date. (e.g. Previous job or other custom needs)
- Custom Other Contacts: Custom fields for Employees/Admins, _Student_ Relatives, Agents, External Companies, Suppliers, Other Institutes and Other Contacts.
- Admission: Fields, TABs and options related to the Admission or Re-registration, such as the Main Personal Data TAB, Admission Data TAB, Consents TAB, Application Management menu or Accept/Reject (usually an offer) special buttons.
- Inflections: Covers linguistic variations, name inflections, and different grammatical forms for better localization.
- Educational Program: Custom Educational Program fields, such as _Educational Program Category_, indications (dropdown), alternative locations-streams, Date fields, free text or other custom needs.
- Employment Data: Adjust terminology for employment-related fields, including bonuses, employment types, legal relationships, and operational status.
Open new fields (Enable/Disable)
Some fields are enabled by default, while others can be activated/deactivated based on institutional needs.
Fields enabled by Default
Navigate to Configuration > Customize Terminology.
Active and Inactive field.
Toggle fields on or off, as needed. Save your changes.
Once activated, an icon will appear in the top right corner of the field, indicating it is active.
Using Default vs. Custom Fields
Before creating a custom field, always search if a similar default field already exists, even if the terminology is slightly different.
Using default fields instead of custom ones is highly recommended, as it ensures:
- Better system integration
- Consistency across modules
- Easier system updates
Field Types Explained
Classter provides multiple field types for structured data entry:
- Lookup: A single-select drop-down list field with predefined options.
- MultiLookup: A multiple-select drop-down field allowing multiple selections.
- Free Text: An open text field for manual input.
- Date Picker: A field for selecting calendar dates.
- Checkbox: A simple on/off toggle for boolean values.
Examples
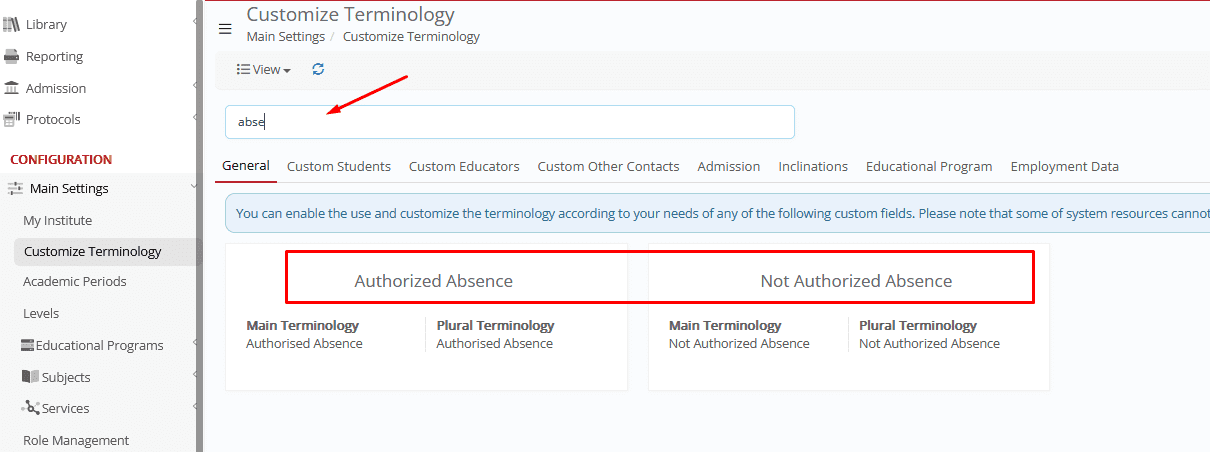
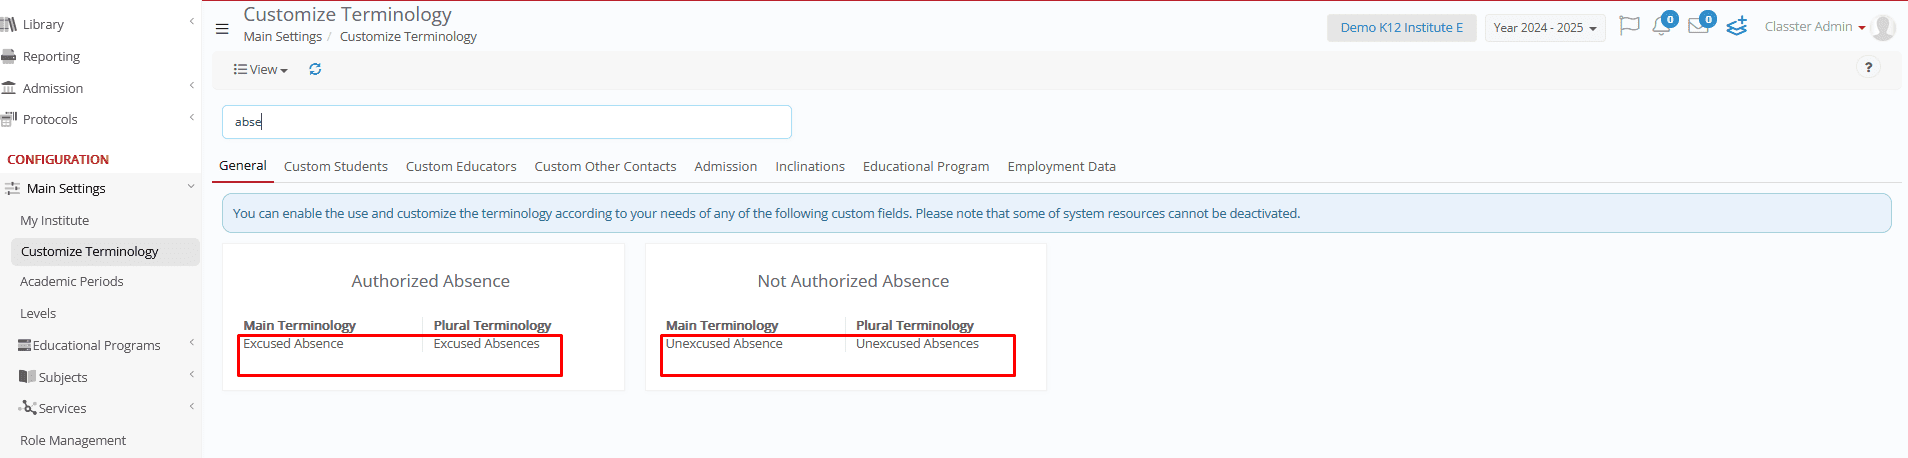
a. Authorized – Unauthorized Absences (General Tab)
- Go to Customize Terminology
- Search for the term Absence.
- Update the default terms:
Default: Authorized Absence → Custom: Excused Absence
Default: Not Authorized Absence → Custom: Unexcused Absence
- Modify the terms as needed and save your changes.
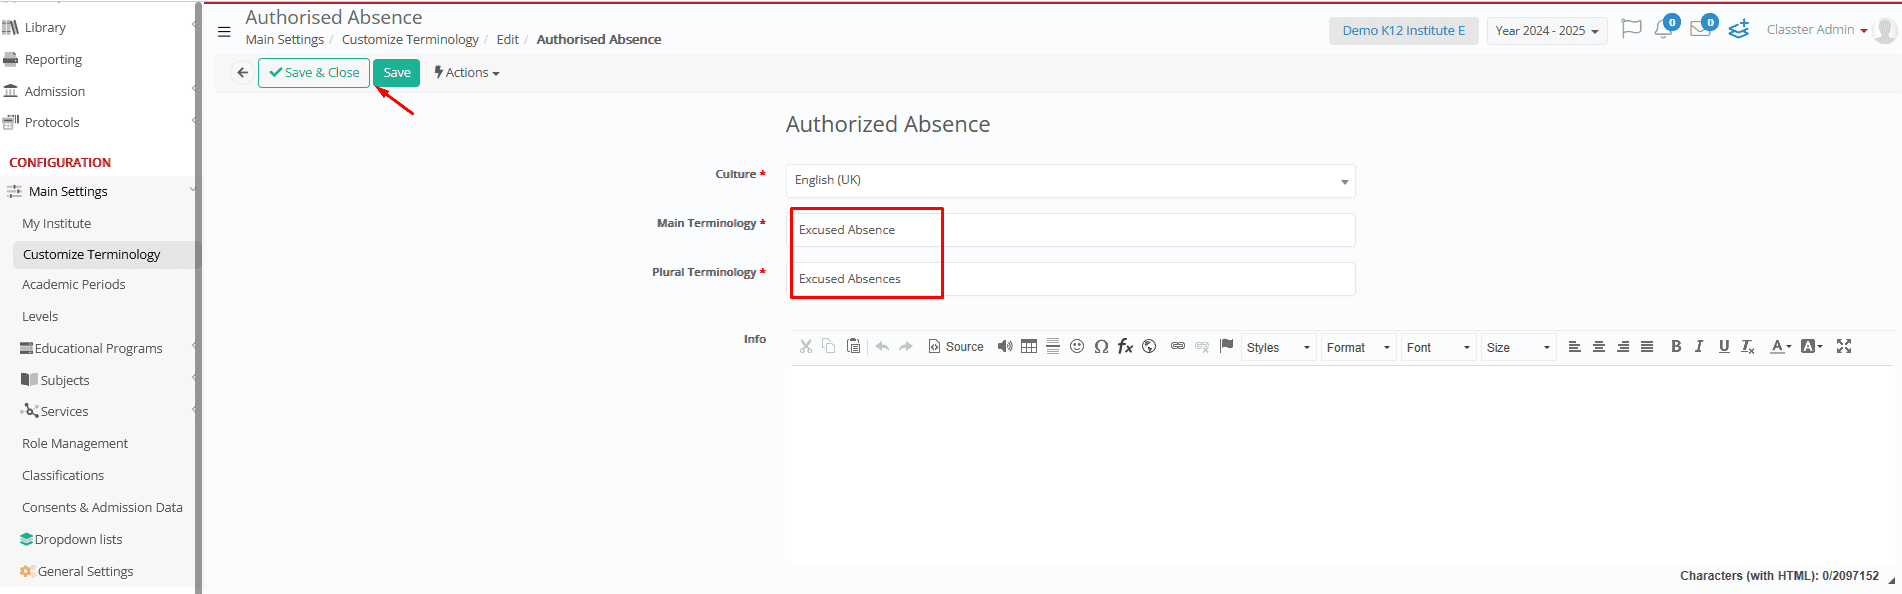

✅ Your custom terminology is now applied!
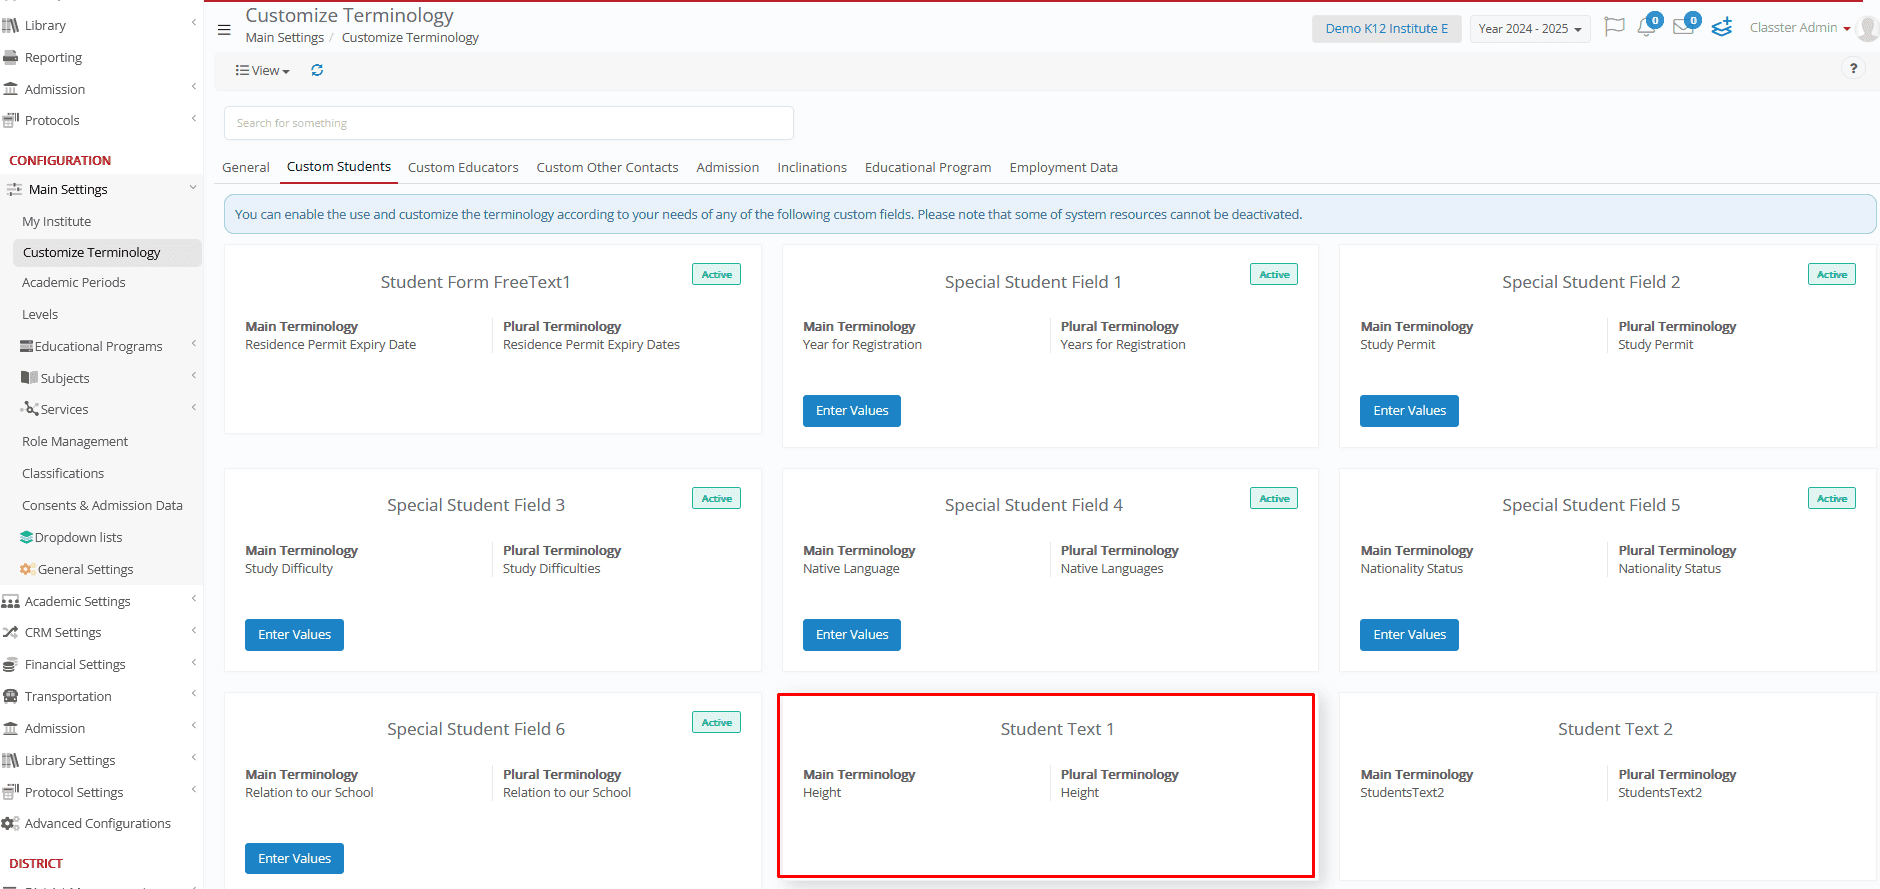
b. Student Fields (Custom Students Tab)
Keep in mind that the first seven fields are part of the Basic Data/ Student’s Basic Data section in the _Student_ form, while all other fields below them belong to Various Data/Custom Fields.
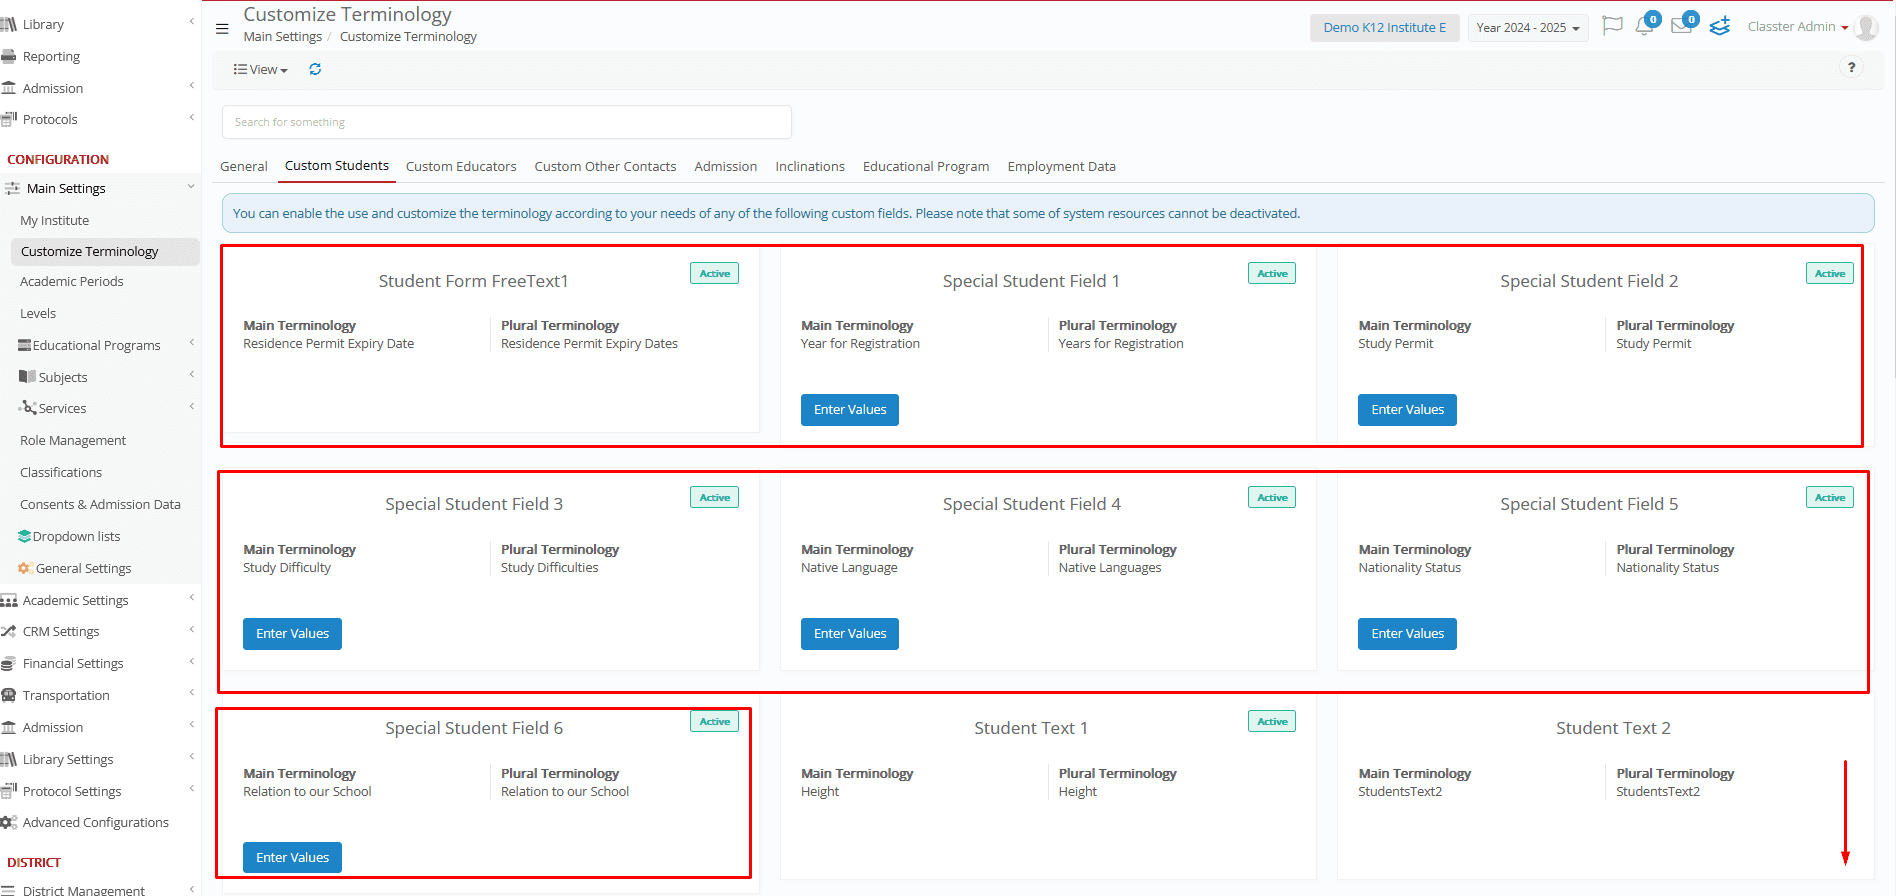
Enabling a Lookup Student Field (Basic data)
To enable a lookup student field, follow these steps:
- Special Student Field 3 (renamed Study Difficulties – Plural) → Click Enter Values to access the dropdown list configuration.
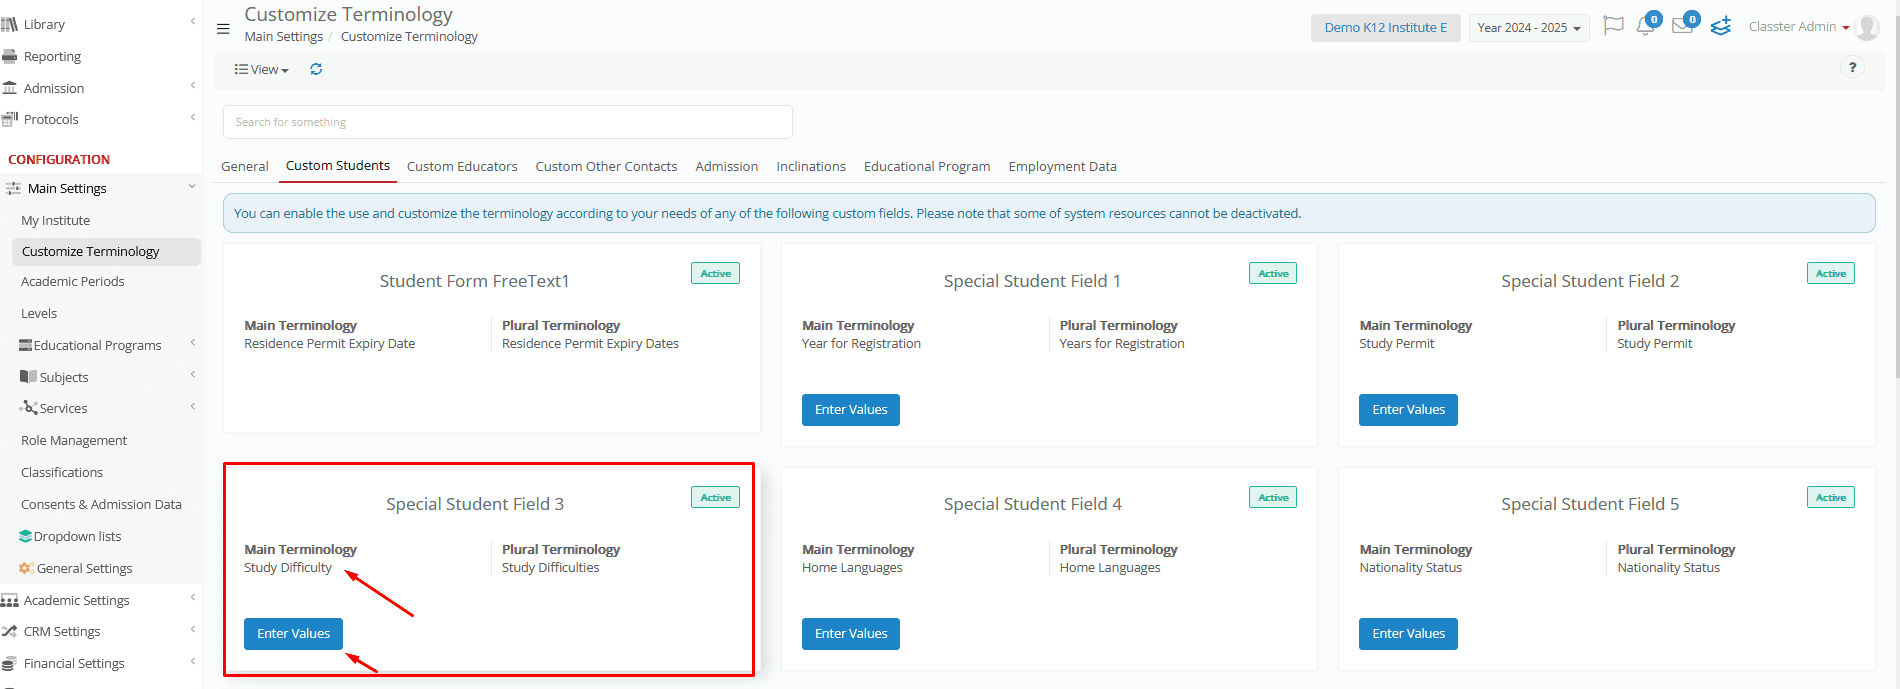
- Edit existing dropdown values or add new ones as needed.

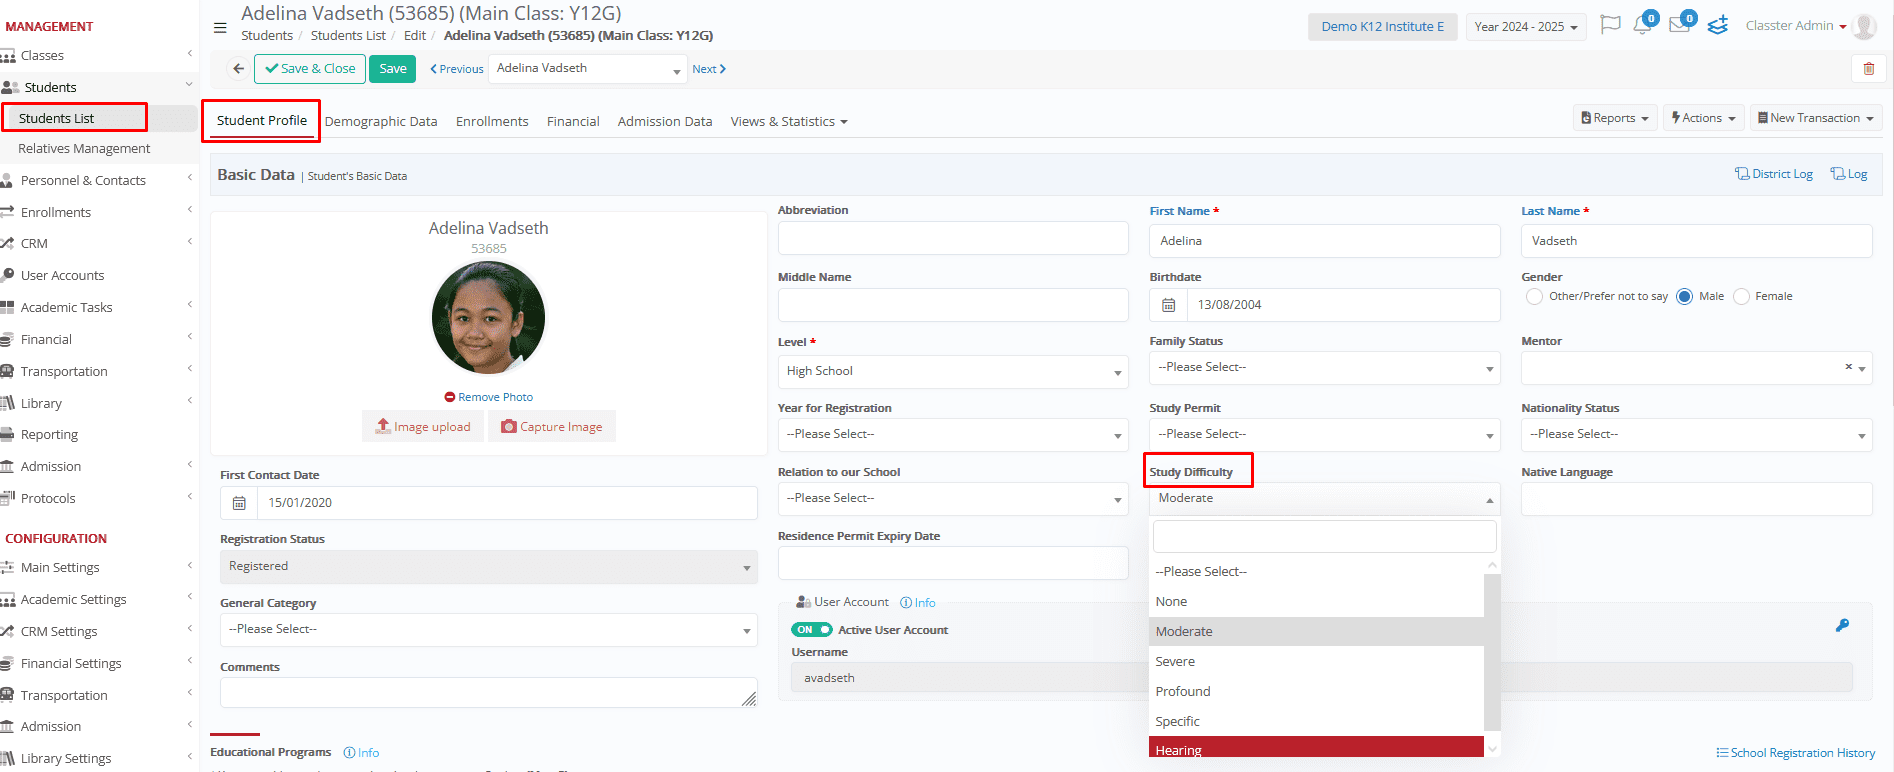
✅ The lookup field will now display a single selectable value from the predefined list. You can find it in the Student Card under the Basic Data section.
Enabling a Custom Text Student Field (Various data)
To enable a custom text student field, follow these steps:
- Student Text 1 (renamed Height) → Open it and toggle the switch ON.
- Define the Culture, activate the Field, and enter your preferred term in both singular and plural form (if needed). You can also assign the term to a specific Custom Field Category. Finally, save your changes to apply the updates.
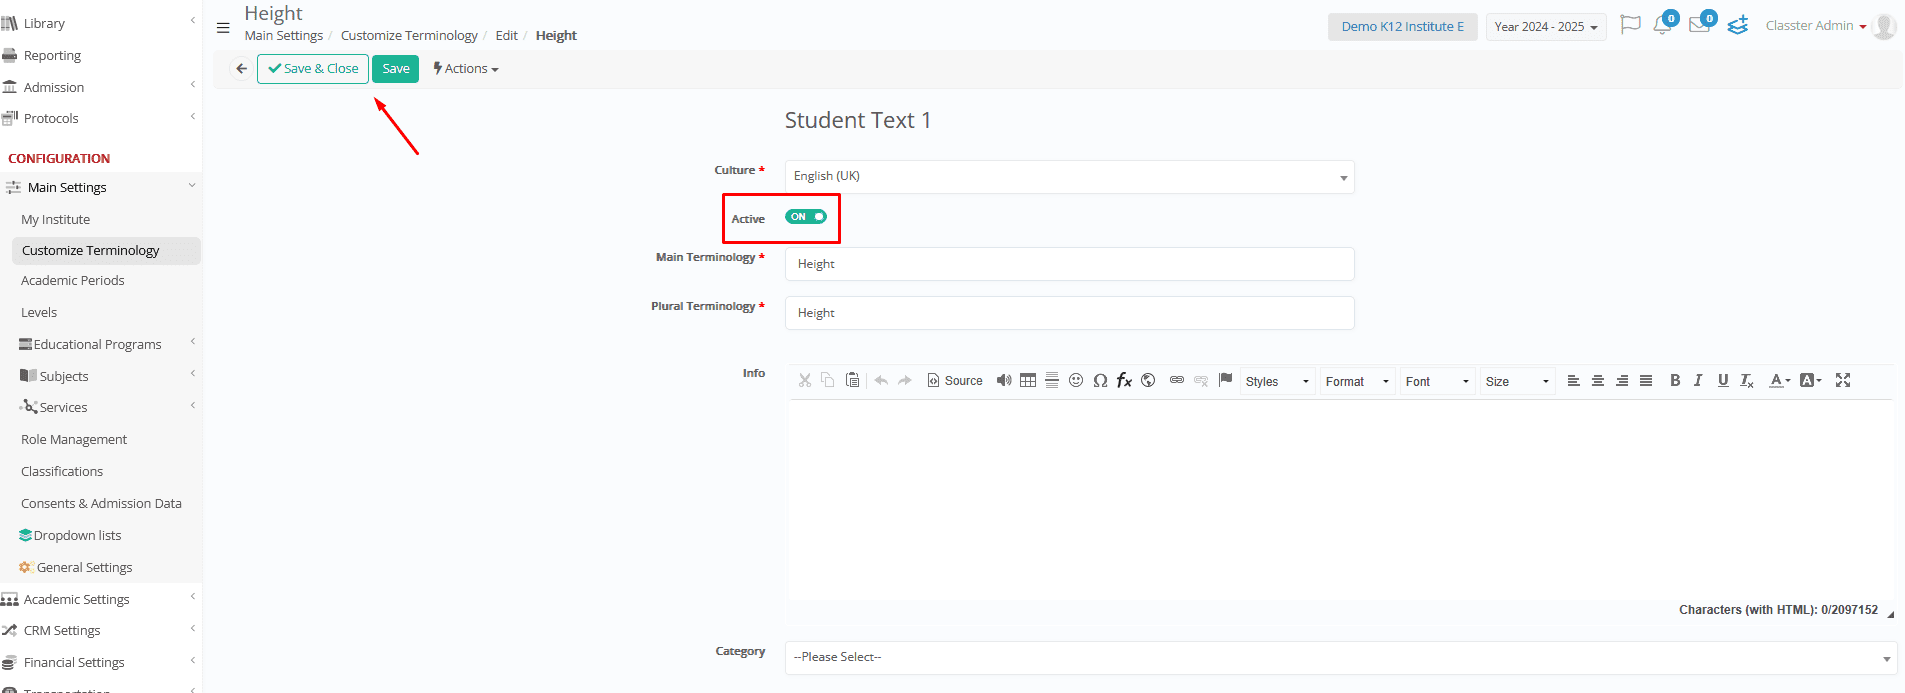
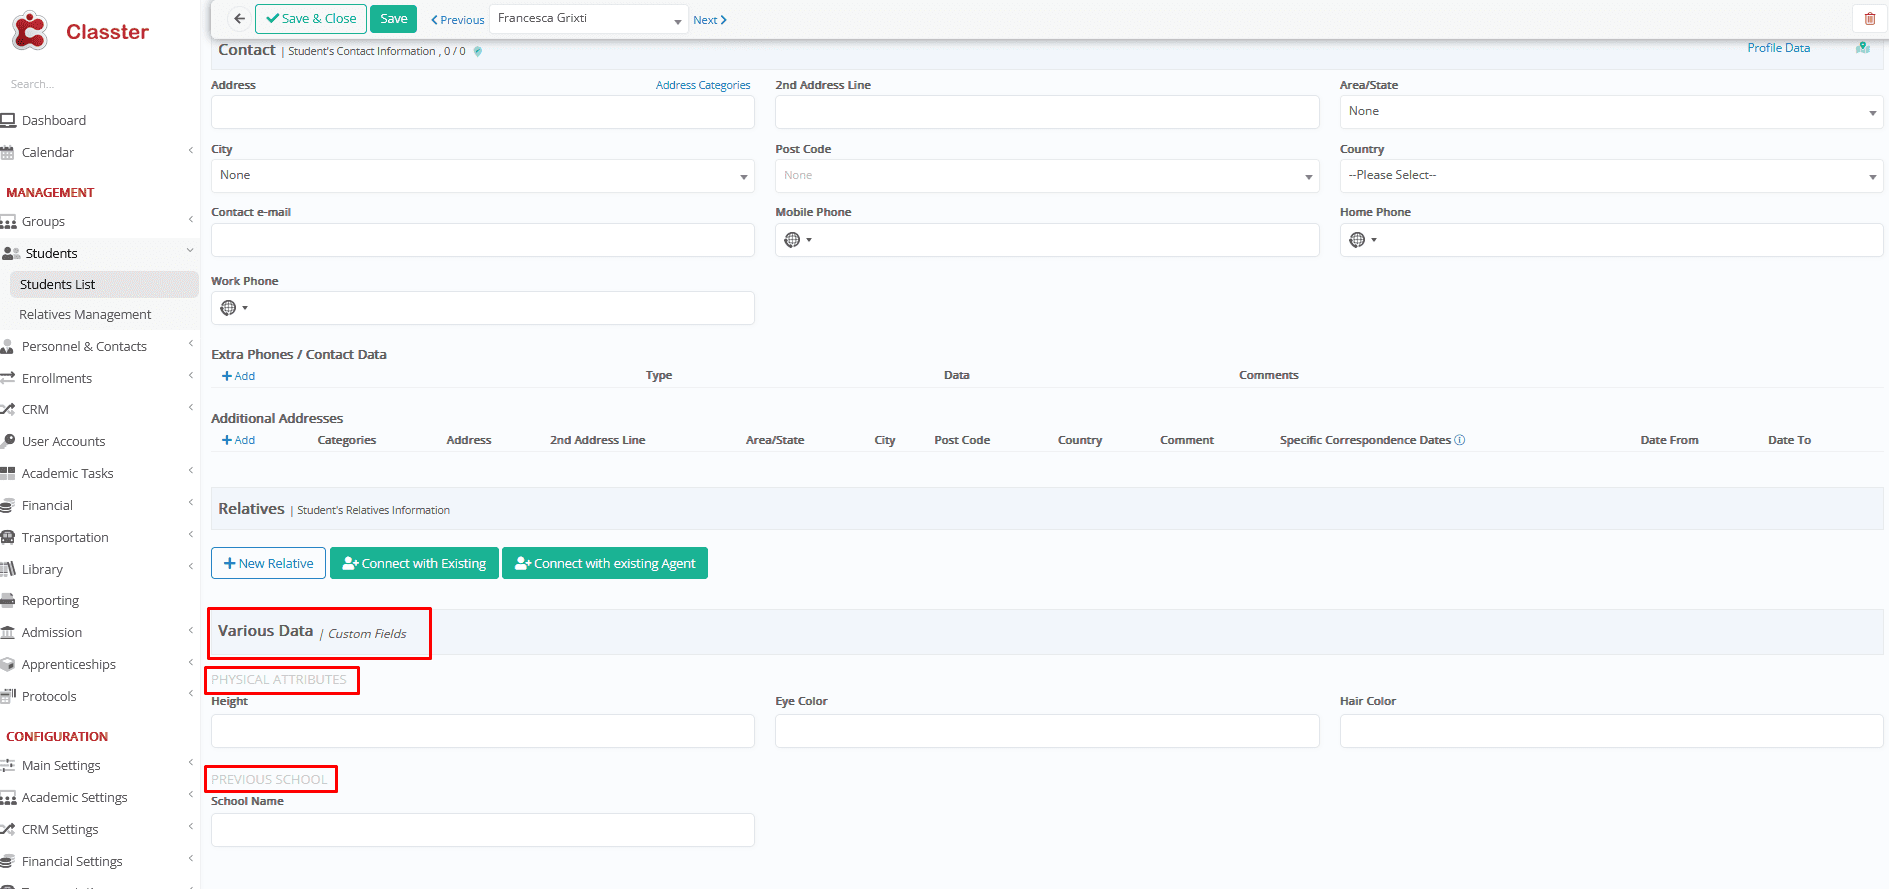
✅ The field is now active and will appear as a text input where you can enter the relevant information. You can find it in the _Student_ Card under the Various Data section.

Creating a Custom Fields Category
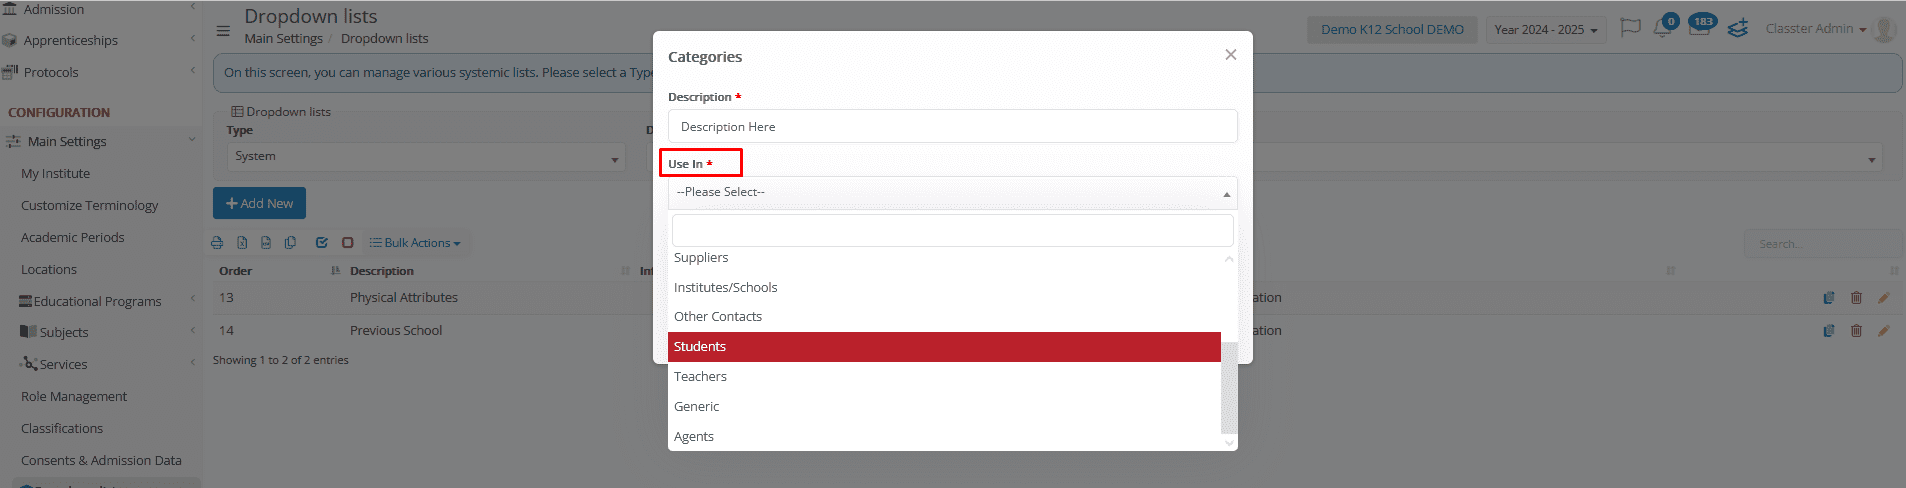
🔁 To create a specific category under Various Data, navigate to Main Settings > Dropdown lists > Type: System & Dropdown lists: Custom Fields Categories > Add the categories that best fit your needs.
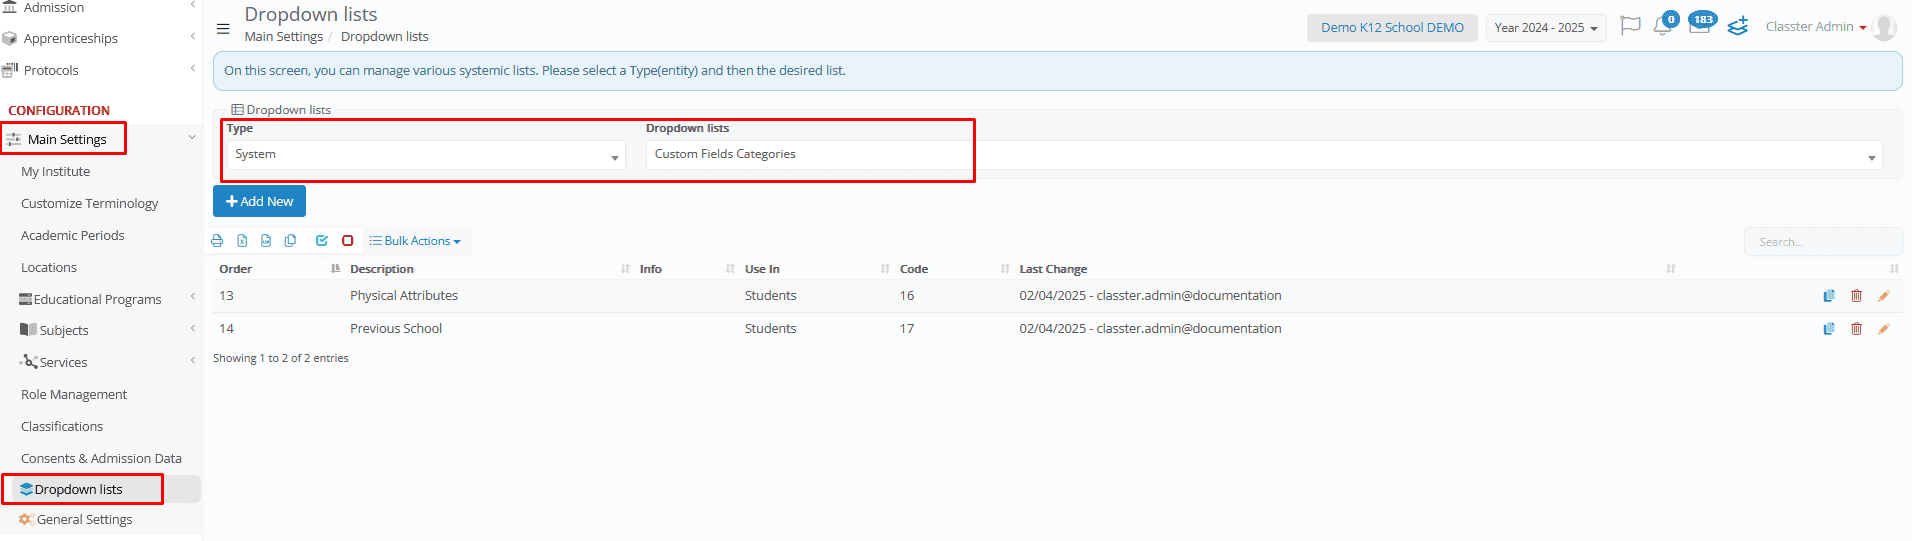
Configure each category by setting its Description, specifying the form where it will be applied, and providing any other relevant details.
Select the appropriate category when configuring your Custom Field.
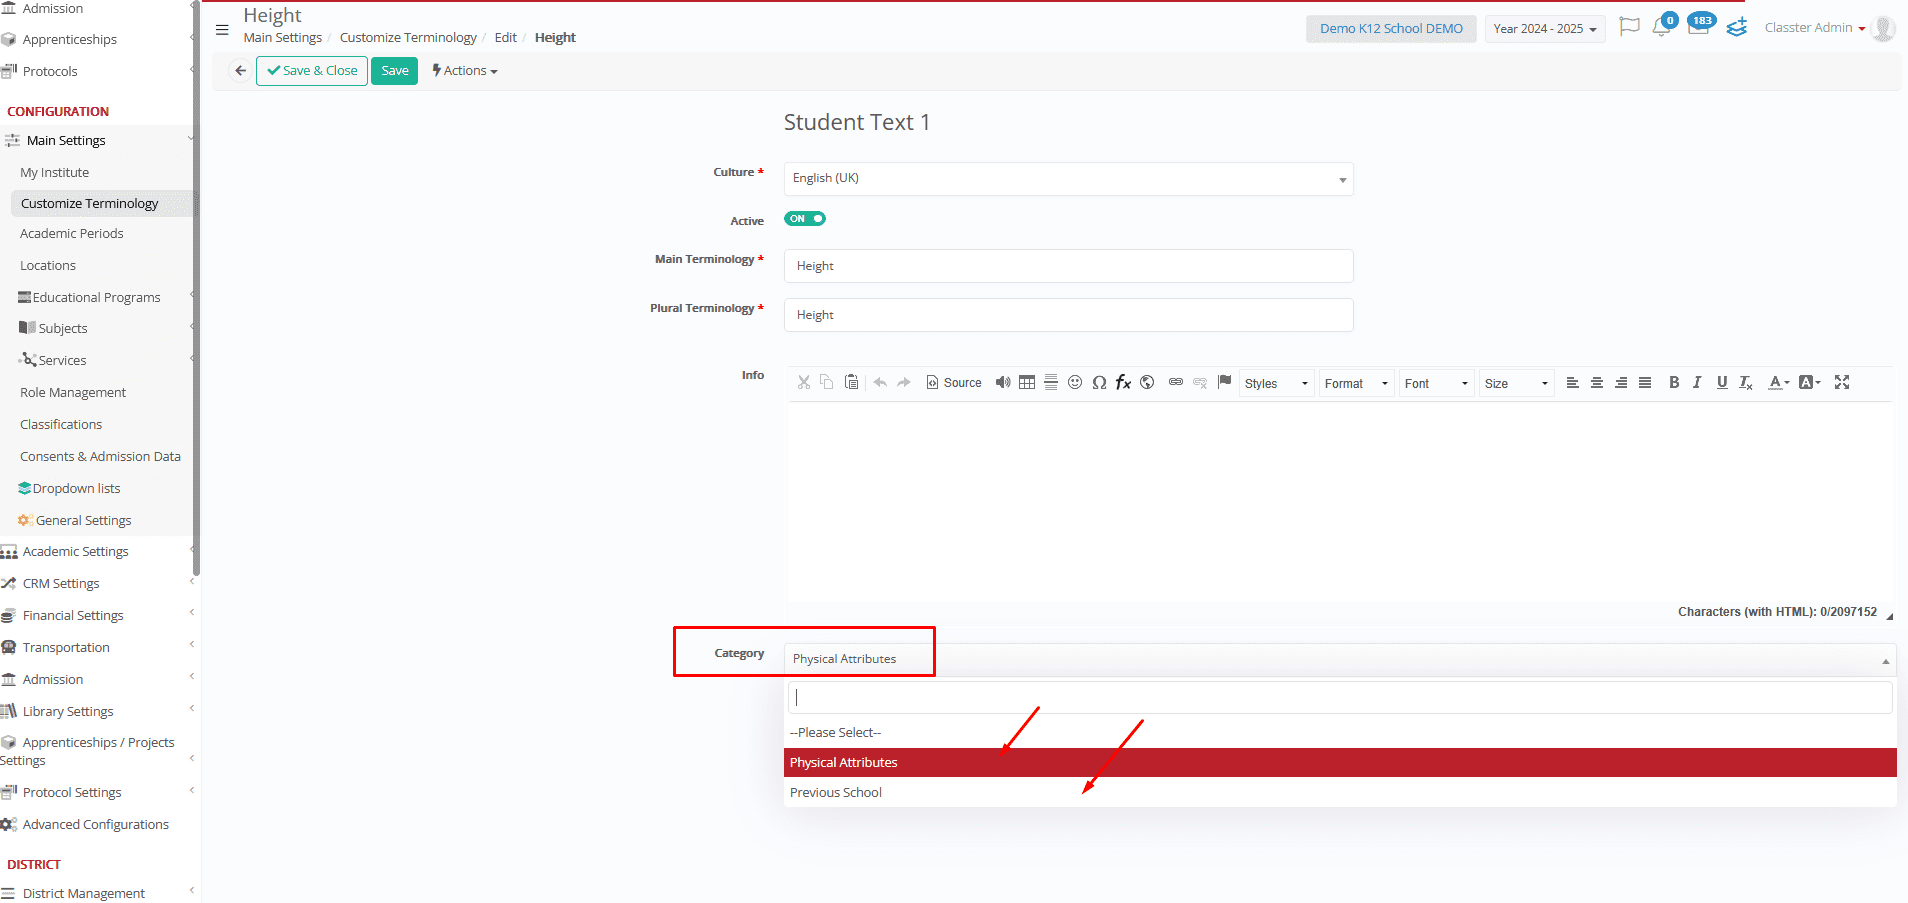
Save and refresh the Academic Period. The changes are now applied to all student forms, with the custom fields under Various Data displayed as separate categories.
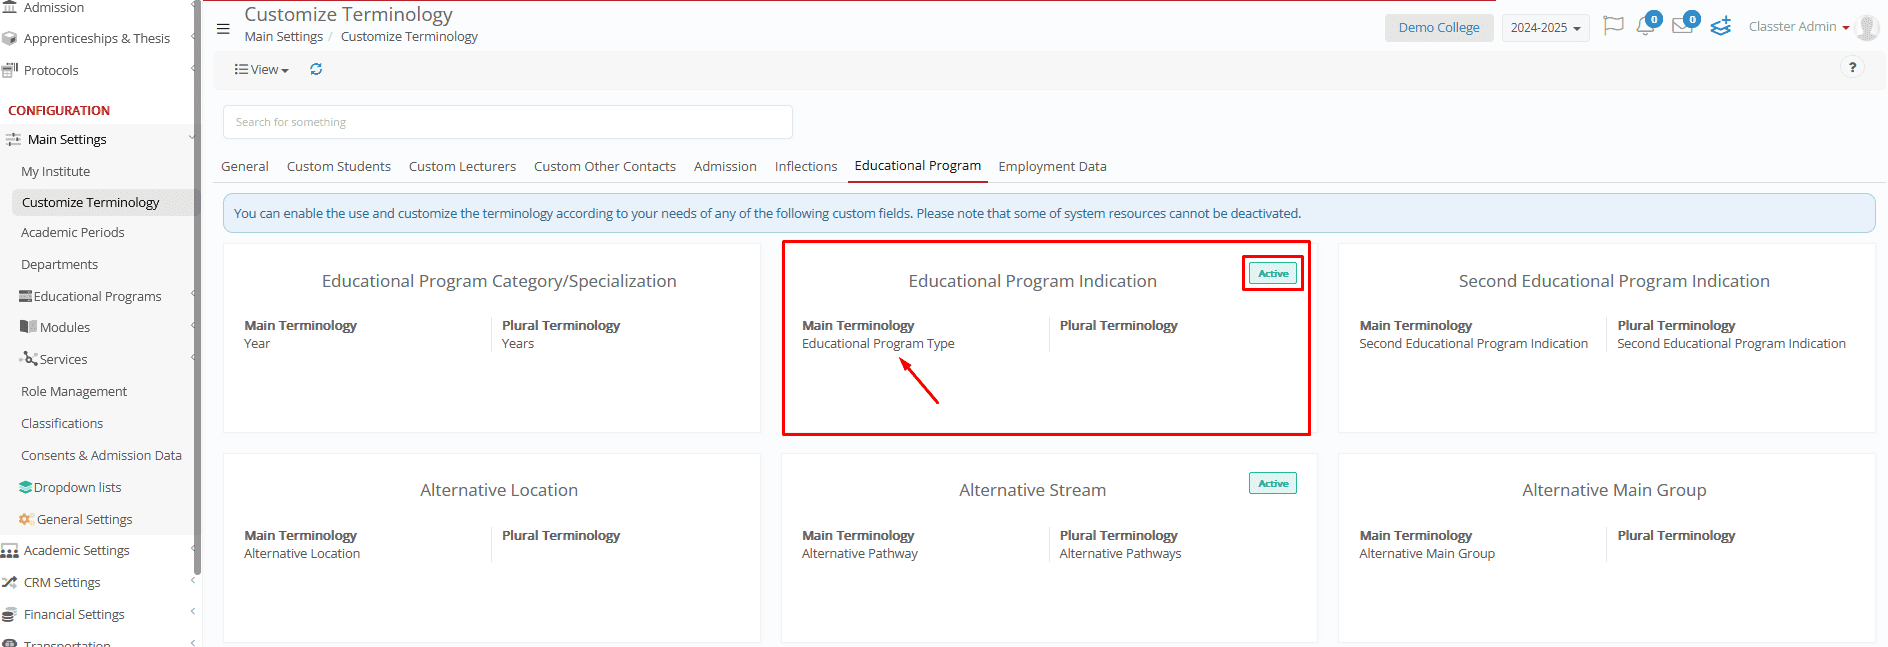
c. Educational Program Custom Fields
Enabling an Educational Program Field
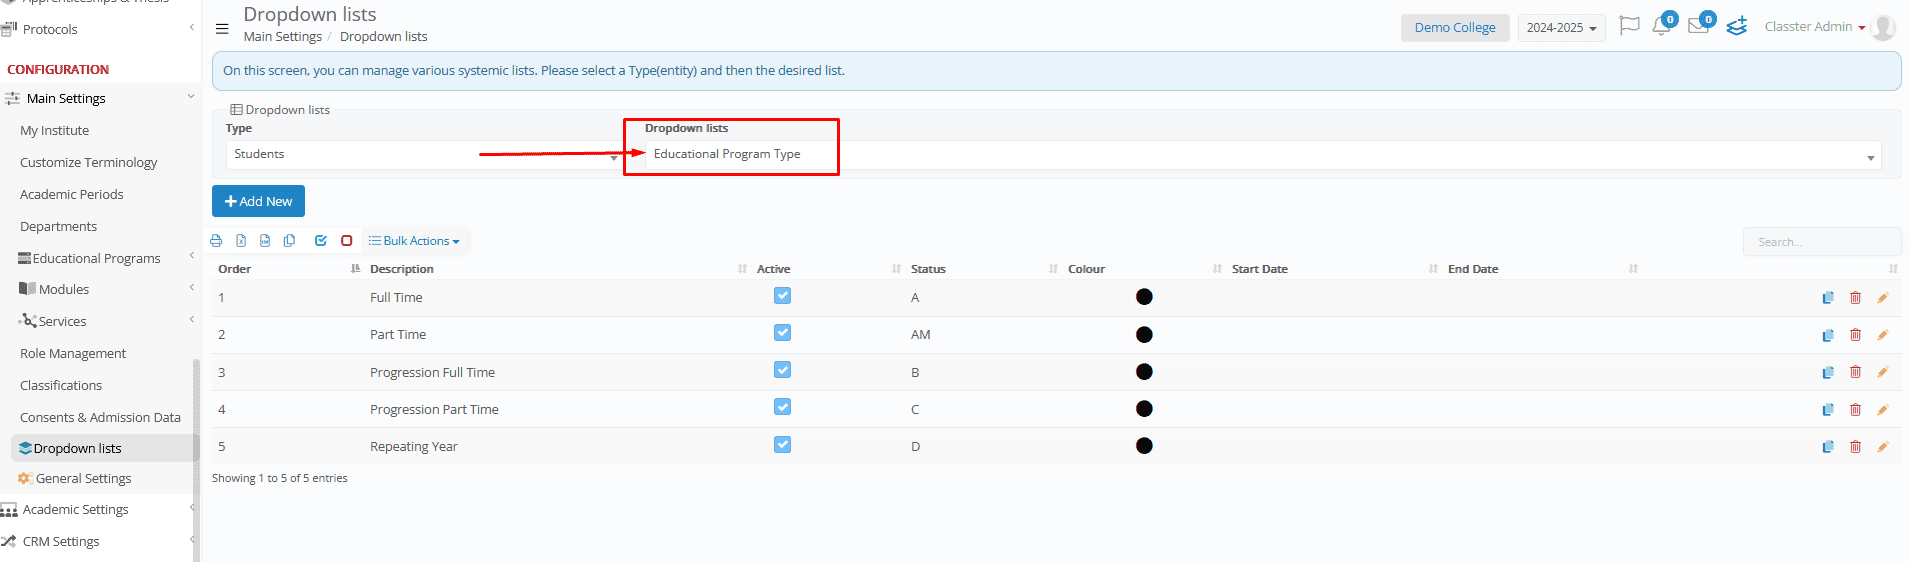
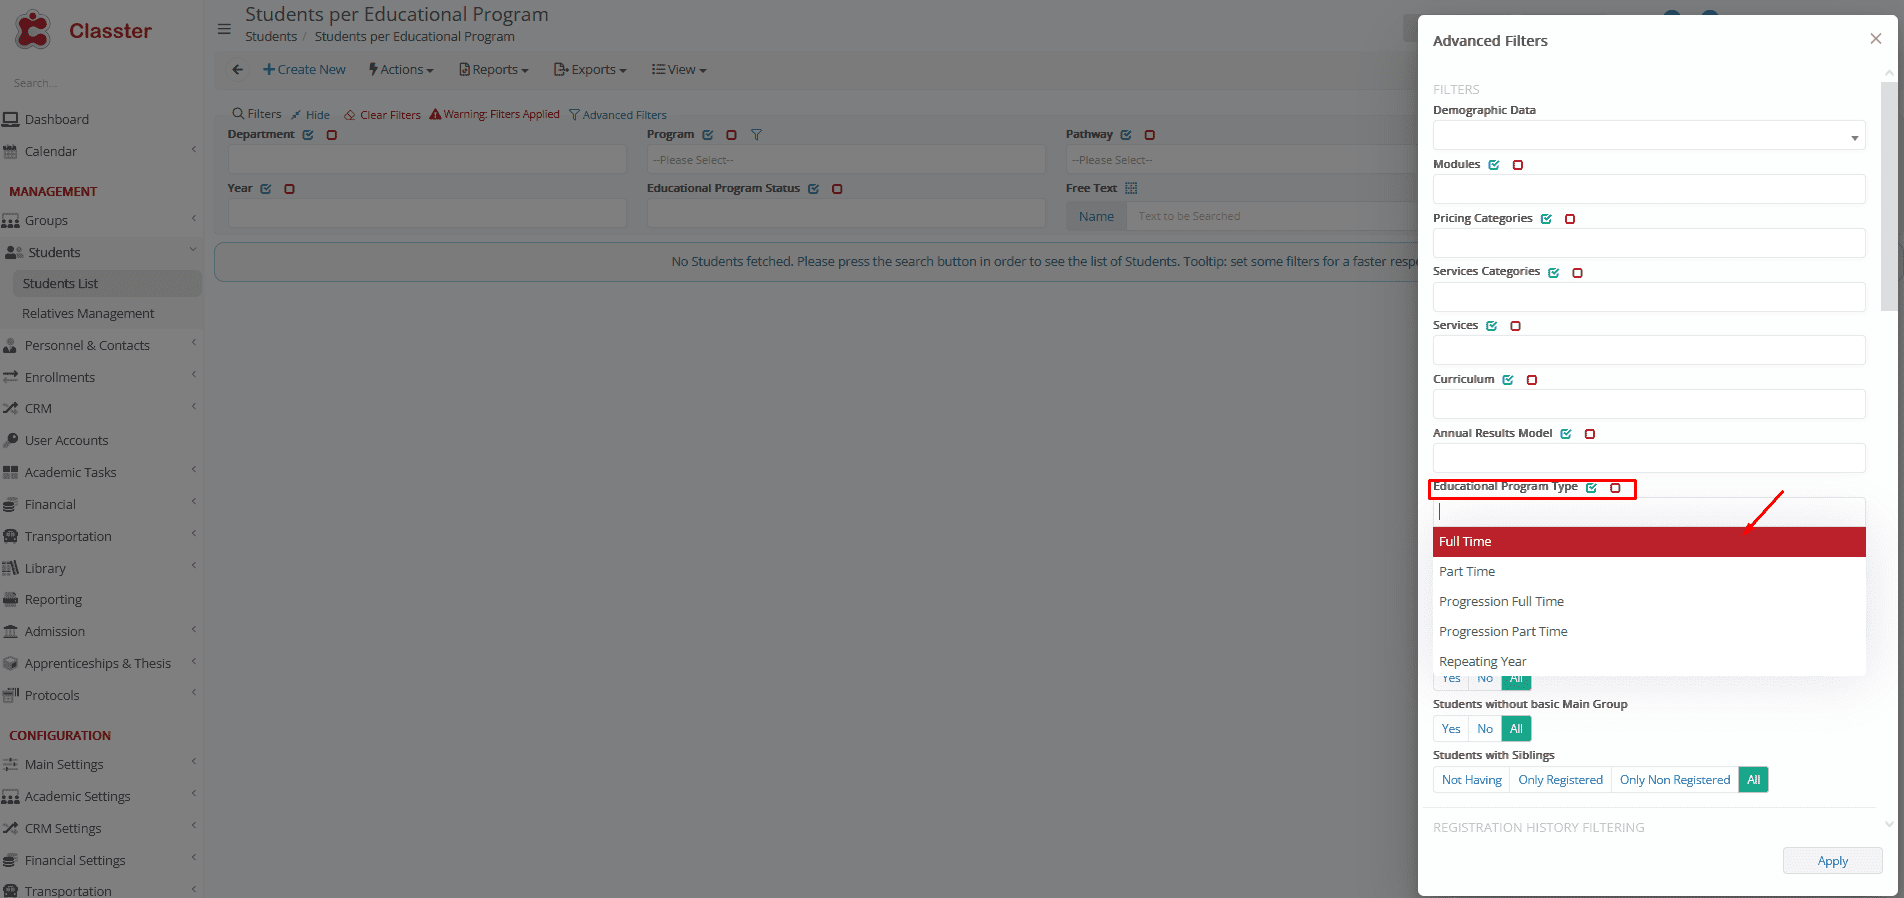
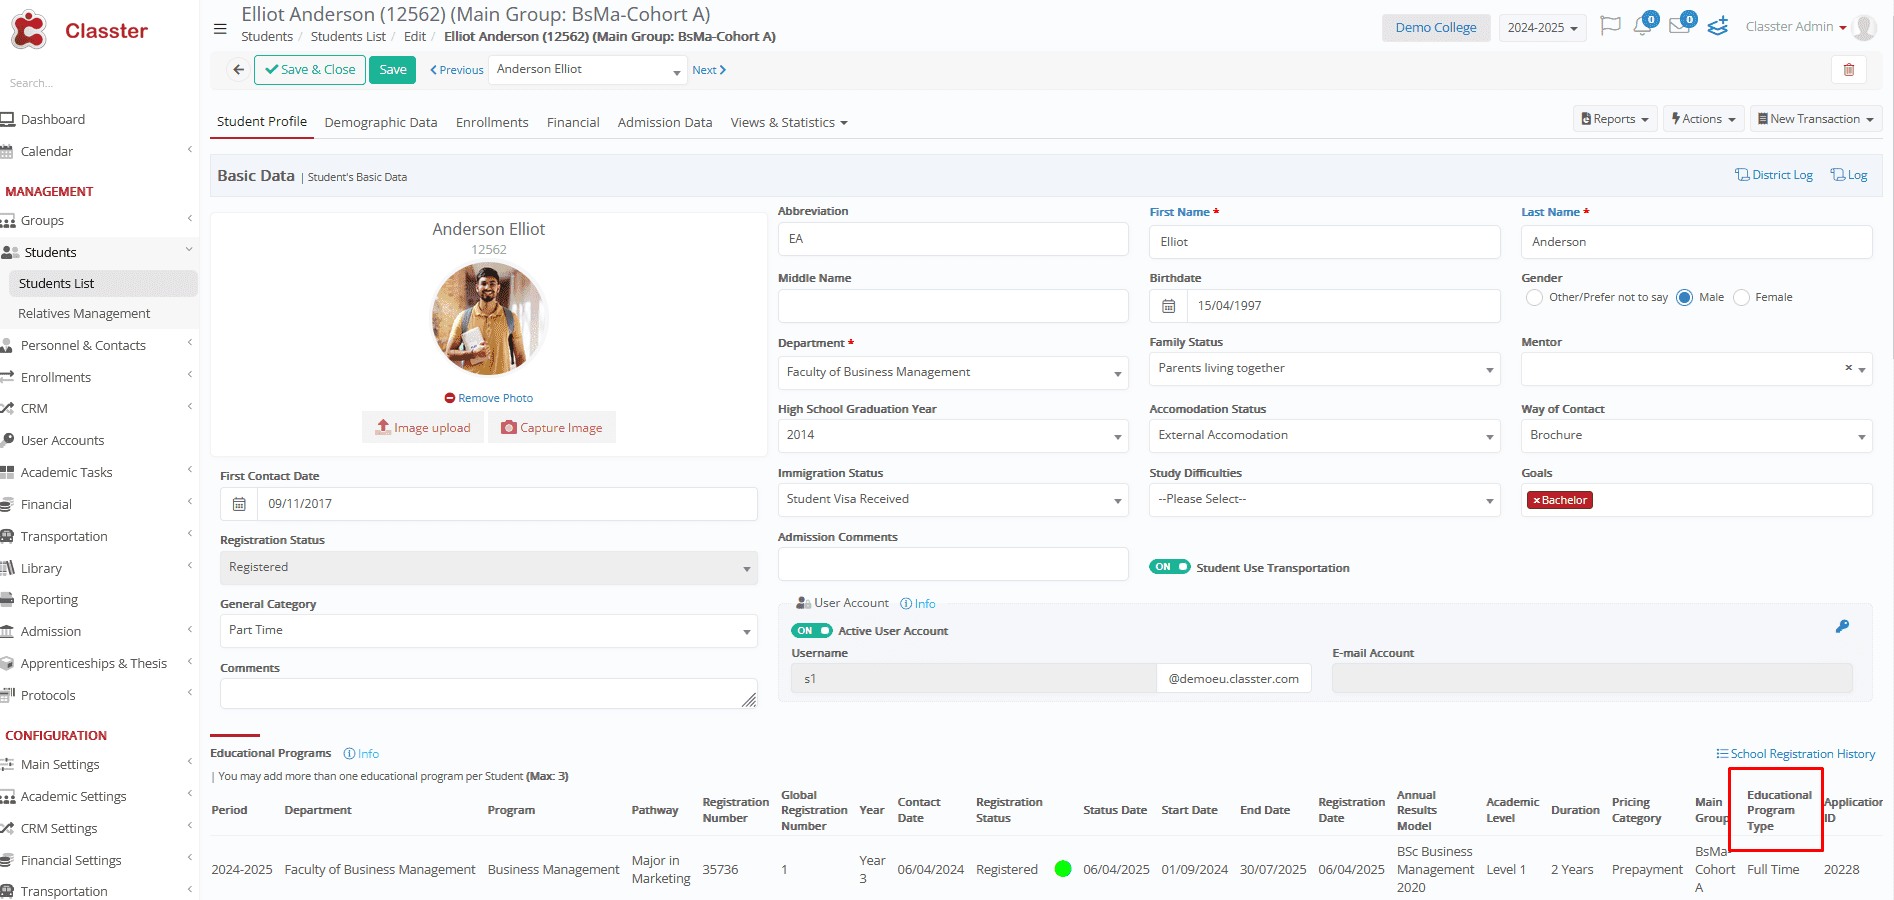
Activate the Educational Program Indication field and rename it to Educational Program Type. This field is linked to a dropdown list with the following options:
- Full-Time
- Part-Time
- Progression Full-Time
- Progression Part-Time
- Repeating Year
Where to Find It
Once set up, this field will be available in:
- Advanced Filters → View Students per Educational Program
- Student Form → Educational Program Details
Note on Alternative Fields
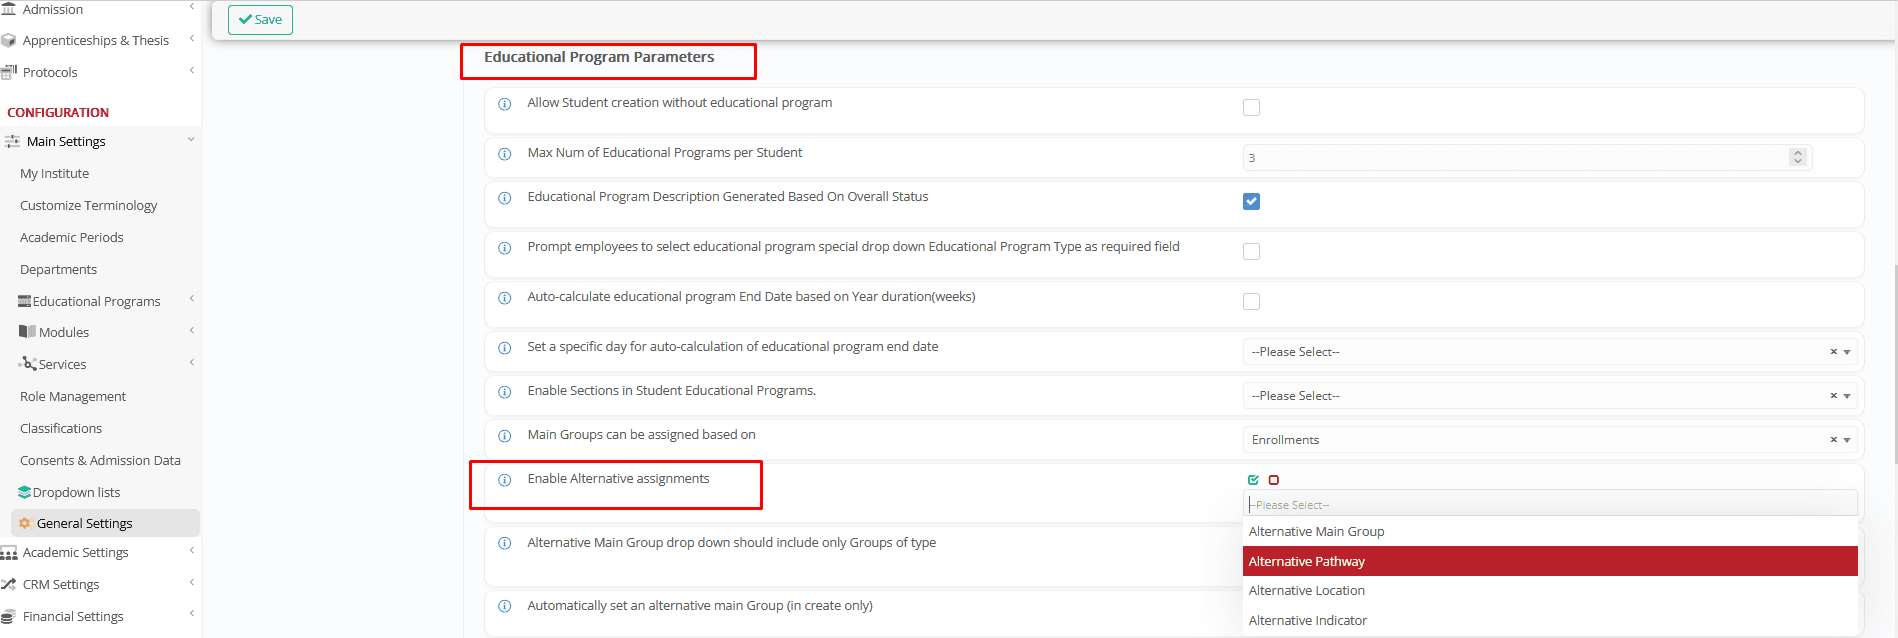
To enable other Alternative fields, activate the “Enable Alternative Assignments” setting under General Settings > Student Form > Educational Program Parameters. These fields will only be visible once this option is turned on.
For more details on Educational Program fields, check out: Custom Educational Program Fields.
! Notes for Main Entities
Classter allows customization of key terminology under the following categories:
You can also refer to the “Main Entities & Institutional Structure” manual for the main entities’ customization.
Defines different types of locations within an institution:
- Institution, Institute, Campus, Country, City, School, Level, Center, Department, Faculty.
Represents specific infrastructure within a location:
- Campus, City, Level, School, Department.
Represents academic progression levels:
- Year, Program, Course (as program), Certificate, Stage.
Represents academic pathways and subdivisions:
- Track, Pathway, Specialization, Focus Area, Year – Semester/Term/Quarter.
_Educational Program Category_ /Specialization
Classifies academic programs and specializations:
- Specialization, Study Type, Study Mode, Block, Track.
Defines alternative terms for students:
- Learner, Pupil, Scholar.
Defines alternative terms for teachers:
- Educator, Instructor, Tutor, Professor, Lecturer.
Represents academic courses or modules:
- Module, Course, Unit.
Defines student learning structures:
- Class, Cohort, Section, Team, Club.
Defines different research and academic writing requirements:
- Dissertation, Research Paper, Final Project.
Represents professional training experiences:
- Traineeship, Apprenticeship, Work Placement, Practicum.
Tracks student progress and participation:
- Logbook, Register, Tracker, Record.
Represents financial aid options:
- Grant, Fellowship, Financial Aid, Tuition Waiver.
Defines different authorization and permission types:
- Permission, Approval, Agreement, Authorization.
Conclusion
By following this guide, institutions can effectively tailor Classter’s terminology to fit their operational needs, ensuring clarity and consistency across all modules. Regular updates and best practices will help maintain a streamlined experience for users.