

An educational program as defined here in the Classter portal is the combination of _Grade_ and _Stream_ (terms may be customized). We will be looking at how to create grades and streams in which _Students_ can enrol in. Educational Programs are used throughout the Classter portal in Student/Teacher forms as well as in Student/_Teacher_ tabs.
Configuration > Main Settings > Educational Programs
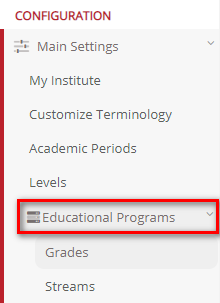
Figure 33
Grades
In this section we will look at one aspect of educational programs, specifically _Grades_. How we can create Grades or edit them. How to make them available for use in the portal.
Configuration > Main Settings > Educational Program > Grades
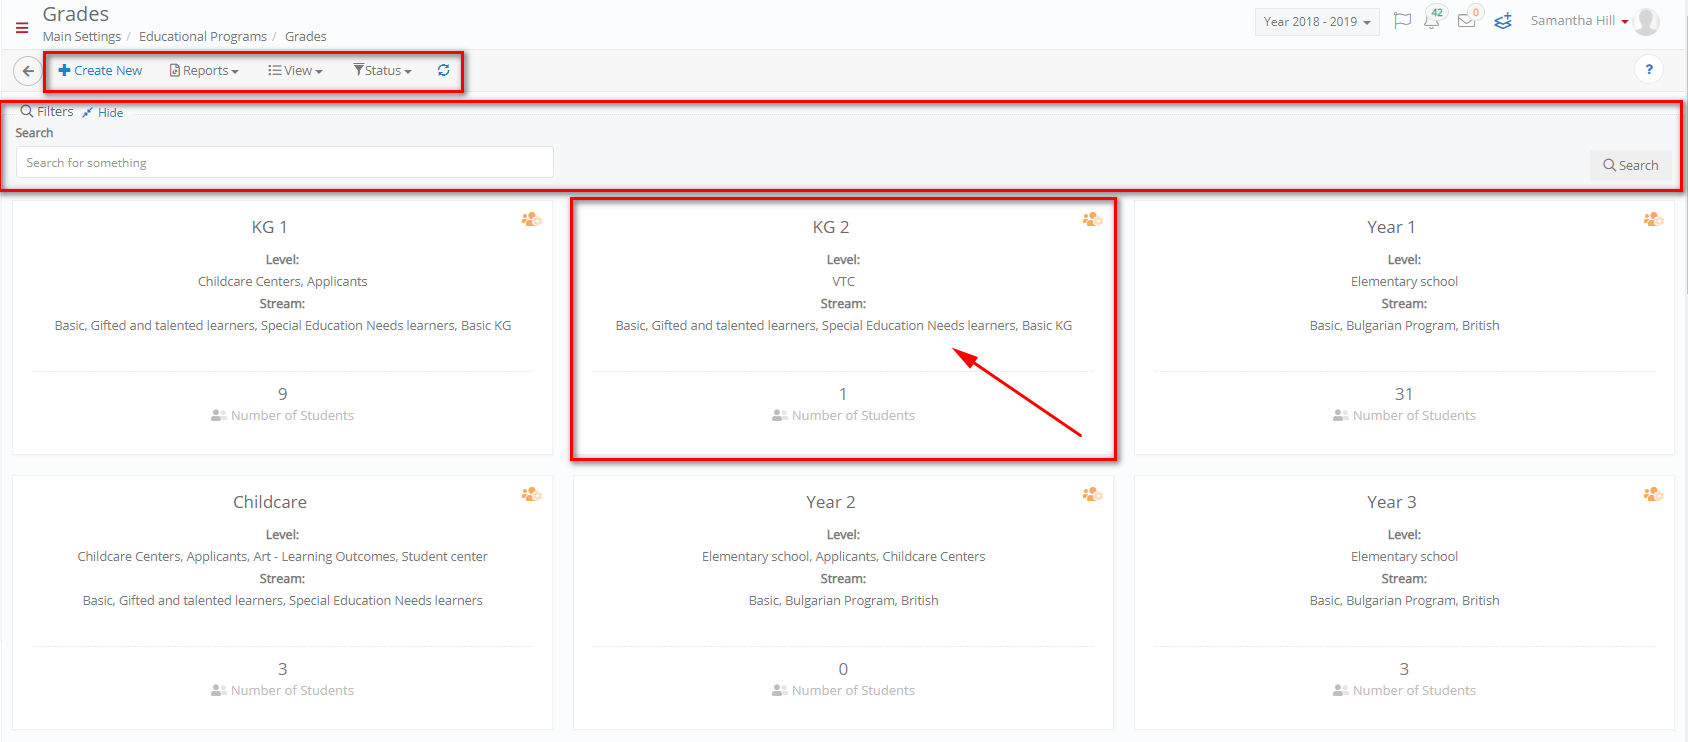 Figure 34
On this page you will see the following (Figure 34):
- View years in a Card or Grid view by clicking on the View button and choosing either option.
- View _Grade_ related reports.
- You can filter grades from the Status dropdown button e.g., active, or inactive.
- From the search field you may locate the year you wish to change.
- Click on the +Create New button to create a new year.
- By clicking on the year card, you can edit it.
- Click on the refresh button to refresh page.
Create New _Grade_
Once you click on the create new button, you will be transferred to the creation page (Figure 35).
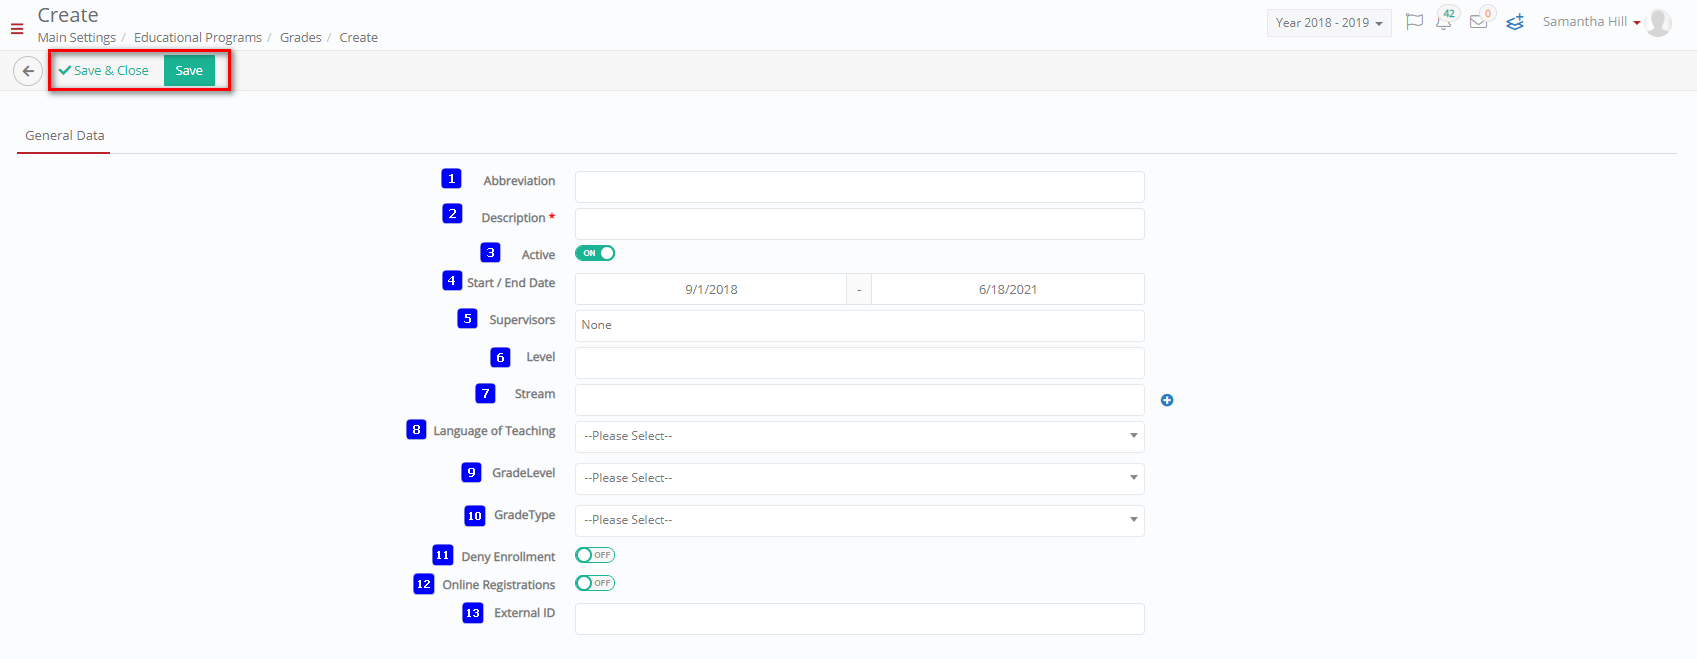 Figure 35
On this page you will see the following options (Figure 35):
- Abbreviation: Here you can enter a quick name code for this grade e.g., Y1.
- Description: Here you must add the description of this _Grade_ e.g., Year 1.
- Active: Turn the switch on to make this grade available for use in the portal.
- Start/End Date: This option allows you to define the period your institution considers an academic year. This period will then be used in organizing the educational program for your institution.
- Supervisors: Here you can choose a supervisor (Teacher/Employee) who is responsible for overseeing the normal operation for this grade academically.
- Level: Here you can add the level/_Location_ this grade will affect e.g., Elementary School.
- _Stream_: Here you will make the connection between grade and stream by adding which streams will be active in this year e.g., Basic.
- Language of Teaching: Here you can choose the language of study from the list of available languages in the dropdown list.
- _Grade Level_: Select the level of the grade from the dropdown list.
- _Grade Type_: Here you can choose a learning type e.g., Full-Time, or Part-Time.
- Deny Enrollment: If this is turned on then you will deny applicants and current _Students_ from enrolling to this grade.
- Online Registrations: Turning this on allows online registrations.
- External ID: Input the external ID for the grade here.
Once you are done click on the ‘Save’ button to save the new grade.
Edit Existing _Grade_
Once you click on the grade card that you created (Figure 34), you will be transferred to the edit page (Figure 36).
 Figure 36
On this page you will see the following options (Figure 36):
- Abbreviation: Here you can change the quick name code for this grade.
- Description: Here you can change the description of this _Grade_.
- Active: Turn the switch on to make this year available for use in the portal.
- Start/End Date: This option allows you to define the period your institution considers an academic year. This period will then be used in organizing the educational program for your institution. You should change it only if you have not associated it with active streams or classes because it will create problems in the timetables.
- Supervisors: Here you can choose a supervisor (Teacher/Employee) who is responsible for overseeing the normal operation for this grade academically.
- Level: Here you can change the level/_Location_ this grade will affect.
- _Stream_: Here you will make the connection between grade and stream by adding which streams will be active in this year. You can change it.
- Language of Teaching: Here you can change the language that will be used for teaching in this grade by your institution.
- _Grade Level_: Select the level of the grade from the dropdown list.
- _Grade Type_: Here you can change a learning type e.g., Full-Time, or Part-Time.
- Deny Enrollment: If this is turned on then you will deny applicants and current _Students_ from enrolling to this grade.
- Online Registrations: Turning this on allows online registrations.
- External ID: Input the external ID for the grade here.
Once you are done click on the ‘Save’ button to save the grade. If you want to delete this grade you can click on the ‘Delete’ button. If this grade is in use, you will see a warning message (Figure 37).
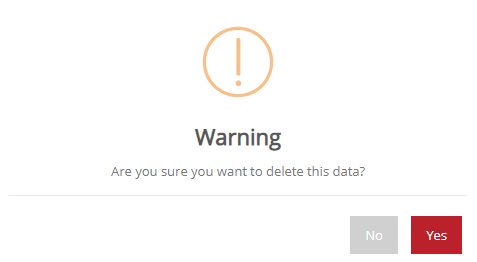
Figure 37
On the edit page you can now see additional tabs other than the General Data tab you could not see in the creation page. Now you can add more information to this year by filling in the information on the rest of the tabs (Figure 38).
![]()
Figure 38
Academic
Here you can add information regarding academics to this year (Figure 39).
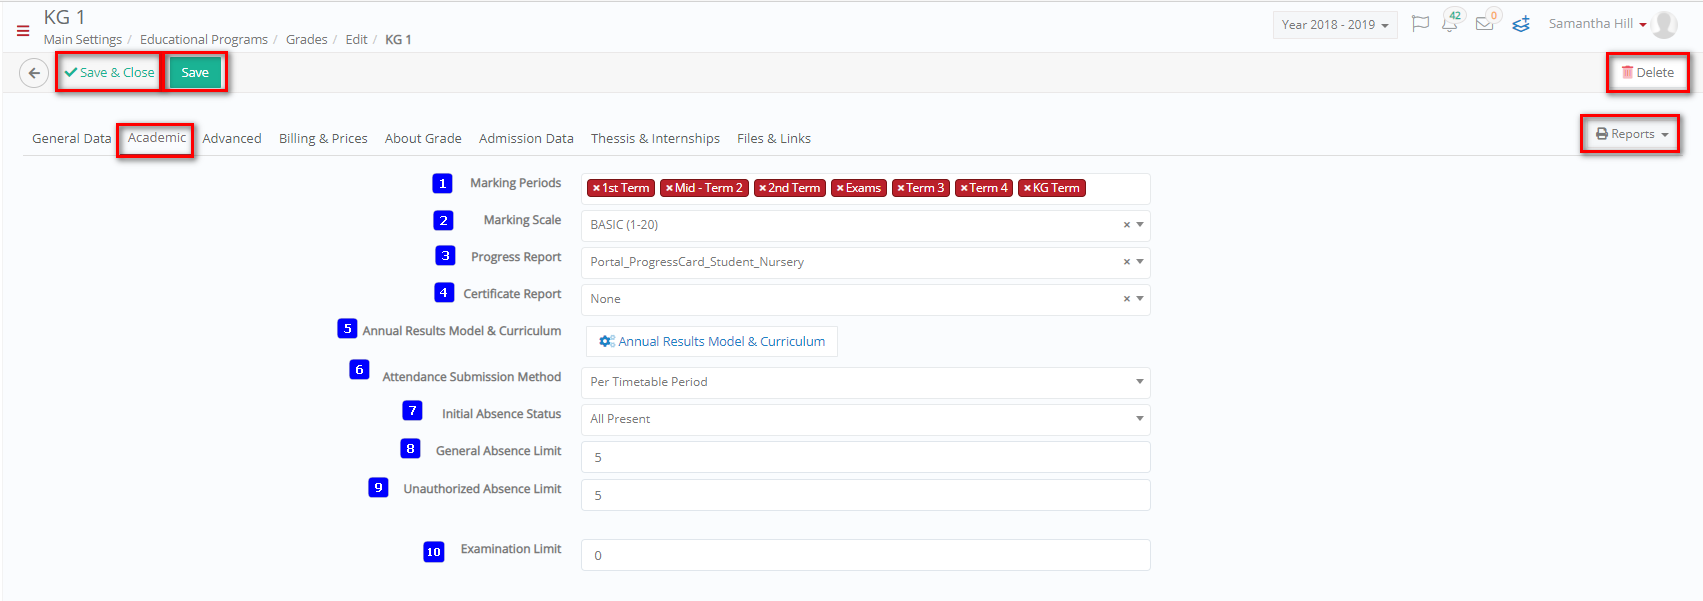 Figure 39
On this page you will see the following options (Figure 39):
- Marking Periods: Here you can choose how many marking periods will be contained in this academic year e.g., 1st Term, 2nd Term etc.
- Marking Scale: From the list choose which marking scale you wish to use e.g., Basic (1-20).
- Progress Report: From here you can choose a template for progress reports.
- Certificate Report: From here you can choose a template for the certificate reports.
- Annual Results Model & Curriculum: By clicking on the button, you will see a popup window where you will be able to assign the annual results model and curriculum to specific streams (Figure 40).
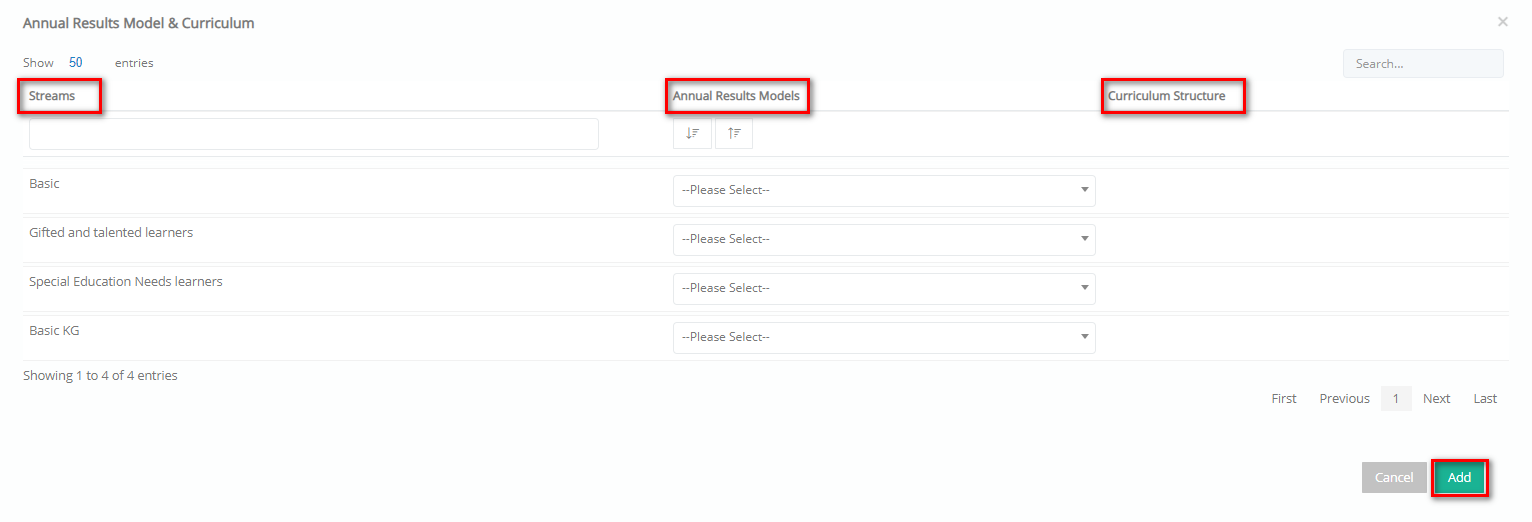 Figure 40
- Attendance Submission Method: Here you can select attendance submission method for the _Grade_ e.g., Absences based on timeline or based on _Subject_ etc.
- Initial Absence Status: Here you can define the starting absence status before any changes are reported by _Teachers_ or staff e.g., All Present.
- General Absence Limit: Enter the maximum yearly limit for student absences e.g., 20.
- Unauthorized Absence Limit: enter the number of unauthorized absences per year allowed e.g., 15.
- Examination Limit: Enter the maximum number of examinations _Students_ can have per year.
Once you are done click on the ‘Save’ button to save the year. If you want to delete this grade you can click on the ‘Delete’ button. If this grade is in use, you will see a warning message (Figure 37).
Advanced
Here you can manage advanced settings concerning registration classifications for students registering to this year (Figure 41).

Figure 41
On this page you will see the following options (Figure 41):
- Independent Registration Number: If this switch is turned on then the students registering will receive unique registration numbers associated to this year.
- Online Registration Classification: Here you can choose a classification type for students registering online.
- Registration Statistics Classification: Here you can choose what statistic classification will be used for this year.
Once you are done click on the ‘Save’ button to save the grade. If you want to delete this grade you can click on the ‘Delete’ button. If this grade is in use, you will see a warning message (Figure 37).
Billing & Prices
On this tab you can manage the billing details associated with this year (Figure 42).
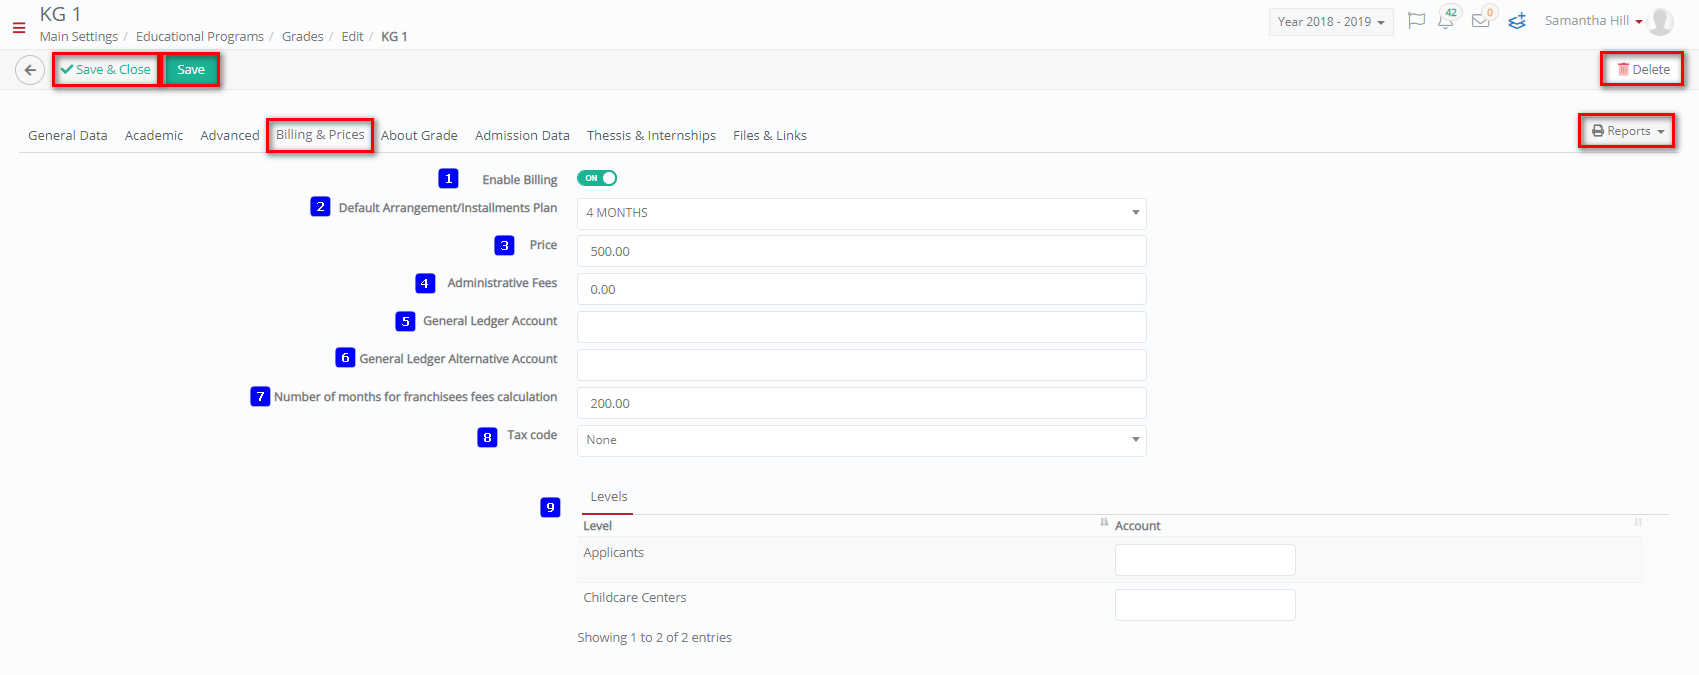
Figure 42
On this page you will see the following options (Figure 42):
- Enable Billing: If this is turned on then the billing functions will be enabled for this grade. If billing is turned off, then ignore the rest of the options on this page.
- Default Arrangement/Instalments Plan: Choose which arrangement/instalment plan you want to follow for _Students_ registered for the year e.g., 4-month plan.
- Price: Enter the price to be charged to students for this academic year e.g., 500 euros.
- Administrative Fees: Enter the amount of administrative fees to be charged for this year (if applicable).
- General Ledger Account: Enter your institutions general ledger account.
- General Ledger Alternative Account: Enter your institutions alternative general ledger account if your institution possesses one.
- Number of months for franchisees fees calculation: Here you can enter the franchise fee if applicable for your institution.
- Tax code: Select the tac option for this _Grade_ e.g., Main or Tax free.
- Levels: Add the account information for the levels available.
Once you are done click on the ‘Save’ button to save the grade. If you want to delete this grade you can click on the ‘Delete’ button. If this grade is in use, you will see a warning message (Figure 37).
About _Grade_
On this tab you can describe various aspects of the year. This section is entirely optional.
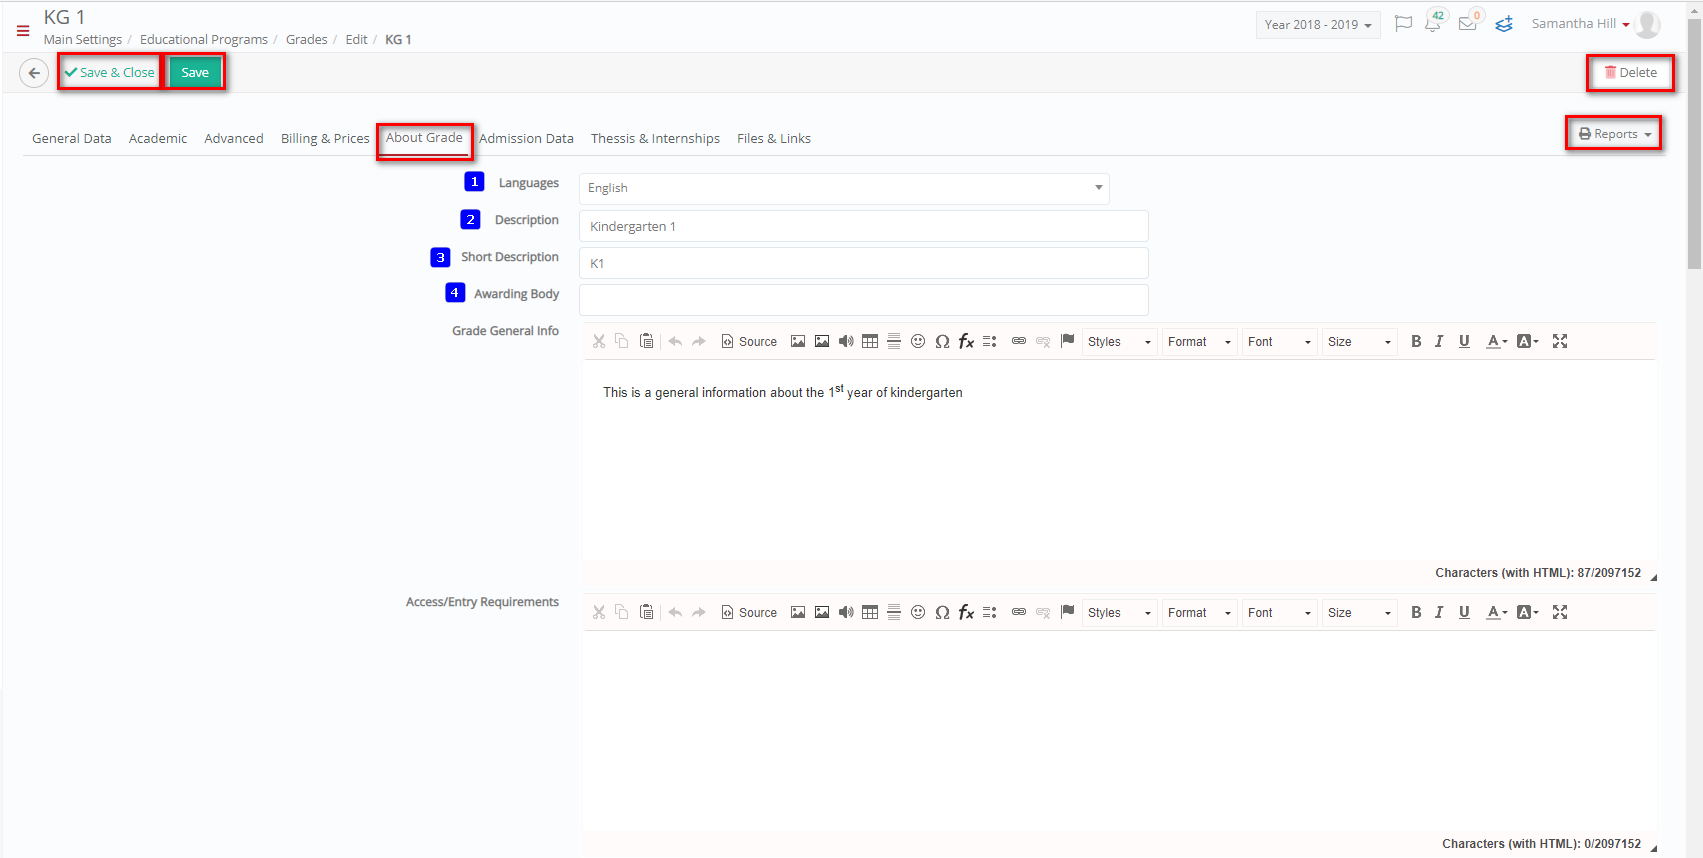 Figure 43
On this page you will see the following options
- Languages: Select the language to be used for the grade.
- Description: Add a full description for the grade.
- Short Description: Add a short description for the grade.
- Awarding Body: Add the degree awarding body.
Further on this page you will see the following text boxes (Figure 43):
- Grade General Info
- Access/Entry Requirements
- Other Entry Requirements
- Main Fields of Study
- Program Requirements
- Marking Scheme
- Access to Further _Students_
- Career Opportunities
- Program Learning Outcomes
- Professional Status
- Additional Info
- Further Info
Once you are done click on the ‘Save’ button to save the grade. If you want to delete this _Grade_ you can click on the ‘Delete’ button.
Admission Data
Here you can enable educational programs for the year and other acceptance criteria (Figure 44).

Figure 44
On this page you will see the following text boxes (Figure 44):
- Educational Programs Enabled: Here you can choose the educational programs enabled for this academic year e.g., Basic, Bulgarian Program, British.
- Maturity Age: Here you can enter the minimum age for enrollment in the year e.g., 5.
- Maximum Number of Students: Here you can define the maximum number of _Students_ that can be enrolled to this year e.g., 10.
- Application Types: Here you may choose the types of applications accepted for this year e.g., New Application to Elementary School.
- Qualification Criteria: Here you can set the criteria required by the institution to accept students e.g., entrance interview.
- Next Grades: By clicking on the add button in this option you can add qualifications needed for progression to following year (Figure 45).
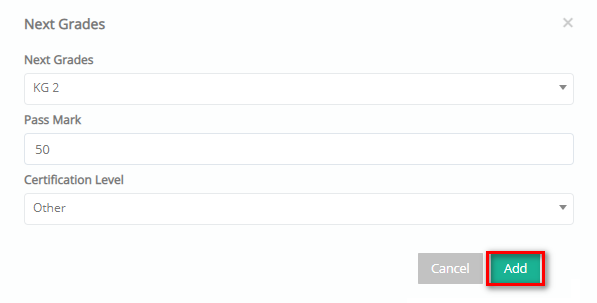
Figure 45
Once you are done click on the ‘Save’ button to save the grade. If you want to delete this grade you can click on the ‘Delete’ button.
_Thesis_ & _Internships_
Here you can configure thesis and apprenticeships for this grade, if applicable.
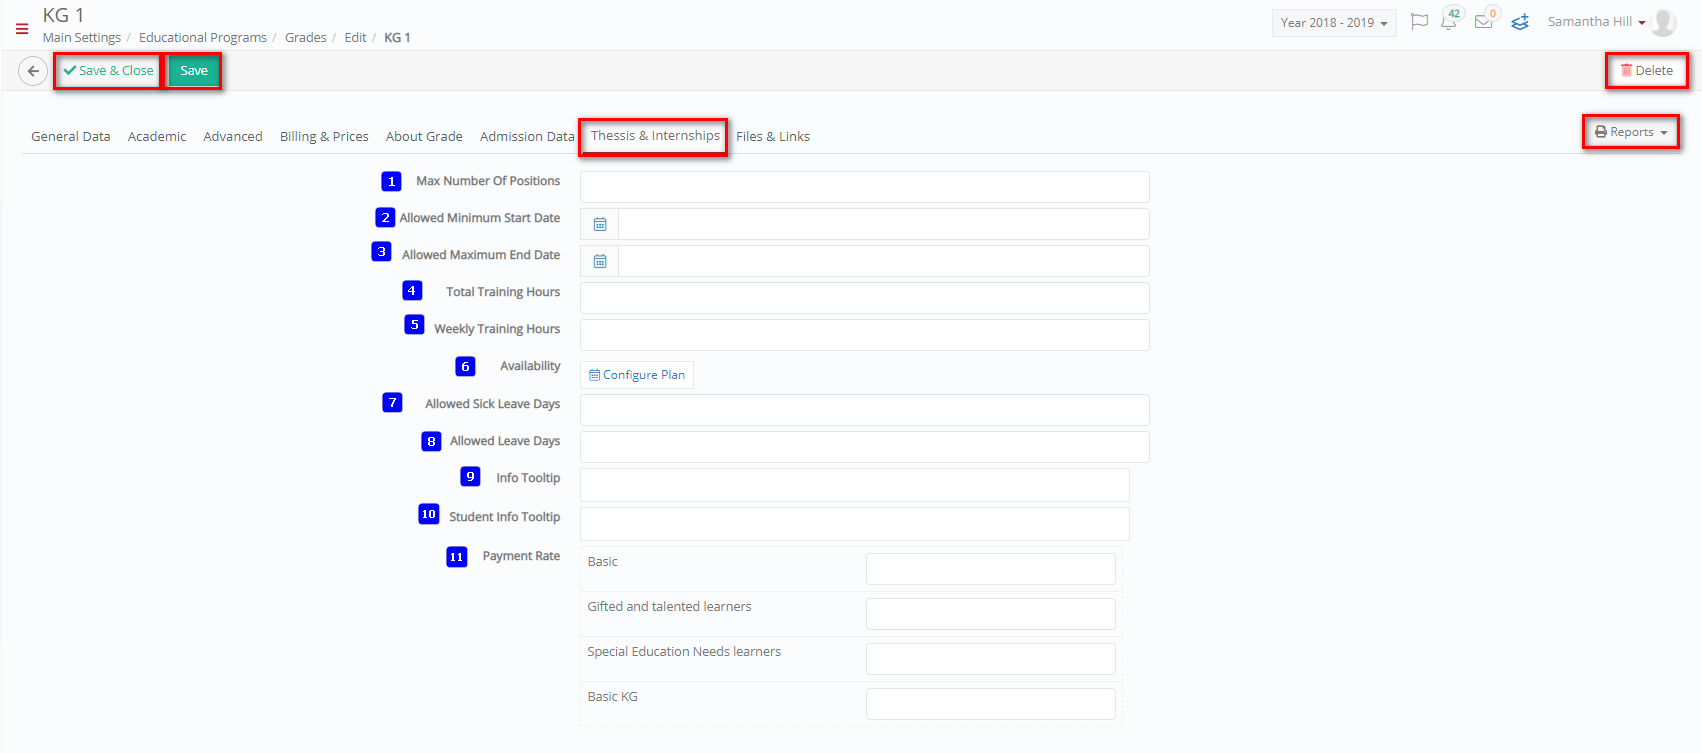 Figure 46
- Max Number of Positions: Maximum number of apprenticeship positions available to _Students_ of this course.
- Allowed Minimum Start Date: The date when students from this course are eligible to start their apprenticeship.
- Allowed Maximum End Date: The date when students from this course are expected to end their apprenticeship.
- Total Training Hours: The total training hours required for the apprenticeship or work experience.
- Weekly Training Hours: This is a breakdown of the total training hours into hours required for each week.
- Availability: The availability is configured by the administrator using the ‘Configure Plan’ option and will be made available to the employer when creating jobs.
- Allowed Sick Leave Days: The number of sick leave days the student is eligible for while on apprenticeship.
- Allowed Leave Days: The number of leave days the student is eligible for while on apprenticeship.
- Info Tooltip: These are information messages about the application provided by the institute, for the employers.
- Student Info Tooltip: These are information messages about the application provided by the institute, for the students.
- Payment Rate: The payment rate is per hour and varies depending on the year of the course. This rate is used when calculating the student’s payments
Configure Plan
The configure plan option allows you configure availability at _Grade_ or at _Group_ level.
- Click on the Configure Plan button to open a new window.
 Figure 47
- Select either Availability per _Grade_ or Availability per _Group_ and set Availability.
-
- For Availability per Group, you need to select a group then set availability.
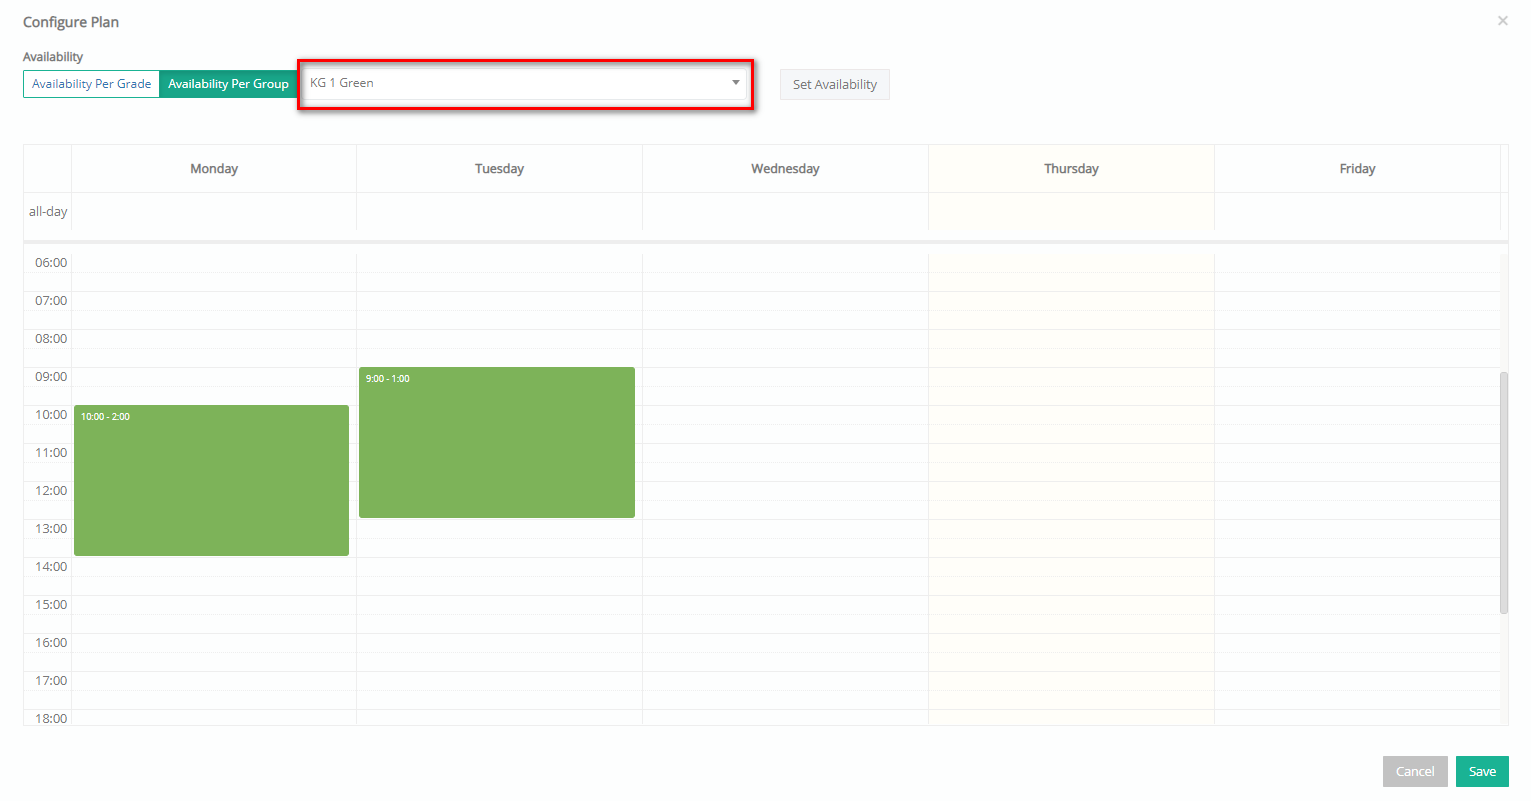 Figure 48
Files & Links
Here you can add any files or links that are related to this academic year (Figure 49).
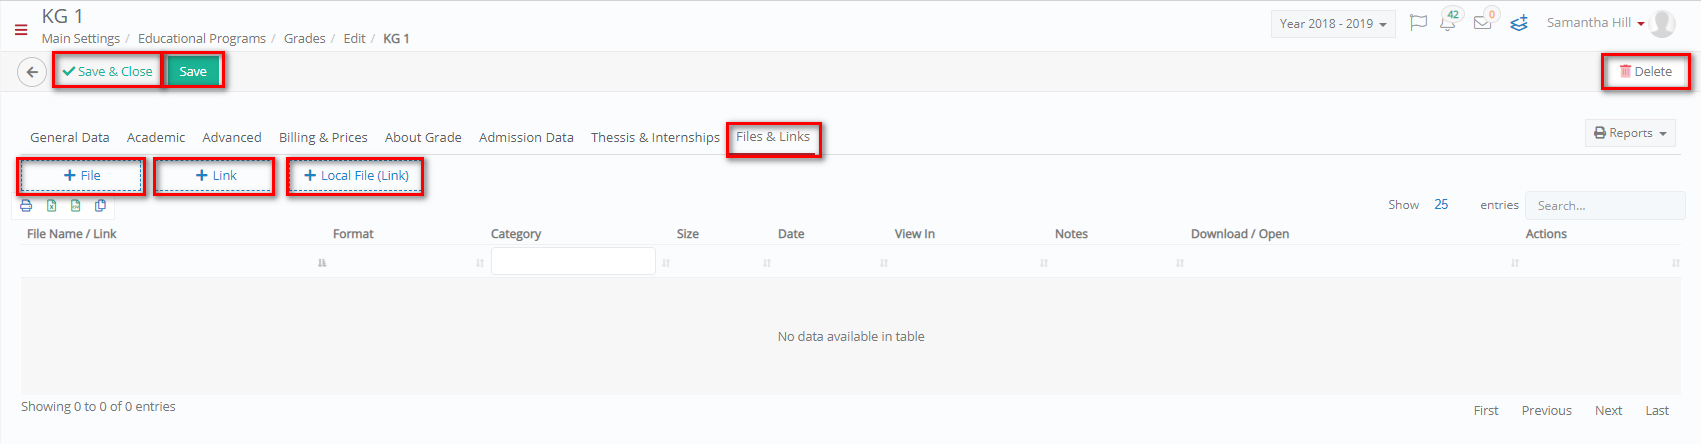 Figure 49
On this page you will see the following options (Figure 49):
- Use the File link to upload files e.g. books
-
- Choose a file
- Select a category
- Select in which views these can be accessed, i.e. View in Staff, _Students_, _Teachers_, Creator, etc.
- Add Notes related to the file

Figure 50
- Use the Link button to add links related to _Group_
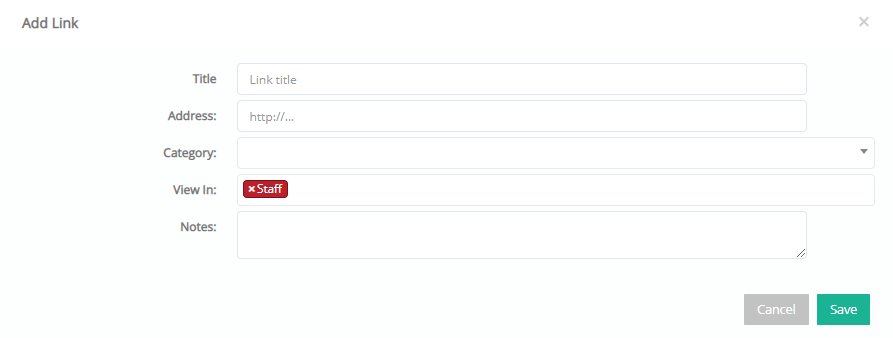
Figure 51
- Use the Local File (Link) to upload files from the local file directory.
Once you are done click on the ‘Save’ button to save the grade. If you want to delete this grade you can click on the ‘Delete’ button.
Note: All fields or options with a red asterisk next to them are mandatory fields or options. If you do not fill them in, you will be unable to save your creations or edits.
_Streams_
You can create _Streams_ that _Students_ will follow, they are a set academic program that contains students’, years, and _Subjects_. We will be looking at how you can create and edit Streams.
Configuration > Main Settings > Educational Program > Streams
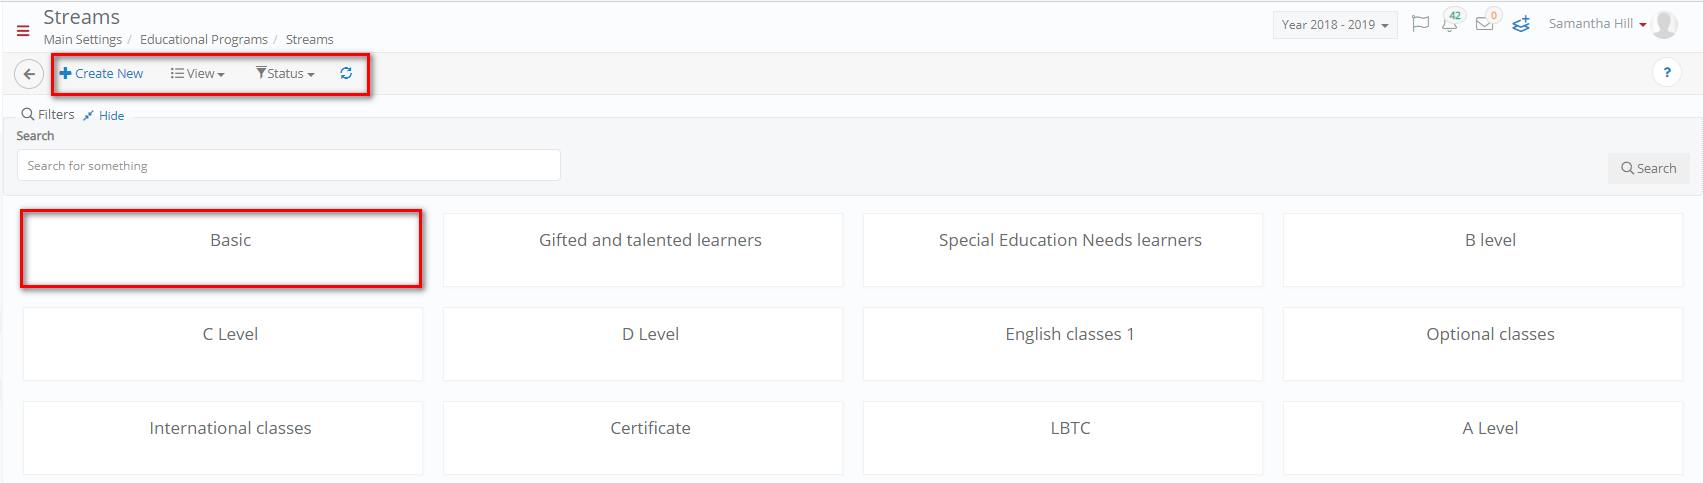 Figure 52
On this page you will see the following (Figure 52):
- View streams in a Card or Grid view by clicking on the View button and choosing either option.
- You can filter streams from the Status dropdown button e.g., active, or inactive.
- From the search field you may locate the stream you wish to change.
- Click on the +Create New button to create a new stream.
- By clicking on the stream card, you can edit it.
- Click on the refresh button to refresh page.
Create New _Stream_
Once you click on the create new button, you will be transferred to the creation page (Figure 53).
You will arrive on the Basic Data tab. You must also fill in the Academic and Billing & Prices tab.
Basic Data
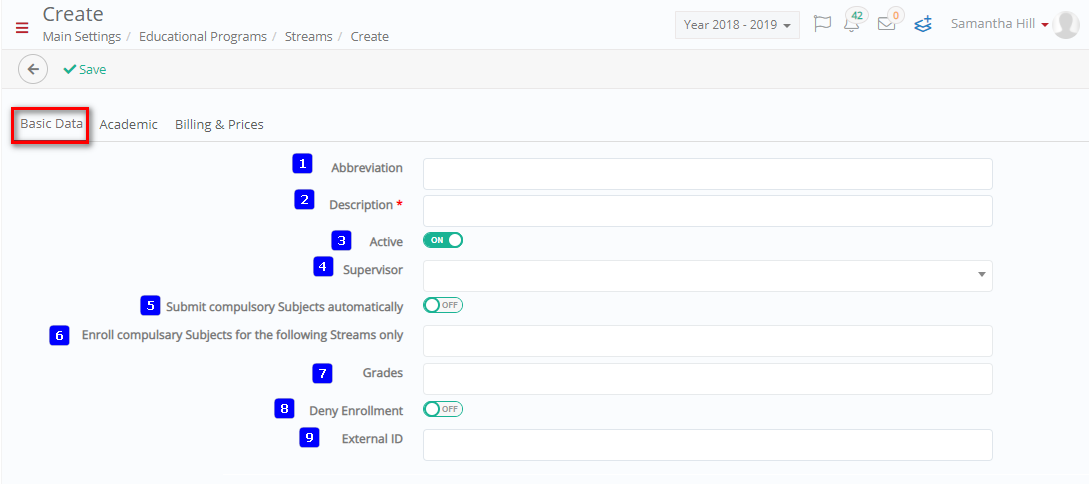
Figure 53
On this page you will see the following (Figure 53):
- Abbreviation: Here you can enter a short code for the new stream e.g., IB.
- Description: Here you must enter a description of the stream e.g., International Baccalaureate.
- Active: If this switch is turned on then the stream will be available to the system for use in admissions, students etc.
- Supervisor: Here you can choose an employee or _Teacher_ to be the academic supervisor for this stream e.g., Martha Testra.
- Submit compulsory subjects automatically: If this is turned on then _Students_ attending this stream will be automatically assigned certain _Subjects_ by default.
- Enroll compulsory subjects for the following streams only: Here if you wish you can either enter all streams or wait to edit this _Stream_ once you have first created it to add itself in this option e.g., once created you can edit this stream and enter International Baccalaureate into this option.
- _Grades_: Here you can make the connection between years and the stream. Choose the years that will be included in this stream e.g., year 5 year 6.
- Deny Enrollment: If this switch is on then enrollment for this stream will not be available in admission portal for registration.
- External ID: Add the external ID for the grade here.
Academic
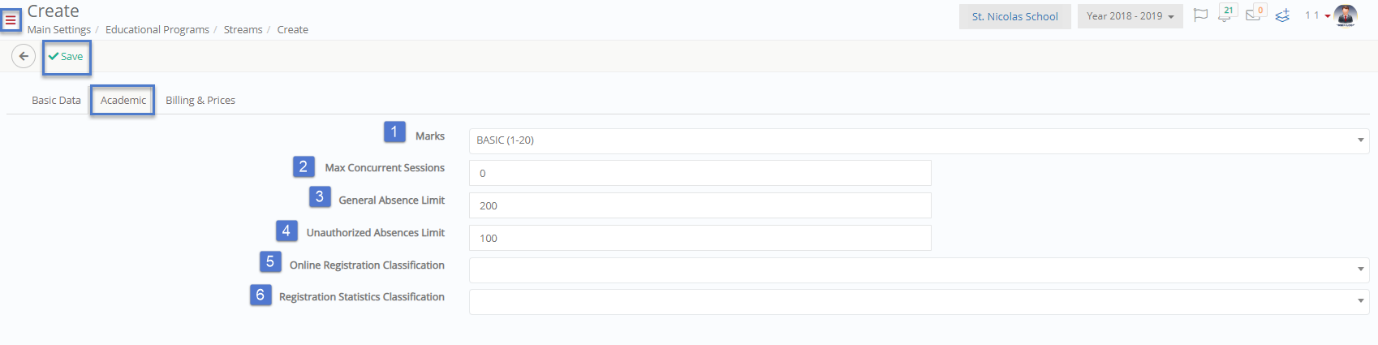
Figure 54
On this page you will see the following (Figure 54):
- Marks: Here you can set the marking scale for this specific stream e.g., Basic (1-20).
- Max Concurrent Sessions: Here you can set the number of concurrent sessions that can take place in subjects of this stream.
- General Absence Limit: Enter the number of absences allowed for students of this _Stream_ e.g., 200.
- Unauthorized Absence Limit: Enter the number of unauthorized absences allowed for students of this stream.
- Online Registration Classification: Here you can choose a classification type for _Students_ registering online.
- Registration Statistics Classification: Here you can choose what statistic classification will be used for this year.
Billing & Prices
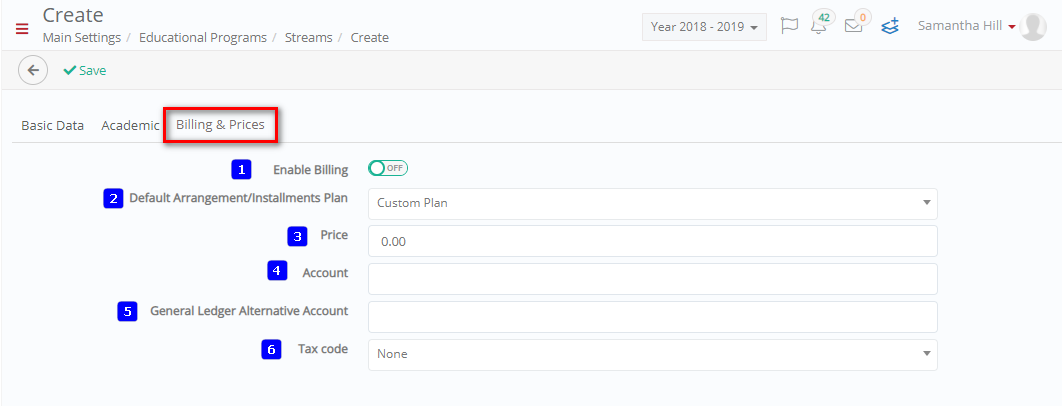
Figure 55
On this page you will see the following (Figure 55):
- Enable Billing: if this is turned on then this stream will be enabled for billing students.
- Default Arrangement/Instalments Plan: choose which plan you want to apply e.g., Annual (single payment for per year).
- Price: enter the amount the institution wants to charge the student for this stream. If you do not enter an amount the system will use the price of the year.
- Account: enter the institutions account number.
- General Ledger Alternative Account: enter an alternative account number if applicable to your institution.
- Tax Code: Select the tax method from the dropdown list, e.g., Main or Tax free.
Once you are done click on the ‘Save’ button to save the new _Stream_.
Note: All fields or options with a red asterisk next to them are mandatory fields or options. If you do not fill them in, you will be unable to save your creations or edits.
Edit Existing Stream
Once you click on the _Stream_ card (Figure 52), you will be transferred to the edit page (Figure 56).
On this page you will see the following and make changes to the field as seen in Create New Stream (Figure 56).
Once you are done click on the ‘Save’ button to save the new stream. If you want to delete this year you can click on the ‘Delete’ button.
Note: All fields or options with a red asterisk next to them are mandatory fields or options. If you do not fill them in, you will be unable to save your creations or edits.
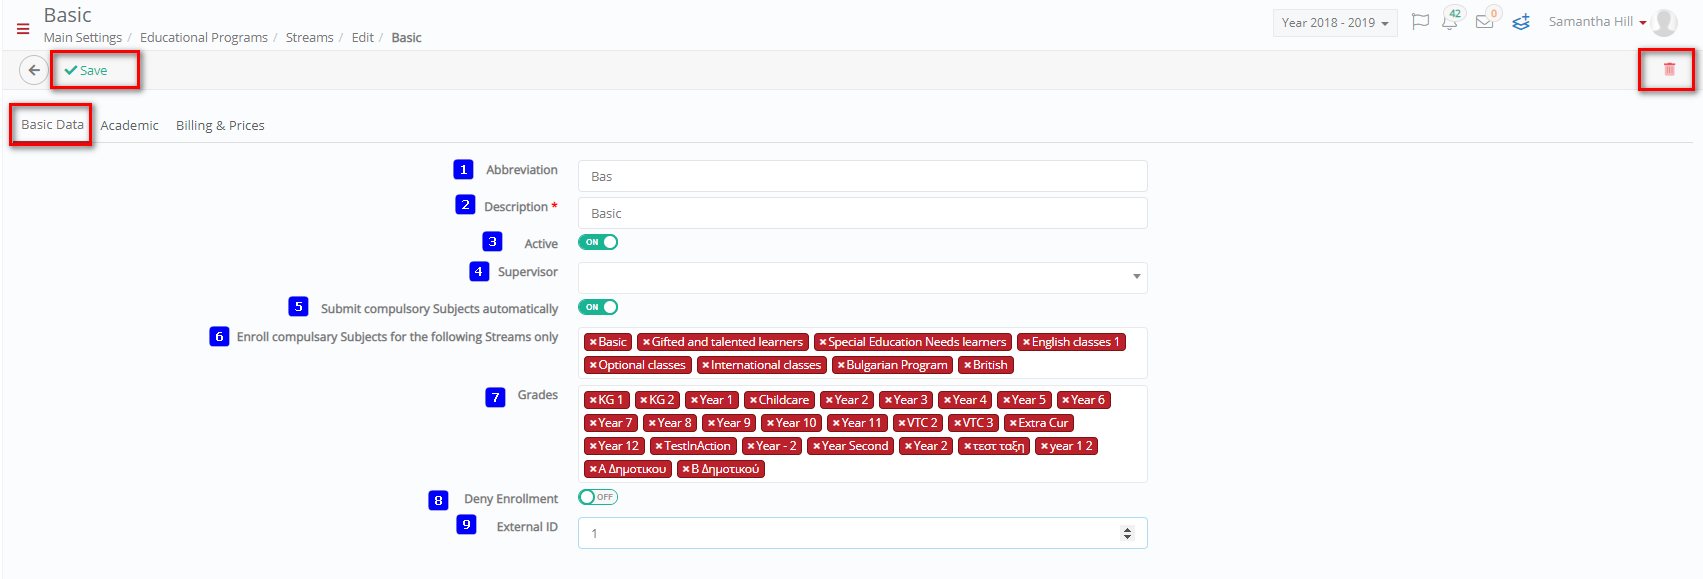
Figure 56