

Zoom Registration & Sign In
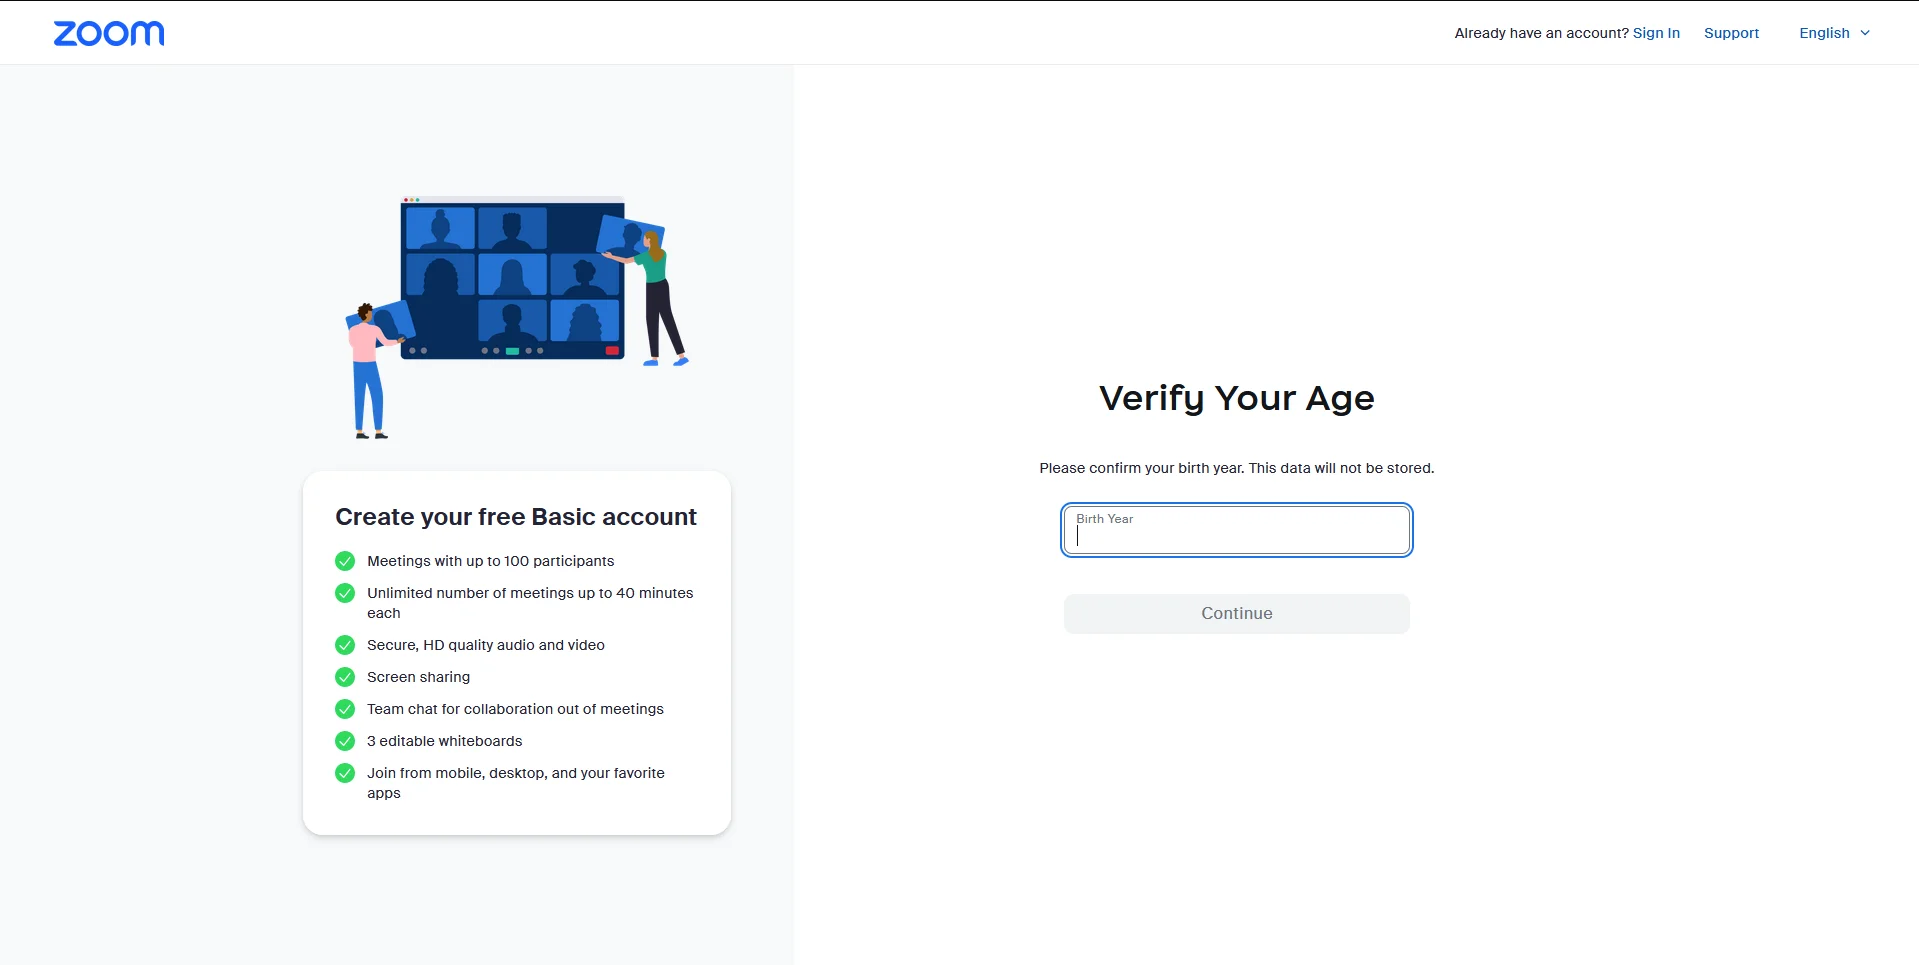
Visit Zoom’s Registration Page to Sign Up, or if you already have an account, just Sign In.
The registration page should look something like this:
After you’ve successfully registered / logged in, navigate to the Zoom App Marketplace.
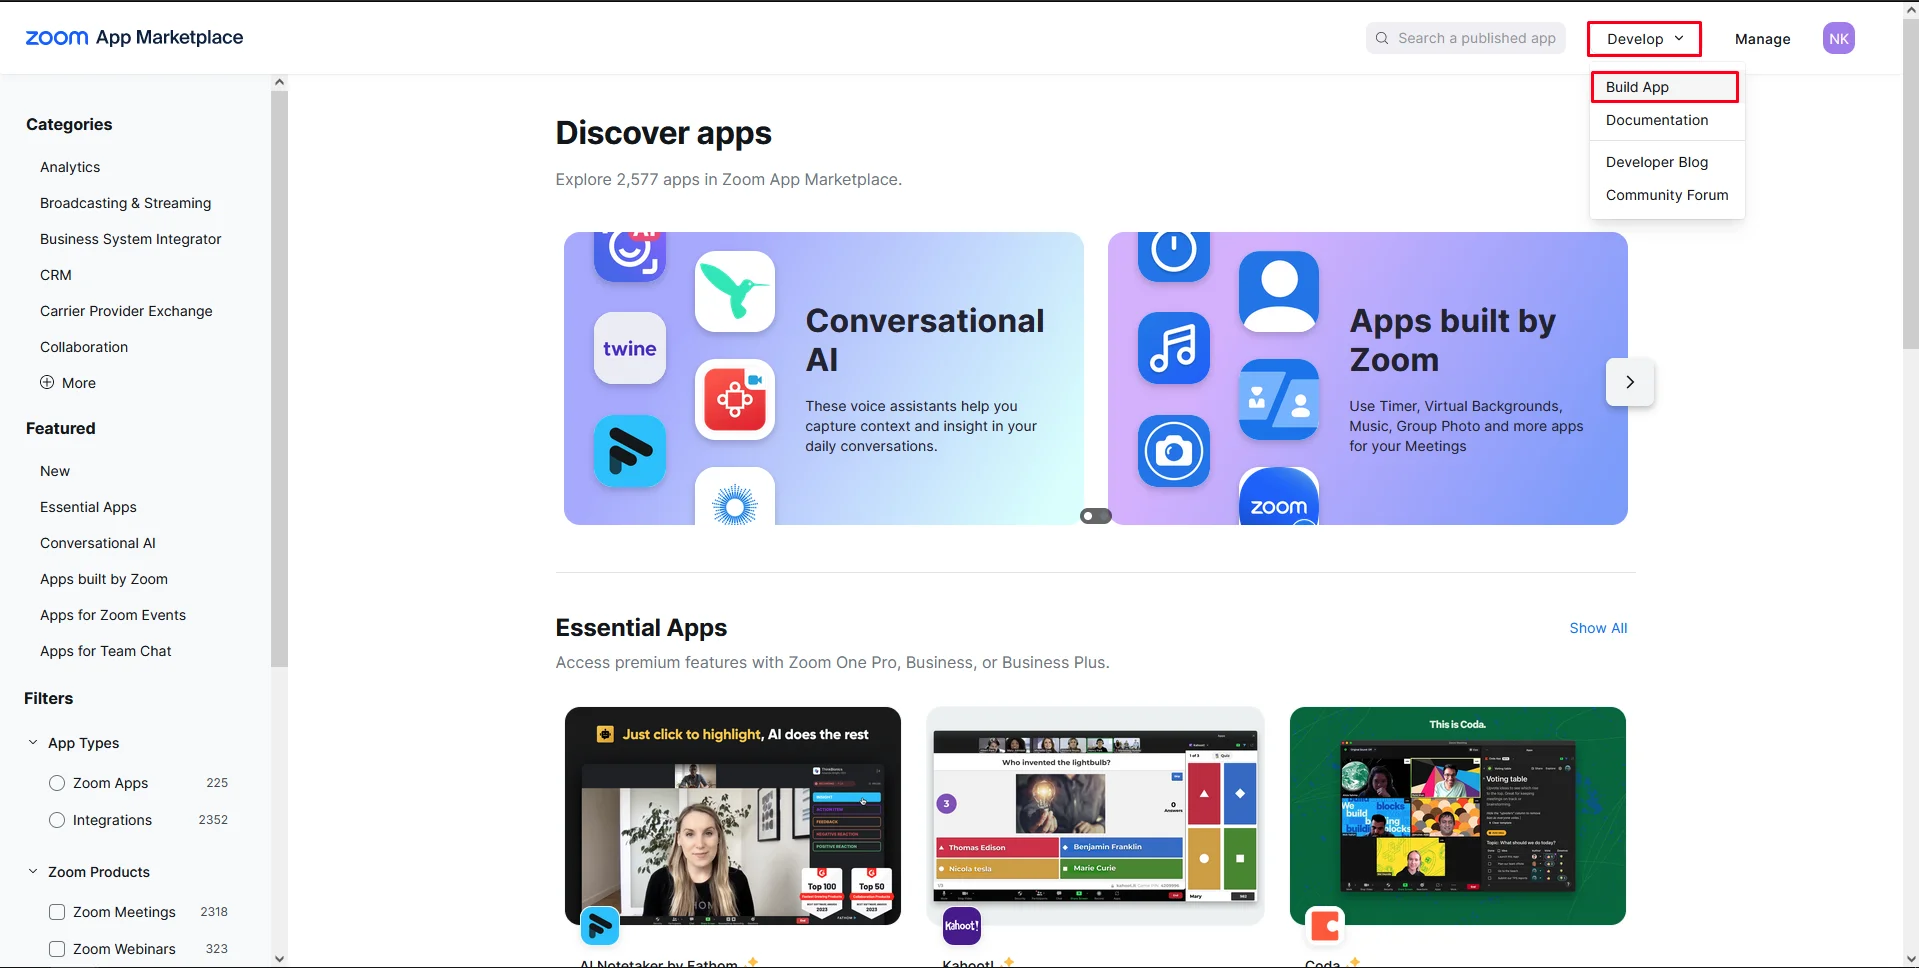
Zoom App Marketplace
Hover on the “Develop” button on the top-right of your screen and then click on “Build App”.
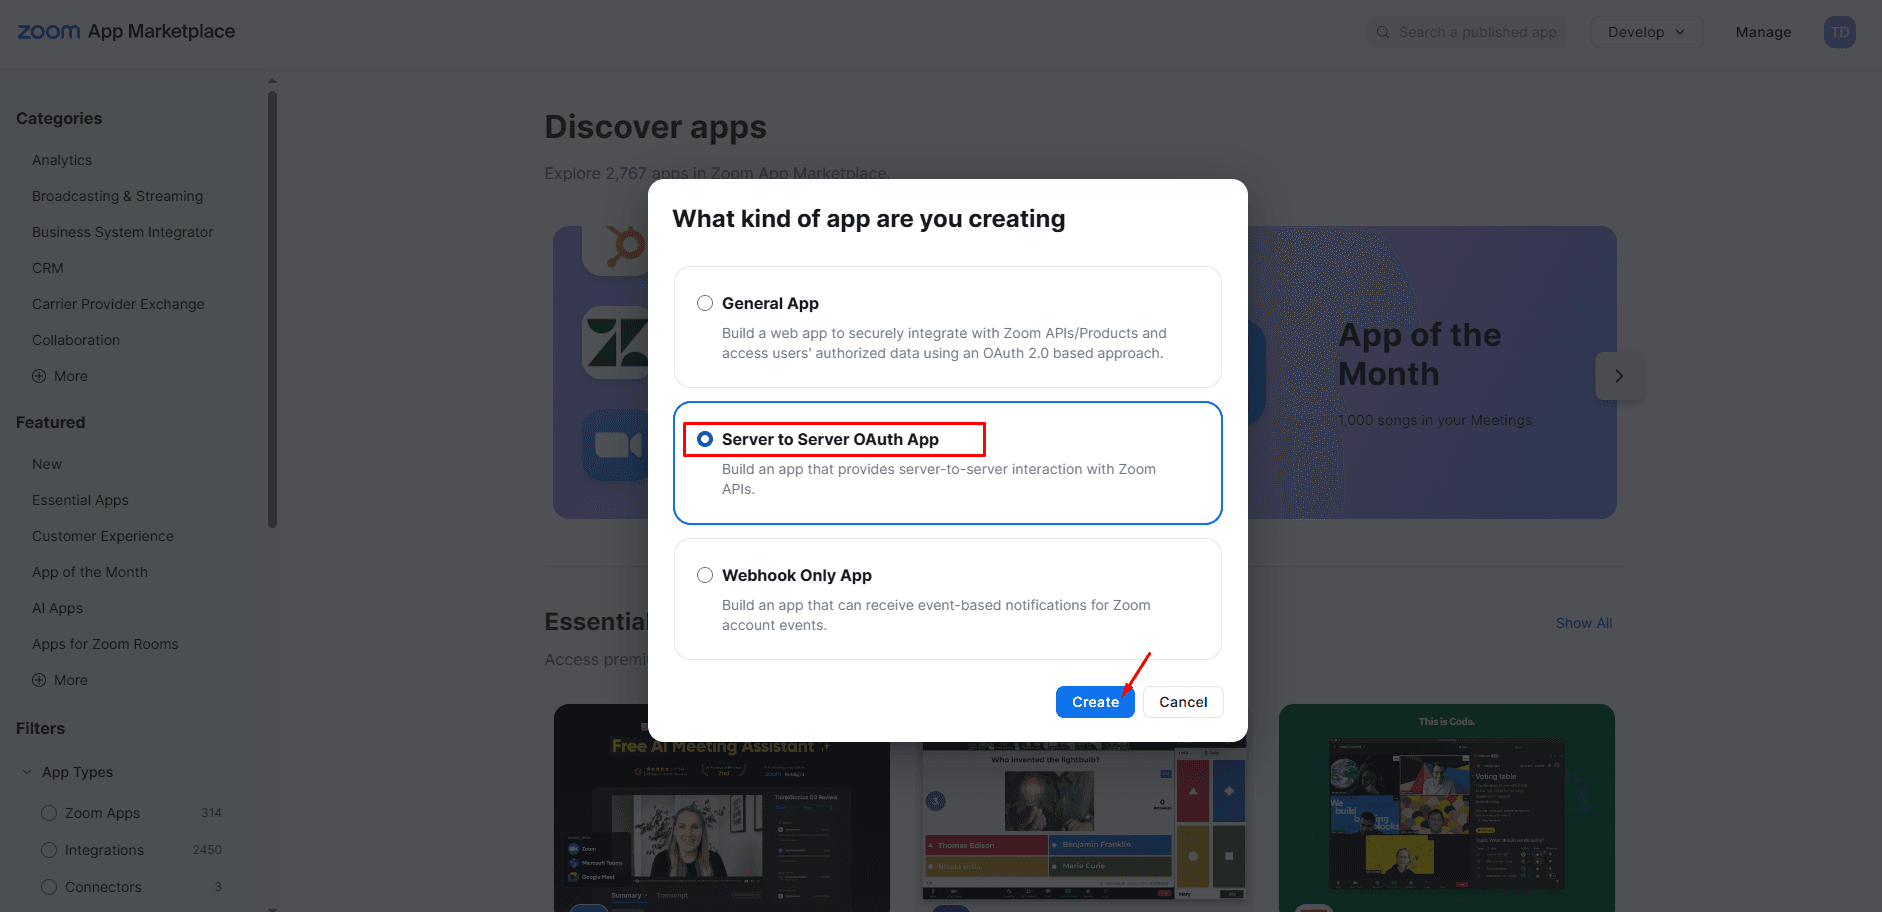
Then scroll and find “Server-to-Server OAuth” and click on the “Create” button.
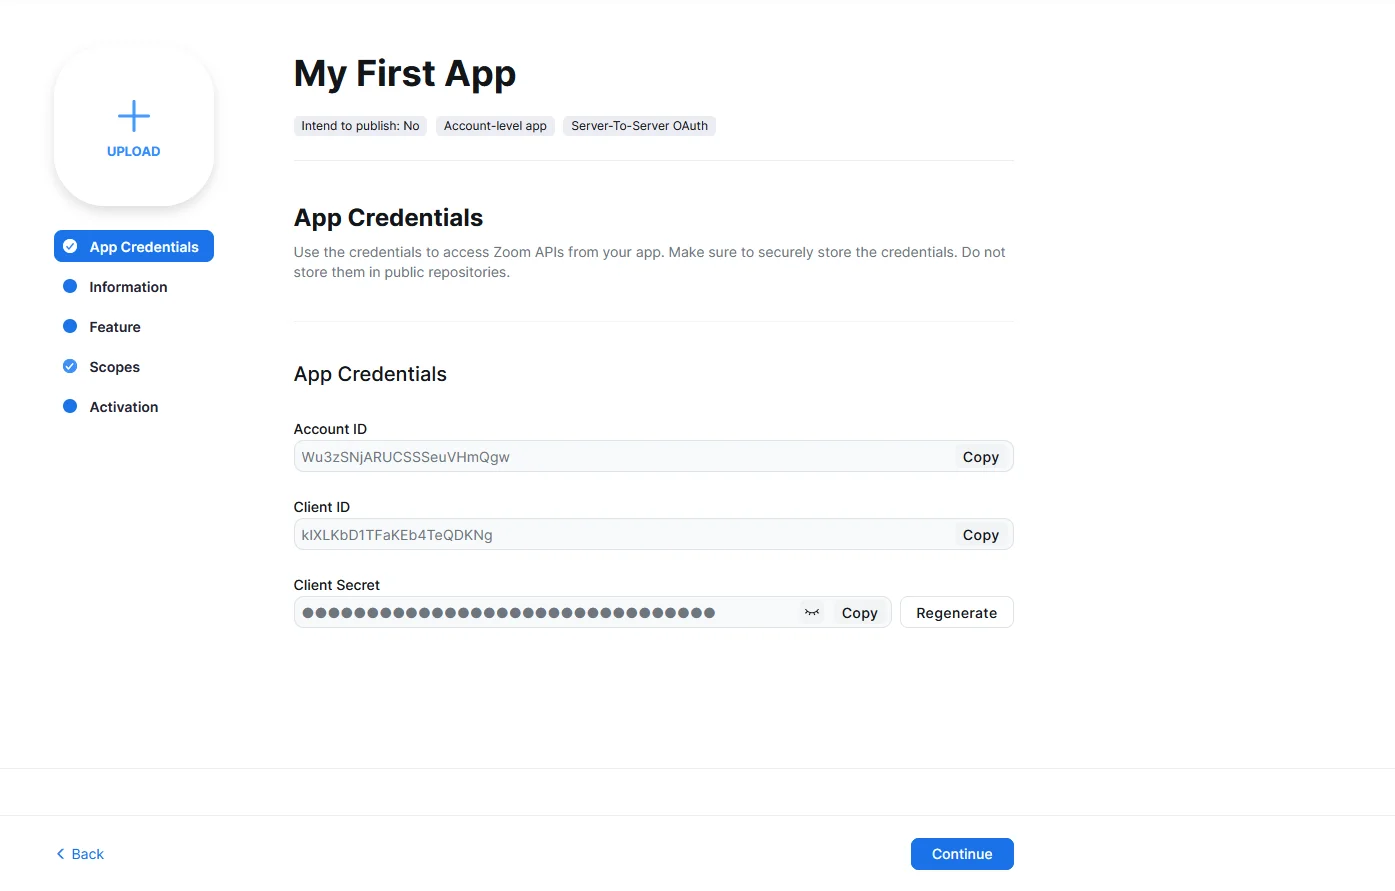
Give an awesome name to your app.

After clicking on “Create” you will be navigated to a page similar to this:
Then navigate to “Scopes”, in order for this integration to work, you need to define which scopes Zoom is allowed to use.

It will all make sense in the next steps.
By clicking on the “+ Add Scopes” button, a popup like the following will show up.
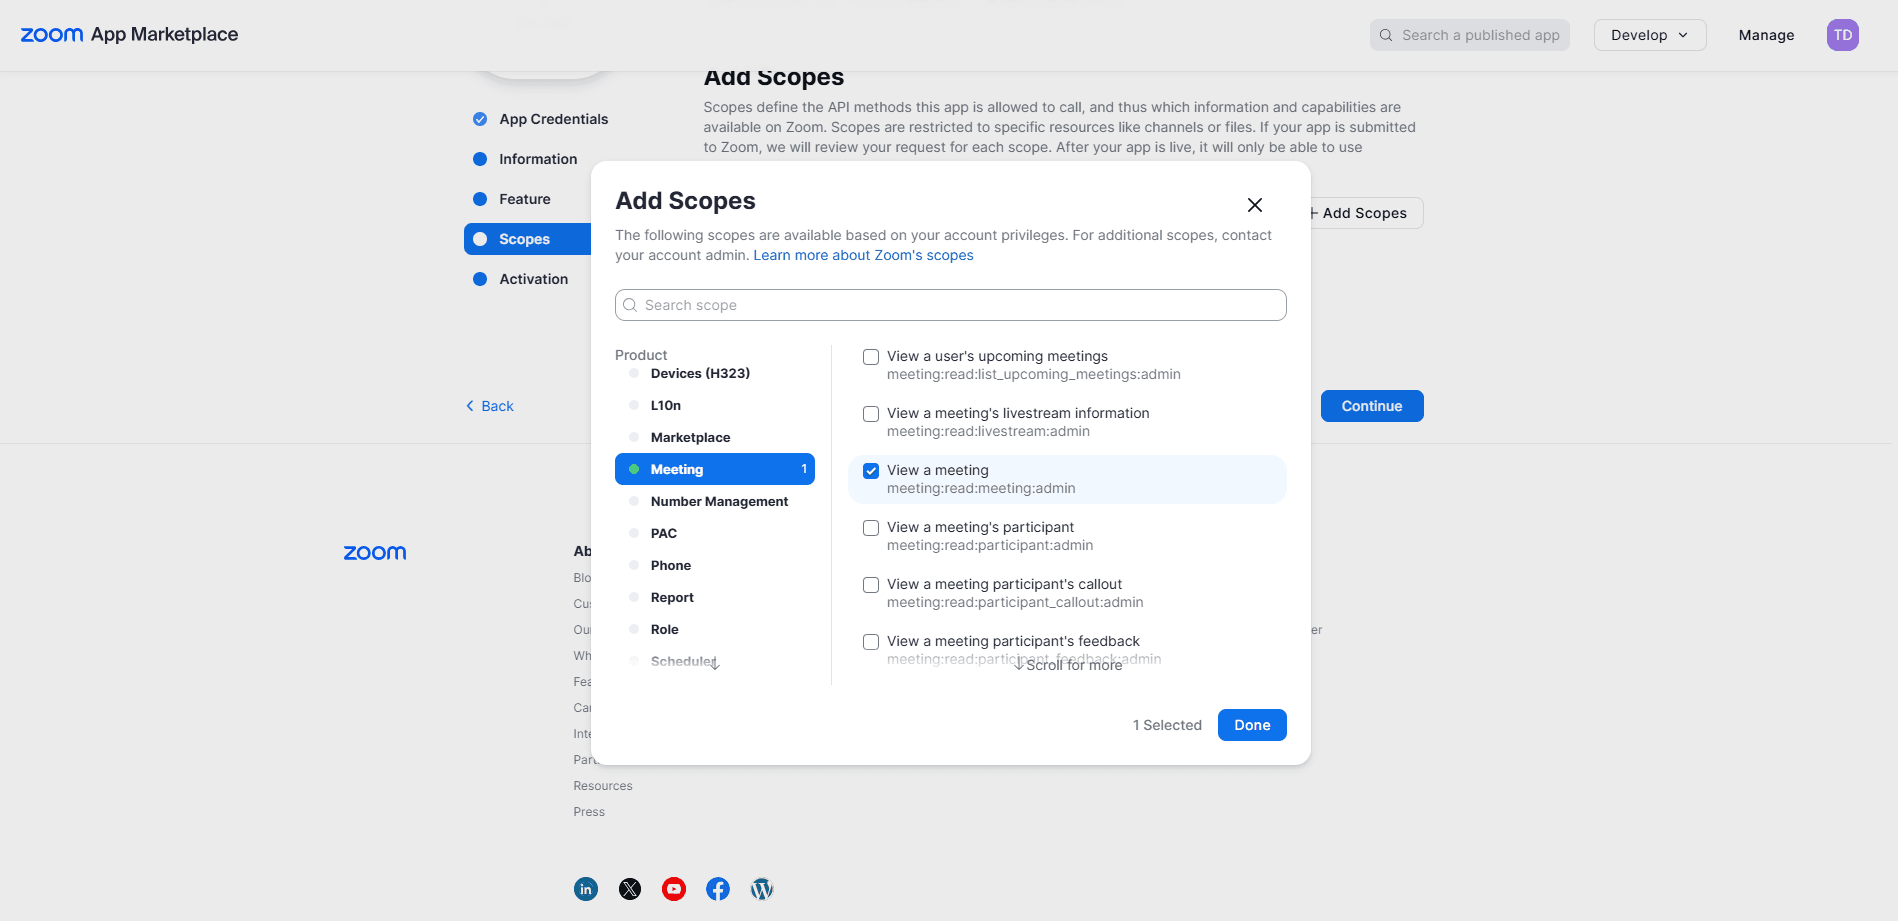
In the left list, the one with the search option, the available categories are listed.
You are required to activate only five scopes that are inside two of those categories.
More specifically, you will be using:
- meeting:read:meeting:admin
- meeting:write:meeting:admin
- meeting:delete:meeting:admin
- cloud_recording:read:list_recording_files:admin
- cloud_recording:read:recording_settings:admin
Find meeting:read:meeting:admin, meeting:write:meeting:admin, and meeting:delete:meeting:admin inside the Meeting category.
Find cloud_recording:read:list_recording_files:admin and cloud_recording:read:recording_settings:admin inside the Recording category.
Click “Done” once all scopes are selected.
If everything went ok, the pop-up will close and five scopes will be added to your app.

By clicking on “Continue” you will be redirected to “Activation”, which will show you what is missing in order to complete your first app successfully.
If you followed the steps correctly, only three things should be missing.
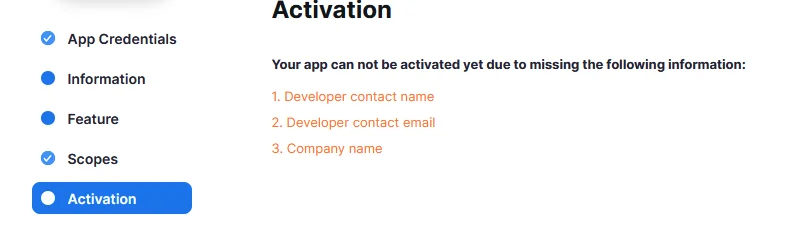
By navigating to “Information”, you will be presented with three fields that are currently missing.
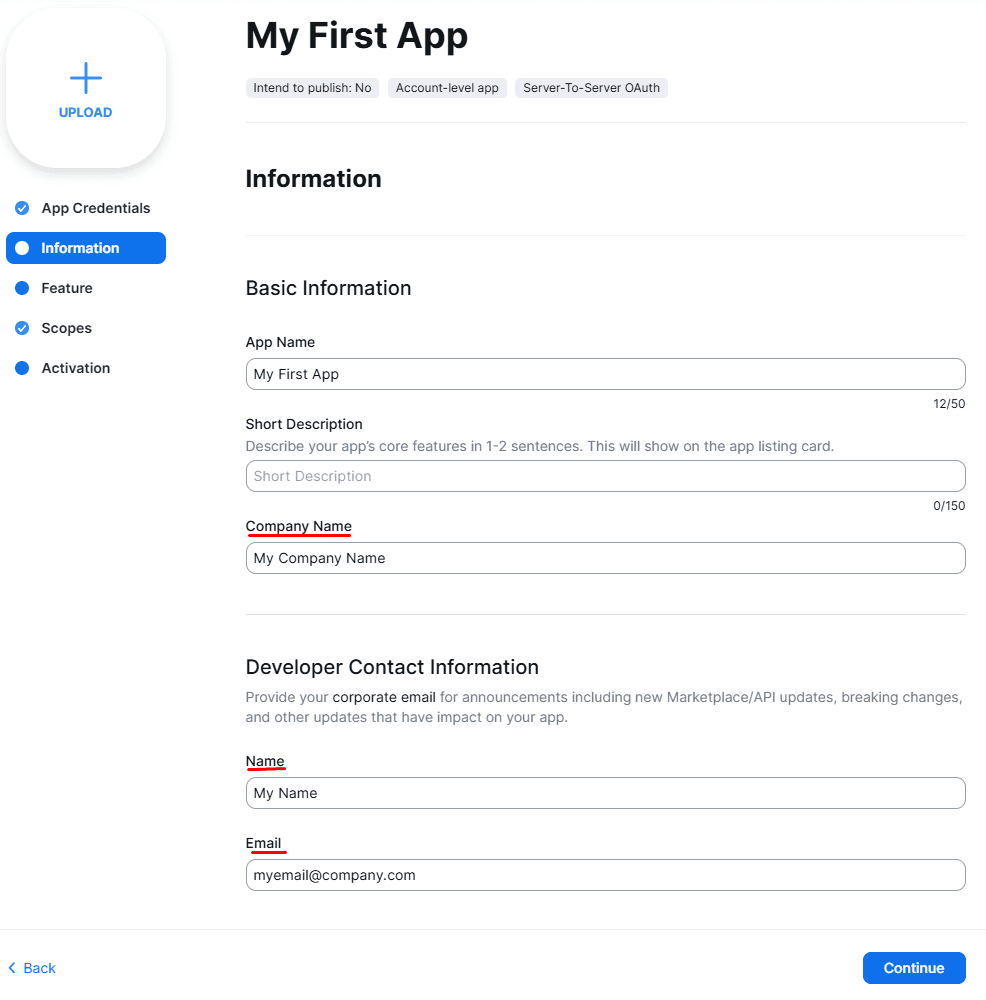
Fill the fields accordingly.
Finally, navigate to “Activation” as per now your app is ready to be activated.
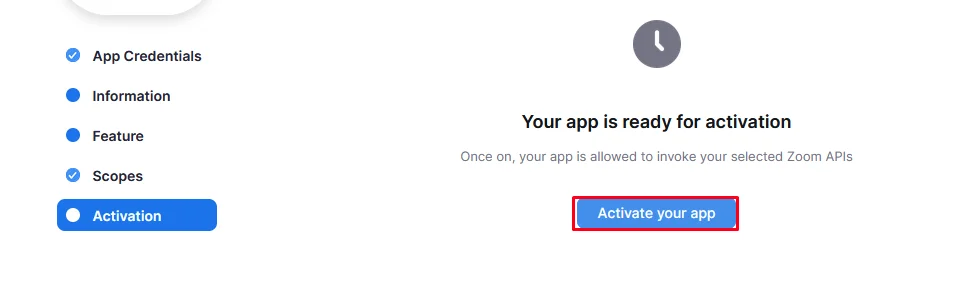
Hit activate, and you should be able to see a message similar to the following image, that means everything went smoothly.
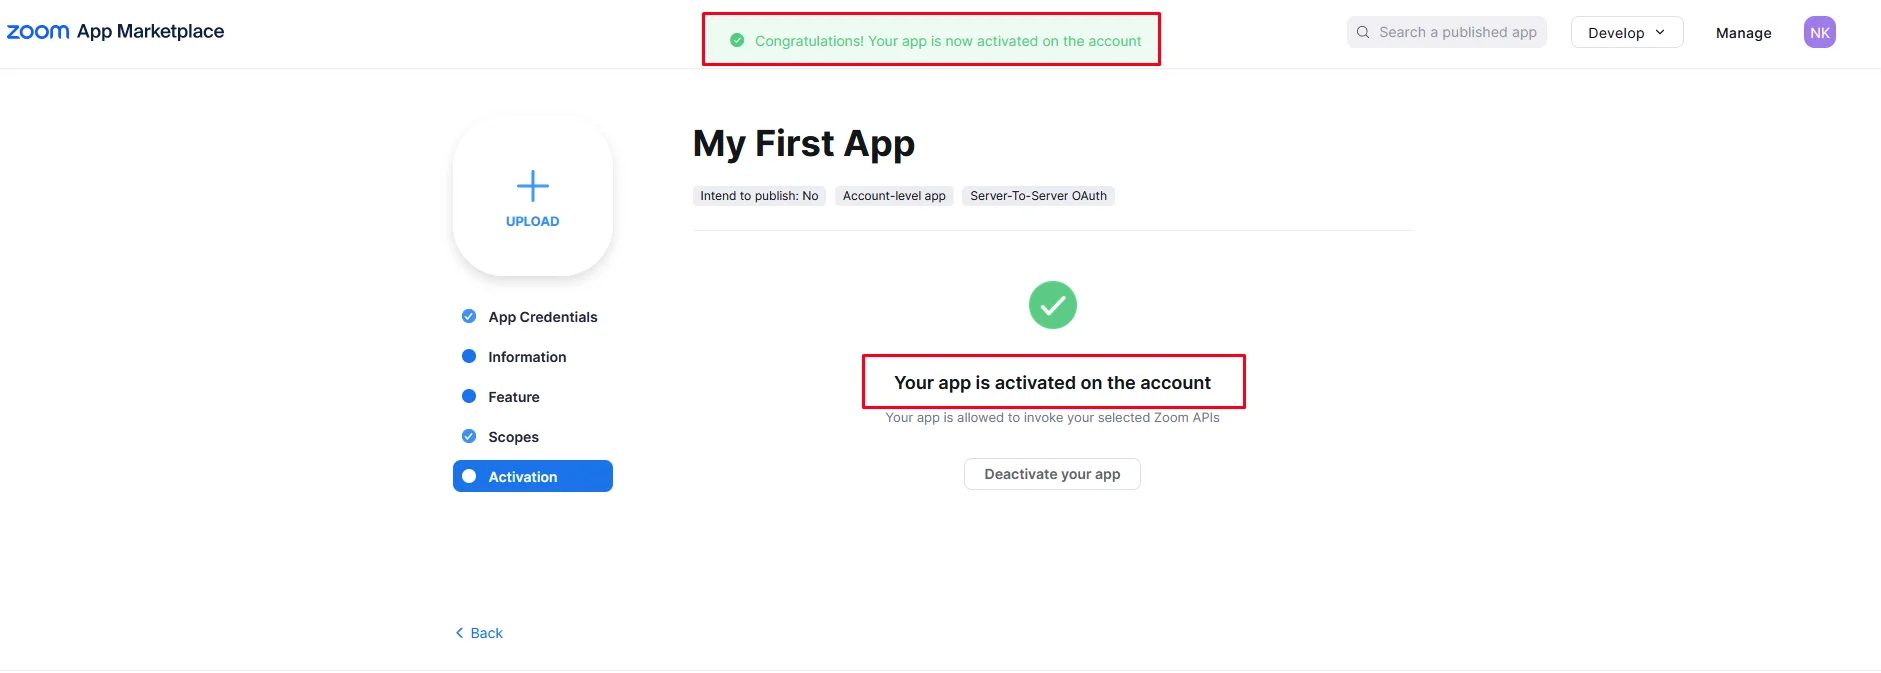
Don’t close that window yet.
Please navigate to “App Credentials” as of now you are required to copy-and-paste some credentials that Zoom has generated, in Classter.

Keep in mind those three fields are, these fields are the ones you need to copy-and-paste inside your Classter configuration.
Follow the steps below as the real configuration begins now!
Classter – Zoom Configuration
Log into your account and navigate to Advanced Configurations > Third-Party Integrations > Zoom
First things first, switch “Enable” and “Use Organizational Account” to ON.
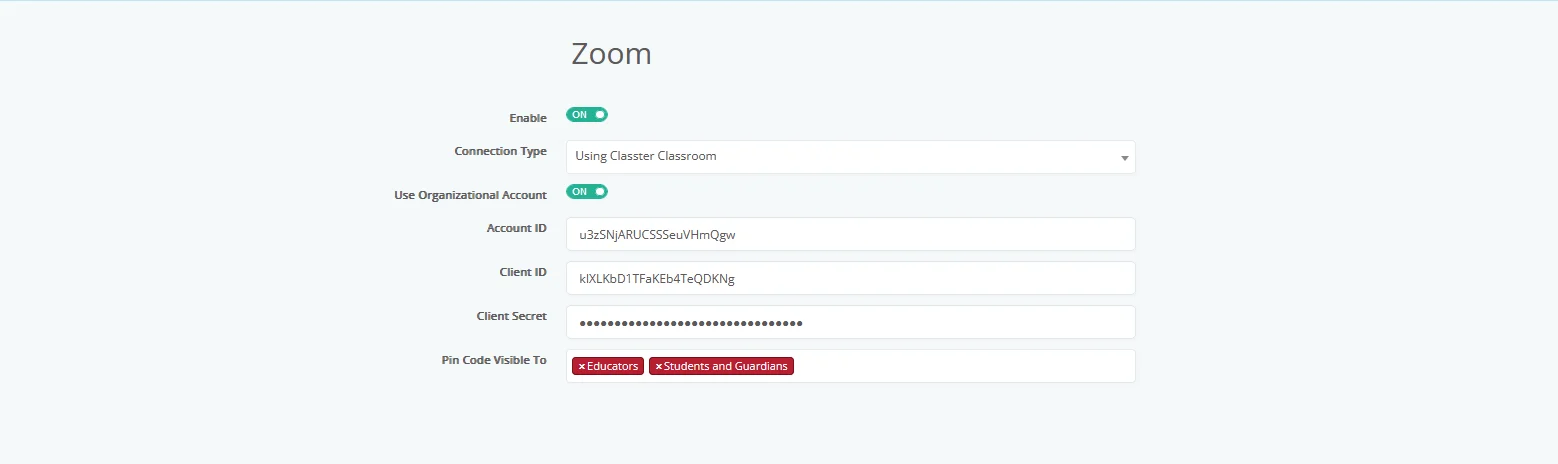
Then copy-and-paste the fields from your Zoom app accordingly.
Please pay attention to the next step, as it requires you to make a critical decision based on your institute’s configuration.
By clicking on the “Connection Type” dropdown once, you will be presented with four choices.
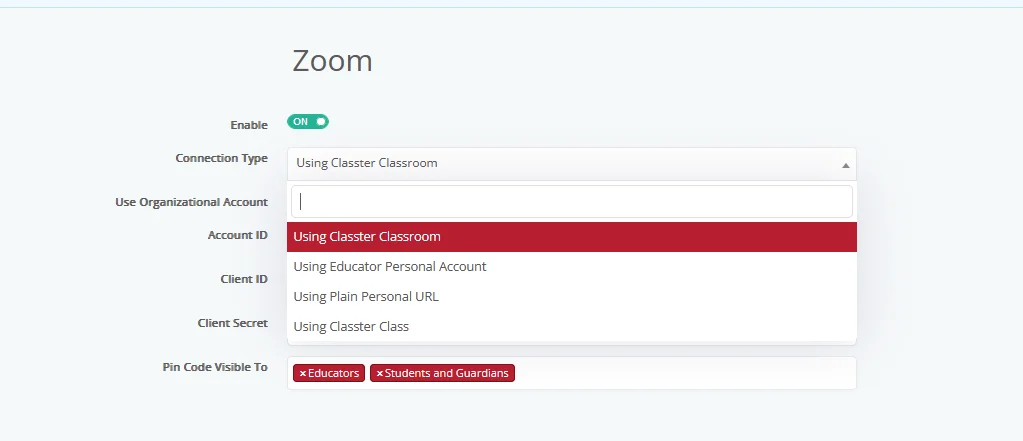
Each option will conclude to a different type of Zoom – Classter integration, so please choose accordingly.
Learn more about all the available “Connection Types” below
- Using Classter Classroom
- Using Educator Personal Account
- Using Plain Personal URL
- Using Classter Class
Now that you’ve selected the appropriate “Connection Type” for your institute,
you can finalize the integration by clicking the “Save” button on the top-left.
That’s it. Classter & Zoom are now connected!
Specific Zoom Actions
Classter suggests in order to proceed with the activation of users, to have an organizational account and to be an administrator
Check Zoom for education (https://zoom.us/education) for more.
You will also need to have as many licenses as the user accounts who will be using Zoom for meetings.
Free plan can also work with the limitations that are stated here: Zoom Plans
With that in mind, please follow the steps below to add a new user.
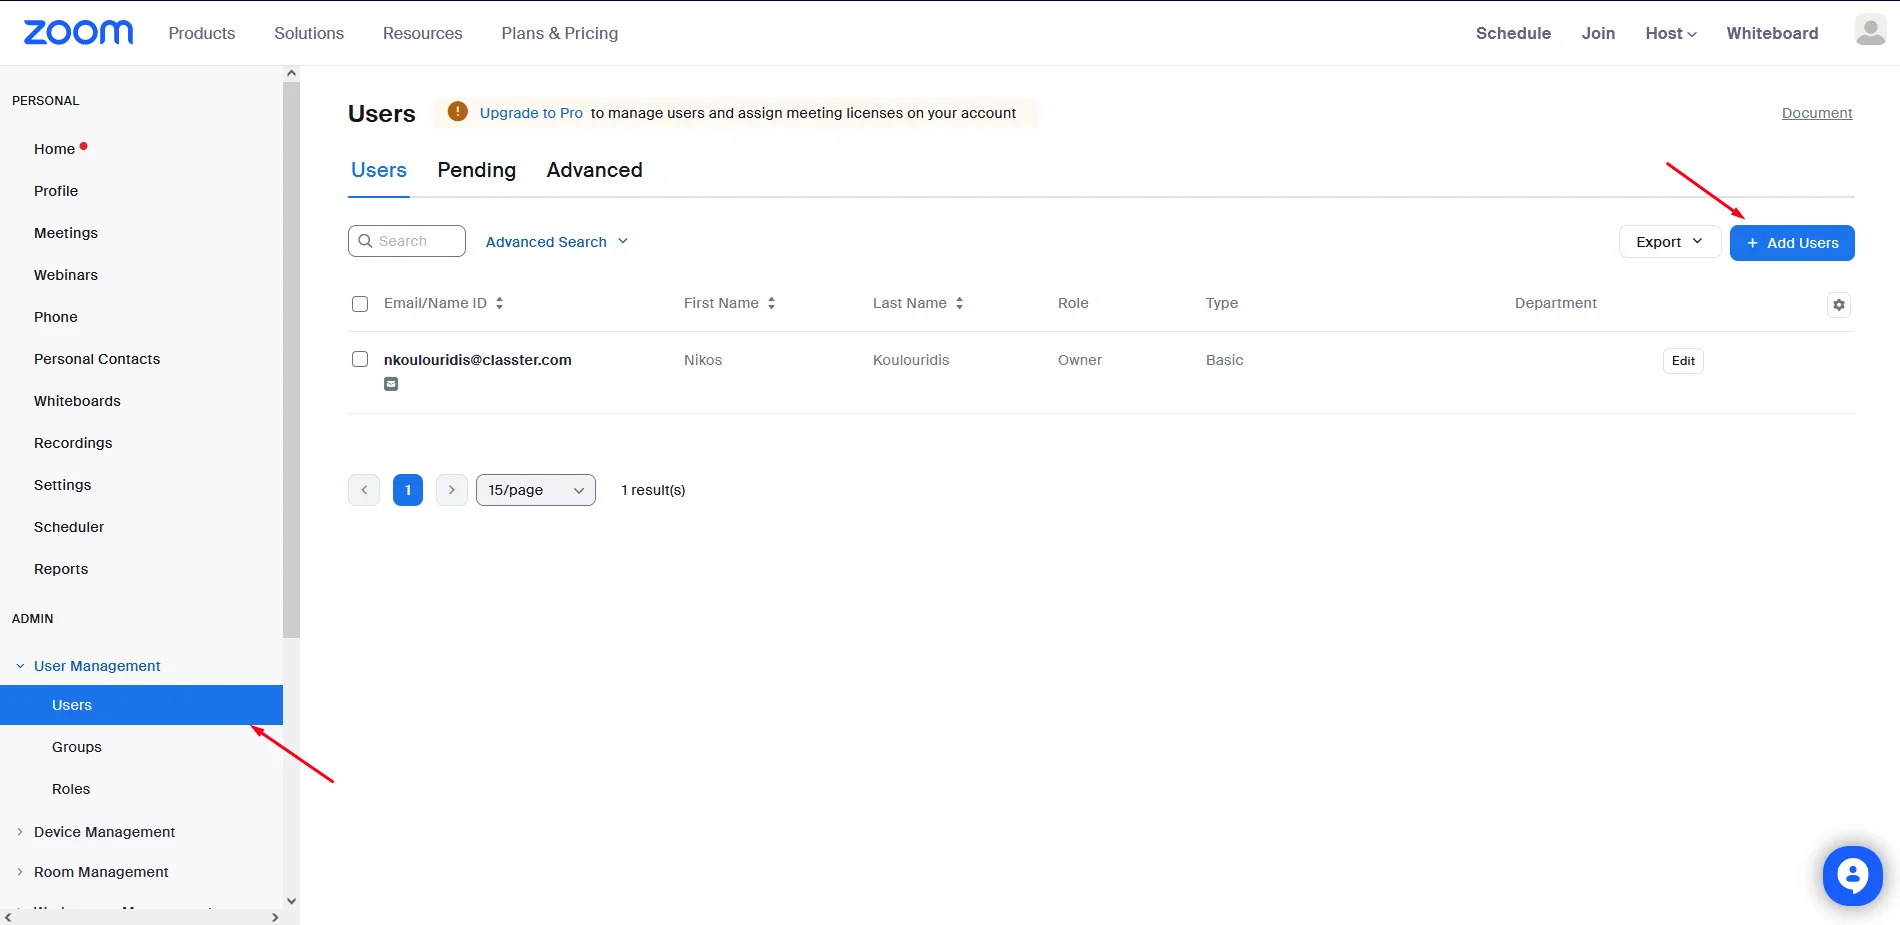
Navigate to your Zoom Dashboard (Log-in may be required).
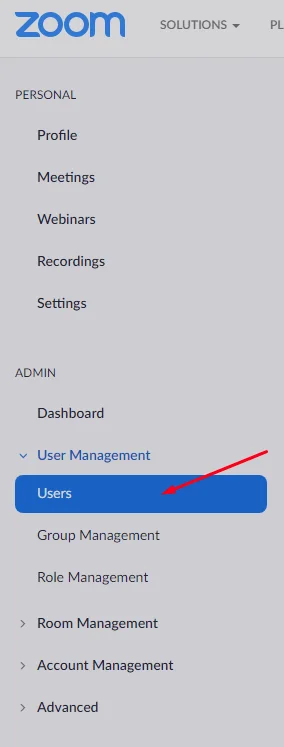
Then find “Users” under “User Management” find and click on the “+ Add Users” button.
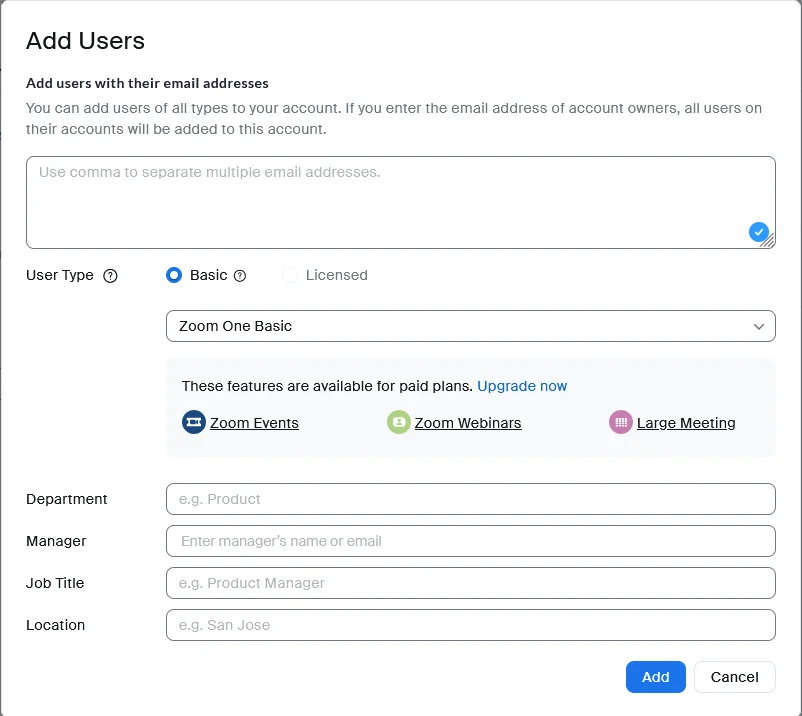
By clicking on “+ Add Users” button, a pop-up will come up requiring you to fill in
- User Type (If you are using Free edition, you are only allowed to use Basic as the user type)
- Feature (Only in Licensed edition)
- Department
- Manager
- Job Title
- Location
- User Group (Only in Licensed edition)
Users can be of type Classrooms or Lecturers. (User Group)
Classter suggests that because Classrooms are used less than Lecturers, it is usually better to add users as Classrooms.
Keep in mind that, if Users are of the Lecturers type, you will need more licenses on your Zoom account (e.g 4 Classrooms = 4 Licenses but 12 Lecturers = 12 Licenses).