

Step 1 – Go to the Students list
You have created a new academic period and successfully transferred everything except _Students_. To transfer students to another academic period, follow this path:
Dashboard > Management > Students > Students List (Figure 3).
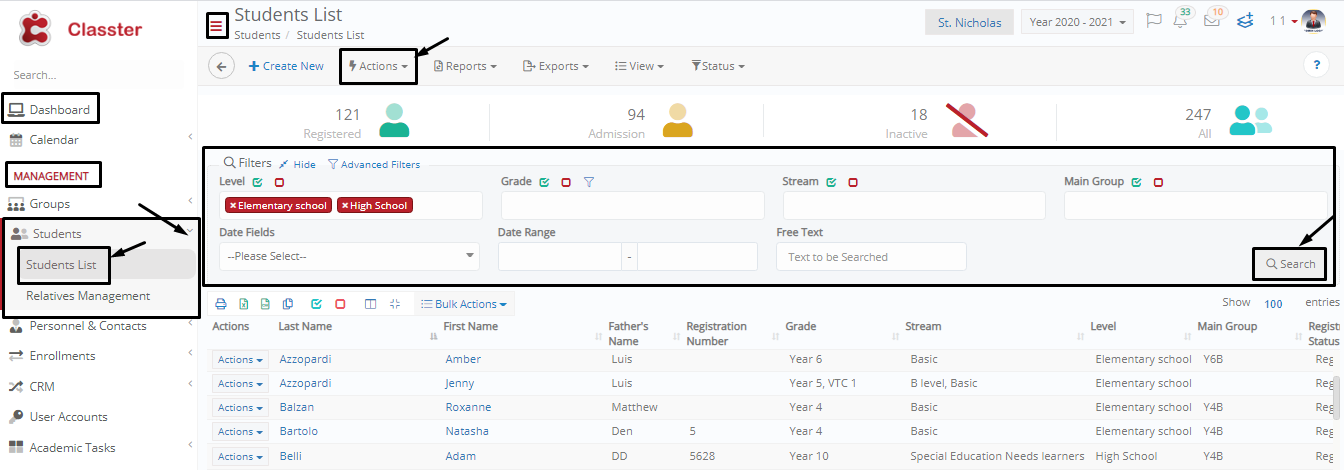
Figure 3
Step 2 – Access the “Transfer from Period” Option
On the Students List page, click on the ‘Actions’ menu button at the top. A dropdown menu will appear (Figure 4).

Figure 4
Click on the “Transfer from Period” button (Figure 4). This will take you to the Transfer from Period page (Figure 5).

Figure 5
Step 3 – Configure Transfer Options
On the Transfer from Period page, review the available options to customize the _Student_ transfer process.
Filters
- Select an Academic Period: Choose the academic period from which you want to transfer students. For example, if you are in Year 2020-2021, you can transfer _Students_ from Year 2019-2020.
- From Registrations: Select students based on their current registration status (e.g., Registered).
- To Registrations: Define the new registration status for the transferred students (e.g., from “Registered” to “Candidate”).
- Increase Institute’s Registration Based On: Choose the entity that determines the registration increase, such as _Location_, _Grade_, _Stream_.
Transfer Properties
- Enroll _Groups_ and _Subjects_ to _Students_ using _Group_ Prerequisites: If enabled, students will be enrolled in the same sections and courses as the previous academic period, based on group prerequisites.
- Enroll _Subjects_ to _Students_ using _Subject_ Prerequisites: If enabled, students will be enrolled in subjects they qualify for based on prerequisite courses completed in the previous period.
- Enroll Main _Group_ to _Students_ without _Subjects_: If enabled, students will be assigned to their main groups but without specific subjects.
- Transfer Admission Documents: If enabled, students’ admission documents will be transferred along with them.
Registration Number Options
- Do not change Students’ registration number: Students retain their existing registration number.
- Automatic Register Numbering: _Students_ are assigned a new registration number automatically.
- Set Students’ registration number to zero: All transferred students receive a registration number of zero (for special cases).
Step 4 – Selecting Students for Transfer
Click on the “Add _Students_” button to select the students to transfer (Figure 5). A pop-up window will appear (Figure 6).

Figure 6
Inside the pop-up (Figure 6):
- Use search filters (_Location_, _Grade_, _Stream_) to locate _Students_ from the selected period (e.g., Spring 2017-2018).
- Select students manually or click “Select All” to choose all _Students_.
- Click the “Add” button at the bottom of the pop-up (Figure 7).

Figure 7
Once added, the Transfer from Period page will display the selected _Students_ (Figure 8).

Figure 8
Managing Student Selection
Removing Students:
- Click the “Remove All” button to clear the entire _Student_ list.
- Use the “Remove Selected” option to remove specific students (Figure 8a).

Figure 8a
Bulk Actions Menu:
- Click “Use Custom Values for Transfer” (Figure 8b) to define _Location_, _Grade_, and _Stream_ for the transferred _Students_.
- Enter the custom values in the pop-up (Figure 8c) and click “Add”.

Figure 8b

Figure 8c
Step 5 – Completing the Transfer
After confirming your selections, click the “Transfer” button to finalize the process (Figure 8).