

Use the Student Registration Statistics to derive various statistics concerning students’ registration, customizable to your needs.
You start of on the main page of the portal namely the ‘Dashboard’.
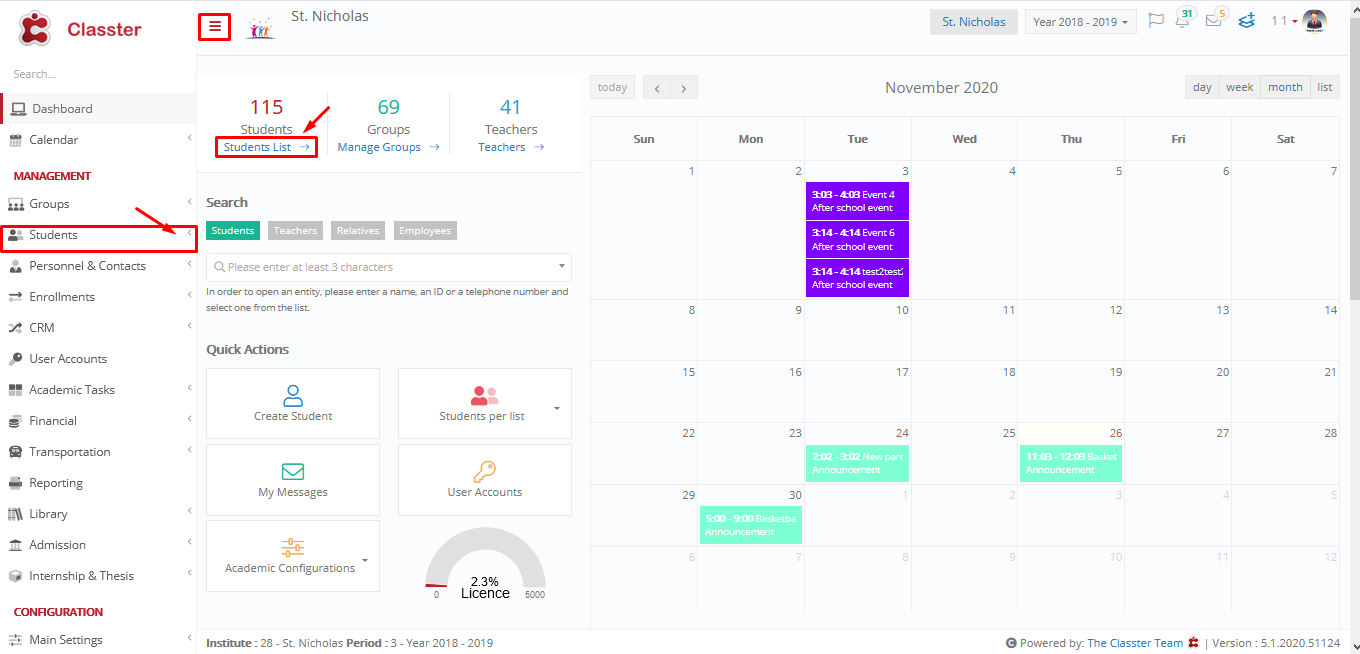 Figure 1
- Click on the Students List button on your dashboard.
- Or Go to Main menu (Management) > Select ‘Students’ > Select ‘Students List’ (Figure 2).
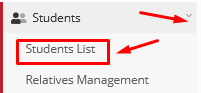
Figure 2
- Click on the ‘Actions’ drop-down menu > Select ‘Student Registration Statistics’ (Figure 3).
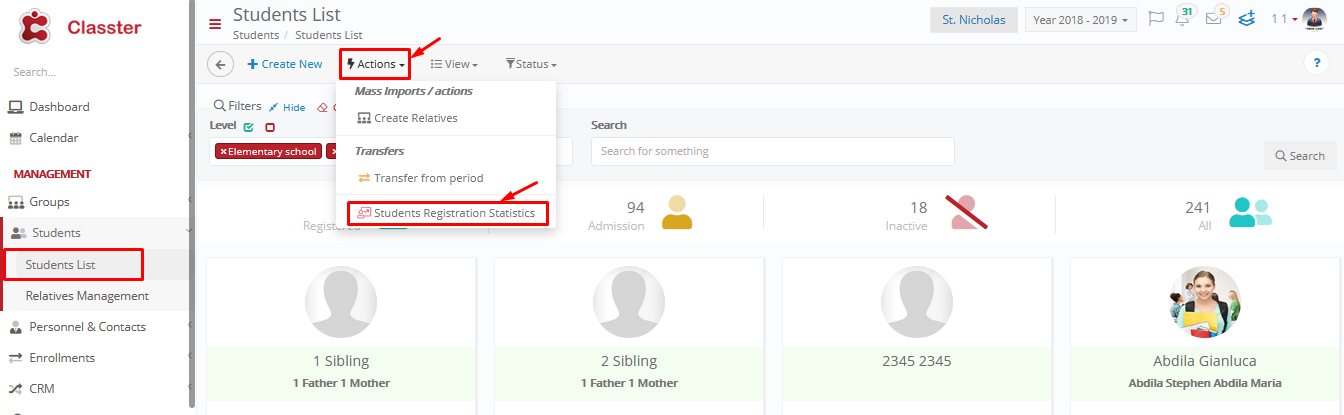 Figure 3
- Click on the Show/Hide button to see the available filters you can use to produce your statistics (Figure 4a).
The “Companies” field is mandatory to view your results. Specifying the “Program”, “Degree” and “Semester” fields is optional.
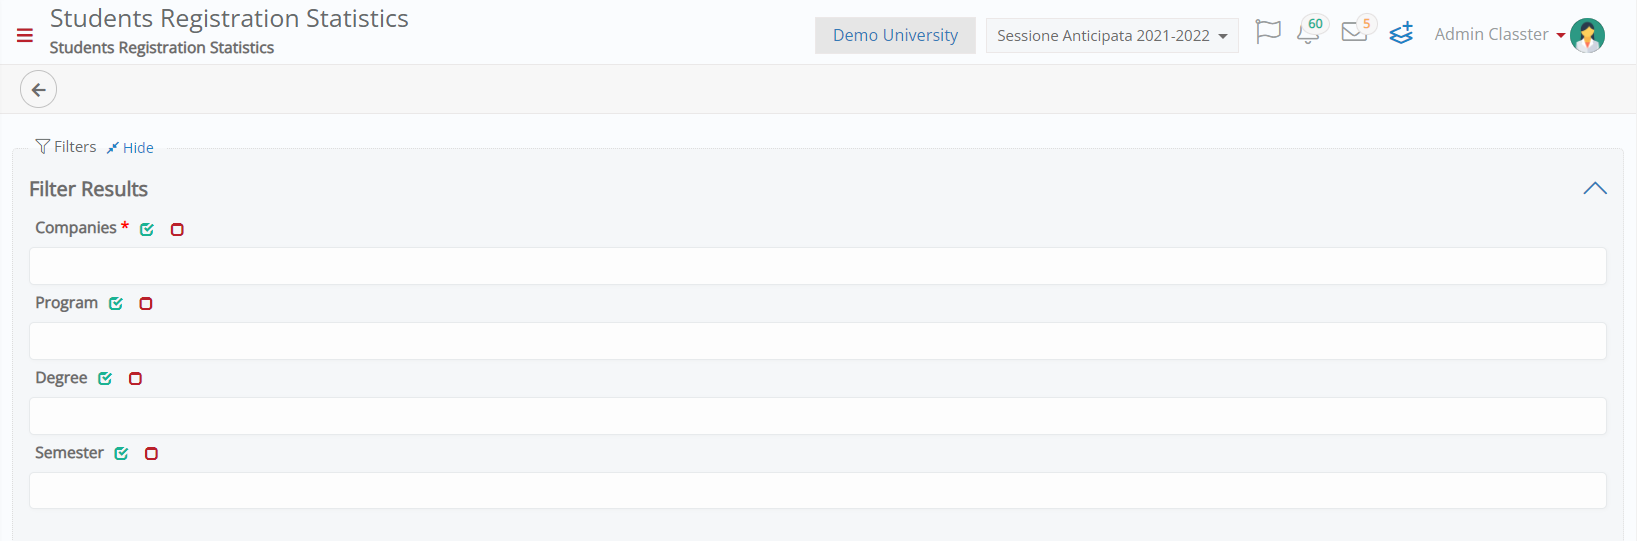
Figure 4a
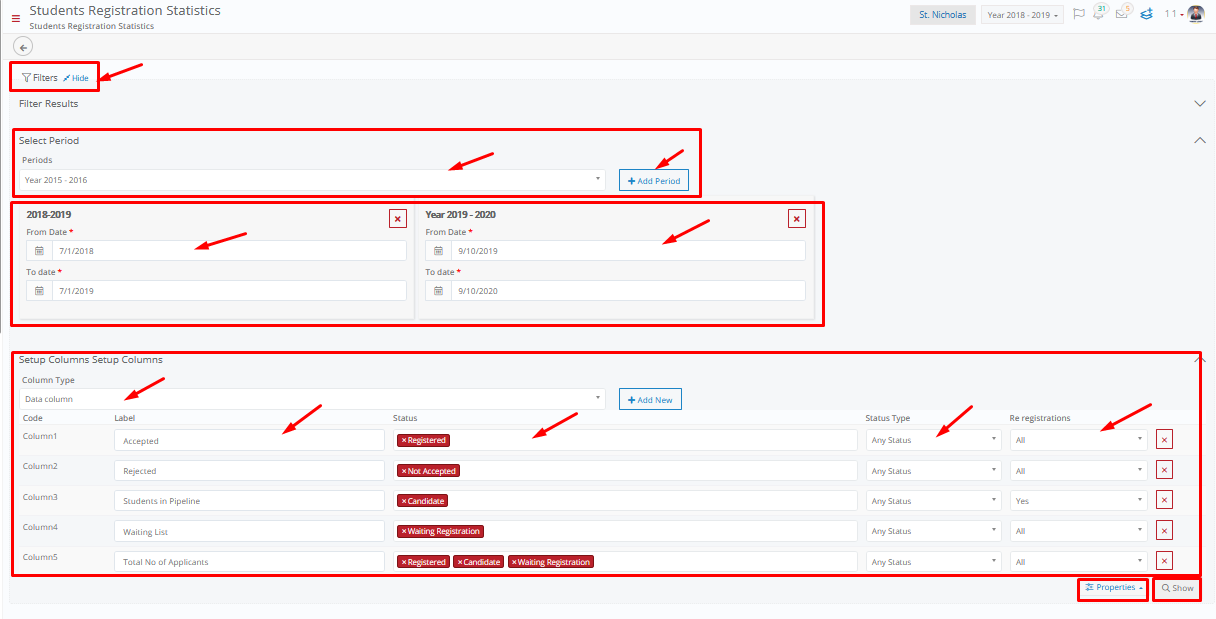
Figure 4b
- In the Select Period section choose the academic period you want from the available drop-down list e.g 2018-2019 and click on the ‘Add Period’ button. Set the exact time period using the ‘From date’, ‘To date’ fields.
Note: You can select more than one periods, if you want to compare data between different periods (Figure 4b). - In the Setup Columns section select one of the two column types Data Column or Functional and click on ‘Add New’:
- Use the ‘Label’ text box to enter a column name e.g. ‘Accepted’ (Figure 4b).
Note: You will need to add Labels to both column types (Data, Functional).
- Use the ‘Label’ text box to enter a column name e.g. ‘Accepted’ (Figure 4b).
-
- Column type ‘Data column’ – to add a column that will derive the data you want:
- Use the ‘Status’ drop-down list, to select which students’ status you want to see in the results e.g. Registered (Figure 4b)
- Use the ‘Status Type’ drop-down list to select a status type between ‘First (i.e. will show students whose initial status, logged in the selected time period, is ‘Registered’), Final (i.e. will show students whose last status, logged in the selected time period, is ‘Registered’), and Any’ (i.e. will show students with a ‘Registered’ status, at any time of the selected time period) select e.g Any Status (Figure 4b).
- Use the ‘Re-registrations’ drop-down list to select if you want to see Re-registrations or not. ‘Yes’ will only show re-registrations, ‘No’ will only show new registrations, and ‘All’ will show both (Figure 4b).
- Column type ‘Functional’ – to be able to make calculations between columns e.g. to find Total Students for period 2018-2019 perform the function: Column1 + Column5 – Column2 (use the column codes and not the column labels in your function) (Figure 5).
- Column type ‘Data column’ – to add a column that will derive the data you want:
 Figure 5
- Click on the delete button if you want to delete a column (Figure 4b).
Before you move on you have the option to Show Column Codes, view results by Company, _Grade_, _Stream_ or Educational Program and save all filters (Figure 6).
- At the bottom of the page Next to the ‘Show’ button you will find the ‘Properties’ button. Click on it (Figure 6).
- ‘Show Column Codes’ if you want to add the column codes to your results click on this option to turn it ON e.g Code 28 (Figure 6).
- Using the ‘View By’ option you can view results by Company e.g St.Nicolas, _Grade_ e.g _Grade_ 1, _Stream_ e.g Basic or Educational Program which in essence combines ‘_Grade_’ and ‘_Stream_’ eg. _Grade_ 1 Basic (Figure 6).
Note: The terms Company, _Grade_, _Stream_ and Educational program are terms from the Glossary and can have different meanings from institution to institution.
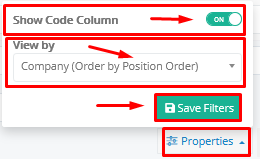
Figure 6
- Click on ‘Save’ to save filters for use in the future (Figure 6).
- Click on ‘Show’ to see results (Figure 4b).
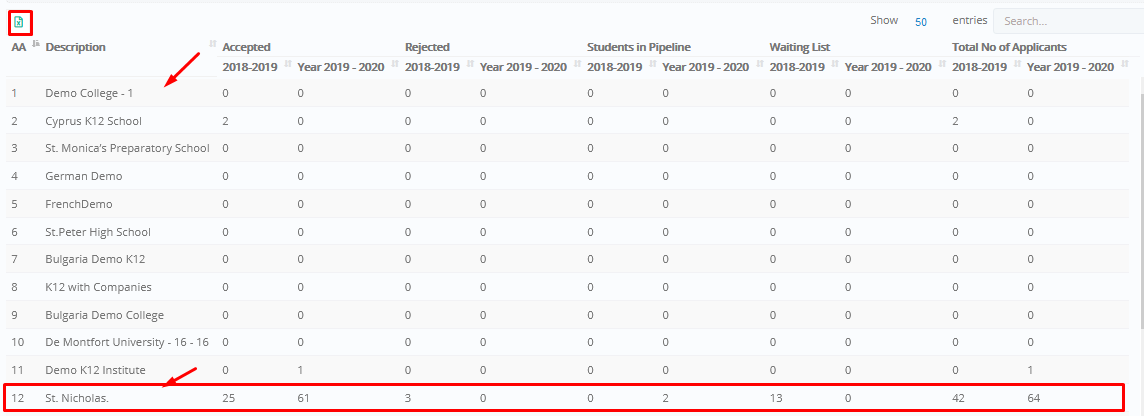
Results by Company (Order by Position Order)
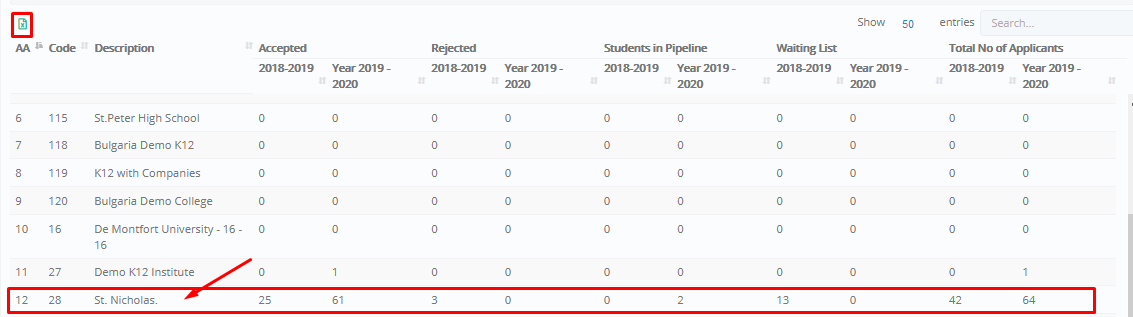 Figure 7
Results by _Group_
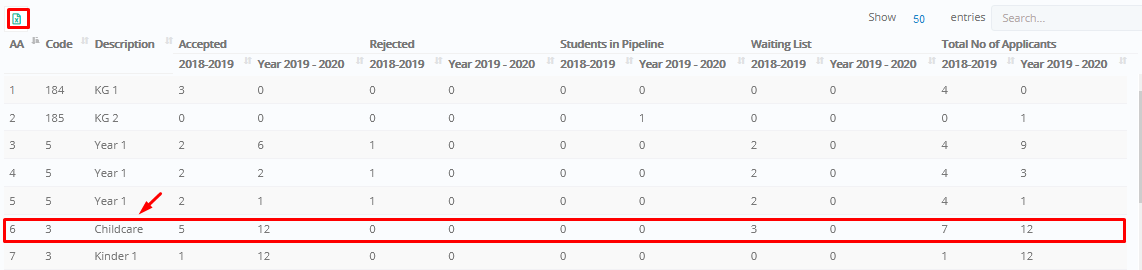 Figure 8
Results by _Stream_/Program

Results by Educational Program

Results by Company (Order by Name)
Note: The terms Company, _Grade_, _Stream_ and Educational program are terms from the Custom Terminology page of the Classter Platform and can have different meanings from institution to institution. Therefore, results may vary.
- Click on the Excel button to export the results in MS Excel

