

Watch the How-to Video

Classter allows the educational institution to determine which fields will be visible to the applicant during the Admission process. This can help you adapt your printed application form, or application form from other systems to the admissions module of Classter. To set up the fields in the Personal Data tab in the Admissions Portal, from the configuration menu, go to Admission → Admission Settings. (Figure 1)
Tip: Find out how you can manage admission applications in our Knowledge Base.

Figure 1
In the next window, click on the “General Admission Settings” tab. In the section “Basic Settings”, you are interested in the “Available fields Configuration”. Click on the “Open” button. (Figure 2)

Figure 2
Here you can see all the fields that are available to appear in the Personal Data tab in Admissions Portal. These fields are classified in categories (e.g. Basic data) and sub-categories (e.g. Photo). (Figure 3). Categories and sub-categories order of appearance can be modified, simply by dragging and dropping the respective field. However, please note that sub-categories cannot be reordered in a different category.
 Figure 3
All categories and sub-categories can be edited if you click on the “Edit” button next to each one of them. (Figure 4)
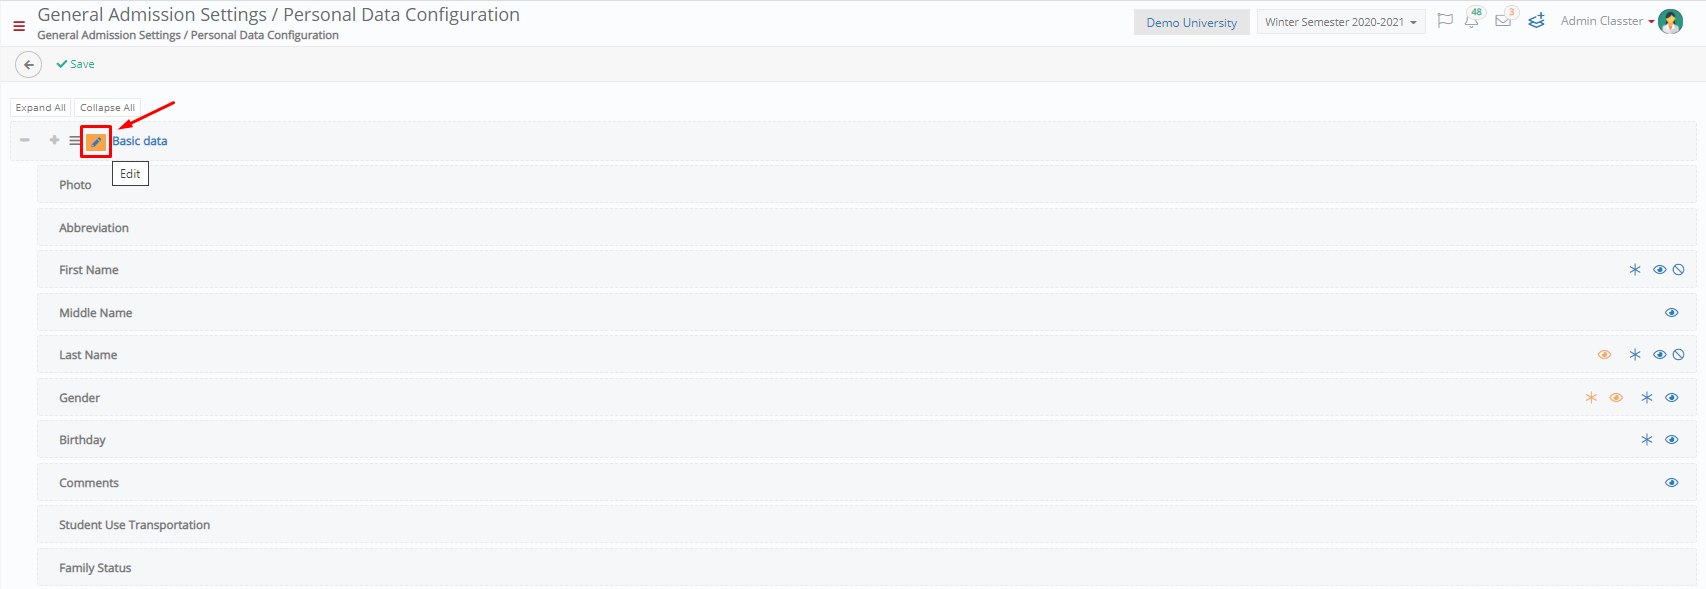 Figure 4
When you click on the “Edit” button, the following pop-up window appears. (Figure 5) Here you can modify several fields, based on your educational institutions’ requirements:
- Literal: The field’s name (in Global Culture when there is not a defined language).
- Literal (English): The field’s name (in English).
- Info: The field’s description (that may contain text, images, hyperlinks etc.).
- Required: The field is mandatory.
- Visible: The field is visible in in the Personal Data tab in Admissions Portal.
- Read Only: The field’s information is imported from an external source and it cannot be modified.
- Read Only (If Has Value): The field can be completed by the user. Once completed, it cannot be modified.
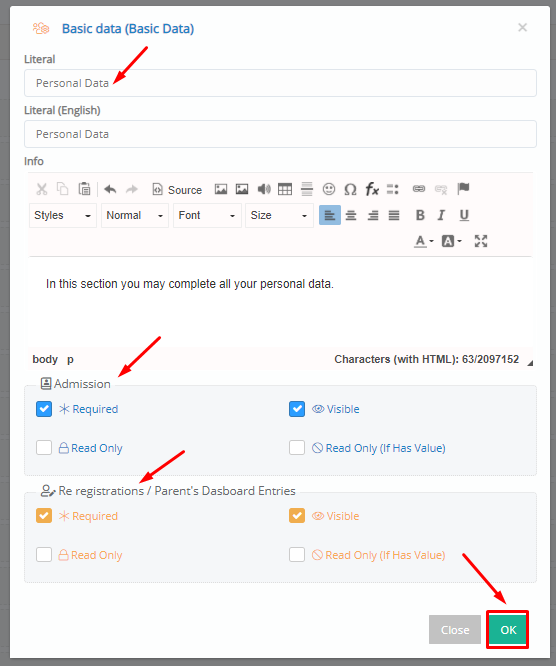
Figure 5
Note: The same field options apply to the Re-Registration process (Figure 5).
Extra Tip: Do not forget to take a look at our Employee’s How-to Guide to take advantage of all its capabilities.
Find more or post your questions on our Facebook Community Page. Also, watch our how-to videos on our Youtube channel.