

Application Types, Categories, and Intakes can all be found under CONFIGURATION > Admission > Dropdown lists. They are part of the basic configuration required for the Admission Module and are those that define what an applicant can apply for, based on the Programs available and the day/time period he applies. (Figure 1)
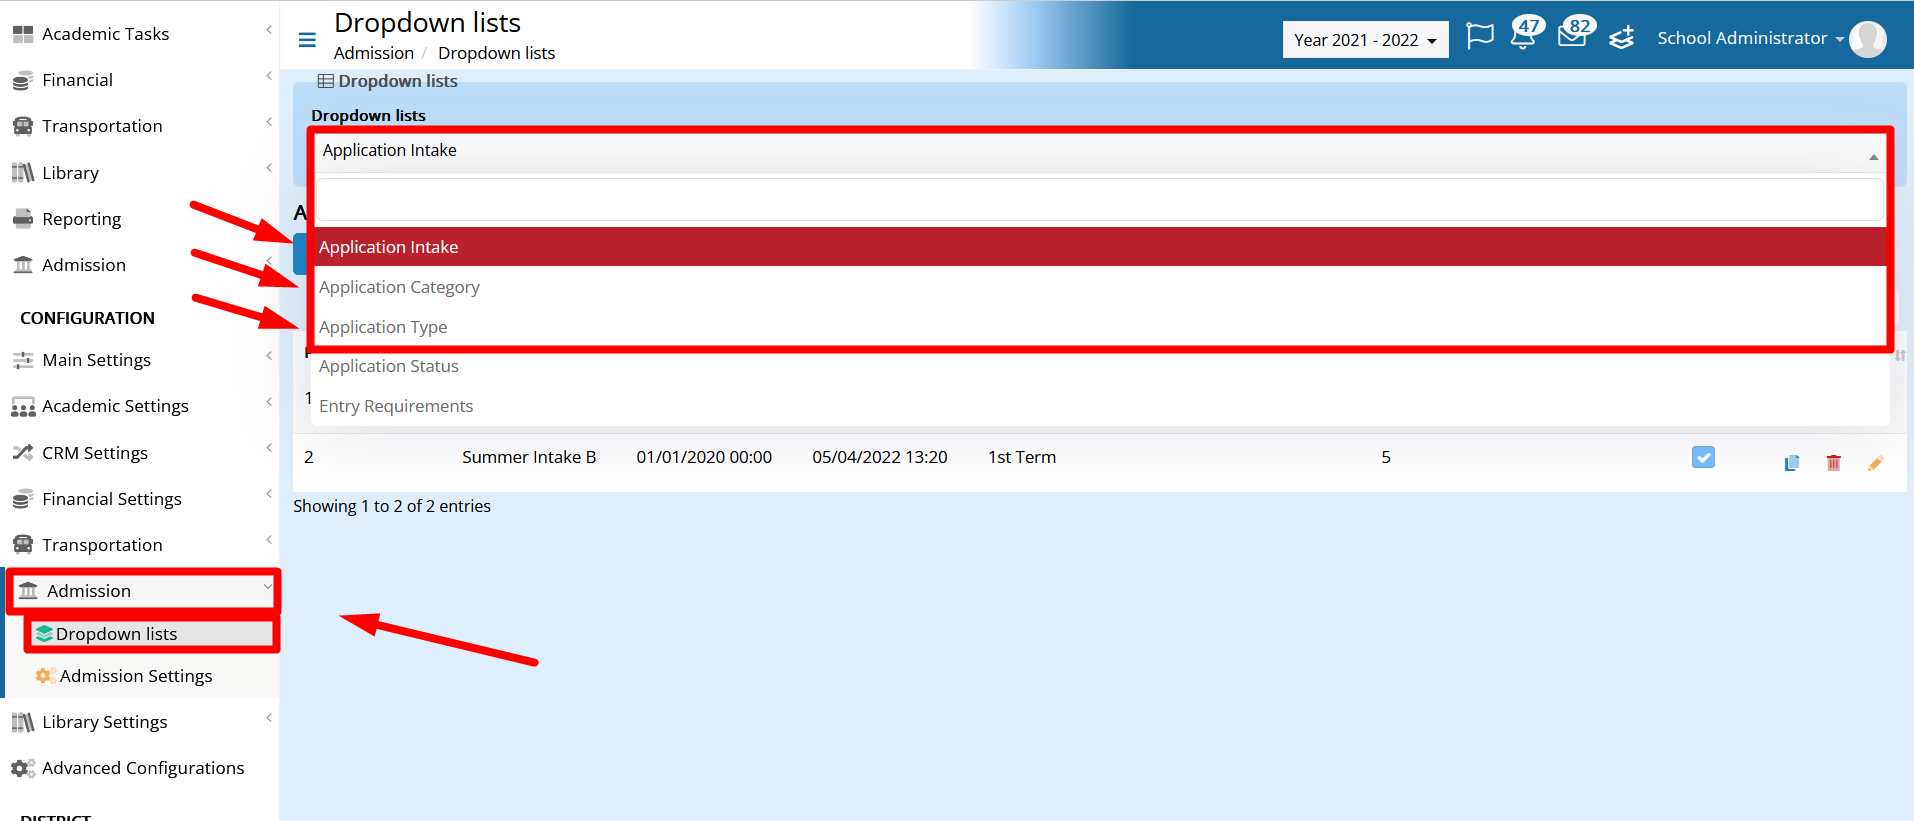
Figure 1
In this article, we will see how, and in which sequence, they should be configured.
Intakes
Intakes are those that define when Applicants can apply. Depending on each case, you might require receiving applications in a certain period in the year, multiple times throughout the year, or during the entire year.
Whatever the case, in every Academic period you need to have at least one intake.
To create/configure an Intake, a user must click on the Add New/Edit button accordingly. (Figure 2)
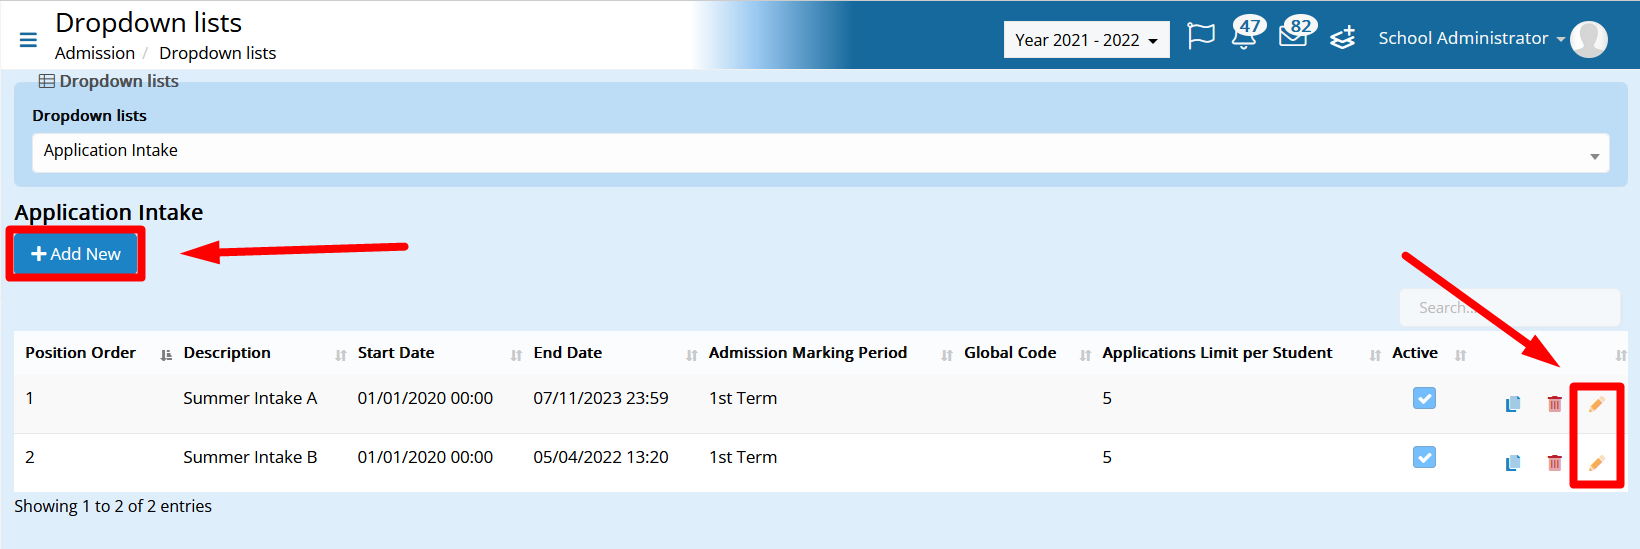
Figure 2
The following window will pop up where the user is able to configure the intake. (Figure 3)
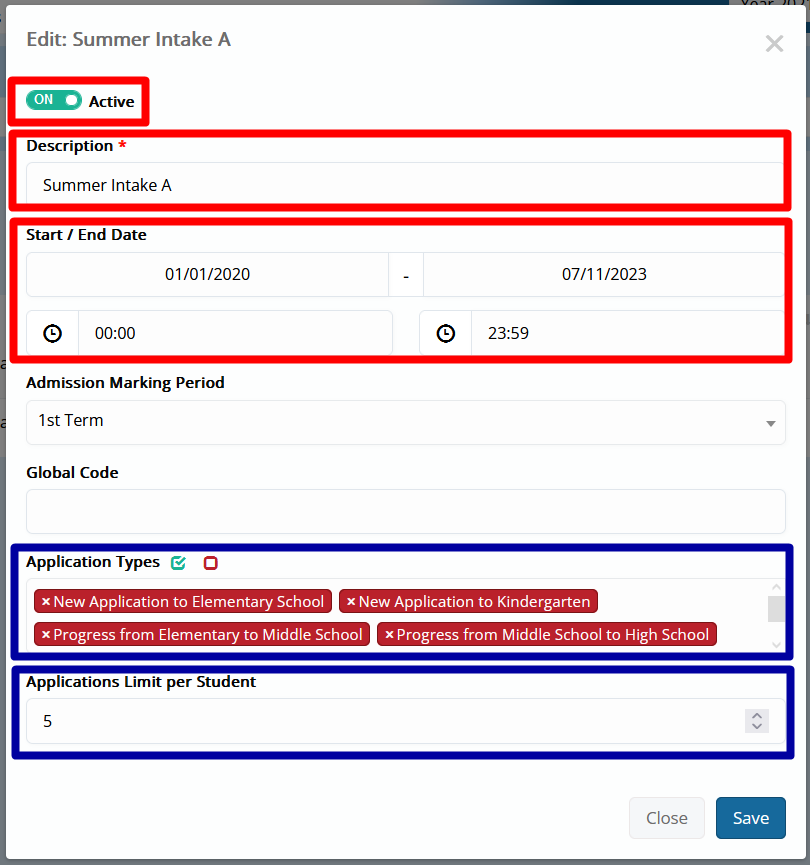
Figure 3
You should always make sure to have the “Active” radio button switched on. Additionally, a Description is always mandatory.
In the Start / End Date area, you need to configure the time period in which your institution receives Applications.
The Application Types field is where you connect the Application Types with the Intake. We will get back to it later, in the Application Type section.
In the Applications Limit per Student field, you set the number of applications an applicant can submit. If you want applicants to submit unlimited applications, you leave it blank.
Note: The Applications Limit per Student is in effect when your setup is configured for multiple applications. If you are using the single application workflow, candidates can only submit one application anyway. For more information on the difference between the single and multiple application setups, check out this Article.
Application Categories
Application Categories are also essential for the Admission process. Age restrictions in the Admission process are defined by them. Also, in the multiple application workflow, you can include a verification message before the final submission of an application which is created here.
To create/configure an Application Category, a user clicks on the Add New/Edit button accordingly. (Figure 4)
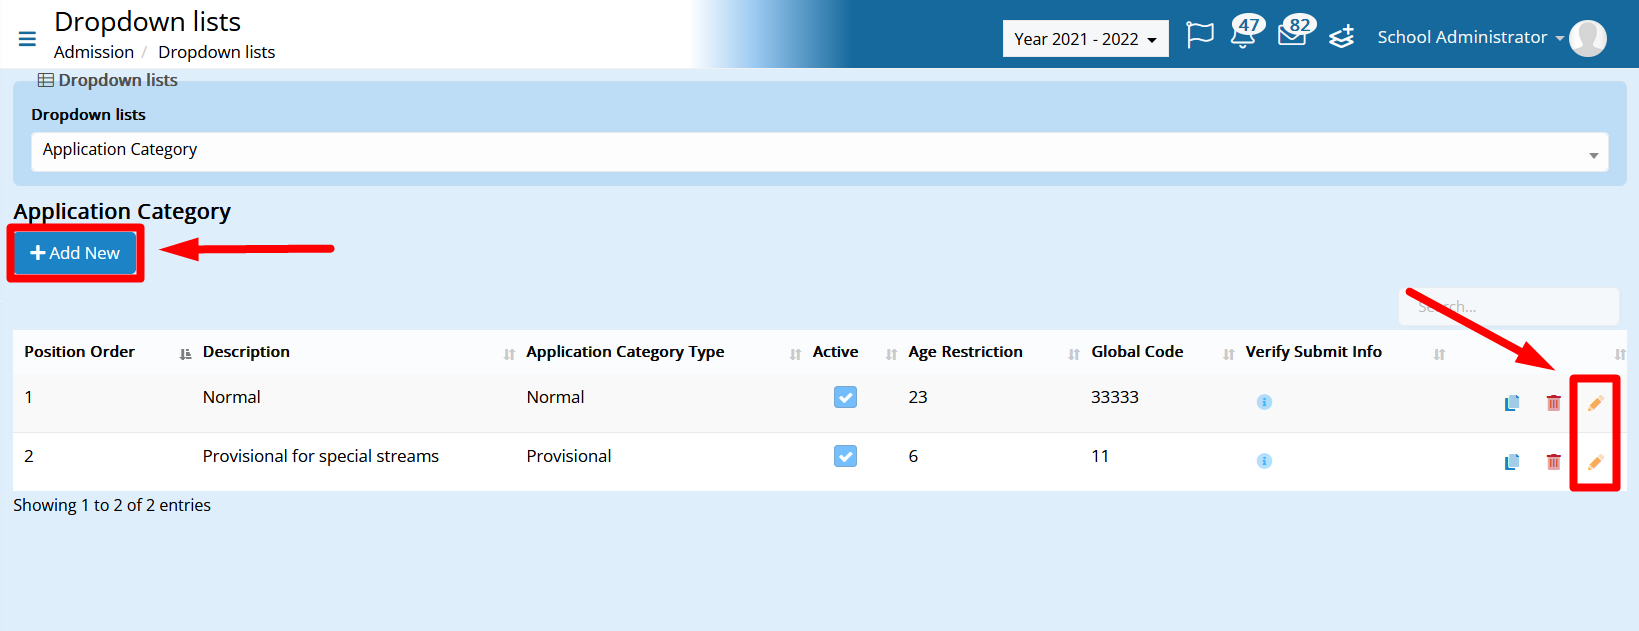
Figure 4
The following window will pop up where the user needs to configure the Application Category. (Figure 5)
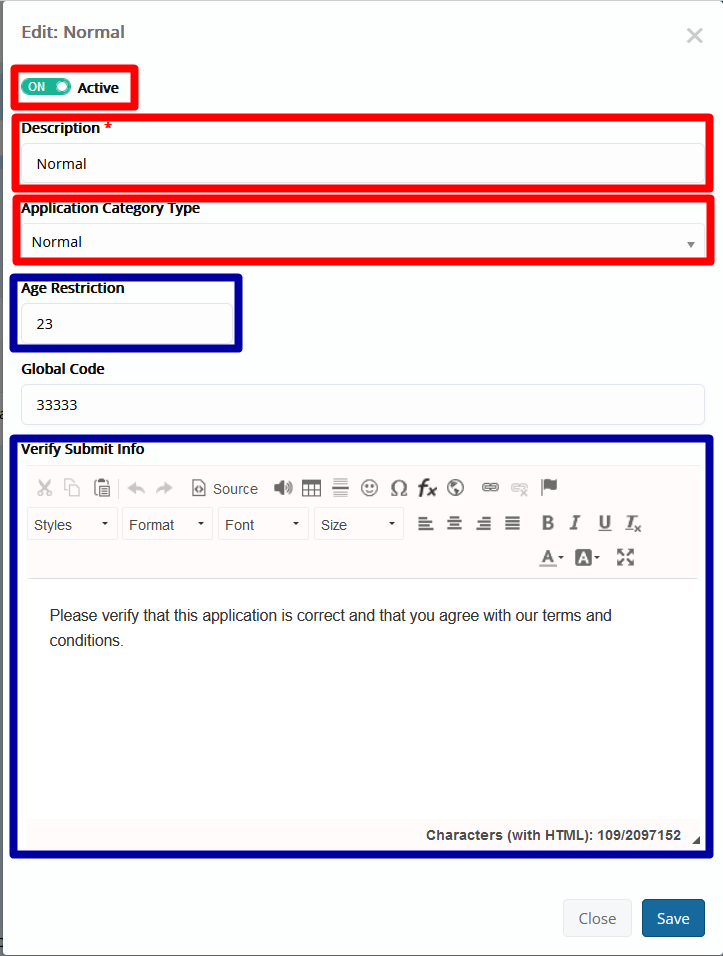
Figure 5
Like in Intakes, the “Active” radio button should be switched on, and a Description is filled in. In the Application Category Type field, the Normal option is auto selected. In every admission setup, you usually have an Application Category of the normal type. If your institution accepts applications from Candidates that due to previous education want to start their studies midway through an educational program, then you can have additional Application Categories with the option Provisional selected in the Application Category Type.
The Age Restriction field is optional and used when a specific age limit is required. The Verify Submit Info field is also optional, and this is where the verification message before the final submission of an application is set.
Application Types
The Application Types is where everything gets tied together. It’s where the intakes get connected with the Grades/Educational programs.
To create/configure an Application Type, a user must click on the Add New/Edit button accordingly. (Figure 6)
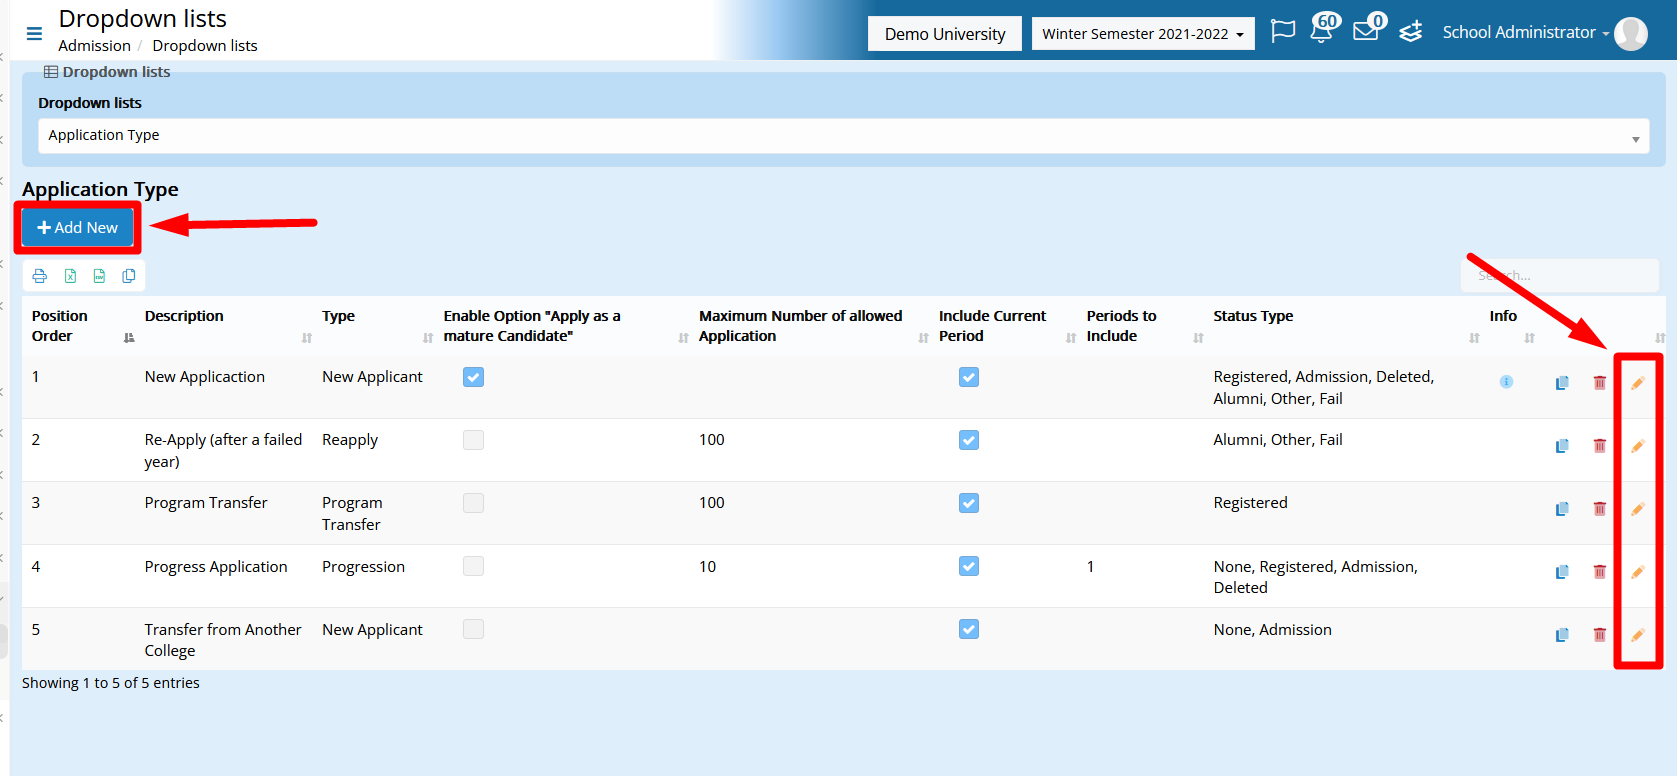
Figure 6
The following window will pop up where the user must configure the Application Type. (Figure 7)
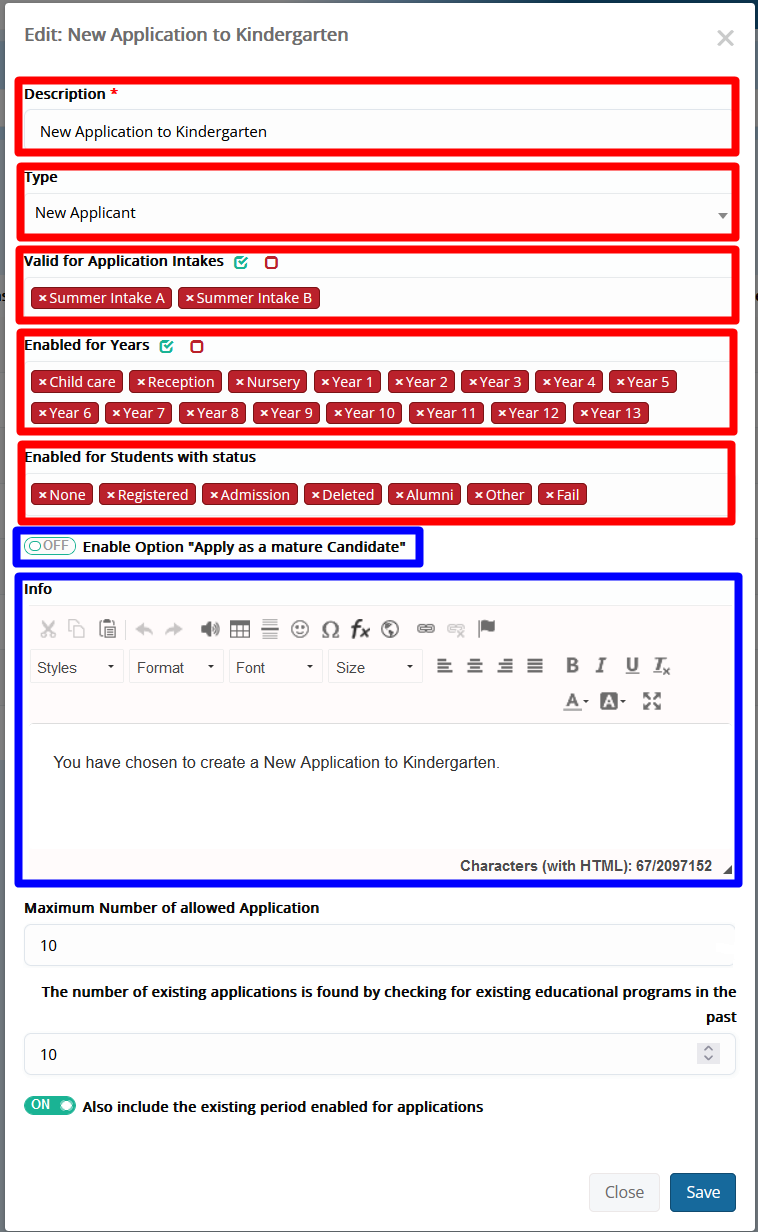
Figure 7
As in the previous ones, you need to create a description. In the Type field, you usually select the New Applicant option, but you can select any of the other options according to your requirements. (Figure 8)
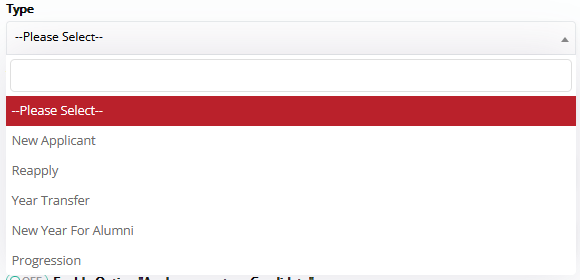
Figure 8
In the Enabled for Years/Educational programs field, you select the Grades or Educational programs of your choice, and in the Valid for Application Intakes field, you select the appropriate intakes.
The intakes can be selected here, or you can select which intake should relate to which Application Type in the Intake dropdown list, as shown in Figure 3.
In the Enabled for Students with status field, you must select which Types of Users (Students) will be able to apply for this Type and as a result for these programs. For new Applicants that come from the Signup form, you need to have the Admission status selected.
If you also want to enable your existing Students that are already registered in another Educational program to apply, you also need to select the Registered option. (Figure 9)
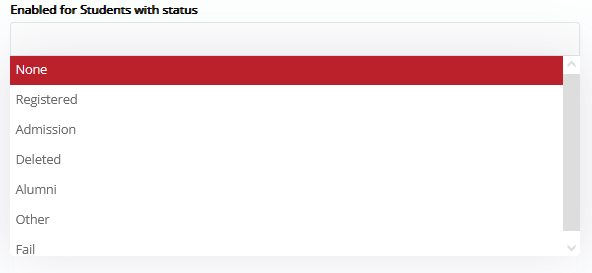
Figure 9
The option “Apply as a mature Candidate” Radio button, when enabled, allows the Applicant of the specific Application Type to declare that he is an adult and therefore age restrictions are lifted in this application, meaning the system does not take into account the applicant’s age.
In the Info field, you can insert a message that appears to the candidate. Both this message and the Apply as mature candidate checkbox appear if the Candidate selects the Application Type as shown in Figure 10.
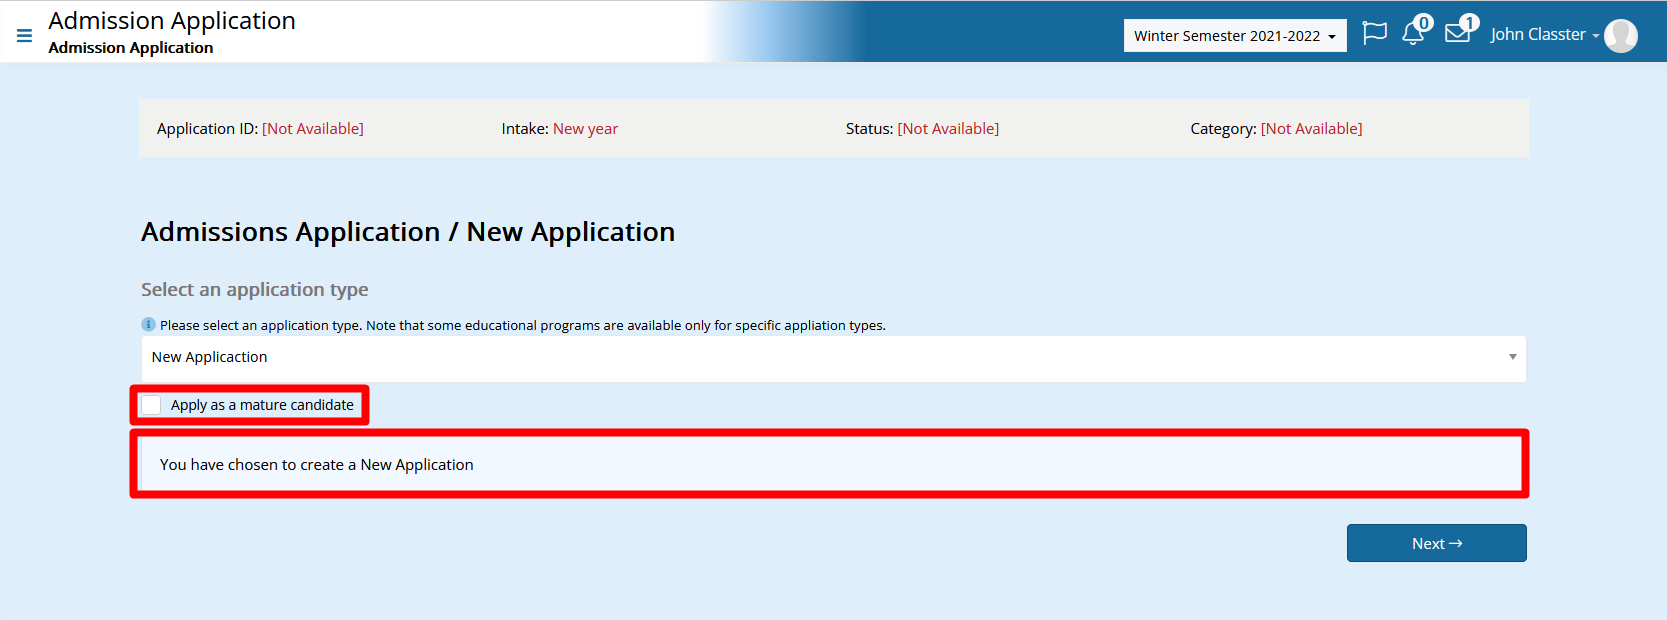
Figure 10
Conclusion
Now you know how the Intakes, Application Categories, and Application Types work and are configured. The most optimal sequence to configure them is the one presented above meaning first the Intakes, then the Categories, and then the Types, but you can choose to configure them in a different order.
To get a better understanding of how to configure the Admission module, check out the Classter Walkthrough Admissions Webinar on our YouTube Channel.
Find more or post your questions on our Facebook Community Page. Also, watch our how-to videos on our YouTube channel.