First you must enter the Classter Portal as an Admin:
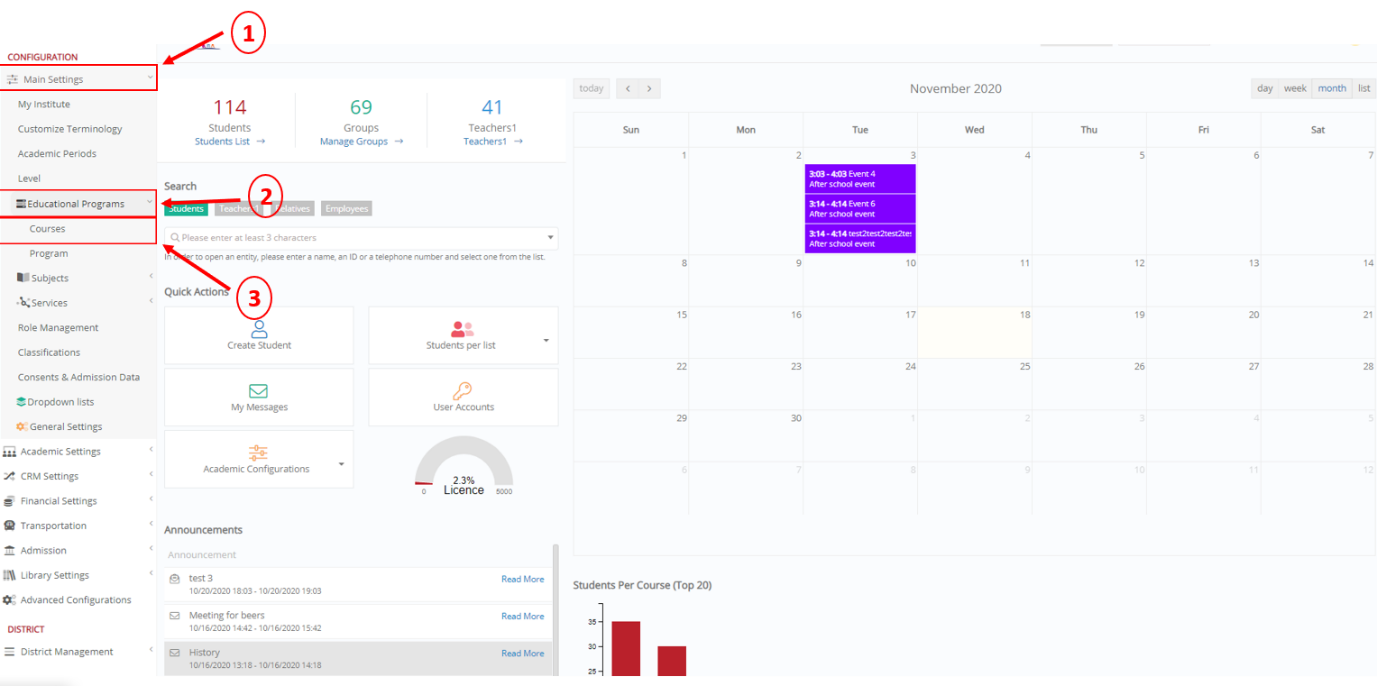
On the configuration menu, click on Main Settings > Educational Programs > Courses. (Figure 1)
Note: Keep in mind that terminology is configurable and may differ for your institution e.g Course/_Grade_ etc.
 Figure 1
In this window, from the ‘View’ menu, select ‘Grid View’. (Figure 2)
 Figure 2
You may find the option ‘Course Constraints’ in the ‘Actions’ menu of each course. (Figure 3)
 Figure 3
On the window that appears, activate the ‘Show all day’ functionality. (Figure 4)
 Figure 4
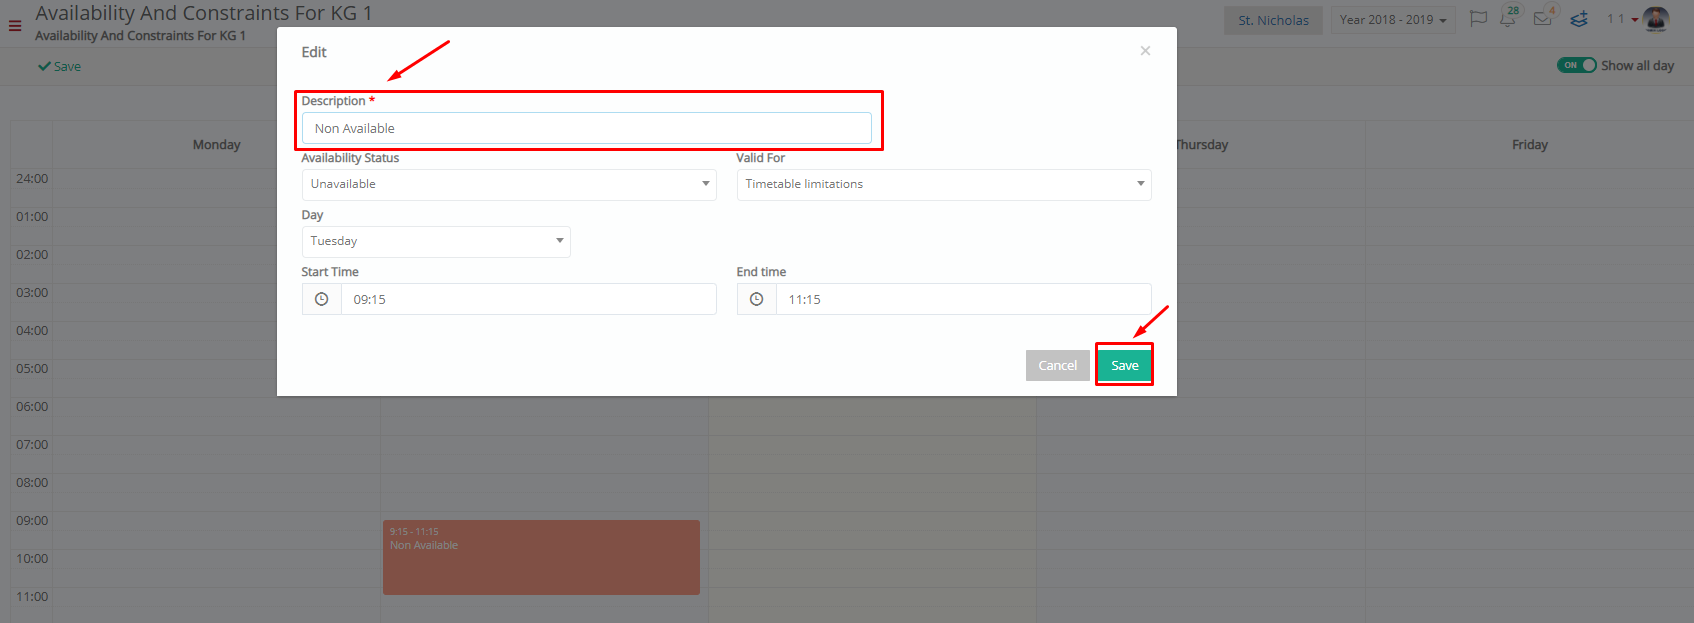
Click anywhere on the timetable to add a constraint. Here you need to write a description, add your availability status, certain limitations and more. Once completed, click on the ‘Save’ button. (Figure 5)
 Figure 5
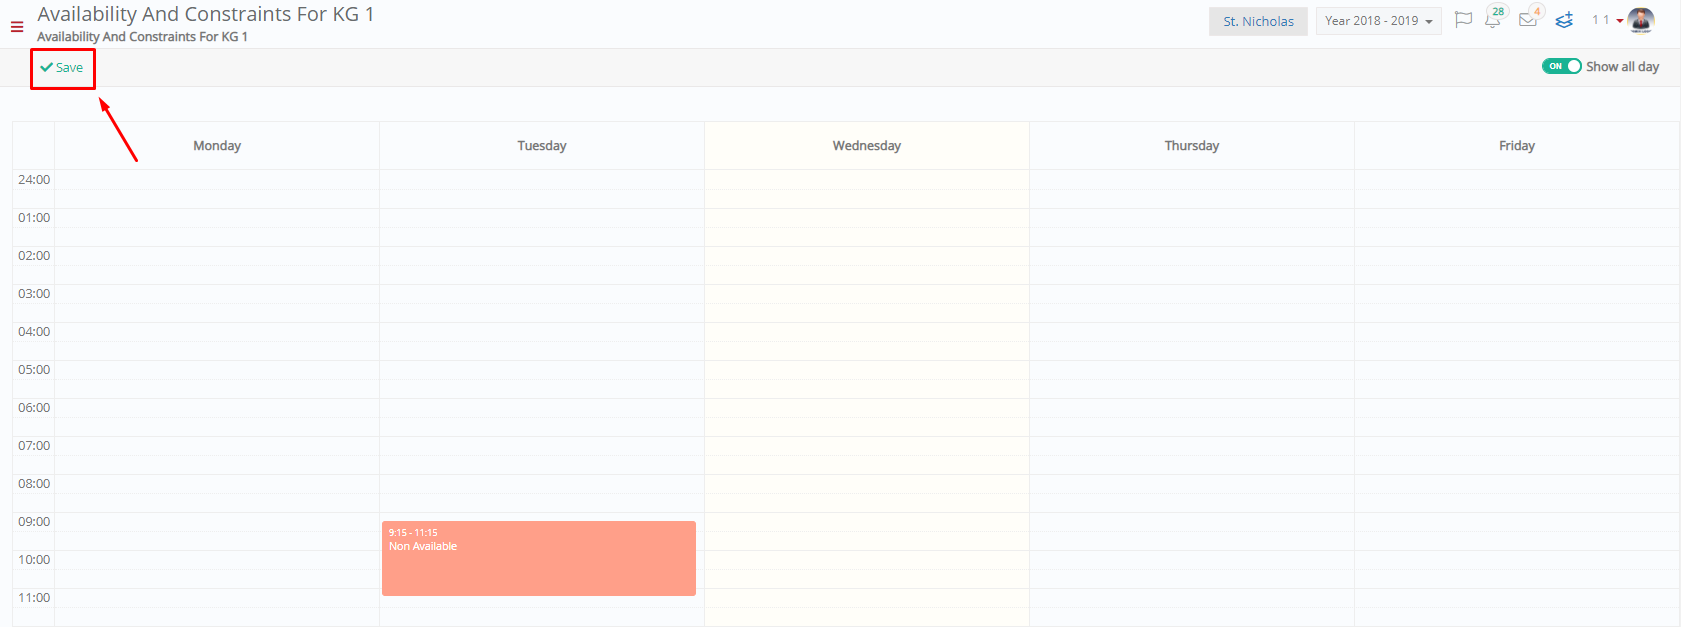
Finally, click on the ‘Save’ button to establish your availability and constraints for this course. (Figure 6)
 Figure 6


