

Watch the how-to video

From the Classes/Groups option from the main menu you can begin setting up classes/groups. Follow the path: Dashboard > Management > Classes > Manage Classes (Figure 34).
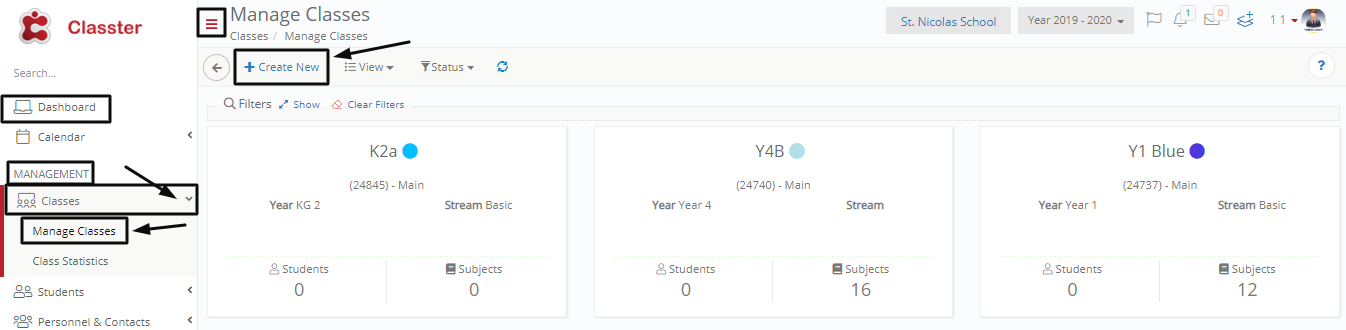 Figure 34
On this page you will see the following (Figure 34):
- On this page, you can see all the existing classes.
- To create a new class/group you will need to click on the ‘+Create New’ button.
- Once you have clicked on the create new button you will be transferred to the creation page (Figure 35).
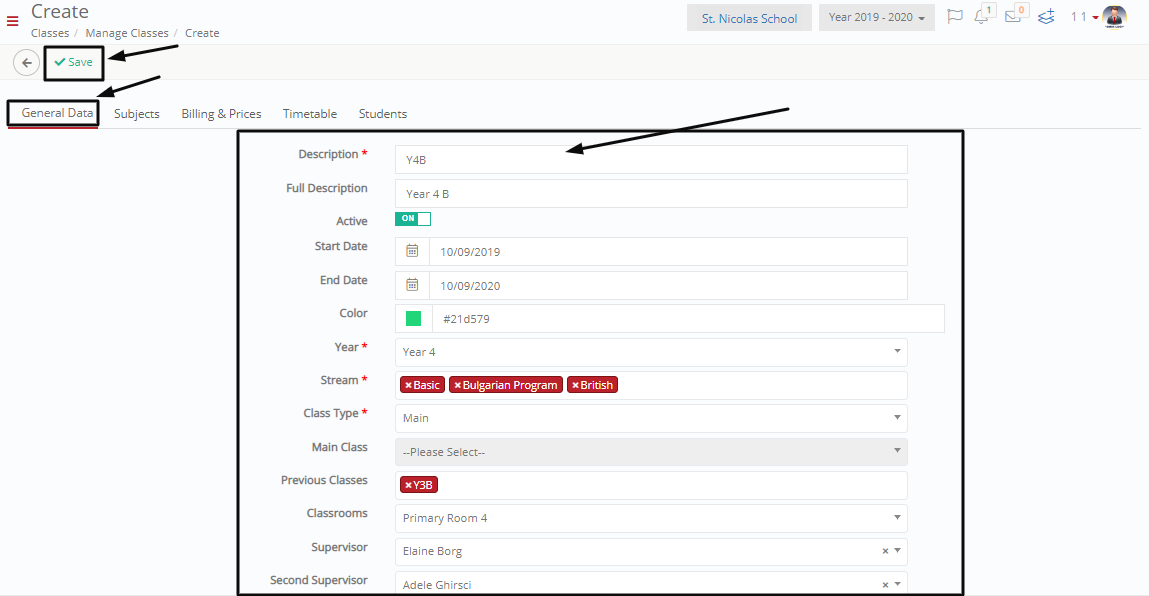
Figure 35
On this page you will see the following (Figure 35):
- Use ‘Description’ to enter classes’ short name e.g. Y4.
- Use ‘Full Description’ to enter classes’ full name e.g. Y3 Music Advanced.
- Select if the class will be ‘Active’ i.e. available for students to enroll to.
- Define the ‘Start’ and ‘End Date’ of the class e.g. from 01/07/2017 to 30/06/2018.
- Select the group’s ‘Color’ e.g. cornflower blue; this will be the color that the group will be presented in the timetable or elsewhere.
- Select the ‘Year’ e.g. Year 4.
- Select the ‘Class Type’ e.g. Main; the class type indicates if it is the main class or foreign languages, projects class etc.
- Select the ‘Previous Class’ e.g. Y3 Music Advanced; the student has to have passed all the subjects of the previous class in order to be able to enroll in the current class.
- Select ‘Classroom’ e.g. Senior Room 5: 28, which is the name of the classroom followed by the code of the Institute i.e. 28.
- Select ‘Supervisor’ e.g. Elaine Borg; she/he is responsible for the group i.e. write comments about the classes’ performance or state any incidents, approve assessments’/assignments’ content etc.
- Select ‘Second Supervisor’ e.g. Formosa Denzel; for example, he/she might be selected for assessments’/assignments’ 2nd marking.
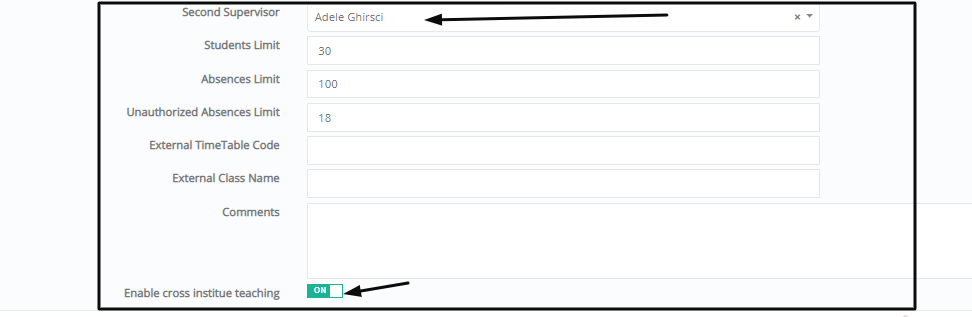
Figure 36
On this screen you will see the following (Figure 36):
- Define the ‘Students limit’ e.g. 30 which is the maximum number of students that can be enrolled in the class.
- Define the ‘Absence Limit’ e.g. 100 which is the maximum total absences allowed to the class students.
- Define the ‘Unauthorized Absence Limit’ e.g. 18 which is the maximum unauthorized absences allowed to the classes’ students.
- Enter ‘External Timetable Code’ if you have set a timetable for the class in a third-party application and you want to import it in to Classter.
- Enter ‘External Class Name’ if you have classes’ basic info in a third-party application and you want to import it in to Classter.
- Use the ‘Comments’ text box to enter any special comments about the class.
- Activate the ‘Enable cross institute teaching’ in order to make the class available for enrollment to students of other institutes.
- Click on the ‘Save’ button to save changes and continue with the next tab or another class.
Subject Tab

Figure 37
On this page you will see the following (Figure 37):
- Click on the subject’s ON/OFF button to activate/deactivate the subject’s availability at the class/group.
Note: If you want to activate/deactivate all subjects, click on the ON/OFF button of the column title ‘Subject’ - Click on the ‘Enroll Subjects’ button to enroll subjects of another year and/or program to the class/group (Figure 38).
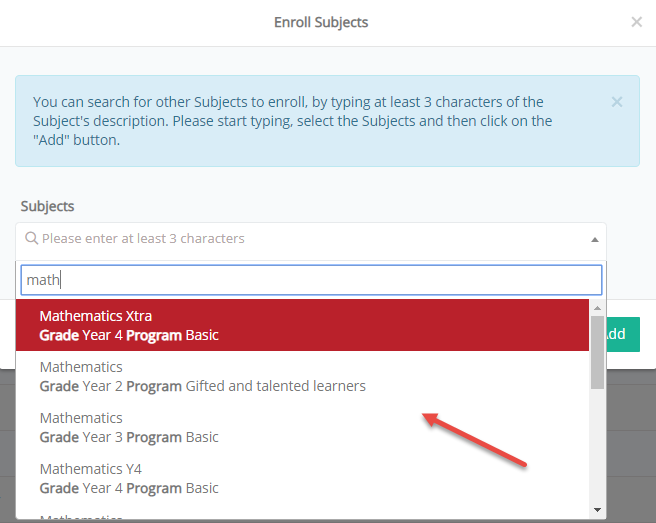
Figure 38
Billing Tab
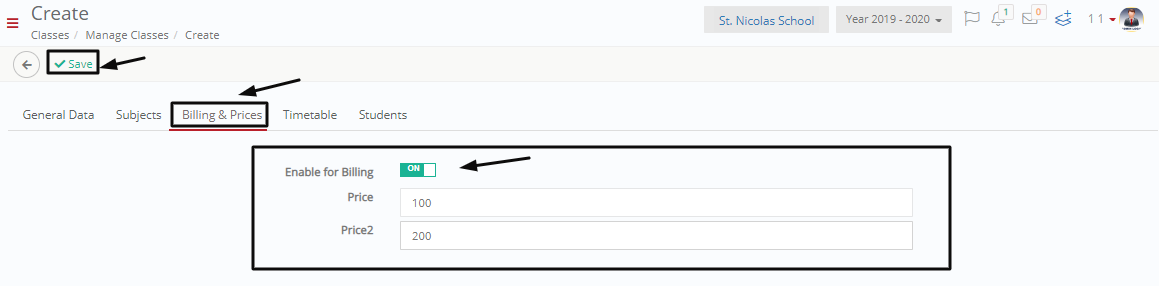
Figure 39
On this page you will see the following (Figure 39):
- Here you can enable the addition of this class into the financial module.
- Add the primary and secondary prices for enrolling in this class.
- Click on ‘Save’ and continue to the next tab.