In Classter student’s data can be massively uploaded from excel sheets, than manually imported _Student_ by student.
Tip: If you need to add a single student, check out our employee’s how to guide here.
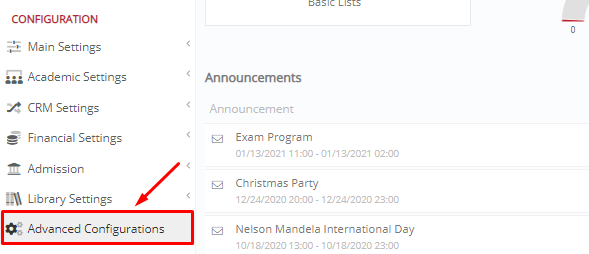
Logged in as an Admin, from the configuration menu, go to Advanced Configurations. (Figure 1)

Figure 1
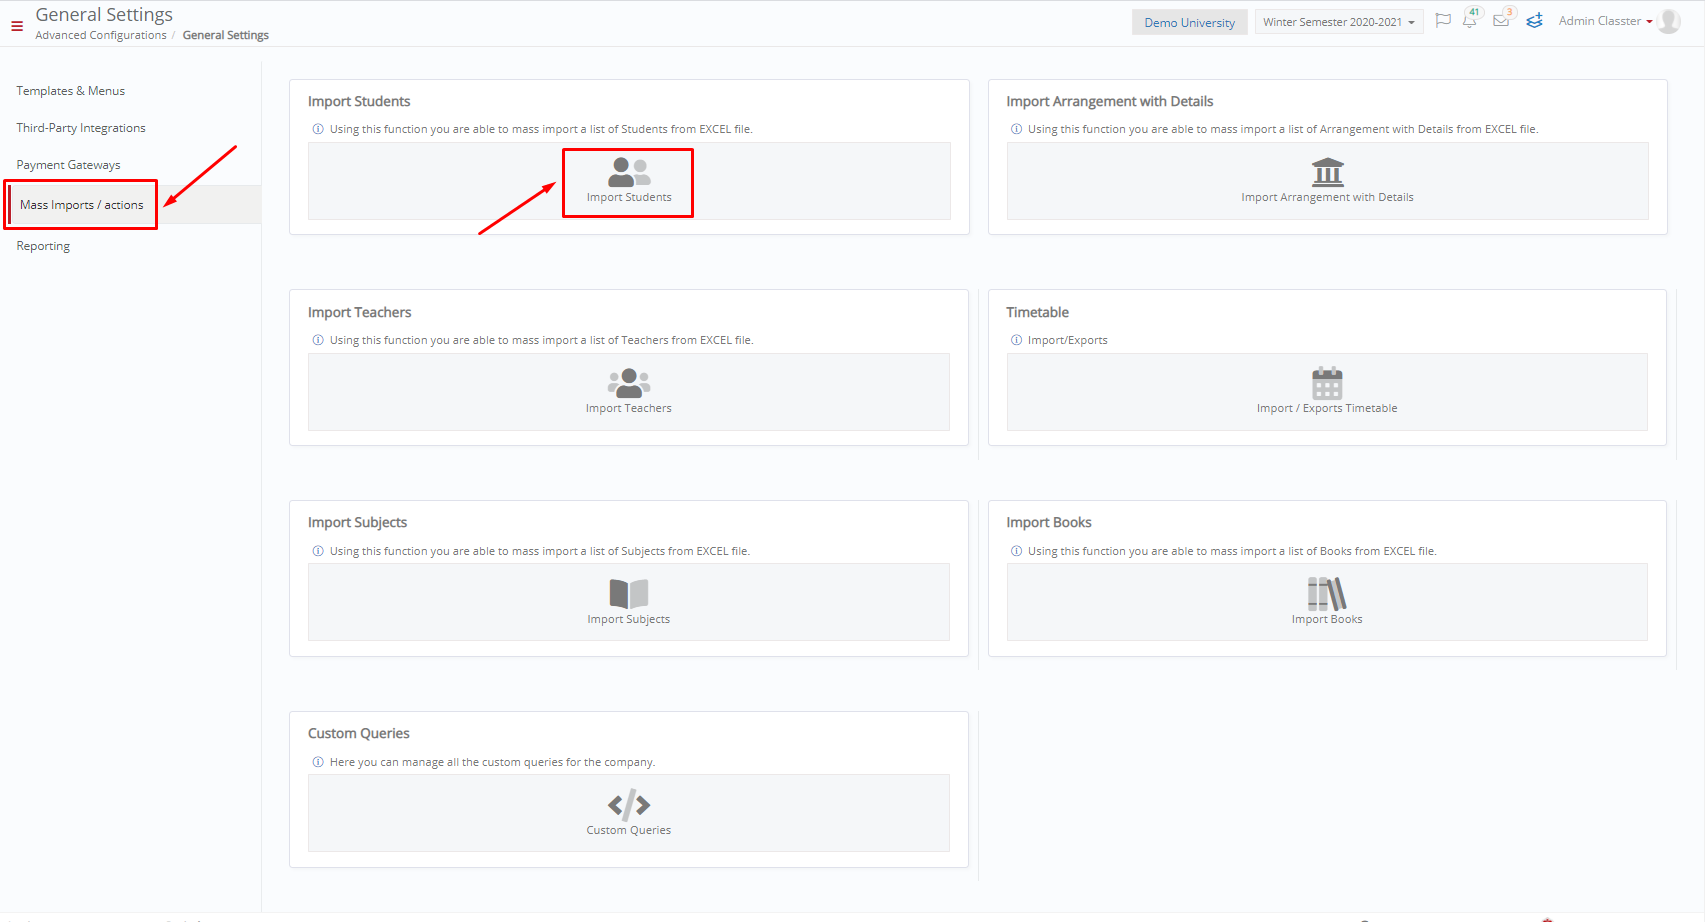
Navigate to the Mass Imports/Actions section, then click on the “Import _Students_” button. (Figure 2)

Figure 2
Here you need to complete 3 steps for your upload to be completed. (Figure 3)

Figure 3
Step 1: Choose the file where your _Student_ data are stored.
Step 2: Here you will find the fields regarding students that are needed by the platform. Set the order of the fields based on the columns you have in your Excel file e.g. First Name 1, Last Name 2 etc. You can choose only the fields that correspond to the information you have on your Excel spreadsheet, except for the fields with red asterisks which are required. Your Excel sheet should have the following form. (Figure 4)
 Figure 4
Once you are ready, click on the “Verify Data” button (Figure 3).
If your data are in the correct form, you will be able to see the following preview (Figure 5).
 Figure 5
If your data alignment is incorrect, you will see a preview with error signs (!) (Figure 6).
 Figure 6
Once you have aligned the data between Classter and your Excel sheet, you can proceed to upload the file to Classter.
Step 3: Last step is to click on the “Import Data” button.
For a more detailed explanation of massive _Student_ import with an Excel sheet check out this page.
For more tips and tricks in Classter, become a member in our Community in Facebook and follow our Twitter page or take a look at our how-to videos in our YouTube channel.
Extra Tip: Do not forget to take a look at our Advanced Configuration Manual to take advantage of all its capabilities.
(Tags: Advanced Configuration, Admin, Student Data, Excel Sheet)


