


How to Configure, Create and View events?
In this menu you will learn how to configure create and view events with Classter simple and easy.
But what is an event?
An event could be for example an event, a seminar, a party, an information day etc. where you can invite students, parents, teachers or employees. All events are presented to participants in their calendar , which is located on the main menu of the Classter under the Dashboard.
Let’s begin
Before we proceed with the main process of creating a new event, let’s take a look at some relevant settings that will help you to organize your events according to your needs
Follow the path : CONFIGURATION > CRM Settings > General Settings > Events Settings > Events Settings

- All Events and Announcements created by Lecturers must be approved before Pupil and Parents can view them If you create new event as Teacher , employee or staff must approve your new event to set visible for parents and students. Εnabling this setting essentially means that if you wish each event will be checked by the person in charge before it is published in the community.
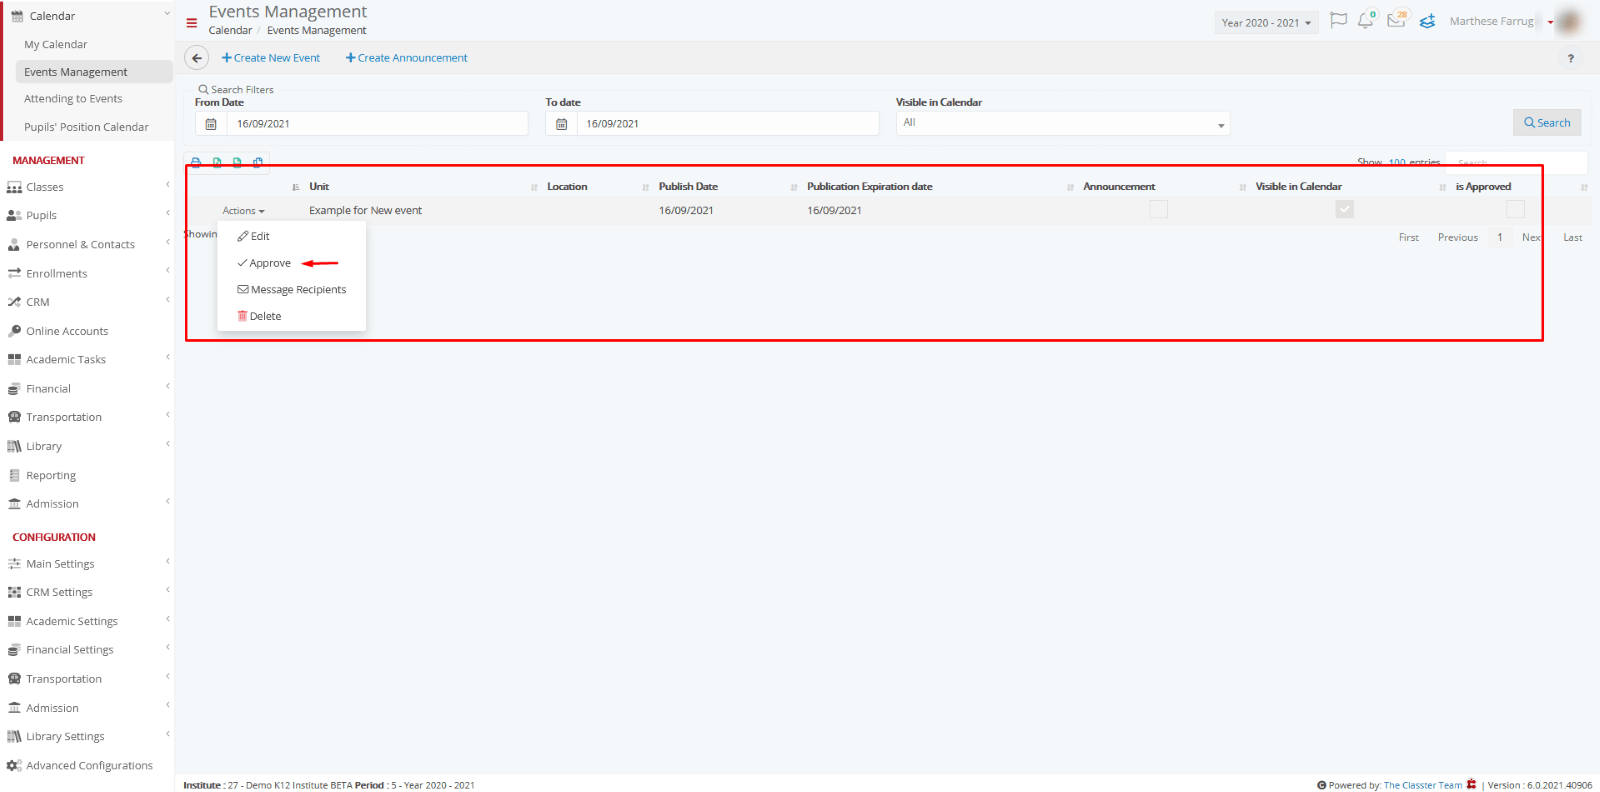
When the settings is active Employee will approve event in Calendar / Event Management
Now is visible in students portal.
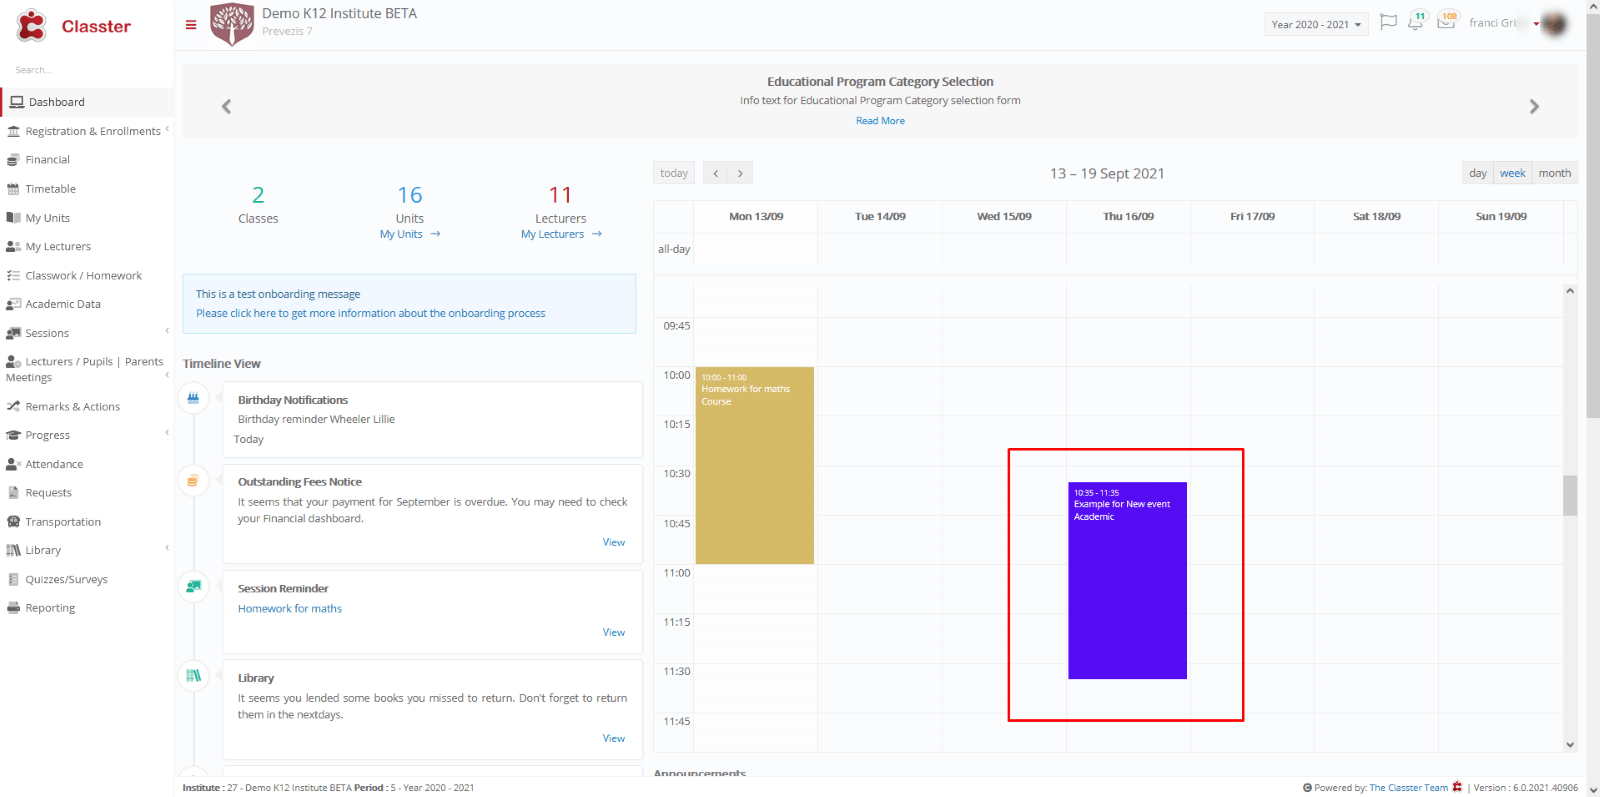
When the setting is inactive The teacher creates new event and it is published and visible without restrictions.
- Enable notifications for new events / Announcements
Enabling this setting essentially means that if you wish, the participants you have invited when you create your event will receive a notification on their Classter account.
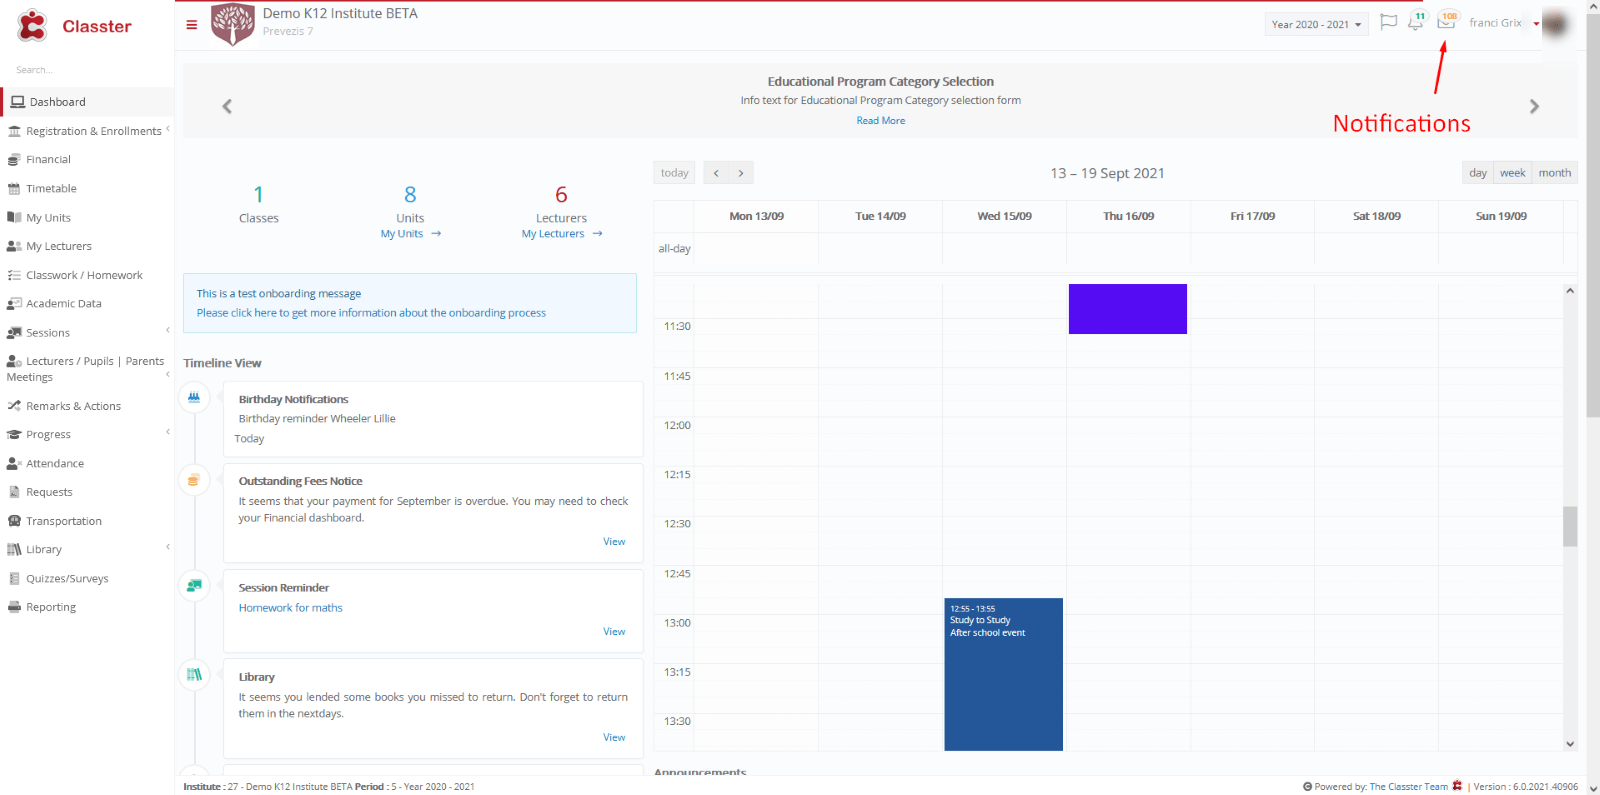
When this setting is inactive Users doesn’t receives notifications.
- Message Category to be used in events messaging
When in this setting you have selected Push Notification , Teacher marks a new event for parents and chooses to send a message.
Parent receives this notice :
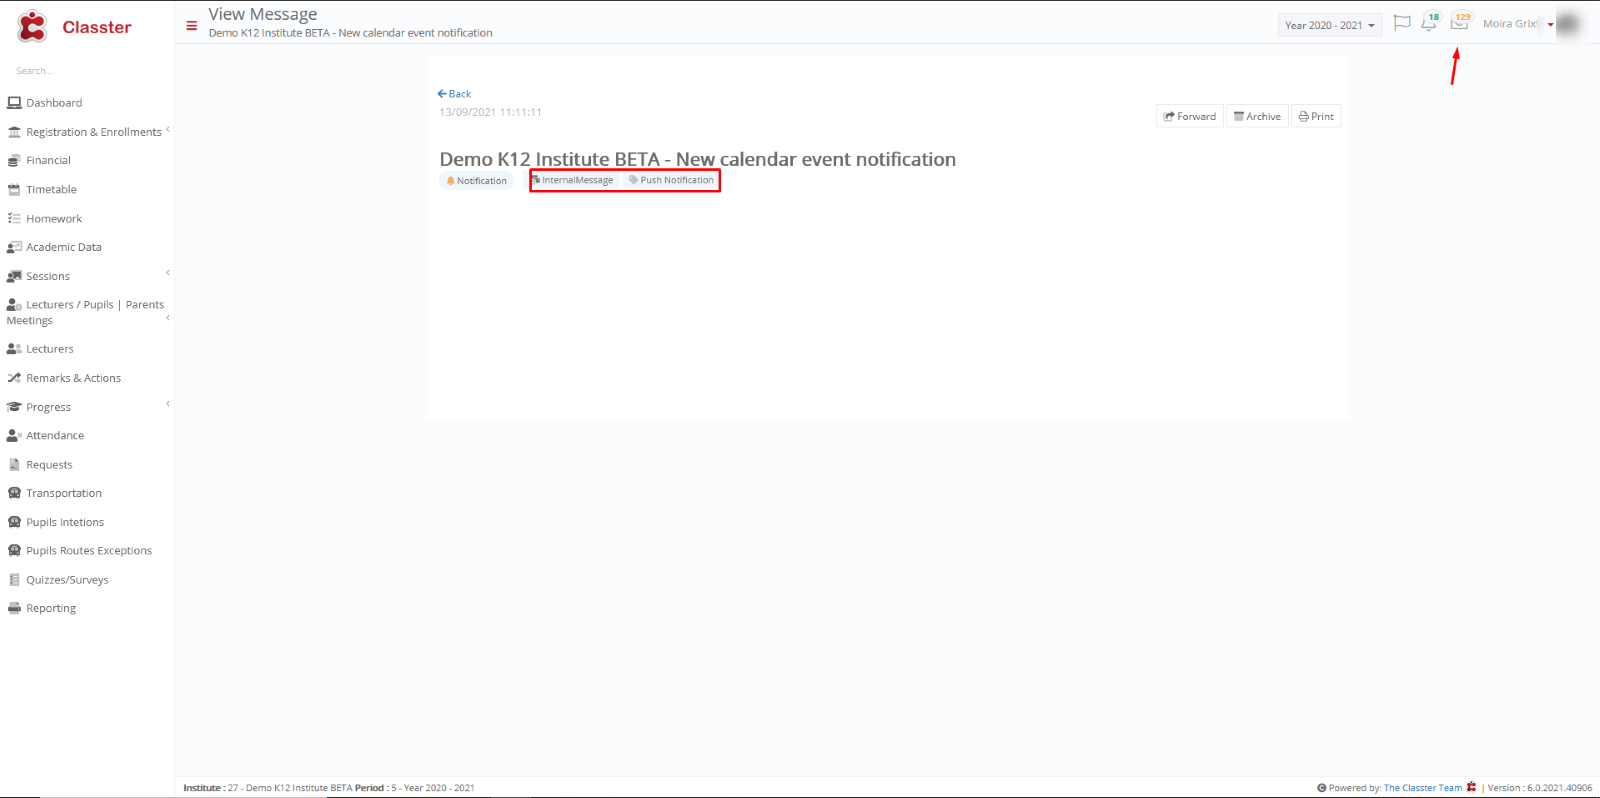
When this setting is inactive the Default Value it gets is the Academic Notification.
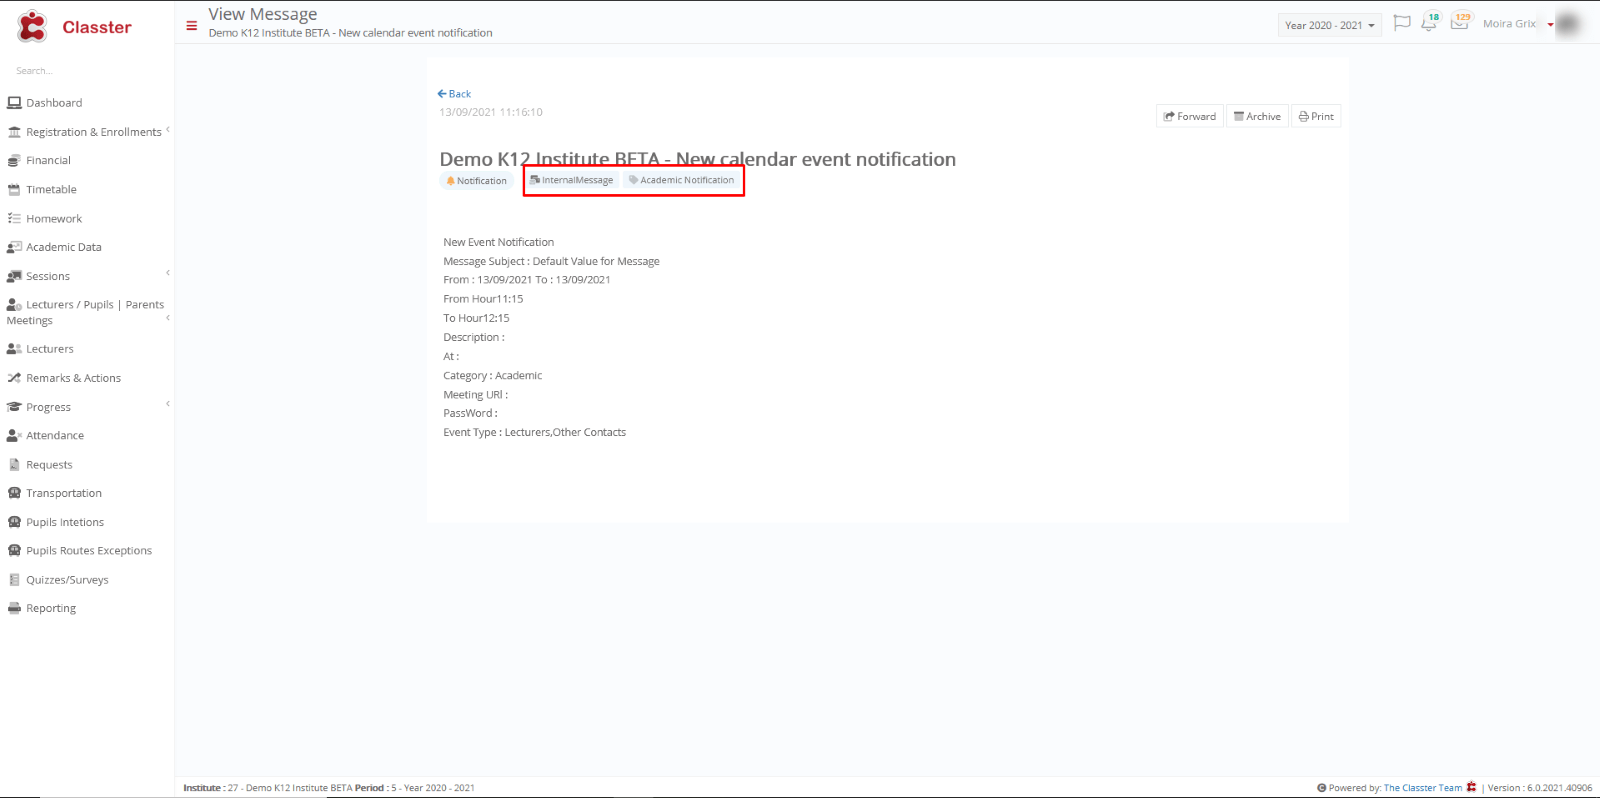
- Default Value for events messaging
Τhere are three options in this settings . Υou can choose to send just an Internal Message . You can also send an Internal Message as well as mail . And the third option is to not send anything if you don’t want to.
By selecting internal message each participant will receive a notification of the event on their personal Classter account.
Default Value is Internal Message & Email when you create new event
This means that each participant, apart from the internal message that will receive a notification about the event in his/her personal Classter account, will also receive a personal email.
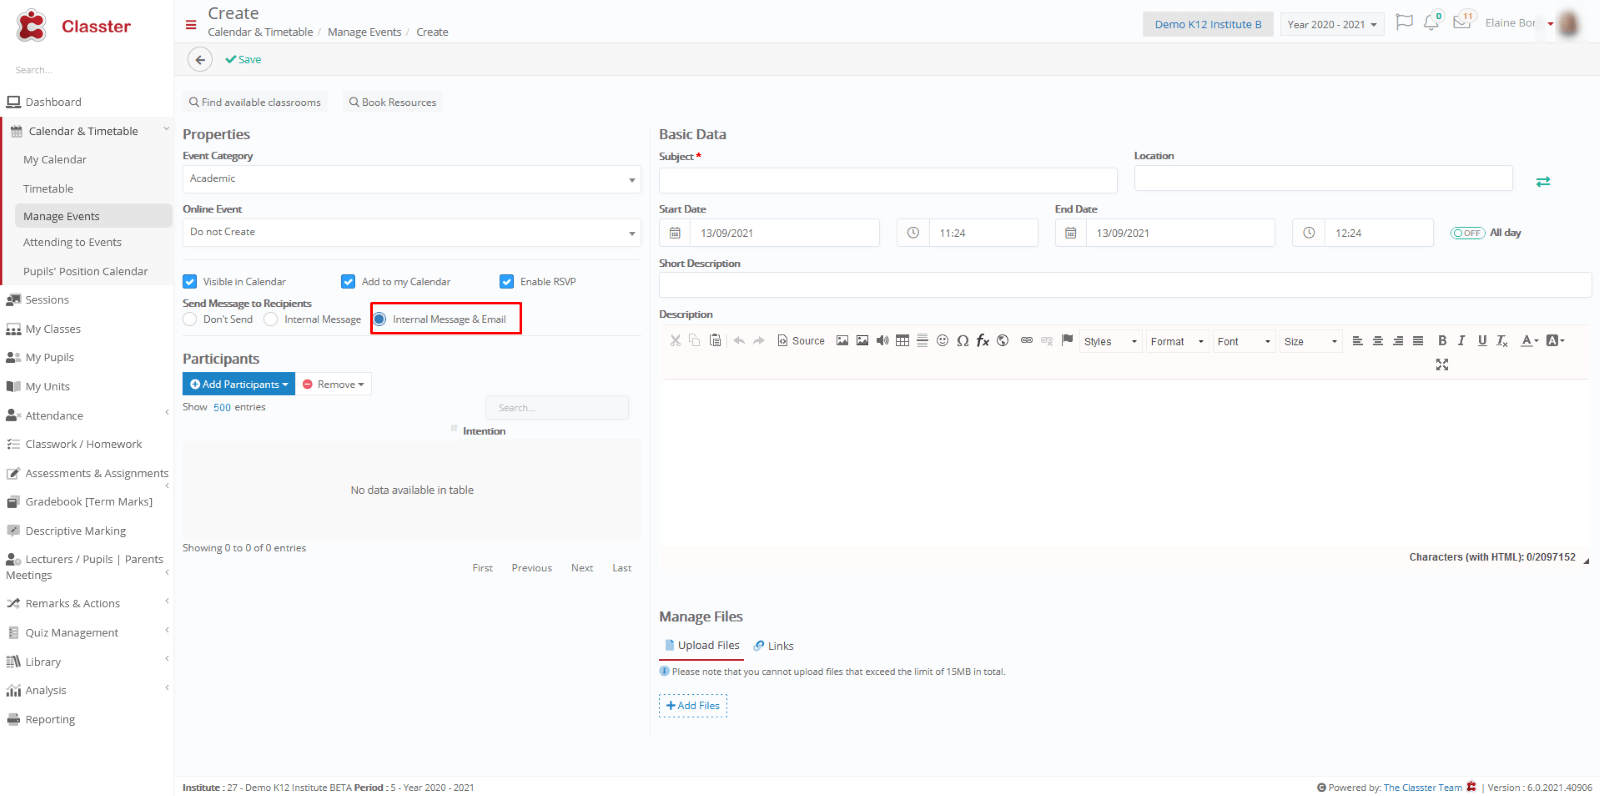
The user also have the option to Don’t Send if do not want to
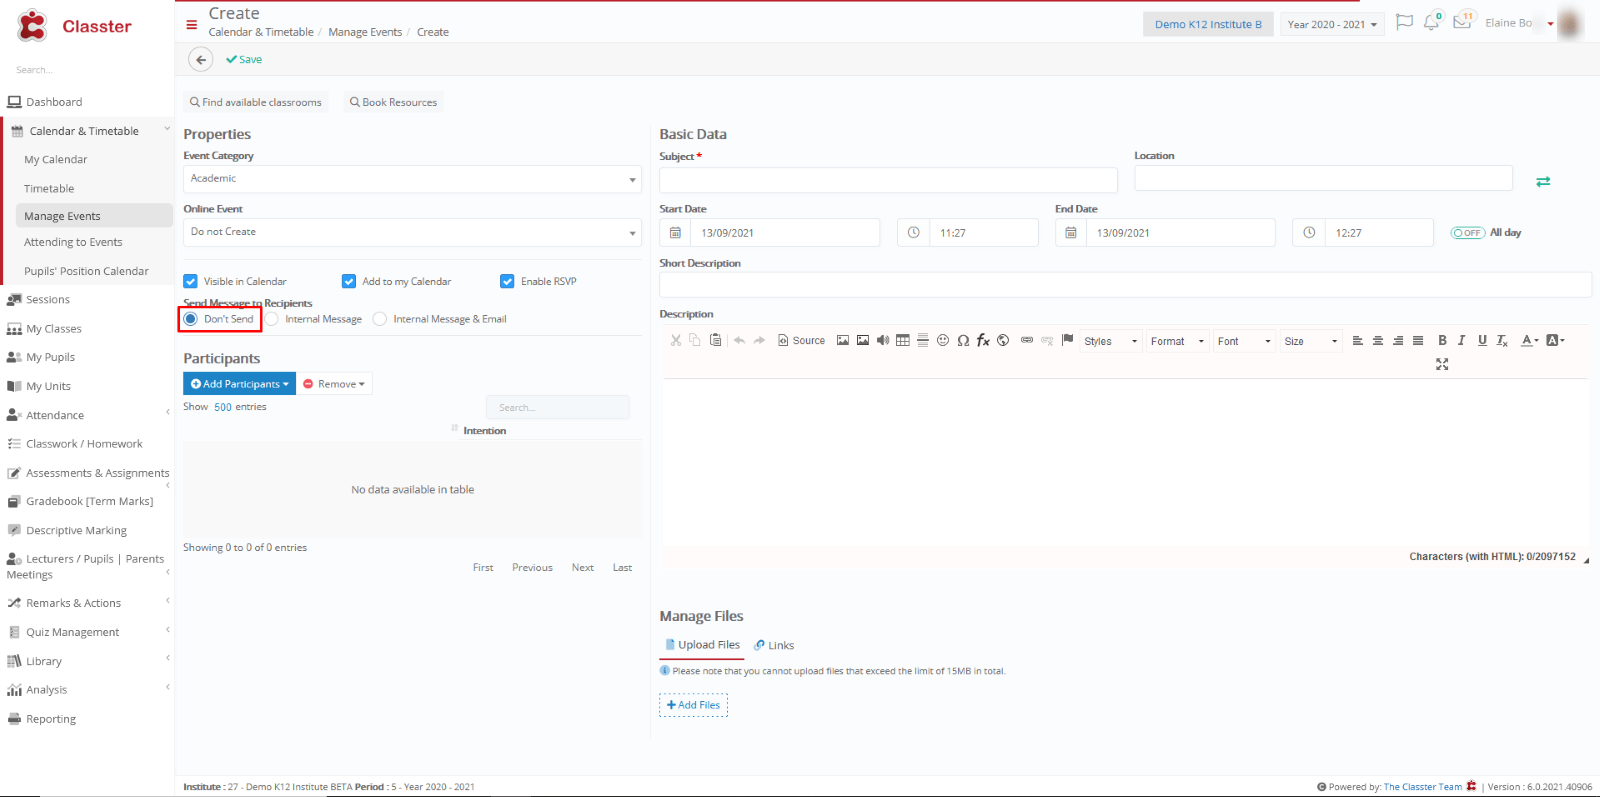
Αnd after seeing the settings and editing them according to our needs we go on to create our event
Follow the path: Calendar & Timetable>Manage Events>Create New Event
- To create a new event, click on the “+ Create New Event”

At the “+Create New Event” page you can create your event by fillings the essential gabs and clicking the buttons that meet your needs

- Choose a category of event e.g Parties.

- You can choose whether you want the event you create to be visible in calendar . you can also add it to your calendar as well as activate the RSVP which what it actually does is to give participants the option to indicate their wish or not to attend the event

- Send Message to Recipients to invite them to your event

- Select Participants by clicking on the +Add participants button (Students, Parents, Staff).Use the filters to narrow down your participants and click ‘’Search’’ to show the list.
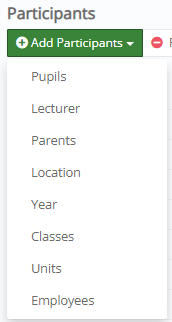

- Fill in the essential fields regarding this event. These fields include Subject, Location/Classroom (changes if you click on the arrows button next to the field), Start and End date as well as a short description.

- If you want to enter more details, fill in the free text box called description which allows you to type and customize your text , insert images as well as grids.
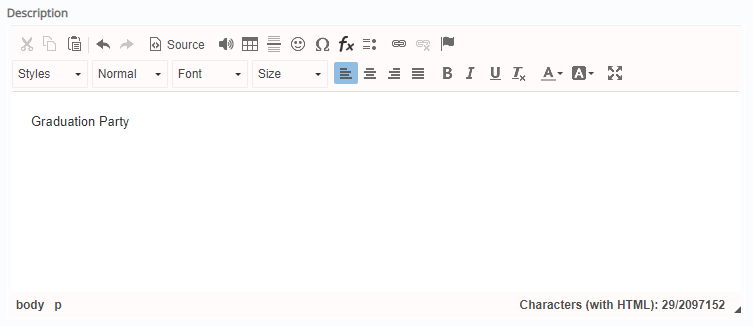
- You can also attach files or add links to this event by clicking on the upload files or links button under the Manage Files section.

- Once you click on ‘Save’ the event will be created and notifications sent if you have chosen this option.

- Click on “Find available classrooms”

- Select location, date, time and number of students

- Click on the “Search” button
- Click on the ”Book Classroom” button of the classroom you want to book.

Note: Once added, click on the “Convert to Classroom” button if you want to select another classroom 

- Book Resources[1] such as projectors, speakers or tablets
- Select a resource “Category”
- Click on the “Search” button
- Click on the result to select it
And now that you have finished creating your event let’s see how it will look on the calendar and to the users
Where can someone find an event?
All the events are located at the Calendar , from there one can view and edit all scheduled events . Follow the path on the Calendar menu – Calendar
- Select a range of dates for which you would like to see the events

- Click on “Actions” button to “Edit” or “Delete” the event/announcements

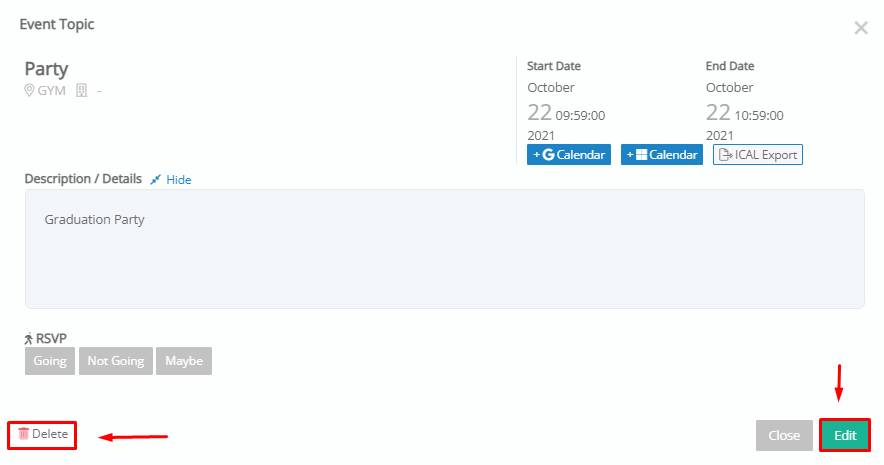
Note: The “Edit” button is only available on events/announcements created by the teacher logged.
Create your own Graduation Ceremony event
Ιn this manual I will give you an example of how you can create and organize through Classter the perfect graduation ceremony quickly and easily.
Let’s Begin
Follow the path : Calendar > Events Management > Create New Event
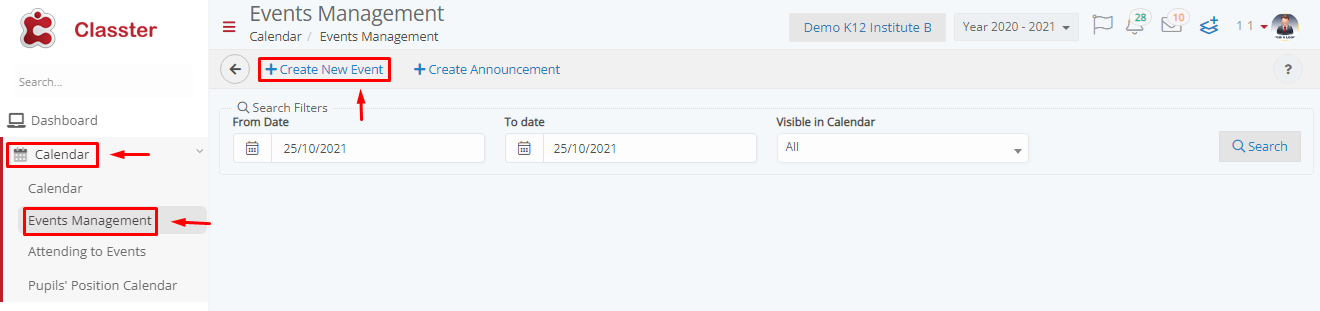
By clicking “Create New Event” the following page will pop up .

And now all you have to do is It’s to fill in the blanks as you wish.
I will give you the example on the following image


Select in the category of events Graduation Ceremony

- Select the Graduation Ceremony to be visible on Every users Calendar , including mine. Still activate the ,RSVP , this essentially means that those interested can declare their wish or not to attend the event.

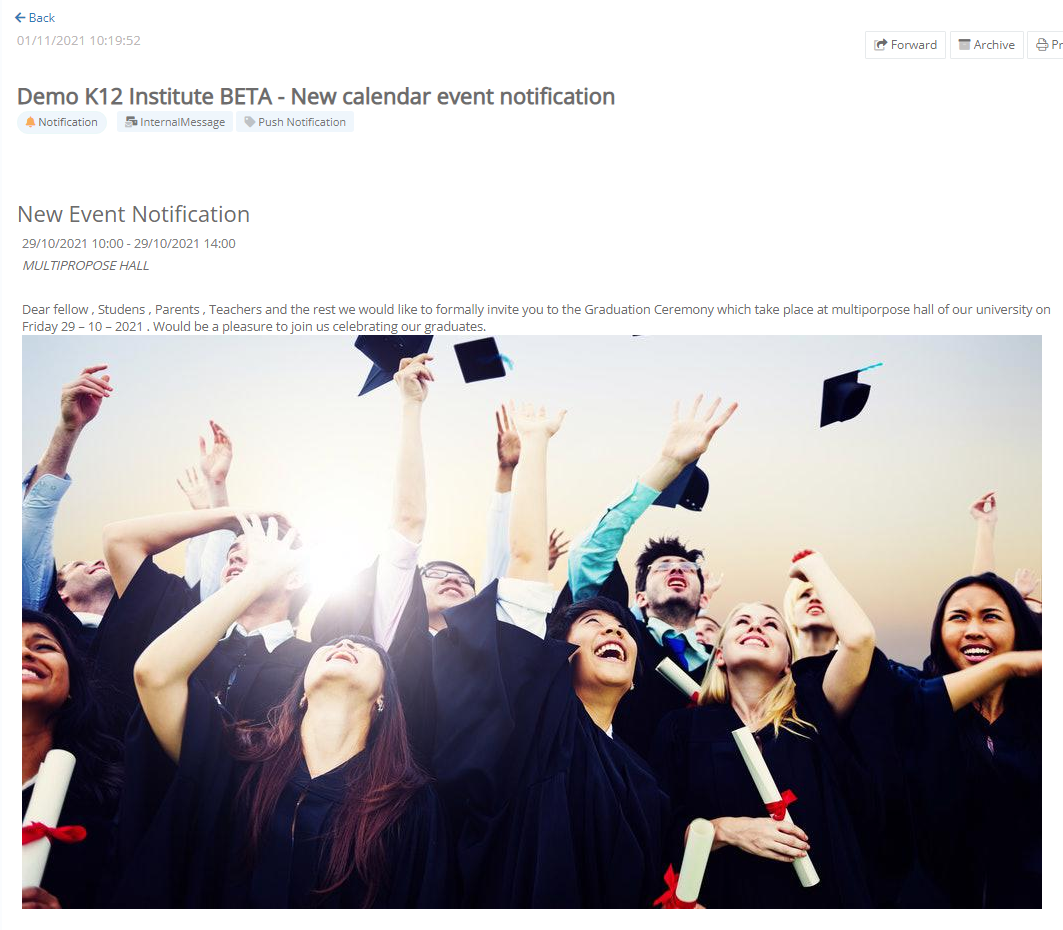
- Select to send the invitation to the recipients as an Internal Message and Email

and this is how the message of the invitation will appear to the audience.
- Select the participants i wish to invite ,which in this case are basically the Graduated, to the ceremony.


- Filling the blanks given essential information about the Ceremony.

- Also added a description in which I write a greeting and added a picture to embellish it

- At the end of this page I attach the invitation of the Graduation Ceremony

Once you have done , click the save button and the event is ready.
And this is how the event will appear in the calendar of all users

Create your own Annual Ball event
Ιn this manual I will give you an example of how you can create and organize through Classter the perfect Annual Ball quickly and easily.
Let’s Begin
Follow the path : Calendar > Events Management > Create New Event

By clicking “Create New Event” the following page will pop up .

And now all you have to do is It’s to fill in the blanks as you wish.
I will give you the example on the following image


- Select in the category of events Parties

- Select the Annual Ball to be visible on Every users Calendar , including mine. Still activate the ,RSVP , this essentially means that those interested can declare their wish or not to attend the event.

- Select to send the invitation to the recipients as an Internal Message and Email

and this is how the message of the invitation will appear to the audience.

- Select the participants i wish to invite ,which in this case are basically pupils, to the Annual Ball.


- Filling the blanks given essential information about the Annual Ball.

- Also added a description in which I write a greeting and added a picture to embellish it

- At the end of this page I attach the invitation of the Annual Ball

Once you have done , click the save button and the event is ready.
And this is how the event will appear in the calendar of all users

Create your own Halloween Party event
Ιn this manual I will give you an example of how you can create and organize through Classter a Halloween Party quickly and easily.
Let’s Begin
Follow the path : Calendar > Events Management > Create New Event

By clicking “Create New Event” the following page will pop up .

And now all you have to do is It’s to fill in the blanks as you wish.
I will give you the example on the following image


- Select in the category of events Parties

- Select the Halloween Part to be visible on Every users Calendar , including mine. Still activate the ,RSVP , this essentially means that those interested can declare their wish or not to attend the event.

- Select to send the invitation to the recipients as an Internal Message and Email

and this is how the message of the invitation will appear to the audience.

- Select the participants i wish to invite ,which in this case are basically the pupils, to the Halloween Party.


- Filling the blanks given essential information about the Halloween Party.

- Also added a description in which I write a greeting and added a picture to embellish it

- At the end of this page I attach the invitation of the Halloween Party

Once you have done , click the save button and the event is ready.
And this is how the event will appear in the calendar of all users

