

Students can be created manually on the Classter platform. The fastest way to get started, though is to upload your student lists into Classter.
This can be done by uploading an Excel file.
To initiate this process, you will need to follow the path: Dashboard > Configuration > Advanced Configurations > Mass Imports/actions > Import Students (Figure 1).

Figure 1
On this page, you will see the following (Figure 1):
- On this page you can make mass actions, upload Students, Teachers, Timetables or Financial Arrangements.
- In this case, we will be looking at massively uploading students.
- Click on the Import Students button.
- Once you do, you will see the following pop-up window (Figure 2).

Figure 2
On this page, you will see the following (Figure 2):
- First, edit the order of fields to match your Excel file (if it is necessary).
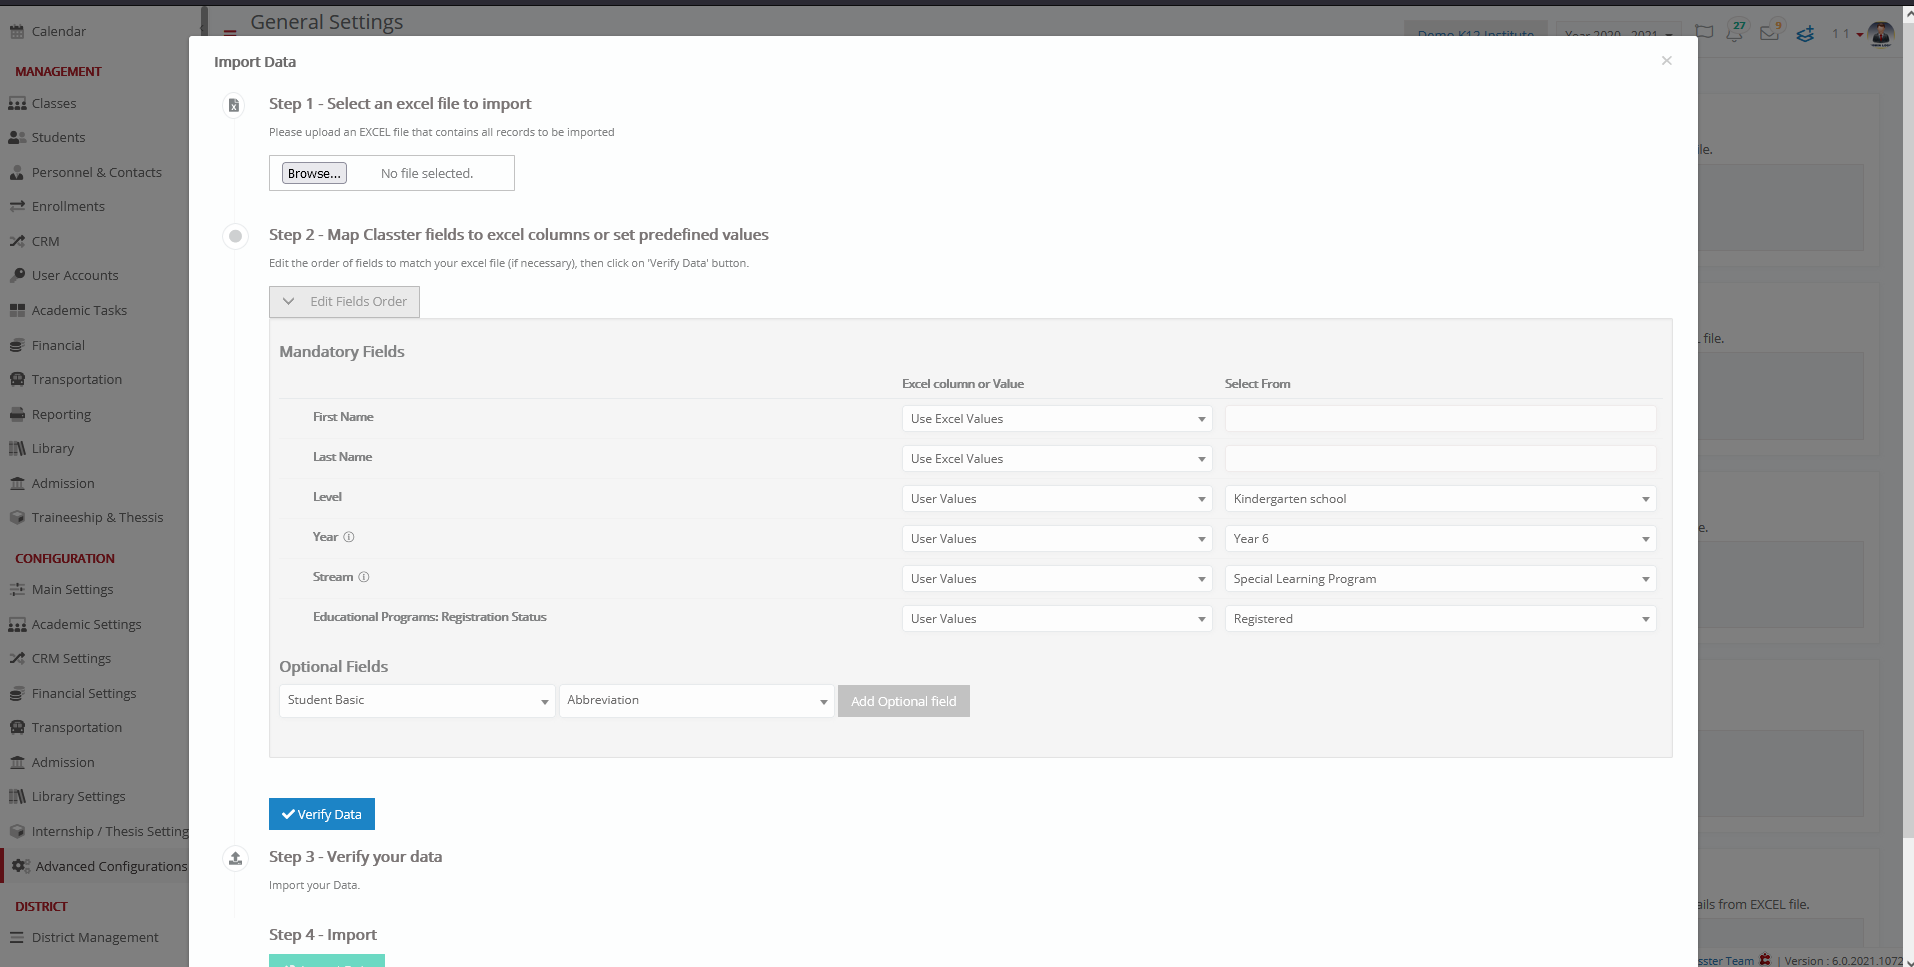
Figure 3
On this page, you will see the following (Figure 3):
- Here you can find the fields regarding students that are needed by the Classter platform.
- Set the order of the fields based on the columns you have in your Excel file, e.g. First Name 1, Last Name 2 etc.
- You can choose the fields that correspond to the information you have on your Excel spreadsheet. The fields with red asterisks next to them are required fields and you must have that information in the Excel sheet.
- Organize your Excel sheet like you see in Figure 4.

Figure 4
- Organize your Excel sheet similarly (Figure 4) and then click on the Verify Data button (Figure 4).
- If your data are in the correct form, you will be able to see the following preview (Figure 5).
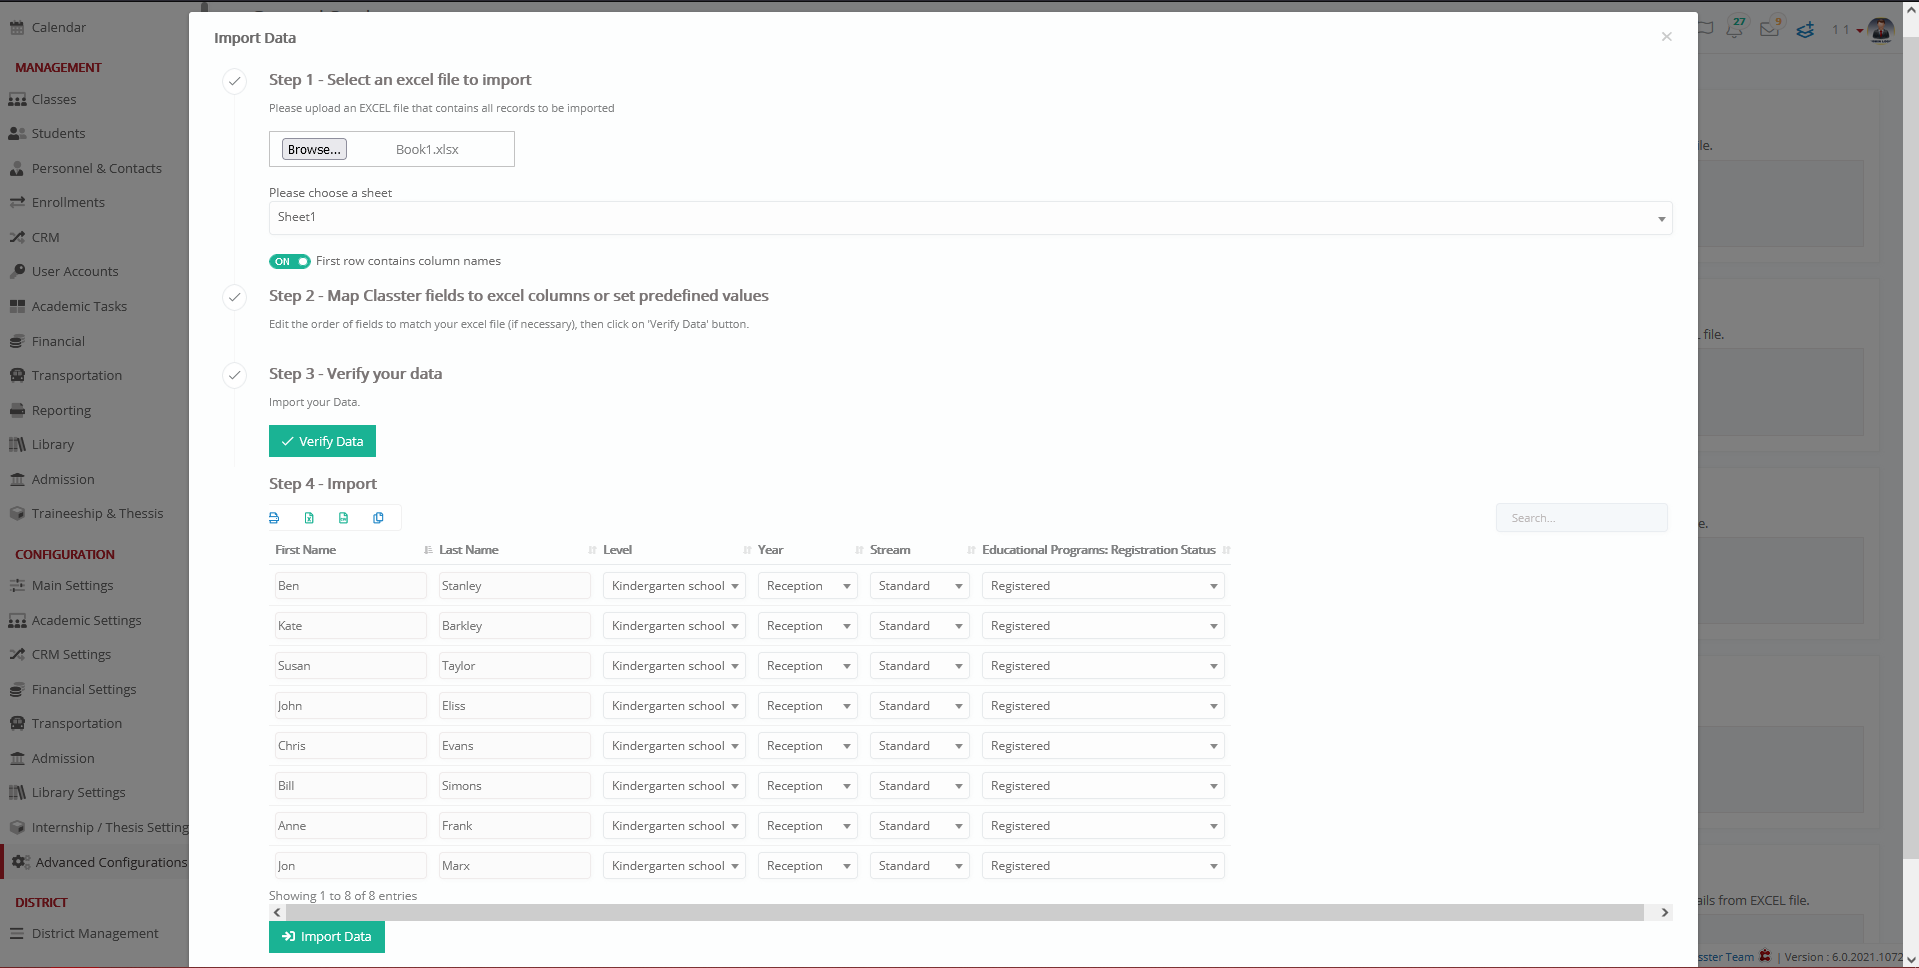
Figure 5
- If there is a problem in the alignment with the Excel sheet, you will see a pop-up error message in red color top right of your screen and the problematic fields will be framed in red color (Figure 6).

Figure 6
Once you have aligned the data between Classter and your Excel sheet, you can proceed to upload the Excel file to Classter.
Click on the ‘Browse’ button (Figure 7) and you will see a pop-up window (Figure 8).

Figure 7

Figure 8
On this page, you will see the following (Figure 8):
- When you are ready, you can upload your Excel file
- Choose your Excel file.
- Click on open to select the file
- The location of your Excel file may vary from the above image (Figure 8)

Figure 9
- The Excel file has been verified, selected, and now you can click on the Import Data button to complete the process (Figure 9).
Invite Students to Log in
You have uploaded your students, and it is time to notify them and provide them with sign-in credentials! This process is done through the user accounts page.
Follow the path: Dashboard > Management > User Accounts (Figure 10).

Figure 10
On this page, you will see the following (Figure 10):
- From the Search Filters, select the User Type ‘Students’.
- Click on the ‘Search’ button to load the results in the list.
- Now you can view all the institution’s students.
- Select all the students you have previously imported, by clicking on the select all button
SEND INITIAL INVITATION BY EMAIL
On this page, you will see the following (Figure 11):
- Once you have selected all the students, click on the bulk actions button and from the dropdown list click on the ‘Send Initial Invitation’ button.
The email that is sent to students contains a welcome message and the student’s credentials (username and password) so they may enter the Classter Portal (Figure 12).
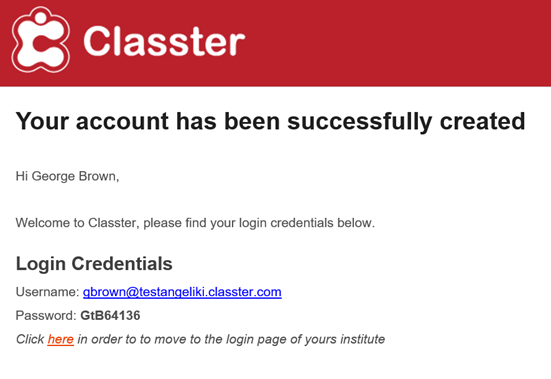
Figure 12